1994 Chevrolet Camaro Owner's Manual - Page 198
1994 Chevrolet Camaro Manual

Page 198 highlights
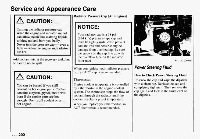
Service and Appearance Care If the fluid level is low, add only enough of the proper fluid to bring the level upto the "COLD' area for a cold check or the "HOT" area for a hot check. It doesn't take much fluid, generally less than a pint. Don't overfill. We recommend you use only fluid labeled DEXRON@-III or DEXRON@-IIE, because fluids with that label are made especially for your automatic transmission. Dama e caused by fluid other than DEXRON -111 or DEXRON@-IIE is not covered by your new vehicle warranty. After adding fluid, recheck the fluid level as described under "How to Check." When the correct fluid level is obtained, push the dipstick back in all the way. How to Add Fluid: Too much or too little fluid can damage your transmission. Too much can mean that some of the fluid could come out and fall on hot engine parts or exhaust system, starting a fire. Be sure to get an accurate reading if you check your transmission fluid. Check the fluid level only when your engine is off, the vehicle is parked on a level place and the transmissionis cool enough for you to rest your fingers on the transmission case. Here's how to addfluid. Refer to the Maintenance Schedule to determine what kind of fluid to use. See "Recommended Fluids and Lubricants" in the Index. 1. Remove the filler plug. 2. Add fluid at the filler plug hole. Add only enough fluid to bring thefluid level up to the bottom of the filler plug hole. 3. Install the filler plug. Be sure the plug is fully seated. D Manual TransmissionFluid How to Check: Because this operation can be difficult, you may choose to have this done at a Chevrolet dealership Service Department. If you do it yourself, be sure to follow all the instructions here, or you could get a false reading. Then, follow these steps: 1. Remove the filler plug. 2. Check that the lubricant level is up to the bottom of the filler plug hole. 3 If the fluid level is good, install the . plug and be sure it is fully seated. If the fluid level is low, add more fluid as described in the next steps. , .196
-
 1
1 -
2
-
3
-
4
-
5
-
6
-
7
-
8
-
9
-
10
-
11
-
12
-
13
-
14
-
15
-
16
-
17
-
18
-
19
-
20
-
21
-
22
-
23
-
24
-
25
-
26
-
27
-
28
-
29
-
30
-
31
-
32
-
33
-
34
-
35
-
36
-
37
-
38
-
39
-
40
-
41
-
42
-
43
-
44
-
45
-
46
-
47
-
48
-
49
-
50
-
51
-
52
-
53
-
54
-
55
-
56
-
57
-
58
-
59
-
60
-
61
-
62
-
63
-
64
-
65
-
66
-
67
-
68
-
69
-
70
-
71
-
72
-
73
-
74
-
75
-
76
-
77
-
78
-
79
-
80
-
81
-
82
-
83
-
84
-
85
-
86
-
87
-
88
-
89
-
90
-
91
-
92
-
93
-
94
-
95
-
96
-
97
-
98
-
99
-
100
-
101
-
102
-
103
-
104
-
105
-
106
-
107
-
108
-
109
-
110
-
111
-
112
-
113
-
114
-
115
-
116
-
117
-
118
-
119
-
120
-
121
-
122
-
123
-
124
-
125
-
126
-
127
-
128
-
129
-
130
-
131
-
132
-
133
-
134
-
135
-
136
-
137
-
138
-
139
-
140
-
141
-
142
-
143
-
144
-
145
-
146
-
147
-
148
-
149
-
150
-
151
-
152
-
153
-
154
-
155
-
156
-
157
-
158
-
159
-
160
-
161
-
162
-
163
-
164
-
165
-
166
-
167
-
168
-
169
-
170
-
171
-
172
-
173
-
174
-
175
-
176
-
177
-
178
-
179
-
180
-
181
-
182
-
183
-
184
-
185
-
186
-
187
-
188
-
189
-
190
-
191
-
192
-
 193
193 -
 194
194 -
 195
195 -
 196
196 -
 197
197 -
 198
198 -
 199
199 -
 200
200 -
 201
201 -
 202
202 -
 203
203 -
204
-
205
-
206
-
207
-
208
-
209
-
210
-
211
-
212
-
213
-
214
-
215
-
216
-
217
-
218
-
219
-
220
-
221
-
222
-
223
-
224
-
225
-
226
-
227
-
228
-
229
-
230
-
231
-
232
-
233
-
234
-
235
-
236
-
237
-
238
-
239
-
240
-
241
-
242
-
243
-
244
-
245
-
246
-
247
-
248
-
249
-
250
-
251
-
252
-
253
-
254
-
255
-
256
-
257
-
258
-
259
-
260
-
261
-
262
-
263
-
264
-
265
-
266
-
267
-
268
-
269
-
270
-
271
-
272
-
273
-
274
-
275
-
276
-
277
-
278
-
279
-
280
-
281
-
282
-
283
-
284
-
285
-
286
-
287
-
288
-
289
-
290
-
291
-
292
 |
 |