2004 Chevrolet Cavalier Owner's Manual - Page 139
2004 Chevrolet Cavalier Manual
Page 139 highlights
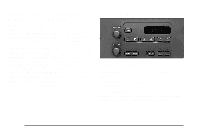
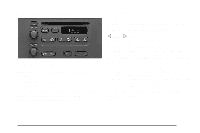
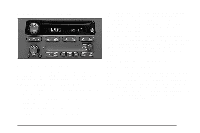
To adjust both tone controls and both speaker controls to the middle position, first end out of audio mode by pressing another button, causing the radio to perform that function, or by waiting five seconds for the display to return to the time of day. Then press and hold AUDIO for more than two seconds until you hear a beep. CEN will appear on the display. The CD player can play the smaller 8 cm single CDs with an adapter ring. Full-size CDs and the smaller CDs are loaded in the same manner. If playing a CD-R the sound quality may be reduced due to CD-R quality, the method of recording, the quality of the music that has been recorded, and the way the CD-R has been handled. You may experience an increase in skipping, difficulty in finding tracks and/or difficulty in loading and ejecting. If these problems occur try a known good CD. Do not add paper labels to CDs, they could get caught in the CD player. Do not play 3 inch CDs without a standard adapter CD. If an error appears on the display, see "CD Messages" later in this section. 1 PREV (Previous): Press this pushbutton to go to the previous track if the current track has been playing for less than eight seconds. If pressed when the current track has been playing for more than eight seconds, it will go to the beginning of the current track. The track number will appear on the display. If you hold the pushbutton or press it more than once, the player will continue moving back through the CD. 2 NEXT: Press this pushbutton to go to the next track. The track number will appear on the display. If you hold the pushbutton or press it more than once, the player will continue moving forward through the CD. 3-41 Radio Messages CAL (Calibration): Your audio system has been calibrated for your vehicle from the factory. If CAL appears on the display it means that your radio has not been configured properly for your vehicle and must be returned to the dealer for service. Playing a CD With the ignition on, insert a CD partway into the slot, label side up. The player will pull it in and the CD should begin playing. CD will appear on the display. If you want to insert a CD with the ignition off, first press the eject button or the RCL knob. If you turn off the ignition or radio with a CD in the player, it will stay in the player. When you turn on the ignition or the radio, the CD will start playing where it stopped, if it was the last selected audio source. As each new track starts to play, the track number will appear on the display.
-
 1
1 -
2
-
3
-
4
-
5
-
6
-
7
-
8
-
9
-
10
-
11
-
12
-
13
-
14
-
15
-
16
-
17
-
18
-
19
-
20
-
21
-
22
-
23
-
24
-
25
-
26
-
27
-
28
-
29
-
30
-
31
-
32
-
33
-
34
-
35
-
36
-
37
-
38
-
39
-
40
-
41
-
42
-
43
-
44
-
45
-
46
-
47
-
48
-
49
-
50
-
51
-
52
-
53
-
54
-
55
-
56
-
57
-
58
-
59
-
60
-
61
-
62
-
63
-
64
-
65
-
66
-
67
-
68
-
69
-
70
-
71
-
72
-
73
-
74
-
75
-
76
-
77
-
78
-
79
-
80
-
81
-
82
-
83
-
84
-
85
-
86
-
87
-
88
-
89
-
90
-
91
-
92
-
93
-
94
-
95
-
96
-
97
-
98
-
99
-
100
-
101
-
102
-
103
-
104
-
105
-
106
-
107
-
108
-
109
-
110
-
111
-
112
-
113
-
114
-
115
-
116
-
117
-
118
-
119
-
120
-
121
-
122
-
123
-
124
-
125
-
126
-
127
-
128
-
129
-
130
-
131
-
132
-
133
-
 134
134 -
 135
135 -
 136
136 -
 137
137 -
 138
138 -
 139
139 -
 140
140 -
 141
141 -
 142
142 -
 143
143 -
 144
144 -
145
-
146
-
147
-
148
-
149
-
150
-
151
-
152
-
153
-
154
-
155
-
156
-
157
-
158
-
159
-
160
-
161
-
162
-
163
-
164
-
165
-
166
-
167
-
168
-
169
-
170
-
171
-
172
-
173
-
174
-
175
-
176
-
177
-
178
-
179
-
180
-
181
-
182
-
183
-
184
-
185
-
186
-
187
-
188
-
189
-
190
-
191
-
192
-
193
-
194
-
195
-
196
-
197
-
198
-
199
-
200
-
201
-
202
-
203
-
204
-
205
-
206
-
207
-
208
-
209
-
210
-
211
-
212
-
213
-
214
-
215
-
216
-
217
-
218
-
219
-
220
-
221
-
222
-
223
-
224
-
225
-
226
-
227
-
228
-
229
-
230
-
231
-
232
-
233
-
234
-
235
-
236
-
237
-
238
-
239
-
240
-
241
-
242
-
243
-
244
-
245
-
246
-
247
-
248
-
249
-
250
-
251
-
252
-
253
-
254
-
255
-
256
-
257
-
258
-
259
-
260
-
261
-
262
-
263
-
264
-
265
-
266
-
267
-
268
-
269
-
270
-
271
-
272
-
273
-
274
-
275
-
276
-
277
-
278
-
279
-
280
-
281
-
282
-
283
-
284
-
285
-
286
-
287
-
288
-
289
-
290
-
291
-
292
-
293
-
294
-
295
-
296
-
297
-
298
-
299
-
300
-
301
-
302
-
303
-
304
-
305
-
306
-
307
-
308
-
309
-
310
-
311
-
312
-
313
-
314
-
315
-
316
-
317
-
318
-
319
-
320
-
321
-
322
-
323
-
324
-
325
-
326
-
327
-
328
-
329
-
330
-
331
-
332
-
333
-
334
-
335
-
336
-
337
-
338
-
339
-
340
-
341
-
342
-
343
-
344
-
345
-
346
-
347
-
348
-
349
-
350
-
351
-
352
 |
 |