2004 Chevrolet Malibu Owner's Manual - Page 97
2004 Chevrolet Malibu Manual
Page 97 highlights
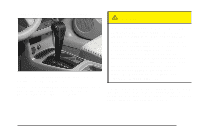
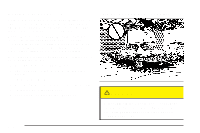
Notice: Driving your vehicle if you notice that it is moving slowly or not shifting gears as you increase speed may damage the transaxle. Have your vehicle serviced right away. You can drive in LOW (L2) when you are driving less than 35 mph (55 km/h) and AUTOMATIC OVERDRIVE (D) for higher speeds until then. LOW (L): This position gives you access to THIRD, SECOND and FIRST gears for more power but lower fuel economy than AUTOMATIC OVERDRIVE (D). You can use it on very steep hills, or in deep snow or mud. If the electronic range select is put in LOW (L1), the transaxle won't shift into lower gears until the vehicle is going slow enough. Parking Brake To set the parking brake, push down the parking brake pedal with your left foot. If the ignition is on, the brake system warning light will come on. See Brake System Warning Light on page 3-36. To release the parking brake, hold the regular brake pedal down with your right foot. Push down momentarily on the parking brake pedal with your left foot until you feel the pedal release. If the parking brake is not released when you begin to drive, the brake system warning light will be on and a chime will sound warning you that the parking brake is still on. A message will also appear in the Driver Information Center (DIC) to remind you to release the parking brake. See DIC Warnings and Messages on page 3-50. Notice: Driving with the parking brake on can overheat the brake system and cause premature wear or damage to brake system parts. Verify that the parking brake is fully released and the brake warning light is off before driving. If you are towing a trailer and are parking on a hill, see Towing a Trailer on page 4-40. Electronic Range Select Mode This feature allows you to select lower driving gears. The button for this mode is located on the left side of the shift lever knob. The electronic range select mode only changes gear when the shift lever is in LOW (L). When the shift lever is first moved into the LOW (L) position, the display in the instrument panel shows L3. Press the (−) end of the button on the shift lever once for L2 and once more for L1. Press the (+) end of the button to return to L2 and L3. The shift lever must be moved back to DRIVE (D) to turn off the electronic range select mode. 2-29
-
 1
1 -
2
-
3
-
4
-
5
-
6
-
7
-
8
-
9
-
10
-
11
-
12
-
13
-
14
-
15
-
16
-
17
-
18
-
19
-
20
-
21
-
22
-
23
-
24
-
25
-
26
-
27
-
28
-
29
-
30
-
31
-
32
-
33
-
34
-
35
-
36
-
37
-
38
-
39
-
40
-
41
-
42
-
43
-
44
-
45
-
46
-
47
-
48
-
49
-
50
-
51
-
52
-
53
-
54
-
55
-
56
-
57
-
58
-
59
-
60
-
61
-
62
-
63
-
64
-
65
-
66
-
67
-
68
-
69
-
70
-
71
-
72
-
73
-
74
-
75
-
76
-
77
-
78
-
79
-
80
-
81
-
82
-
83
-
84
-
85
-
86
-
87
-
88
-
89
-
90
-
91
-
 92
92 -
 93
93 -
 94
94 -
 95
95 -
 96
96 -
 97
97 -
 98
98 -
 99
99 -
 100
100 -
 101
101 -
 102
102 -
103
-
104
-
105
-
106
-
107
-
108
-
109
-
110
-
111
-
112
-
113
-
114
-
115
-
116
-
117
-
118
-
119
-
120
-
121
-
122
-
123
-
124
-
125
-
126
-
127
-
128
-
129
-
130
-
131
-
132
-
133
-
134
-
135
-
136
-
137
-
138
-
139
-
140
-
141
-
142
-
143
-
144
-
145
-
146
-
147
-
148
-
149
-
150
-
151
-
152
-
153
-
154
-
155
-
156
-
157
-
158
-
159
-
160
-
161
-
162
-
163
-
164
-
165
-
166
-
167
-
168
-
169
-
170
-
171
-
172
-
173
-
174
-
175
-
176
-
177
-
178
-
179
-
180
-
181
-
182
-
183
-
184
-
185
-
186
-
187
-
188
-
189
-
190
-
191
-
192
-
193
-
194
-
195
-
196
-
197
-
198
-
199
-
200
-
201
-
202
-
203
-
204
-
205
-
206
-
207
-
208
-
209
-
210
-
211
-
212
-
213
-
214
-
215
-
216
-
217
-
218
-
219
-
220
-
221
-
222
-
223
-
224
-
225
-
226
-
227
-
228
-
229
-
230
-
231
-
232
-
233
-
234
-
235
-
236
-
237
-
238
-
239
-
240
-
241
-
242
-
243
-
244
-
245
-
246
-
247
-
248
-
249
-
250
-
251
-
252
-
253
-
254
-
255
-
256
-
257
-
258
-
259
-
260
-
261
-
262
-
263
-
264
-
265
-
266
-
267
-
268
-
269
-
270
-
271
-
272
-
273
-
274
-
275
-
276
-
277
-
278
-
279
-
280
-
281
-
282
-
283
-
284
-
285
-
286
-
287
-
288
-
289
-
290
-
291
-
292
-
293
-
294
-
295
-
296
-
297
-
298
-
299
-
300
-
301
-
302
-
303
-
304
-
305
-
306
-
307
-
308
-
309
-
310
-
311
-
312
-
313
-
314
-
315
-
316
-
317
-
318
-
319
-
320
-
321
-
322
-
323
-
324
-
325
-
326
-
327
-
328
-
329
-
330
-
331
-
332
-
333
-
334
-
335
-
336
-
337
-
338
-
339
-
340
-
341
-
342
-
343
-
344
-
345
-
346
-
347
-
348
-
349
-
350
-
351
-
352
-
353
-
354
-
355
-
356
-
357
-
358
-
359
-
360
-
361
-
362
-
363
-
364
-
365
-
366
-
367
-
368
-
369
-
370
-
371
-
372
-
373
-
374
-
375
-
376
-
377
-
378
-
379
-
380
-
381
-
382
-
383
-
384
-
385
-
386
-
387
-
388
-
389
-
390
-
391
-
392
-
393
-
394
-
395
-
396
-
397
-
398
-
399
-
400
-
401
-
402
-
403
-
404
-
405
-
406
-
407
-
408
-
409
-
410
-
411
-
412
-
413
-
414
-
415
-
416
-
417
-
418
-
419
-
420
-
421
-
422
-
423
-
424
-
425
-
426
 |
 |