2005 Chrysler Sebring Owner's Manual - Page 98
2005 Chrysler Sebring Manual
Page 98 highlights
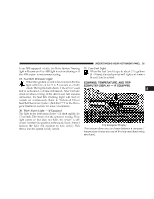
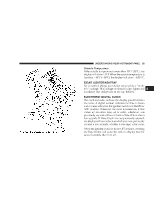
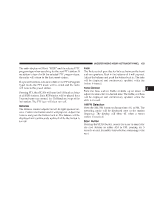
98 UNDERSTANDING YOUR INSTRUMENT PANEL Manual Compass Calibration Compass calibration can also be requested. To manually calibrate the compass, use the STEP button to step to the compass/ temperature display and then hold down both the STEP and US/M buttons simultaneously until the CAL symbol is displayed. Release the buttons once the CAL symbol appears. Manual compass calibration has been initiated at this point. Drive the vehicle in circles in an area free from large metal objects until the CAL symbol is extinguished. When the CAL indicator goes off, the compass is calibrated and should display correct headings. Verify proper calibration by checking North (N), South (S), East (E), and West (W). If the compass does not appear accurate, repeat the calibration procedure in another area. Compass Variance Variance is the difference between magnetic North and geographic North. For proper compass function, the correct variance zone must be set. Setting the Compass Variance Refer to the variance map for the correct compass variance zone. To check the variance zone, the ignition must be on and the compass / temperature displayed. Hold down both the US / M and STEP buttons simultaneously until the VAR symbol is lit and then immediately release both buttons. The current variance zone will now be displayed. To change the zone, press the STEP button until the correct zone is displayed. Wait for about 5 seconds. The trip computer will store this variance in memory and the compass will resume normal operation.
-
 1
1 -
2
-
3
-
4
-
5
-
6
-
7
-
8
-
9
-
10
-
11
-
12
-
13
-
14
-
15
-
16
-
17
-
18
-
19
-
20
-
21
-
22
-
23
-
24
-
25
-
26
-
27
-
28
-
29
-
30
-
31
-
32
-
33
-
34
-
35
-
36
-
37
-
38
-
39
-
40
-
41
-
42
-
43
-
44
-
45
-
46
-
47
-
48
-
49
-
50
-
51
-
52
-
53
-
54
-
55
-
56
-
57
-
58
-
59
-
60
-
61
-
62
-
63
-
64
-
65
-
66
-
67
-
68
-
69
-
70
-
71
-
72
-
73
-
74
-
75
-
76
-
77
-
78
-
79
-
80
-
81
-
82
-
83
-
84
-
85
-
86
-
87
-
88
-
89
-
90
-
91
-
92
-
 93
93 -
 94
94 -
 95
95 -
 96
96 -
 97
97 -
 98
98 -
 99
99 -
 100
100 -
 101
101 -
 102
102 -
 103
103 -
104
-
105
-
106
-
107
-
108
-
109
-
110
-
111
-
112
-
113
-
114
-
115
-
116
-
117
-
118
-
119
-
120
-
121
-
122
-
123
-
124
-
125
-
126
-
127
-
128
-
129
-
130
-
131
-
132
-
133
-
134
-
135
-
136
-
137
-
138
-
139
-
140
-
141
-
142
-
143
-
144
-
145
-
146
-
147
-
148
-
149
-
150
-
151
-
152
-
153
-
154
-
155
-
156
-
157
-
158
-
159
-
160
-
161
-
162
-
163
-
164
-
165
-
166
-
167
-
168
-
169
-
170
-
171
-
172
-
173
-
174
-
175
-
176
-
177
-
178
-
179
-
180
-
181
-
182
-
183
-
184
-
185
-
186
-
187
-
188
-
189
-
190
-
191
-
192
-
193
-
194
-
195
-
196
-
197
-
198
-
199
-
200
-
201
-
202
-
203
-
204
-
205
-
206
-
207
-
208
-
209
-
210
-
211
-
212
-
213
-
214
-
215
-
216
-
217
-
218
-
219
-
220
-
221
-
222
-
223
-
224
-
225
-
226
-
227
-
228
-
229
-
230
-
231
-
232
-
233
-
234
-
235
-
236
-
237
-
238
-
239
-
240
-
241
-
242
-
243
-
244
-
245
-
246
-
247
-
248
-
249
-
250
-
251
-
252
-
253
-
254
-
255
-
256
-
257
-
258
-
259
-
260
-
261
-
262
-
263
-
264
-
265
-
266
-
267
-
268
-
269
-
270
-
271
-
272
-
273
-
274
-
275
-
276
-
277
-
278
-
279
-
280
-
281
-
282
-
283
-
284
-
285
-
286
-
287
-
288
-
289
-
290
-
291
 |
 |