2003 Ford Crown Victoria Owner's Manual - Page 83
2003 Ford Crown Victoria Manual
Page 83 highlights
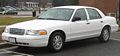
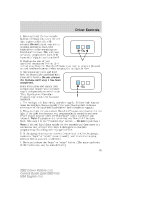
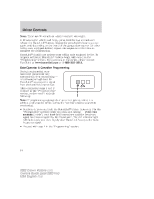
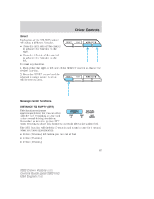
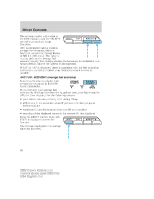
Driver Controls 1. Press and hold the two outside buttons releasing only when the red light begins to flash after 20 seconds. Do not repeat step one to program additional hand-held transmitters to the remaining two HomeLink buttons. This will erase previously programmed hand-held transmitter signals into HomeLink . 2. Position the end of your hand-held transmitter 2-8 cm (1-3 inches) away from the HomeLink button you wish to program (located on your overhead console) while keeping the red light in view. 3. Simultaneously press and hold both the HomeLink and hand-held transmitter button. Do not release the buttons until step 4 has been completed. Some entry gates and garage door openers may require you to replace step 3 with procedures noted in the "Gate Operator and Canadian Programming" section for Canadian residents. 4. The red light will flash slowly and then rapidly. Release both buttons when the red light flashes rapidly. (The rapid flashing light indicates acceptance of the hand-held transmitters' radio frequency signals.) 5. Press and hold the just-trained HomeLink button and observe the red light. If the light is a constant red, programming is complete and your device should activate when the HomeLink button is pressed and released. Note: To program the remaining two HomeLink buttons, begin with step 2 in the "Programming" section - do not repeat step 1. Note: If the red light blinks rapidly for two seconds and then turns to a continuous red, proceed with steps 6 through 8 to complete programming of a rolling code equipped device. 6. At the garage door opener receiver (motor-head unit) in the garage, locate the "learn" or "smart" button (usually near where the hanging antenna wire is attached to the unit). 7. Press and release the "learn" or "smart" button. (The name and color of the button may vary by manufacturer.) 83 2003 Crown Victoria (cro) Owners Guide (post-2002-fmt) USA English (fus)
-
 1
1 -
2
-
3
-
4
-
5
-
6
-
7
-
8
-
9
-
10
-
11
-
12
-
13
-
14
-
15
-
16
-
17
-
18
-
19
-
20
-
21
-
22
-
23
-
24
-
25
-
26
-
27
-
28
-
29
-
30
-
31
-
32
-
33
-
34
-
35
-
36
-
37
-
38
-
39
-
40
-
41
-
42
-
43
-
44
-
45
-
46
-
47
-
48
-
49
-
50
-
51
-
52
-
53
-
54
-
55
-
56
-
57
-
58
-
59
-
60
-
61
-
62
-
63
-
64
-
65
-
66
-
67
-
68
-
69
-
70
-
71
-
72
-
73
-
74
-
75
-
76
-
77
-
 78
78 -
 79
79 -
 80
80 -
 81
81 -
 82
82 -
 83
83 -
 84
84 -
 85
85 -
 86
86 -
 87
87 -
 88
88 -
89
-
90
-
91
-
92
-
93
-
94
-
95
-
96
-
97
-
98
-
99
-
100
-
101
-
102
-
103
-
104
-
105
-
106
-
107
-
108
-
109
-
110
-
111
-
112
-
113
-
114
-
115
-
116
-
117
-
118
-
119
-
120
-
121
-
122
-
123
-
124
-
125
-
126
-
127
-
128
-
129
-
130
-
131
-
132
-
133
-
134
-
135
-
136
-
137
-
138
-
139
-
140
-
141
-
142
-
143
-
144
-
145
-
146
-
147
-
148
-
149
-
150
-
151
-
152
-
153
-
154
-
155
-
156
-
157
-
158
-
159
-
160
-
161
-
162
-
163
-
164
-
165
-
166
-
167
-
168
-
169
-
170
-
171
-
172
-
173
-
174
-
175
-
176
-
177
-
178
-
179
-
180
-
181
-
182
-
183
-
184
-
185
-
186
-
187
-
188
-
189
-
190
-
191
-
192
-
193
-
194
-
195
-
196
-
197
-
198
-
199
-
200
-
201
-
202
-
203
-
204
-
205
-
206
-
207
-
208
-
209
-
210
-
211
-
212
-
213
-
214
-
215
-
216
-
217
-
218
-
219
-
220
-
221
-
222
-
223
-
224
-
225
-
226
-
227
-
228
-
229
-
230
-
231
-
232
-
233
-
234
-
235
-
236
-
237
-
238
-
239
-
240
-
241
-
242
-
243
-
244
-
245
-
246
-
247
-
248
 |
 |