2004 Mazda RX-8 Owner's Manual - Page 148
2004 Mazda RX-8 Manual
Page 148 highlights
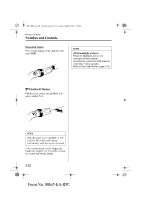
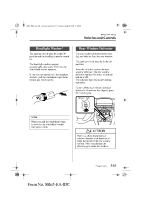
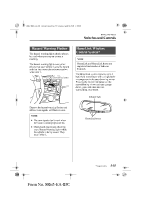
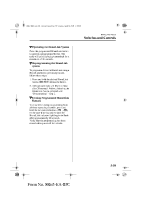
J60E_8R65-EA-03C_Edition2.book Page 57 Saturday, April 26, 2003 1:48 PM Driving Your Mazda Switches and Controls M Programming the HomeLink System 4. After the HomeLink indicator light changes from a slow to a rapidly blinking light, release both the HomeLink and hand-held transmitter buttons. NOTE CAUTION When programming a garage door opener or a gate, disconnect the power to these devices before performing programming, as continuous operation of the devices could damage the motor. The HomeLink system provides 3 buttons which can be individually selected and programmed using the transmitters for current, on-market devices as follows: 1. Press and hold the two outer HomeLink buttons (buttons one and three) - releasing only when the indicator light begins to flash (after 20 seconds). Do not hold the buttons for longer than 30 seconds and do not repeat step 1 to program a second and/ or third hand-held transmitter to the remaining two HomeLink buttons. 2. Position the end of your hand-held transmitter 2.5-7.5 cm (1-3 inches) away from the HomeLink button you wish to program while keeping the indicator light in view. 3. Simultaneously press and hold both the chosen HomeLink and hand-held transmitter buttons. Do not release the buttons until step 4 has been completed. NOTE If the HomeLink indicator light does not change to a rapidly blinking light, contact HomeLink at www.homelink.com or call 1-800-3553515 for assistance. 5. Press and hold the just-trained HomeLink button and observe the indicator light. If the indicator light stays on constantly, programming is complete and your device should activate when the HomeLink button is pressed and released. NOTE To program the remaining two HomeLink buttons, begin with "Programming" - step 2. Do not repeat step 1. If the indicator light blinks rapidly for two seconds and then turns to a constant light, continue with "Programming" steps 6-8 to complete the programming of a rolling code equipped device (most commonly a garage door opener). 6. At the garage door opener receiver (motor-head unit) in the garage, locate the "learn" or "smart" button. This can usually be found where the hanging antenna wire is attached to the motorhead unit. Some gate operators and garage door openers may require you to replace this Programming Step 3 with procedures noted in the "Gate Operator/Canadian Programming" section. 5-57 Form No. 8R65-EA-03C
-
 1
1 -
2
-
3
-
4
-
5
-
6
-
7
-
8
-
9
-
10
-
11
-
12
-
13
-
14
-
15
-
16
-
17
-
18
-
19
-
20
-
21
-
22
-
23
-
24
-
25
-
26
-
27
-
28
-
29
-
30
-
31
-
32
-
33
-
34
-
35
-
36
-
37
-
38
-
39
-
40
-
41
-
42
-
43
-
44
-
45
-
46
-
47
-
48
-
49
-
50
-
51
-
52
-
53
-
54
-
55
-
56
-
57
-
58
-
59
-
60
-
61
-
62
-
63
-
64
-
65
-
66
-
67
-
68
-
69
-
70
-
71
-
72
-
73
-
74
-
75
-
76
-
77
-
78
-
79
-
80
-
81
-
82
-
83
-
84
-
85
-
86
-
87
-
88
-
89
-
90
-
91
-
92
-
93
-
94
-
95
-
96
-
97
-
98
-
99
-
100
-
101
-
102
-
103
-
104
-
105
-
106
-
107
-
108
-
109
-
110
-
111
-
112
-
113
-
114
-
115
-
116
-
117
-
118
-
119
-
120
-
121
-
122
-
123
-
124
-
125
-
126
-
127
-
128
-
129
-
130
-
131
-
132
-
133
-
134
-
135
-
136
-
137
-
138
-
139
-
140
-
141
-
142
-
 143
143 -
 144
144 -
 145
145 -
 146
146 -
 147
147 -
 148
148 -
 149
149 -
 150
150 -
 151
151 -
 152
152 -
 153
153 -
154
-
155
-
156
-
157
-
158
-
159
-
160
-
161
-
162
-
163
-
164
-
165
-
166
-
167
-
168
-
169
-
170
-
171
-
172
-
173
-
174
-
175
-
176
-
177
-
178
-
179
-
180
-
181
-
182
-
183
-
184
-
185
-
186
-
187
-
188
-
189
-
190
-
191
-
192
-
193
-
194
-
195
-
196
-
197
-
198
-
199
-
200
-
201
-
202
-
203
-
204
-
205
-
206
-
207
-
208
-
209
-
210
-
211
-
212
-
213
-
214
-
215
-
216
-
217
-
218
-
219
-
220
-
221
-
222
-
223
-
224
-
225
-
226
-
227
-
228
-
229
-
230
-
231
-
232
-
233
-
234
-
235
-
236
-
237
-
238
-
239
-
240
-
241
-
242
-
243
-
244
-
245
-
246
-
247
-
248
-
249
-
250
-
251
-
252
-
253
-
254
-
255
-
256
-
257
-
258
-
259
-
260
-
261
-
262
-
263
-
264
-
265
-
266
-
267
-
268
-
269
-
270
-
271
-
272
-
273
-
274
-
275
-
276
-
277
-
278
-
279
-
280
-
281
-
282
-
283
-
284
-
285
-
286
-
287
-
288
-
289
-
290
-
291
-
292
-
293
-
294
-
295
-
296
-
297
-
298
-
299
-
300
-
301
-
302
-
303
-
304
-
305
-
306
-
307
-
308
-
309
-
310
-
311
-
312
-
313
-
314
-
315
-
316
-
317
-
318
-
319
-
320
-
321
-
322
-
323
-
324
-
325
-
326
-
327
-
328
-
329
-
330
-
331
-
332
-
333
-
334
-
335
-
336
-
337
-
338
-
339
-
340
-
341
-
342
-
343
-
344
-
345
-
346
-
347
 |
 |
