2004 Mazda Tribute Owner's Manual - Page 221
2004 Mazda Tribute Manual
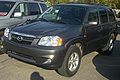
Page 221 highlights
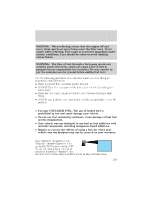
Maintenance and Specifications When fueling your vehicle: 1. Turn the engine off. 2. Pull the fuel filler door release handle to open the fuel filler door. 3. Carefully turn the filler cap counterclockwise 1/8 of a turn until it stops. 4. Pull to remove the cap from the fuel filler pipe. 5. To install the cap, align the tabs on the cap with the notches on the filler pipe. 6. Turn the filler cap clockwise 1/8 of a turn until it stops. After refueling, if the "CHECK FUEL CAP" indicator comes on and stays on when you start the engine, the fuel filler cap may not be properly installed. Turn off the engine, remove the fuel filler cap, align the cap properly and reinstall it securely. The indicator should turn off after three driving cycles with the fuel filler cap properly installed. A driving cycle consists of a cold engine start-up followed by mixed city/highway driving. If you must replace the fuel filler cap, replace it with a fuel filler cap that is designed for your vehicle. The customer warranty may be void for any damage to the fuel tank or fuel system if the correct genuine Mazda fuel filler cap is not used. WARNING: The fuel system may be under pressure. If the fuel filler cap is venting vapor or if you hear a hissing sound, wait until it stops before completely removing the fuel filler cap. Otherwise, fuel may spray out and injure you or others. WARNING: If you do not use the proper fuel filler cap, excessive pressure or vacuum in the fuel tank may damage the fuel system or cause the fuel cap to disengage in a collision, which may result in possible personal injury. Fuel Filter For fuel filter replacement, see your authorized Mazda dealership. Refer to the service maintenance section for the appropriate intervals for changing the fuel filter. Replace the fuel filter with an authorized Mazda part. The customer warranty may be void for any damage to the fuel system if an authorized Mazda fuel filter is not used. 221
-
 1
1 -
2
-
3
-
4
-
5
-
6
-
7
-
8
-
9
-
10
-
11
-
12
-
13
-
14
-
15
-
16
-
17
-
18
-
19
-
20
-
21
-
22
-
23
-
24
-
25
-
26
-
27
-
28
-
29
-
30
-
31
-
32
-
33
-
34
-
35
-
36
-
37
-
38
-
39
-
40
-
41
-
42
-
43
-
44
-
45
-
46
-
47
-
48
-
49
-
50
-
51
-
52
-
53
-
54
-
55
-
56
-
57
-
58
-
59
-
60
-
61
-
62
-
63
-
64
-
65
-
66
-
67
-
68
-
69
-
70
-
71
-
72
-
73
-
74
-
75
-
76
-
77
-
78
-
79
-
80
-
81
-
82
-
83
-
84
-
85
-
86
-
87
-
88
-
89
-
90
-
91
-
92
-
93
-
94
-
95
-
96
-
97
-
98
-
99
-
100
-
101
-
102
-
103
-
104
-
105
-
106
-
107
-
108
-
109
-
110
-
111
-
112
-
113
-
114
-
115
-
116
-
117
-
118
-
119
-
120
-
121
-
122
-
123
-
124
-
125
-
126
-
127
-
128
-
129
-
130
-
131
-
132
-
133
-
134
-
135
-
136
-
137
-
138
-
139
-
140
-
141
-
142
-
143
-
144
-
145
-
146
-
147
-
148
-
149
-
150
-
151
-
152
-
153
-
154
-
155
-
156
-
157
-
158
-
159
-
160
-
161
-
162
-
163
-
164
-
165
-
166
-
167
-
168
-
169
-
170
-
171
-
172
-
173
-
174
-
175
-
176
-
177
-
178
-
179
-
180
-
181
-
182
-
183
-
184
-
185
-
186
-
187
-
188
-
189
-
190
-
191
-
192
-
193
-
194
-
195
-
196
-
197
-
198
-
199
-
200
-
201
-
202
-
203
-
204
-
205
-
206
-
207
-
208
-
209
-
210
-
211
-
212
-
213
-
214
-
215
-
 216
216 -
 217
217 -
 218
218 -
 219
219 -
 220
220 -
 221
221 -
 222
222 -
 223
223 -
 224
224 -
 225
225 -
 226
226 -
227
-
228
-
229
-
230
-
231
-
232
-
233
-
234
-
235
-
236
-
237
-
238
-
239
-
240
-
241
-
242
-
243
-
244
-
245
-
246
-
247
-
248
-
249
-
250
-
251
-
252
-
253
-
254
-
255
-
256
 |
 |