1999 Mercury Villager Owner's Manual - Page 123
1999 Mercury Villager Manual
Page 123 highlights
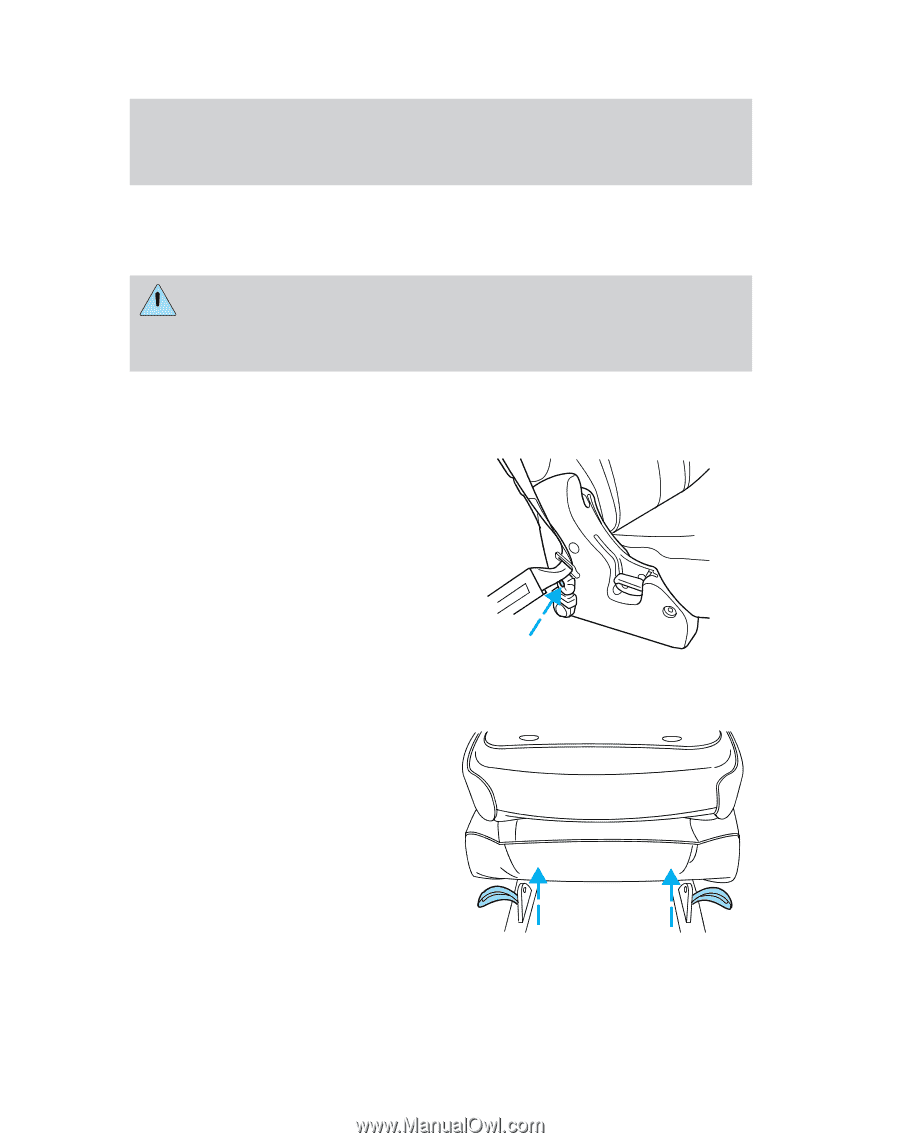
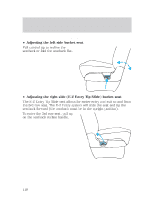
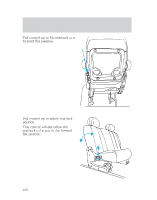
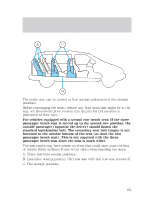
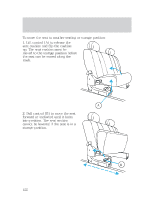
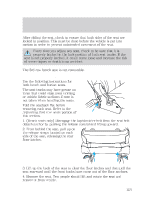
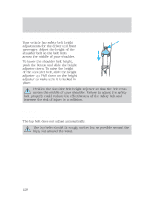
Seating and safety restraints After sliding the seat, check to ensure that both sides of the seat are locked in position. This must be done before the vehicle is put into motion in order to prevent unintended movement of the seat. Every time you adjust any seat, check to be sure that it is properly latched in the lock position of both seat tracks. If the seat is not properly latched, it could come loose and increase the risk of severe injury or death in an accident. The 3rd row bench seat is not removable. To remove the 2nd row seat(s): Use the following instructions for both bench and bucket seats. The seat tracks may have grease on them that could stain your clothing or vehicle fabric surfaces if care is not taken when handling the seats. Fold the seatback flat before removing each seat. Refer to the Adjusting 2nd row seats portion of this section. 1. (Bench seats only) Disengage the lap/shoulder belt from the seat belt detach anchor by pushing the release control and lifting upward. 2. From behind the seat, pull up on the release straps located on each side of the seat, releasing the rear floor latches. 3. Lift up the back of the seat to clear the floor latches and then pull the seat rearward until the front hooks have come out of the floor anchors. 4. Remove the seat. Two people should lift and rotate the seat and remove it from vehicle. 123
-
 1
1 -
2
-
3
-
4
-
5
-
6
-
7
-
8
-
9
-
10
-
11
-
12
-
13
-
14
-
15
-
16
-
17
-
18
-
19
-
20
-
21
-
22
-
23
-
24
-
25
-
26
-
27
-
28
-
29
-
30
-
31
-
32
-
33
-
34
-
35
-
36
-
37
-
38
-
39
-
40
-
41
-
42
-
43
-
44
-
45
-
46
-
47
-
48
-
49
-
50
-
51
-
52
-
53
-
54
-
55
-
56
-
57
-
58
-
59
-
60
-
61
-
62
-
63
-
64
-
65
-
66
-
67
-
68
-
69
-
70
-
71
-
72
-
73
-
74
-
75
-
76
-
77
-
78
-
79
-
80
-
81
-
82
-
83
-
84
-
85
-
86
-
87
-
88
-
89
-
90
-
91
-
92
-
93
-
94
-
95
-
96
-
97
-
98
-
99
-
100
-
101
-
102
-
103
-
104
-
105
-
106
-
107
-
108
-
109
-
110
-
111
-
112
-
113
-
114
-
115
-
116
-
117
-
 118
118 -
 119
119 -
 120
120 -
 121
121 -
 122
122 -
 123
123 -
 124
124 -
 125
125 -
 126
126 -
 127
127 -
 128
128 -
129
-
130
-
131
-
132
-
133
-
134
-
135
-
136
-
137
-
138
-
139
-
140
-
141
-
142
-
143
-
144
-
145
-
146
-
147
-
148
-
149
-
150
-
151
-
152
-
153
-
154
-
155
-
156
-
157
-
158
-
159
-
160
-
161
-
162
-
163
-
164
-
165
-
166
-
167
-
168
-
169
-
170
-
171
-
172
-
173
-
174
-
175
-
176
-
177
-
178
-
179
-
180
-
181
-
182
-
183
-
184
-
185
-
186
-
187
-
188
-
189
-
190
-
191
-
192
-
193
-
194
-
195
-
196
-
197
-
198
-
199
-
200
-
201
-
202
-
203
-
204
-
205
-
206
-
207
-
208
-
209
-
210
-
211
-
212
-
213
-
214
-
215
-
216
-
217
-
218
-
219
-
220
-
221
-
222
-
223
-
224
-
225
-
226
-
227
-
228
-
229
-
230
-
231
-
232
-
233
-
234
-
235
-
236
-
237
-
238
-
239
-
240
-
241
-
242
-
243
-
244
-
245
-
246
-
247
-
248
-
249
-
250
-
251
-
252
-
253
-
254
-
255
-
256
-
257
-
258
-
259
-
260
-
261
-
262
-
263
-
264
 |
 |