2004 Mercury Monterey Owner's Manual - Page 198
2004 Mercury Monterey Manual
Page 198 highlights
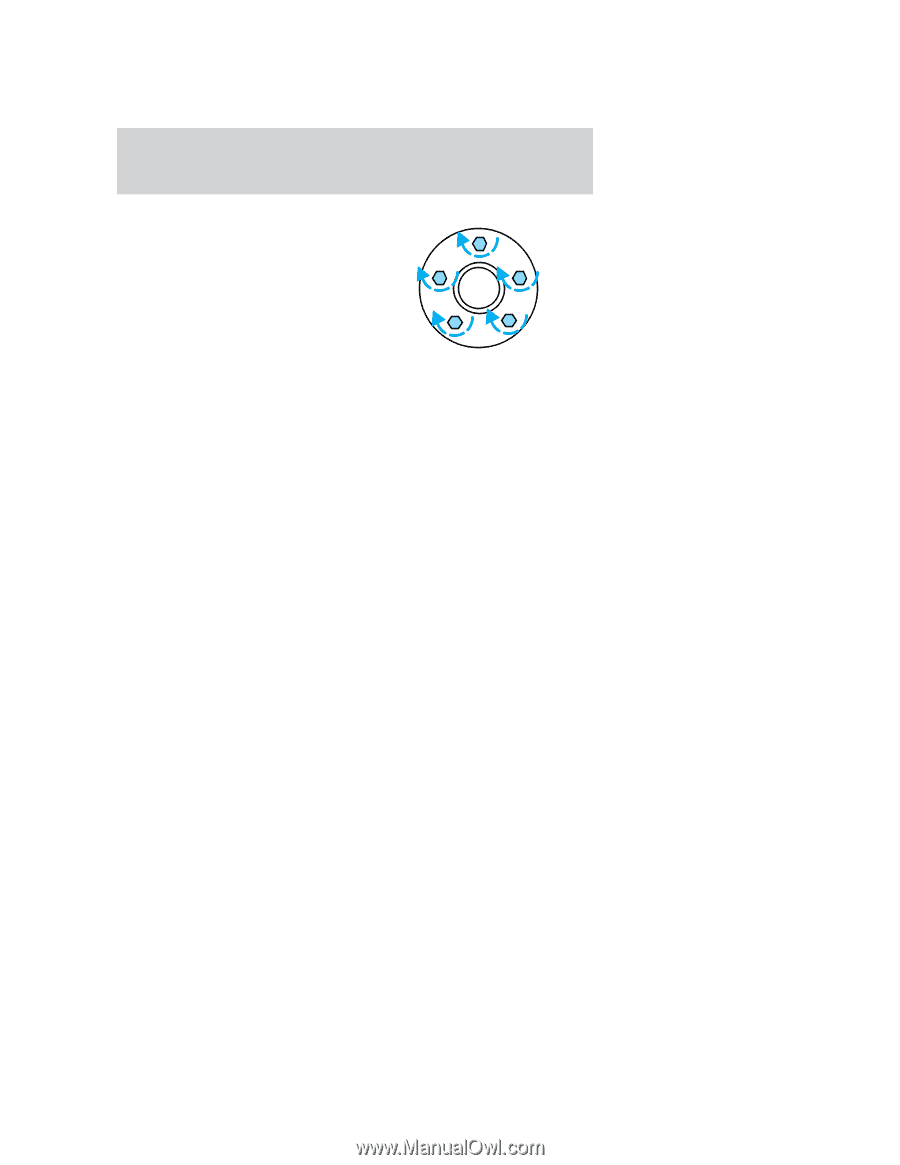
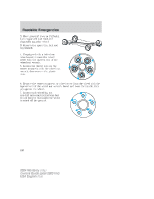
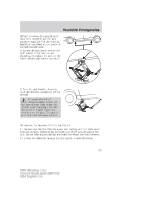
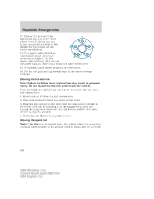
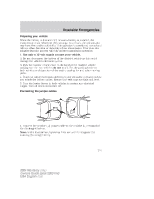
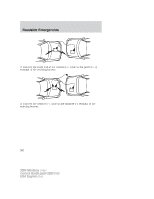
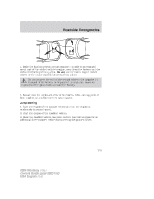
Roadside Emergencies 13. Remove the jack and fully 1 tighten the lug nuts in the order shown. Refer to Wheel lug nut torque specifications later in this 3 4 chapter for the proper lug nut torque specification. 14. If equipped with a bolted-on wheel cover, install the center 5 2 ornament and tighten the five plastic nuts until they click (do not use power tools on these nuts). Install the outer wheel cover. 15. If removed, install center ornament or wheel cover. 16. Put flat tire, jack and lug wrench away in the proper stowage locations. Stowing the full-size tire Note: Failure to follow these instructions may result in personal injury. Do not install the flat tire underneath the vehicle. Place tire inside the vehicle near the rear of the vehicle with the valve stem facing down. 1. Remove tether kit from the jack storage area. 2. Pass cable retainer through the center of the wheel. 3. Raise the tire and secure the cable with the wing screw provided in the tether cable kit, by installing it on the luggage back panel and turning the wing screw clockwise. You will hear an audible click when the tire is properly secured. 4. Check that the flat tire is properly secured. Stowing the spare tire Note: If no tire is to be stowed under the vehicle, attach the secondary (locking) wheel retainer to the primary retainer using cable tie provided. 198 2004 Monterey (mty) Owners Guide (post-2002-fmt) USA English (fus)
-
 1
1 -
2
-
3
-
4
-
5
-
6
-
7
-
8
-
9
-
10
-
11
-
12
-
13
-
14
-
15
-
16
-
17
-
18
-
19
-
20
-
21
-
22
-
23
-
24
-
25
-
26
-
27
-
28
-
29
-
30
-
31
-
32
-
33
-
34
-
35
-
36
-
37
-
38
-
39
-
40
-
41
-
42
-
43
-
44
-
45
-
46
-
47
-
48
-
49
-
50
-
51
-
52
-
53
-
54
-
55
-
56
-
57
-
58
-
59
-
60
-
61
-
62
-
63
-
64
-
65
-
66
-
67
-
68
-
69
-
70
-
71
-
72
-
73
-
74
-
75
-
76
-
77
-
78
-
79
-
80
-
81
-
82
-
83
-
84
-
85
-
86
-
87
-
88
-
89
-
90
-
91
-
92
-
93
-
94
-
95
-
96
-
97
-
98
-
99
-
100
-
101
-
102
-
103
-
104
-
105
-
106
-
107
-
108
-
109
-
110
-
111
-
112
-
113
-
114
-
115
-
116
-
117
-
118
-
119
-
120
-
121
-
122
-
123
-
124
-
125
-
126
-
127
-
128
-
129
-
130
-
131
-
132
-
133
-
134
-
135
-
136
-
137
-
138
-
139
-
140
-
141
-
142
-
143
-
144
-
145
-
146
-
147
-
148
-
149
-
150
-
151
-
152
-
153
-
154
-
155
-
156
-
157
-
158
-
159
-
160
-
161
-
162
-
163
-
164
-
165
-
166
-
167
-
168
-
169
-
170
-
171
-
172
-
173
-
174
-
175
-
176
-
177
-
178
-
179
-
180
-
181
-
182
-
183
-
184
-
185
-
186
-
187
-
188
-
189
-
190
-
191
-
192
-
 193
193 -
 194
194 -
 195
195 -
 196
196 -
 197
197 -
 198
198 -
 199
199 -
 200
200 -
 201
201 -
 202
202 -
 203
203 -
204
-
205
-
206
-
207
-
208
-
209
-
210
-
211
-
212
-
213
-
214
-
215
-
216
-
217
-
218
-
219
-
220
-
221
-
222
-
223
-
224
-
225
-
226
-
227
-
228
-
229
-
230
-
231
-
232
-
233
-
234
-
235
-
236
-
237
-
238
-
239
-
240
-
241
-
242
-
243
-
244
-
245
-
246
-
247
-
248
-
249
-
250
-
251
-
252
-
253
-
254
-
255
-
256
-
257
-
258
-
259
-
260
-
261
-
262
-
263
-
264
-
265
-
266
-
267
-
268
-
269
-
270
-
271
-
272
-
273
-
274
-
275
-
276
-
277
-
278
-
279
-
280
 |
 |