2006 Subaru Legacy Owner's Manual - Page 156
2006 Subaru Legacy Manual
Page 156 highlights
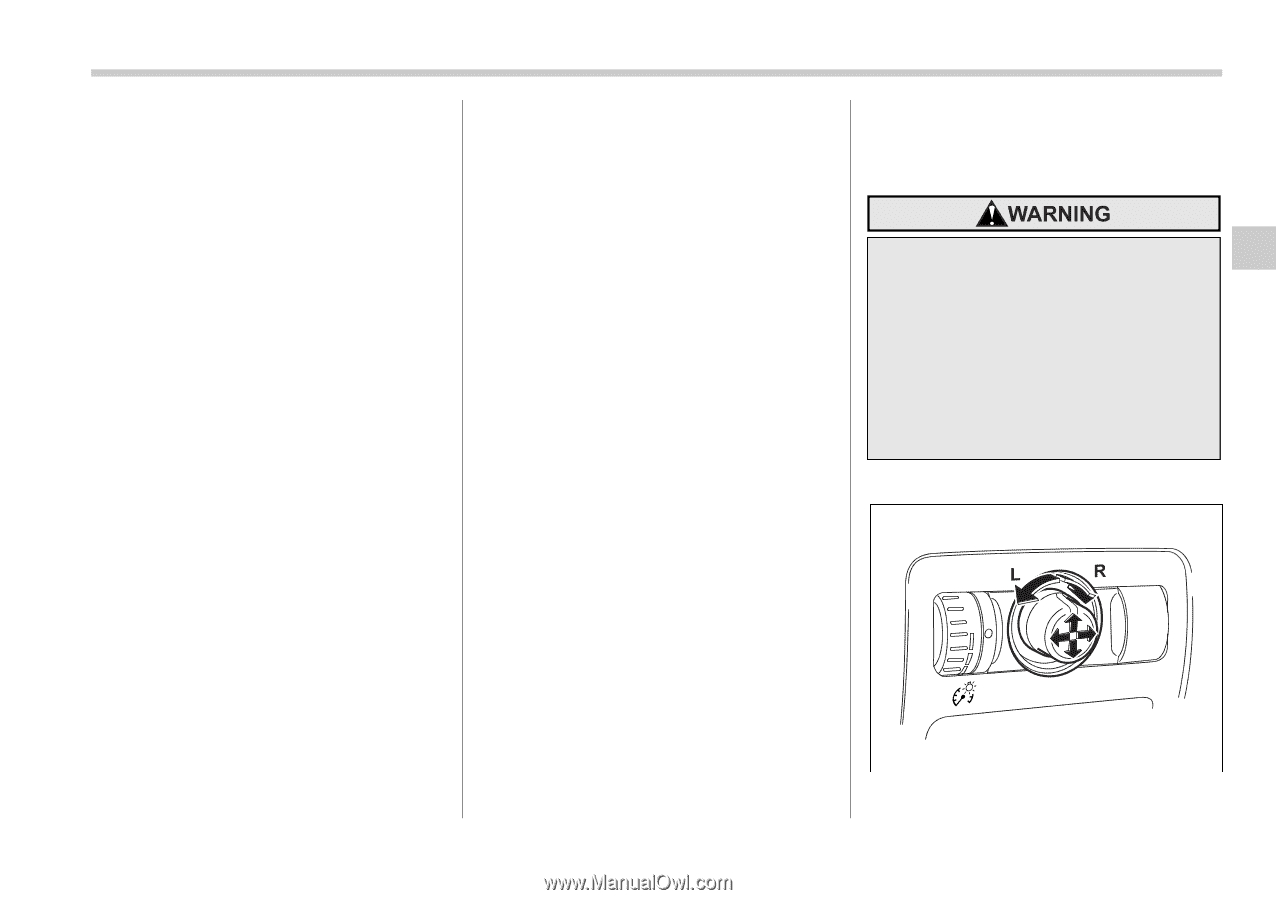
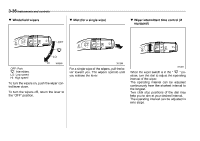
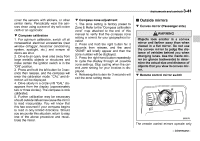
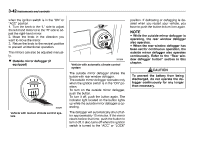
Instruments and controls 3-41 cover the sensors with stickers, or other similar items. Periodically wipe the sensors clean using a piece of dry soft cotton cloth or an applicator. Compass calibration 1. For optimum calibration, switch off all nonessential electrical accessories (rear window defogger, heater/air conditioning system, spotlight, etc.) and ensure all doors are shut. 2. Drive to an open, level area away from large metallic objects or structures and make certain the ignition switch is in the "ON" position. 3. Press and hold the left button for 3 seconds then release, and the compass will enter the calibration mode. "CAL" and direction will be displayed. 4. Drive slowly in a circle until "CAL" disappears from the display (approximately two or three circles). The compass is now calibrated. 5. Further calibration may be necessary should outside influences cause the mirror to read inaccurately. You will know that this has occurred if your compass begins to read in only limited directions. Should you encounter this situation, return to step one of the above procedure and recalibrate the mirror. Compass zone adjustment 1. The zone setting is factory preset to Zone 8. Refer to the "Compass calibration zone" map attached to the end of this manual to verify that the compass zone setting is correct for your geographical location. 2. Press and hold the right button for 3 seconds then release, and the word "ZONE" will briefly appear and then the zone number will be displayed. 3. Press the right-hand button repeatedly to cycle the display through all possible zone settings. Stop cycling when the correct zone setting for your location is displayed. 4. Releasing the button for 3 seconds will exit the zone setting mode. Outside mirrors Convex mirror (Passenger side) Objects look smaller in a convex mirror and farther away than when viewed in a flat mirror. Do not use the convex mirror to judge the distance of vehicles behind you when changing lanes. Use the inside mirror (or glance backwards) to determine the actual size and distance of objects that you view in convex mirror. Remote control mirror switch 300519 The remote control mirrors operate only - CONTINUED -
-
 1
1 -
2
-
3
-
4
-
5
-
6
-
7
-
8
-
9
-
10
-
11
-
12
-
13
-
14
-
15
-
16
-
17
-
18
-
19
-
20
-
21
-
22
-
23
-
24
-
25
-
26
-
27
-
28
-
29
-
30
-
31
-
32
-
33
-
34
-
35
-
36
-
37
-
38
-
39
-
40
-
41
-
42
-
43
-
44
-
45
-
46
-
47
-
48
-
49
-
50
-
51
-
52
-
53
-
54
-
55
-
56
-
57
-
58
-
59
-
60
-
61
-
62
-
63
-
64
-
65
-
66
-
67
-
68
-
69
-
70
-
71
-
72
-
73
-
74
-
75
-
76
-
77
-
78
-
79
-
80
-
81
-
82
-
83
-
84
-
85
-
86
-
87
-
88
-
89
-
90
-
91
-
92
-
93
-
94
-
95
-
96
-
97
-
98
-
99
-
100
-
101
-
102
-
103
-
104
-
105
-
106
-
107
-
108
-
109
-
110
-
111
-
112
-
113
-
114
-
115
-
116
-
117
-
118
-
119
-
120
-
121
-
122
-
123
-
124
-
125
-
126
-
127
-
128
-
129
-
130
-
131
-
132
-
133
-
134
-
135
-
136
-
137
-
138
-
139
-
140
-
141
-
142
-
143
-
144
-
145
-
146
-
147
-
148
-
149
-
150
-
 151
151 -
 152
152 -
 153
153 -
 154
154 -
 155
155 -
 156
156 -
 157
157 -
 158
158 -
 159
159 -
 160
160 -
 161
161 -
162
-
163
-
164
-
165
-
166
-
167
-
168
-
169
-
170
-
171
-
172
-
173
-
174
-
175
-
176
-
177
-
178
-
179
-
180
-
181
-
182
-
183
-
184
-
185
-
186
-
187
-
188
-
189
-
190
-
191
-
192
-
193
-
194
-
195
-
196
-
197
-
198
-
199
-
200
-
201
-
202
-
203
-
204
-
205
-
206
-
207
-
208
-
209
-
210
-
211
-
212
-
213
-
214
-
215
-
216
-
217
-
218
-
219
-
220
-
221
-
222
-
223
-
224
-
225
-
226
-
227
-
228
-
229
-
230
-
231
-
232
-
233
-
234
-
235
-
236
-
237
-
238
-
239
-
240
-
241
-
242
-
243
-
244
-
245
-
246
-
247
-
248
-
249
-
250
-
251
-
252
-
253
-
254
-
255
-
256
-
257
-
258
-
259
-
260
-
261
-
262
-
263
-
264
-
265
-
266
-
267
-
268
-
269
-
270
-
271
-
272
-
273
-
274
-
275
-
276
-
277
-
278
-
279
-
280
-
281
-
282
-
283
-
284
-
285
-
286
-
287
-
288
-
289
-
290
-
291
-
292
-
293
-
294
-
295
-
296
-
297
-
298
-
299
-
300
-
301
-
302
-
303
-
304
-
305
-
306
-
307
-
308
-
309
-
310
-
311
-
312
-
313
-
314
-
315
-
316
-
317
-
318
-
319
-
320
-
321
-
322
-
323
-
324
-
325
-
326
-
327
-
328
-
329
-
330
-
331
-
332
-
333
-
334
-
335
-
336
-
337
-
338
-
339
-
340
-
341
-
342
-
343
-
344
-
345
-
346
-
347
-
348
-
349
-
350
-
351
-
352
-
353
-
354
-
355
-
356
-
357
-
358
-
359
-
360
-
361
-
362
-
363
-
364
-
365
-
366
-
367
-
368
-
369
-
370
-
371
-
372
-
373
-
374
-
375
-
376
-
377
-
378
-
379
-
380
-
381
-
382
-
383
-
384
-
385
-
386
-
387
-
388
-
389
-
390
-
391
-
392
-
393
-
394
-
395
-
396
-
397
-
398
-
399
-
400
-
401
-
402
-
403
-
404
-
405
-
406
-
407
-
408
-
409
-
410
-
411
-
412
-
413
-
414
-
415
-
416
-
417
-
418
-
419
-
420
-
421
-
422
-
423
-
424
-
425
 |
 |