2007 Suzuki XL7 Owner's Manual - Page 126
2007 Suzuki XL7 Manual

Page 126 highlights
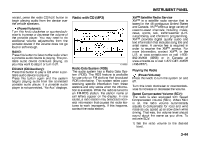
INSTRUMENT PANEL 2) Press the MENU button to display the radio setup menu. 3) Press the pushbutton under the AUTO VOLUM label on the radio display. 4) Press the pushbutton under the desired Speed Compensated Volume setting (OFF, Low, Med, or High) to select the level of radio volume compensation. The display times out after approximately 10 seconds. Each higher setting allows for more radio volume compensation at faster vehicle speeds. Finding a Station BAND: Press this button to switch between AM, FM, or XMTM (if equipped). The display shows the selection. (Tune): Turn this knob to select radio stations. SEEK : Press the right or left SEEK arrow to go to the next or to the previous station and stay there. To scan stations, press and hold either SEEK arrow for a few seconds until a beep sounds. The radio goes to a station, plays for a few seconds, then goes to the next station. Press either SEEK arrow again to stop scanning. The radio only seeks and scans stations with a strong signal that are in the selected band. (Information) (XMTM Satellite Radio Service, MP3, and RDS Features): Press the information button to display additional text information related to the current FM-RDS or XMTM station, or MP3 song. A choice of additional information such as: Channel, Song, Artist, and CAT may appear. Continue pressing the information button to highlight the desired label, or press the pushbutton positioned under any one of the labels and the information about that label is displayed. When information is not available, No Info displays. Storing a Radio Station as a Favorite Drivers are encouraged to set up their radio station favorites while the vehicle is parked. Tune to your favorite stations using the presets, favorites button, and steering wheel controls (if equipped). Refer to "Defensive Driving" in "Your Driving, the Road, and Your Vehicle" in the "Driving Your Vehicle" section. FAV (Favorites): A maximum of 36 stations can be programmed as favorites using the six pushbuttons positioned below the radio station frequency labels and by using the radio favorites page button (FAV button). Press the FAV button to go through up to six pages of favorites, each having six favorite stations available per page. Each page of favorites can contain any combination of AM, FM, or XMTM (if equipped) stations. To store a station as a favorite, perform the following steps: 1) Tune to the desired radio station. 2) Press the FAV button to display the page where you want the station stored. 3) Press and hold one of the six pushbuttons until a beep sounds. Whenever that pushbutton is pressed and released, the station that was set, returns. 4) Repeat the steps for each pushbutton radio station you want stored as a favorite. The number of favorites pages can be setup using the MENU button. To setup the number of favorites pages, perform the following steps: 1) Press the MENU button to display the radio setup menu. 2) Press the pushbutton located below the FAV 1-6 label. 3) Select the desired number of favorites pages by pressing the pushbutton located below the displayed page numbers. 4) Press the FAV button, or let the menu time out, to return to the original main radio screen showing the radio station frequency labels and to begin the process of programming your favorites for the chosen amount of numbered pages. 3-45
-
 1
1 -
2
-
3
-
4
-
5
-
6
-
7
-
8
-
9
-
10
-
11
-
12
-
13
-
14
-
15
-
16
-
17
-
18
-
19
-
20
-
21
-
22
-
23
-
24
-
25
-
26
-
27
-
28
-
29
-
30
-
31
-
32
-
33
-
34
-
35
-
36
-
37
-
38
-
39
-
40
-
41
-
42
-
43
-
44
-
45
-
46
-
47
-
48
-
49
-
50
-
51
-
52
-
53
-
54
-
55
-
56
-
57
-
58
-
59
-
60
-
61
-
62
-
63
-
64
-
65
-
66
-
67
-
68
-
69
-
70
-
71
-
72
-
73
-
74
-
75
-
76
-
77
-
78
-
79
-
80
-
81
-
82
-
83
-
84
-
85
-
86
-
87
-
88
-
89
-
90
-
91
-
92
-
93
-
94
-
95
-
96
-
97
-
98
-
99
-
100
-
101
-
102
-
103
-
104
-
105
-
106
-
107
-
108
-
109
-
110
-
111
-
112
-
113
-
114
-
115
-
116
-
117
-
118
-
119
-
120
-
 121
121 -
 122
122 -
 123
123 -
 124
124 -
 125
125 -
 126
126 -
 127
127 -
 128
128 -
 129
129 -
 130
130 -
 131
131 -
132
-
133
-
134
-
135
-
136
-
137
-
138
-
139
-
140
-
141
-
142
-
143
-
144
-
145
-
146
-
147
-
148
-
149
-
150
-
151
-
152
-
153
-
154
-
155
-
156
-
157
-
158
-
159
-
160
-
161
-
162
-
163
-
164
-
165
-
166
-
167
-
168
-
169
-
170
-
171
-
172
-
173
-
174
-
175
-
176
-
177
-
178
-
179
-
180
-
181
-
182
-
183
-
184
-
185
-
186
-
187
-
188
-
189
-
190
-
191
-
192
-
193
-
194
-
195
-
196
-
197
-
198
-
199
-
200
-
201
-
202
-
203
-
204
-
205
-
206
-
207
-
208
-
209
-
210
-
211
-
212
-
213
-
214
-
215
-
216
-
217
-
218
-
219
-
220
-
221
-
222
-
223
-
224
-
225
-
226
-
227
-
228
-
229
-
230
-
231
-
232
-
233
-
234
-
235
-
236
-
237
-
238
-
239
-
240
-
241
-
242
-
243
-
244
-
245
-
246
-
247
-
248
-
249
-
250
-
251
-
252
-
253
-
254
-
255
-
256
-
257
-
258
-
259
-
260
-
261
-
262
-
263
-
264
-
265
-
266
-
267
-
268
-
269
-
270
-
271
-
272
-
273
 |
 |