2007 Suzuki XL7 Owner's Manual - Page 205
2007 Suzuki XL7 Manual
Page 205 highlights
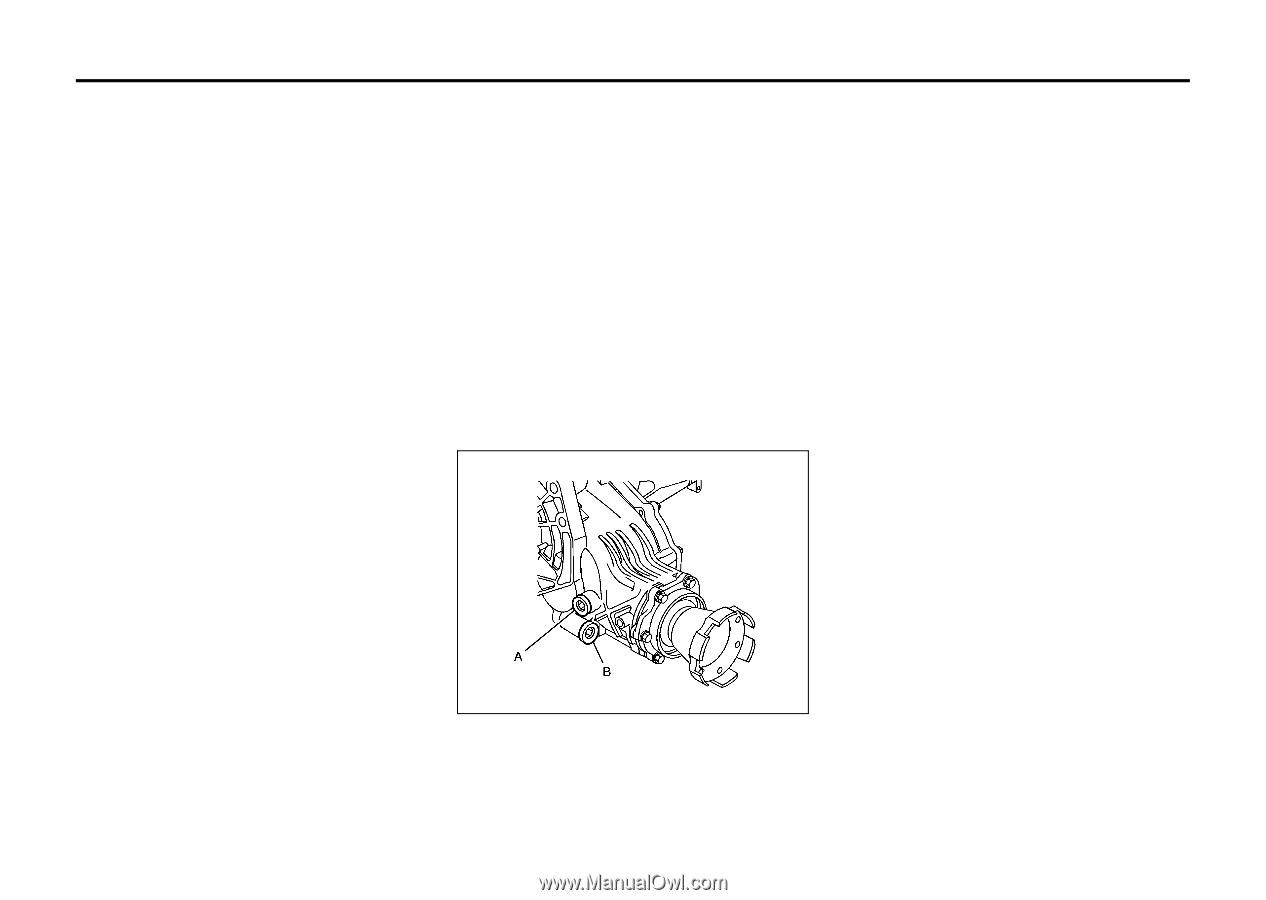
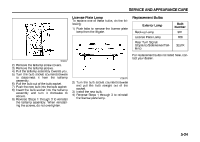
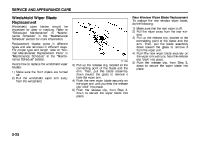
SERVICE AND APPEARANCE CARE To disconnect the jumper cables from both vehicles, do the following: 1) Disconnect the black negative (-) cable from the vehicle that had the dead battery. 2) Disconnect the black negative (-) cable from the vehicle with the good battery. 3) Disconnect the red positive (+) cable from the vehicle with the good battery. 4) Disconnect the red positive (+) cable from the other vehicle. 5) Return the fuse block cover to its originalposition. All-Wheel Drive If you have an all-wheel-drive vehicle, be sure to perform the lubricant checks described in this section. However, there are two additional systems that need lubrication. To get an accurate reading, the vehicle should be on a level surface. If the level is below the bottom of the filler plug hole, you'll need to add some lubricant. Add enough lubricant to raise the level to the bottom of the filler plug hole. What to Use Refer to the Maintenance Schedule to determine what kind of lubricant to use. Refer to "Recommended Fluids and Lubricants" in "Maintenance Schedule" in the "Maintenance Schedule" section. Transfer Case (Power Transfer Unit) When to Check Lubricant Refer to the Maintenance Schedule to determine how often to check the lubricant. Refer to "Scheduled Maintenance" in "Maintenance Schedule" in the "Maintenance Schedule" section. How to Check Lubricant Carrier Assembly-Differential (Rear Drive Module) When to Check and Change Lubricant Refer to the Maintenance Schedule to determine how often to check the lubricant and when to change it. Refer to "Scheduled Maintenance" in "Maintenance Schedule" in the "Maintenance Schedule" section. 1765710 A. Fill Plug B. Drain Plug 5-22
-
 1
1 -
2
-
3
-
4
-
5
-
6
-
7
-
8
-
9
-
10
-
11
-
12
-
13
-
14
-
15
-
16
-
17
-
18
-
19
-
20
-
21
-
22
-
23
-
24
-
25
-
26
-
27
-
28
-
29
-
30
-
31
-
32
-
33
-
34
-
35
-
36
-
37
-
38
-
39
-
40
-
41
-
42
-
43
-
44
-
45
-
46
-
47
-
48
-
49
-
50
-
51
-
52
-
53
-
54
-
55
-
56
-
57
-
58
-
59
-
60
-
61
-
62
-
63
-
64
-
65
-
66
-
67
-
68
-
69
-
70
-
71
-
72
-
73
-
74
-
75
-
76
-
77
-
78
-
79
-
80
-
81
-
82
-
83
-
84
-
85
-
86
-
87
-
88
-
89
-
90
-
91
-
92
-
93
-
94
-
95
-
96
-
97
-
98
-
99
-
100
-
101
-
102
-
103
-
104
-
105
-
106
-
107
-
108
-
109
-
110
-
111
-
112
-
113
-
114
-
115
-
116
-
117
-
118
-
119
-
120
-
121
-
122
-
123
-
124
-
125
-
126
-
127
-
128
-
129
-
130
-
131
-
132
-
133
-
134
-
135
-
136
-
137
-
138
-
139
-
140
-
141
-
142
-
143
-
144
-
145
-
146
-
147
-
148
-
149
-
150
-
151
-
152
-
153
-
154
-
155
-
156
-
157
-
158
-
159
-
160
-
161
-
162
-
163
-
164
-
165
-
166
-
167
-
168
-
169
-
170
-
171
-
172
-
173
-
174
-
175
-
176
-
177
-
178
-
179
-
180
-
181
-
182
-
183
-
184
-
185
-
186
-
187
-
188
-
189
-
190
-
191
-
192
-
193
-
194
-
195
-
196
-
197
-
198
-
199
-
 200
200 -
 201
201 -
 202
202 -
 203
203 -
 204
204 -
 205
205 -
 206
206 -
 207
207 -
 208
208 -
 209
209 -
 210
210 -
211
-
212
-
213
-
214
-
215
-
216
-
217
-
218
-
219
-
220
-
221
-
222
-
223
-
224
-
225
-
226
-
227
-
228
-
229
-
230
-
231
-
232
-
233
-
234
-
235
-
236
-
237
-
238
-
239
-
240
-
241
-
242
-
243
-
244
-
245
-
246
-
247
-
248
-
249
-
250
-
251
-
252
-
253
-
254
-
255
-
256
-
257
-
258
-
259
-
260
-
261
-
262
-
263
-
264
-
265
-
266
-
267
-
268
-
269
-
270
-
271
-
272
-
273
 |
 |