2008 Suzuki Forenza Owner's Manual - Page 167
2008 Suzuki Forenza Manual
Page 167 highlights
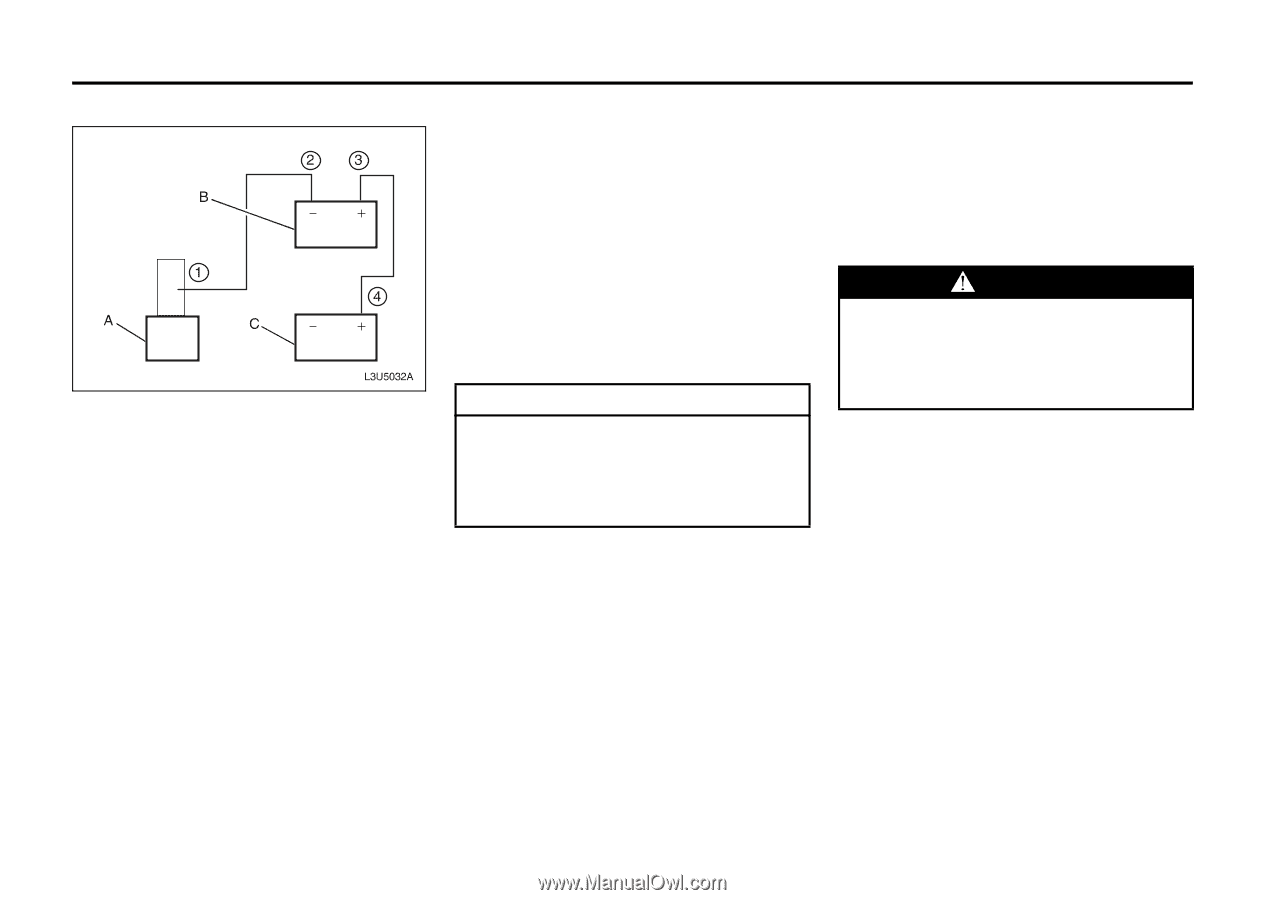
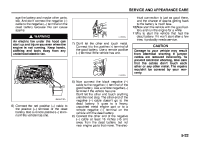
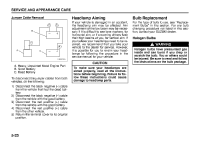
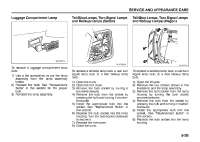
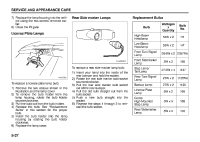
SERVICE AND APPEARANCE CARE Jumper Cable Removal Headlamp Aiming If your vehicle is damaged in an accident, the headlamp aim may be affected. Aim adjustment of the low beam may be necessary if it is difficult to see lane markers, for horizontal aim, or if oncoming drivers flash their high beams at you, for vertical aim. If you believe your headlamps need to be reaimed, we recommend that you take your vehicle to the dealer for service. However, it is possible for you to re-aim your headlamps by following the procedure in the service manual for your vehicle. Bulb Replacement For the type of bulb to use, see "Replacement Bulbs" in this section. For any bulb changing procedure not listed in this section, contact your SUZUKI dealer. Halogen Bulbs WARNING Halogen bulbs have pressurized gas inside and can burst if you drop or scratch the bulb. You or others could be injured. Be sure to read and follow the instructions on the bulb package. A. Heavy, Unpainted Metal Engine Part B. Good Battery C. Dead Battery To disconnect the jumper cables from both vehicles, do the following: 1) Disconnect the black negative (-) cable from the vehicle that had the dead battery. 2) Disconnect the black negative (-) cable from the vehicle with the good battery. 3) Disconnect the red positive (+) cable from the vehicle with the good battery. 4) Disconnect the red positive (+) cable from the other vehicle. 5) Return the terminal cover to its original position. CAUTION To make sure your headlamps are aimed properly, read all the instructions before beginning. Failure to follow these instructions could cause damage to headlamp parts. 5-23
-
 1
1 -
2
-
3
-
4
-
5
-
6
-
7
-
8
-
9
-
10
-
11
-
12
-
13
-
14
-
15
-
16
-
17
-
18
-
19
-
20
-
21
-
22
-
23
-
24
-
25
-
26
-
27
-
28
-
29
-
30
-
31
-
32
-
33
-
34
-
35
-
36
-
37
-
38
-
39
-
40
-
41
-
42
-
43
-
44
-
45
-
46
-
47
-
48
-
49
-
50
-
51
-
52
-
53
-
54
-
55
-
56
-
57
-
58
-
59
-
60
-
61
-
62
-
63
-
64
-
65
-
66
-
67
-
68
-
69
-
70
-
71
-
72
-
73
-
74
-
75
-
76
-
77
-
78
-
79
-
80
-
81
-
82
-
83
-
84
-
85
-
86
-
87
-
88
-
89
-
90
-
91
-
92
-
93
-
94
-
95
-
96
-
97
-
98
-
99
-
100
-
101
-
102
-
103
-
104
-
105
-
106
-
107
-
108
-
109
-
110
-
111
-
112
-
113
-
114
-
115
-
116
-
117
-
118
-
119
-
120
-
121
-
122
-
123
-
124
-
125
-
126
-
127
-
128
-
129
-
130
-
131
-
132
-
133
-
134
-
135
-
136
-
137
-
138
-
139
-
140
-
141
-
142
-
143
-
144
-
145
-
146
-
147
-
148
-
149
-
150
-
151
-
152
-
153
-
154
-
155
-
156
-
157
-
158
-
159
-
160
-
161
-
 162
162 -
 163
163 -
 164
164 -
 165
165 -
 166
166 -
 167
167 -
 168
168 -
 169
169 -
 170
170 -
 171
171 -
 172
172 -
173
-
174
-
175
-
176
-
177
-
178
-
179
-
180
-
181
-
182
-
183
-
184
-
185
-
186
-
187
-
188
-
189
-
190
-
191
-
192
-
193
-
194
-
195
-
196
-
197
-
198
-
199
-
200
-
201
-
202
-
203
-
204
-
205
-
206
-
207
-
208
-
209
-
210
-
211
-
212
-
213
-
214
-
215
-
216
-
217
-
218
-
219
-
220
-
221
-
222
-
223
-
224
-
225
-
226
 |
 |