2008 Suzuki XL7 Owner's Manual - Page 139
2008 Suzuki XL7 Manual

Page 139 highlights
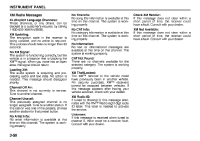
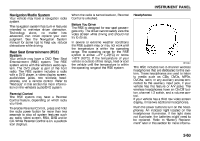
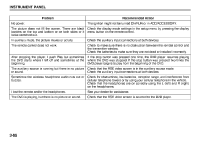
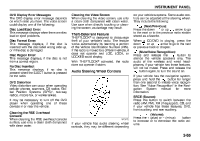
INSTRUMENT PANEL To use the auxiliary inputs of the RSE system, connect an external auxiliary device to the color-coded A/V jacks and turn both the auxiliary device and the video screen power on. If the video screen is in the DVD player mode, pressing the AUX button on the remote control will switch the video screen from the DVD player mode to the auxiliary device. The radio can listen to the audio of the connected auxiliary device by sourcing to auxiliary. Refer to "Radio(s)" in this section for more information. How to Change the RSE Video Screen Settings The screen display mode (normal, full, and zoom), screen brightness, and setup menu language can be changed from the on screen setup menu. To change any feature, perform the following: 1) Press the (display) menu button on the remote control. 2) Use the remote control , , , (navigation) arrows and the button to use the setup menu. 3) Press the (display) menu button again to remove the setup menu from the screen. Audio Output Audio from the DVD player or auxiliary inputs can be heard through the following possible sources: • Wireless Headphones • Vehicle Speakers The RSE system always transmits the audio signal to the wireless headphones, if there is audio available. See "Headphones" earlier in this section for more information. When a device is connected to the radio's auxiliary input jack, if your vehicle has this feature, or A/V jacks, the rear seat passengers are able to hear audio from the auxiliary device through the wireless or wired headphones. The front seat passengers are able to listen to playback from this device through the vehicle speakers by selecting AUX as the source on the radio. Video Screen The video screen is located in the overhead console. To use the video screen, do the following: 1) Push the release button located on the overhead console. 2) Move the screen to the desired position. When the video screen is not in use, push it up into its locked position. If a DVD is playing and the screen is raised to its locked position, the screen remains on, this is normal, and the DVD continues to play through the previous audio source. Use the remote control power button or eject the disc to turn off the screen. The overhead console contains the infrared receivers for the wireless headphones and the infrared receivers for the remote control. They are located at the rear of the console. CAUTION Avoid directly touching the video screen, as damage may occur. See "Cleaning the Video Screen" later in this section for more information. Remote Control To use the remote control, aim it at the transmitter window at the rear of the overhead console and press the desired button. Direct sunlight or very bright light can affect the ability of the RSE transmitter to receive signals from the remote control. If the remote control does not seem to be working, the batteries may need to be replaced. See "Battery Replacement" later in this section. Objects blocking the line of sight can also affect the function of the remote control. If a CD or DVD is in the Radio DVD slot, the remote control power button can be used to turn on the video screen display 3-62
-
 1
1 -
2
-
3
-
4
-
5
-
6
-
7
-
8
-
9
-
10
-
11
-
12
-
13
-
14
-
15
-
16
-
17
-
18
-
19
-
20
-
21
-
22
-
23
-
24
-
25
-
26
-
27
-
28
-
29
-
30
-
31
-
32
-
33
-
34
-
35
-
36
-
37
-
38
-
39
-
40
-
41
-
42
-
43
-
44
-
45
-
46
-
47
-
48
-
49
-
50
-
51
-
52
-
53
-
54
-
55
-
56
-
57
-
58
-
59
-
60
-
61
-
62
-
63
-
64
-
65
-
66
-
67
-
68
-
69
-
70
-
71
-
72
-
73
-
74
-
75
-
76
-
77
-
78
-
79
-
80
-
81
-
82
-
83
-
84
-
85
-
86
-
87
-
88
-
89
-
90
-
91
-
92
-
93
-
94
-
95
-
96
-
97
-
98
-
99
-
100
-
101
-
102
-
103
-
104
-
105
-
106
-
107
-
108
-
109
-
110
-
111
-
112
-
113
-
114
-
115
-
116
-
117
-
118
-
119
-
120
-
121
-
122
-
123
-
124
-
125
-
126
-
127
-
128
-
129
-
130
-
131
-
132
-
133
-
 134
134 -
 135
135 -
 136
136 -
 137
137 -
 138
138 -
 139
139 -
 140
140 -
 141
141 -
 142
142 -
 143
143 -
 144
144 -
145
-
146
-
147
-
148
-
149
-
150
-
151
-
152
-
153
-
154
-
155
-
156
-
157
-
158
-
159
-
160
-
161
-
162
-
163
-
164
-
165
-
166
-
167
-
168
-
169
-
170
-
171
-
172
-
173
-
174
-
175
-
176
-
177
-
178
-
179
-
180
-
181
-
182
-
183
-
184
-
185
-
186
-
187
-
188
-
189
-
190
-
191
-
192
-
193
-
194
-
195
-
196
-
197
-
198
-
199
-
200
-
201
-
202
-
203
-
204
-
205
-
206
-
207
-
208
-
209
-
210
-
211
-
212
-
213
-
214
-
215
-
216
-
217
-
218
-
219
-
220
-
221
-
222
-
223
-
224
-
225
-
226
-
227
-
228
-
229
-
230
-
231
-
232
-
233
-
234
-
235
-
236
-
237
-
238
-
239
-
240
-
241
-
242
-
243
-
244
-
245
-
246
-
247
-
248
-
249
-
250
-
251
-
252
-
253
-
254
-
255
-
256
-
257
-
258
 |
 |