2008 Suzuki XL7 Owner's Manual - Page 190
2008 Suzuki XL7 Manual

Page 190 highlights
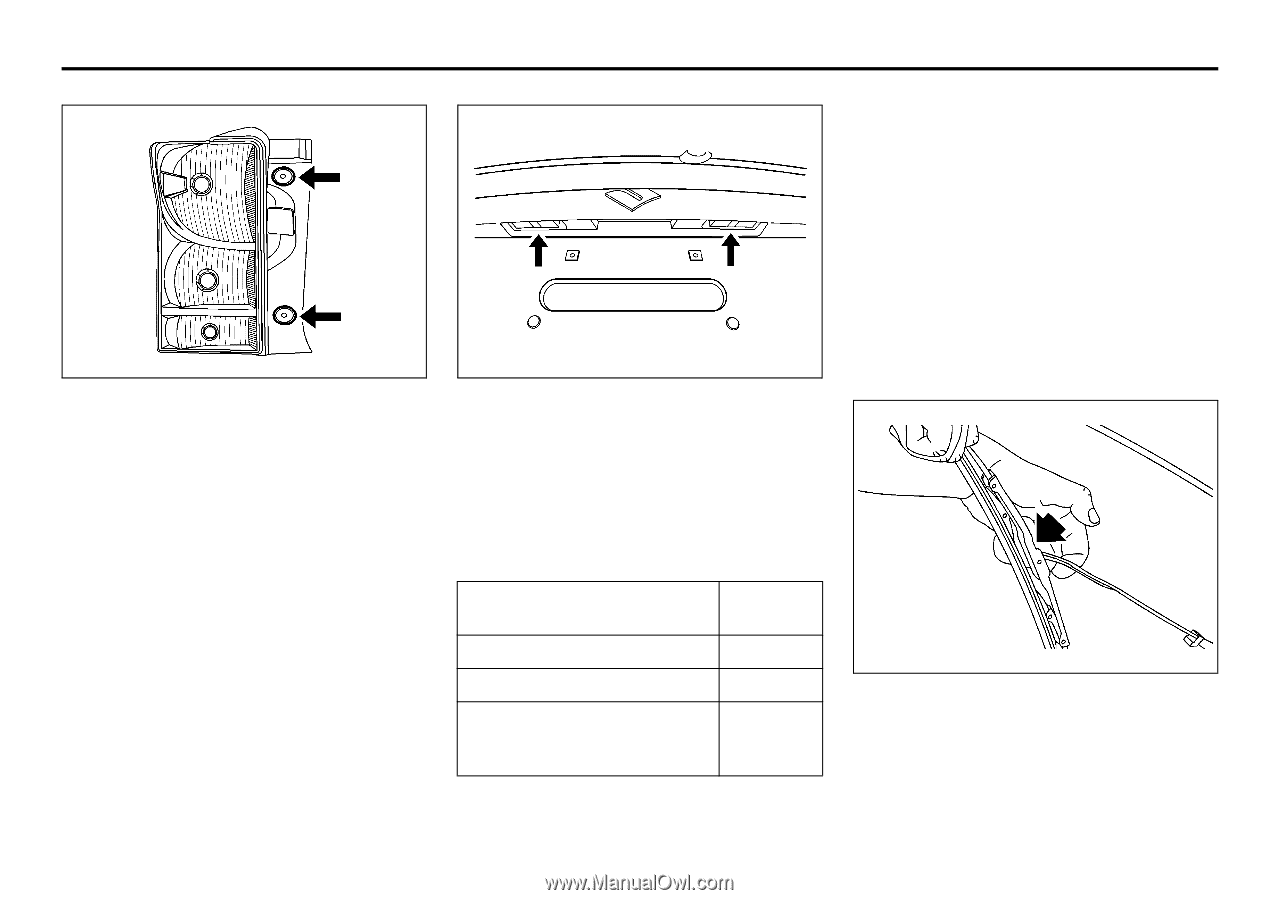
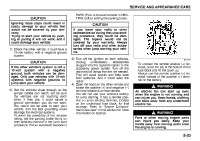
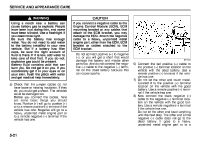
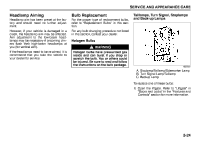
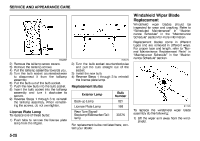
SERVICE AND APPEARANCE CARE Windshield Wiper Blade Replacement Windshield wiper blades should be inspected for wear and cracking. Refer to "Scheduled Maintenance" in "Maintenance Schedule" in the "Maintenance Schedule" section for more information. Replacement blades come in different types and are removed in different ways. For proper type and length, refer to "Normal Maintenance Replacement Parts" in "Maintenance Schedule" in the "Maintenance Schedule" section. 1802297 1708173 2) 3) 4) 5) 6) 7) 8) 9) Remove the taillamp screw covers. Remove the taillamp screws. Pull the taillamp assembly towards you. Turn the bulb socket counterclockwise to disconnect it from the taillamp assembly. Pull the bulb out of the bulb socket. Push the new bulb into the bulb socket. Insert the bulb socket into the taillamp assembly and turn it clockwise to secure. Reverse Steps 1 through 3 to reinstall the taillamp assembly. When reinstalling the screws, do not overtighten. 2) Turn the bulb socket counterclockwise and pull the bulb straight out of the socket. 3) Install the new bulb. 4) Reverse Steps 1 through 3 to reinstall the license plate lamp. Replacement Bulbs Exterior Lamp Back-up Lamp License Plate Lamp Rear Turn Signal/ Stoplamp/Sidemarker/Taillamp Bulb Number 921 168 3057K 811525 License Plate Lamp To replace one of these bulbs: 1) Push tabs to remove the license plate lamp from the liftgate. To replace the windshield wiper blade assembly do the following: 1) Lift the wiper arm away from the windshield. For replacement bulbs not listed here, contact your dealer. 5-25
-
 1
1 -
2
-
3
-
4
-
5
-
6
-
7
-
8
-
9
-
10
-
11
-
12
-
13
-
14
-
15
-
16
-
17
-
18
-
19
-
20
-
21
-
22
-
23
-
24
-
25
-
26
-
27
-
28
-
29
-
30
-
31
-
32
-
33
-
34
-
35
-
36
-
37
-
38
-
39
-
40
-
41
-
42
-
43
-
44
-
45
-
46
-
47
-
48
-
49
-
50
-
51
-
52
-
53
-
54
-
55
-
56
-
57
-
58
-
59
-
60
-
61
-
62
-
63
-
64
-
65
-
66
-
67
-
68
-
69
-
70
-
71
-
72
-
73
-
74
-
75
-
76
-
77
-
78
-
79
-
80
-
81
-
82
-
83
-
84
-
85
-
86
-
87
-
88
-
89
-
90
-
91
-
92
-
93
-
94
-
95
-
96
-
97
-
98
-
99
-
100
-
101
-
102
-
103
-
104
-
105
-
106
-
107
-
108
-
109
-
110
-
111
-
112
-
113
-
114
-
115
-
116
-
117
-
118
-
119
-
120
-
121
-
122
-
123
-
124
-
125
-
126
-
127
-
128
-
129
-
130
-
131
-
132
-
133
-
134
-
135
-
136
-
137
-
138
-
139
-
140
-
141
-
142
-
143
-
144
-
145
-
146
-
147
-
148
-
149
-
150
-
151
-
152
-
153
-
154
-
155
-
156
-
157
-
158
-
159
-
160
-
161
-
162
-
163
-
164
-
165
-
166
-
167
-
168
-
169
-
170
-
171
-
172
-
173
-
174
-
175
-
176
-
177
-
178
-
179
-
180
-
181
-
182
-
183
-
184
-
 185
185 -
 186
186 -
 187
187 -
 188
188 -
 189
189 -
 190
190 -
 191
191 -
 192
192 -
 193
193 -
 194
194 -
 195
195 -
196
-
197
-
198
-
199
-
200
-
201
-
202
-
203
-
204
-
205
-
206
-
207
-
208
-
209
-
210
-
211
-
212
-
213
-
214
-
215
-
216
-
217
-
218
-
219
-
220
-
221
-
222
-
223
-
224
-
225
-
226
-
227
-
228
-
229
-
230
-
231
-
232
-
233
-
234
-
235
-
236
-
237
-
238
-
239
-
240
-
241
-
242
-
243
-
244
-
245
-
246
-
247
-
248
-
249
-
250
-
251
-
252
-
253
-
254
-
255
-
256
-
257
-
258
 |
 |