2010 Suzuki Kizashi Owner's Manual - Page 45
2010 Suzuki Kizashi Manual

Page 45 highlights
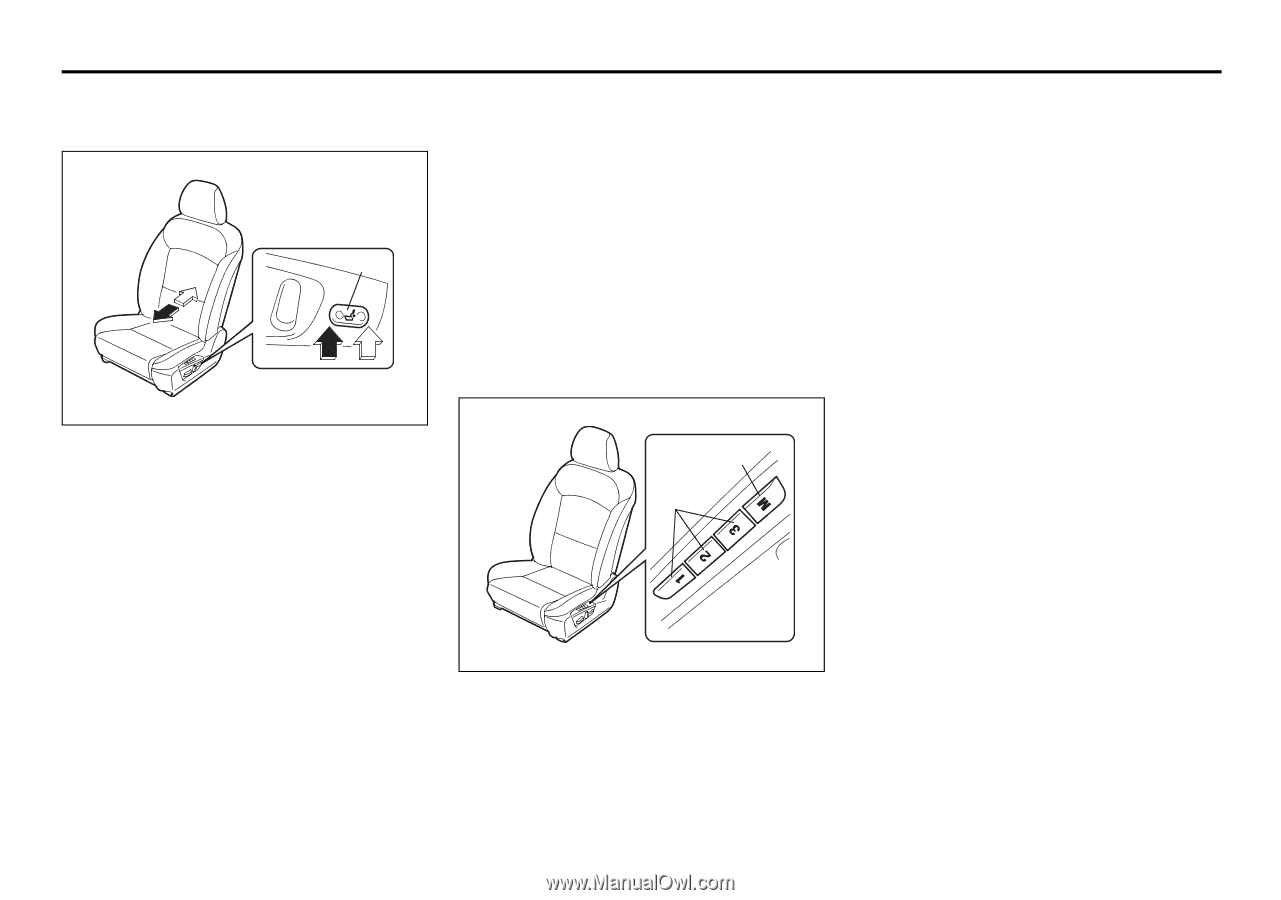
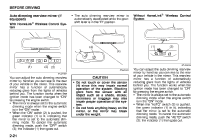
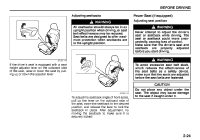
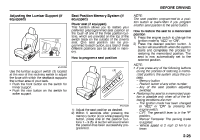
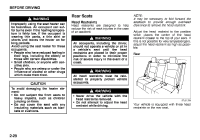
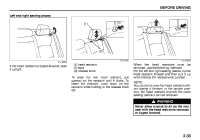
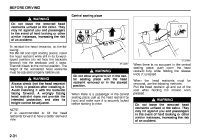
BEFORE DRIVING Adjusting the Lumbar Support (if equipped) Seat Position Memory System (if equipped) Power seat (if equipped) This function allows you to restore your preferred preprogrammed seat position at the touch of one of the three position buttons, which are provided on the top of the switch block on the outside of the driver's seat. One seat position can be programmed to each button, so a total of three different positions can be stored in memory. How to program a seat position 57L21033 NOTE: The seat position programmed to a position button is overwritten if you program another seat position to the same button. How to restore the seat to a memorized position 1) Press the engine switch to change the ignition mode to "ACC" or "ON". 2) Press the desired position button. A buzzer will sound both when the system starts and completes the process for restoring the memorized position. The seat is now automatically set to the selected position. NOTE: • If you press any of the following buttons during the process of restoring a memorized position, the system stops the process. - Memory button - Position button of any other number - Any of the seat position adjusting switches • Restoring the seat to a memorized position is possible only when all of the following conditions are met: - The ignition mode has been changed to "ACC" or "ON" by pressing the engine switch. - CVT: The gearshift lever is in the "P" position. Manual Transaxle: The parking brake is applied. - Vehicle speed is 2 mph (3 km/h) or lower. (3) Use the lumbar support switch (3) located at the rear of the reclining switch to adjust the force with which the seatback supports the lumbar area of your back. • Push the front button on the switch for firmer support. • Push the rear button on the switch for softer support. (4) (5) 57L21034 1) Adjust the seat position as desired. 2) Within 5 seconds after pressing the memory button (4) or while pressing the button, press one of the position buttons 1 - 3 (5). A buzzer will sound when the position has been successfully programmed. 2-26
-
 1
1 -
2
-
3
-
4
-
5
-
6
-
7
-
8
-
9
-
10
-
11
-
12
-
13
-
14
-
15
-
16
-
17
-
18
-
19
-
20
-
21
-
22
-
23
-
24
-
25
-
26
-
27
-
28
-
29
-
30
-
31
-
32
-
33
-
34
-
35
-
36
-
37
-
38
-
39
-
 40
40 -
 41
41 -
 42
42 -
 43
43 -
 44
44 -
 45
45 -
 46
46 -
 47
47 -
 48
48 -
 49
49 -
 50
50 -
51
-
52
-
53
-
54
-
55
-
56
-
57
-
58
-
59
-
60
-
61
-
62
-
63
-
64
-
65
-
66
-
67
-
68
-
69
-
70
-
71
-
72
-
73
-
74
-
75
-
76
-
77
-
78
-
79
-
80
-
81
-
82
-
83
-
84
-
85
-
86
-
87
-
88
-
89
-
90
-
91
-
92
-
93
-
94
-
95
-
96
-
97
-
98
-
99
-
100
-
101
-
102
-
103
-
104
-
105
-
106
-
107
-
108
-
109
-
110
-
111
-
112
-
113
-
114
-
115
-
116
-
117
-
118
-
119
-
120
-
121
-
122
-
123
-
124
-
125
-
126
-
127
-
128
-
129
-
130
-
131
-
132
-
133
-
134
-
135
-
136
-
137
-
138
-
139
-
140
-
141
-
142
-
143
-
144
-
145
-
146
-
147
-
148
-
149
-
150
-
151
-
152
-
153
-
154
-
155
-
156
-
157
-
158
-
159
-
160
-
161
-
162
-
163
-
164
-
165
-
166
-
167
-
168
-
169
-
170
-
171
-
172
-
173
-
174
-
175
-
176
-
177
-
178
-
179
-
180
-
181
-
182
-
183
-
184
-
185
-
186
-
187
-
188
-
189
-
190
-
191
-
192
-
193
-
194
-
195
-
196
-
197
-
198
-
199
-
200
-
201
-
202
-
203
-
204
-
205
-
206
-
207
-
208
-
209
-
210
-
211
-
212
-
213
-
214
-
215
-
216
-
217
-
218
-
219
-
220
-
221
-
222
-
223
-
224
-
225
-
226
-
227
-
228
-
229
-
230
-
231
-
232
-
233
-
234
-
235
-
236
-
237
-
238
-
239
-
240
-
241
-
242
-
243
-
244
-
245
-
246
-
247
-
248
-
249
-
250
-
251
-
252
-
253
-
254
-
255
-
256
-
257
-
258
-
259
-
260
-
261
-
262
-
263
-
264
-
265
-
266
-
267
-
268
-
269
-
270
-
271
-
272
-
273
-
274
-
275
-
276
-
277
-
278
-
279
-
280
-
281
-
282
-
283
-
284
-
285
-
286
-
287
-
288
-
289
-
290
-
291
-
292
-
293
-
294
-
295
-
296
-
297
-
298
-
299
-
300
-
301
-
302
-
303
-
304
-
305
-
306
-
307
-
308
-
309
-
310
-
311
-
312
-
313
-
314
-
315
-
316
-
317
-
318
-
319
-
320
-
321
-
322
-
323
-
324
-
325
-
326
-
327
-
328
-
329
-
330
-
331
-
332
-
333
-
334
-
335
-
336
-
337
-
338
-
339
-
340
-
341
-
342
-
343
-
344
-
345
-
346
-
347
-
348
-
349
-
350
-
351
-
352
-
353
-
354
-
355
-
356
-
357
-
358
-
359
-
360
-
361
-
362
-
363
-
364
-
365
-
366
-
367
-
368
-
369
-
370
-
371
-
372
-
373
-
374
-
375
-
376
-
377
-
378
-
379
-
380
-
381
-
382
-
383
-
384
-
385
-
386
-
387
-
388
 |
 |