2007 Suzuki Grand Vitara Owner's Manual - Page 33
2007 Suzuki Grand Vitara Manual
Page 33 highlights
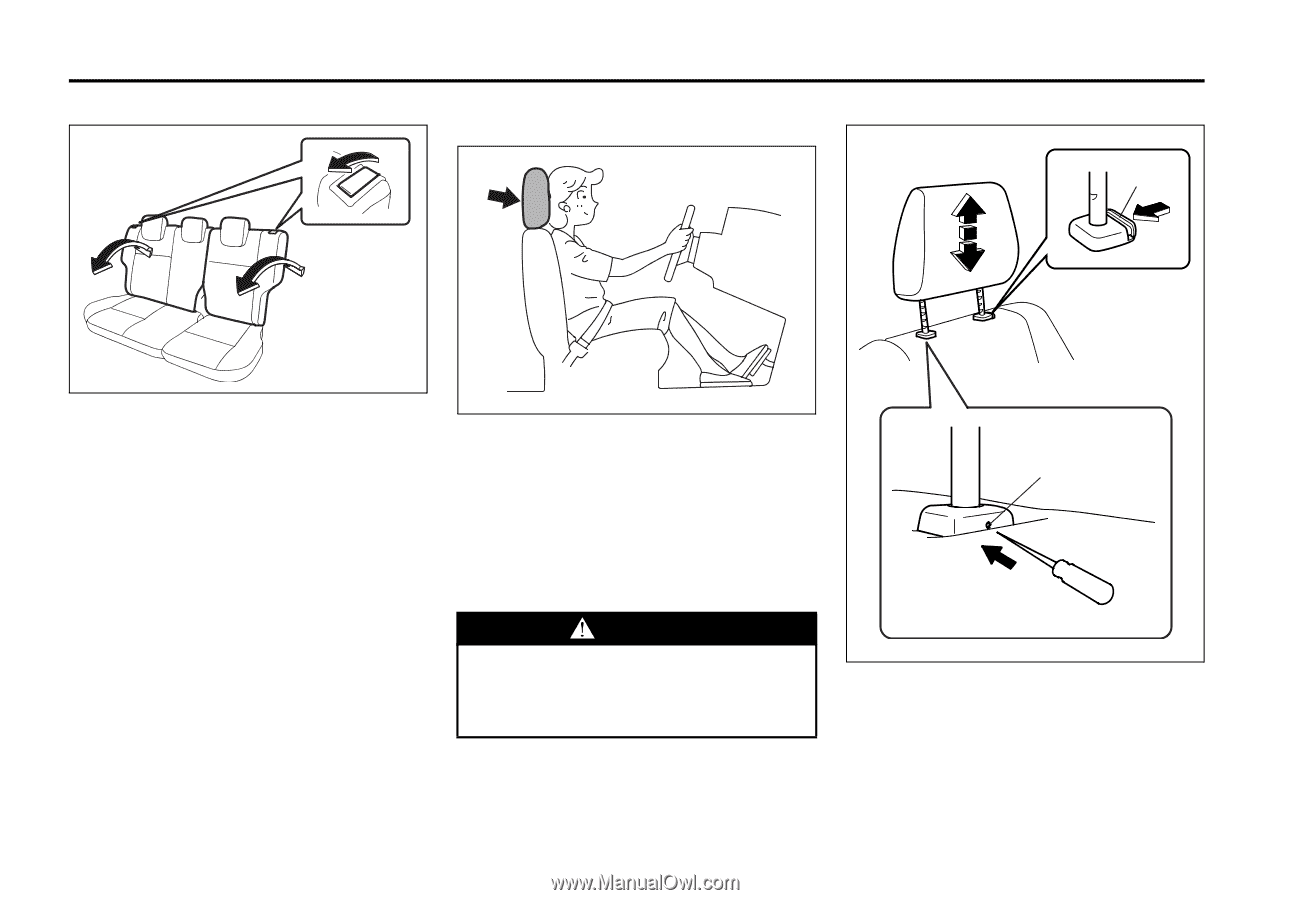
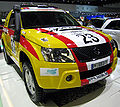
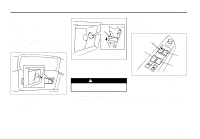
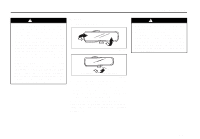
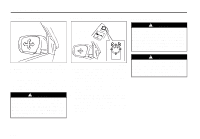
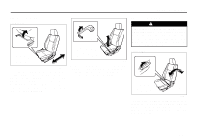
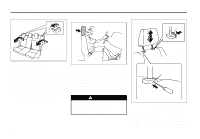
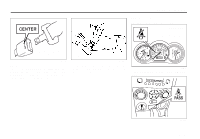
BEFORE DRIVING Rear seat Head Restraints Front EXAMPLE (1) 64J019 To adjust the seatback angle of the rear seats: 1) Pull up the lever on the top of a split folding seat. 2) Move the seatback to one of the lock positions. The number of the lock positions depends on the vehicle specification. 3) Release the lever to lock the seatback in position. After adjustment, try moving the seatback to make sure it is securely locked. 75F123 Head restraints are designed to help reduce the risk of neck injuries in case of an accident. Adjust the head restraint to the position which places the center of the head restraint closest to the top of your ears. If this is not possible for very tall passengers, adjust the head restraint as high as possible. (2) PUSH WARNING • Never drive the vehicle with the head restraints removed. • Do not attempt to adjust the head restraint while driving. 66J150 To raise the head restraint, pull upward on the restraint until it clicks. To lower the restraint, push down on the restraint while holding in the release knob (1). If a head restraint must be removed (for cleaning, replacement, etc.), use the following procedure. 2-19
-
 1
1 -
2
-
3
-
4
-
5
-
6
-
7
-
8
-
9
-
10
-
11
-
12
-
13
-
14
-
15
-
16
-
17
-
18
-
19
-
20
-
21
-
22
-
23
-
24
-
25
-
26
-
27
-
 28
28 -
 29
29 -
 30
30 -
 31
31 -
 32
32 -
 33
33 -
 34
34 -
 35
35 -
 36
36 -
 37
37 -
 38
38 -
39
-
40
-
41
-
42
-
43
-
44
-
45
-
46
-
47
-
48
-
49
-
50
-
51
-
52
-
53
-
54
-
55
-
56
-
57
-
58
-
59
-
60
-
61
-
62
-
63
-
64
-
65
-
66
-
67
-
68
-
69
-
70
-
71
-
72
-
73
-
74
-
75
-
76
-
77
-
78
-
79
-
80
-
81
-
82
-
83
-
84
-
85
-
86
-
87
-
88
-
89
-
90
-
91
-
92
-
93
-
94
-
95
-
96
-
97
-
98
-
99
-
100
-
101
-
102
-
103
-
104
-
105
-
106
-
107
-
108
-
109
-
110
-
111
-
112
-
113
-
114
-
115
-
116
-
117
-
118
-
119
-
120
-
121
-
122
-
123
-
124
-
125
-
126
-
127
-
128
-
129
-
130
-
131
-
132
-
133
-
134
-
135
-
136
-
137
-
138
-
139
-
140
-
141
-
142
-
143
-
144
-
145
-
146
-
147
-
148
-
149
-
150
-
151
-
152
-
153
-
154
-
155
-
156
-
157
-
158
-
159
-
160
-
161
-
162
-
163
-
164
-
165
-
166
-
167
-
168
-
169
-
170
-
171
-
172
-
173
-
174
-
175
-
176
-
177
-
178
-
179
-
180
-
181
-
182
-
183
-
184
-
185
-
186
-
187
-
188
-
189
-
190
-
191
-
192
-
193
-
194
-
195
-
196
-
197
-
198
-
199
-
200
-
201
-
202
-
203
-
204
-
205
-
206
-
207
-
208
-
209
-
210
-
211
-
212
-
213
-
214
-
215
-
216
 |
 |