3Com 3C10220 User Guide
3Com 3C10220 - Ethernet Power Source Supply Manual
 |
UPC - 662705390888
View all 3Com 3C10220 manuals
Add to My Manuals
Save this manual to your list of manuals |
3Com 3C10220 manual content summary:
- 3Com 3C10220 | User Guide - Page 1
3Com® Ethernet Power Source Guide 3C10220 - 12-Port Ethernet Power Source 3C10222 - 24-Port Ethernet Power Source http://www.3com.com/ Part Number: 10038538-01 Rev B Published: November 2000 - 3Com 3C10220 | User Guide - Page 2
3Com Corporation. All rights reserved. No part of this documentation may be reproduced in any form or by any means or used is provided with only such rights as are provided in 3Com's standard commercial license for the Software. Technical data is provided with limited rights only as provided in DFAR - 3Com 3C10220 | User Guide - Page 3
CONTENTS ABOUT THIS GUIDE Conventions 5 Documentation Comments 6 Year 2000 Compliance 6 3Com Support 7 1 3COM ETHERNET POWER SOURCE OVERVIEW Overview 10 Features 10 Front Panel Connections and LEDs 11 10/100BASE-TX Data Input Ports 11 10/100BASE-TX Data and Power Output Ports 12 LEDs 12 Rear Panel - 3Com 3C10220 | User Guide - Page 4
3 TROUBLESHOOTING Solving EPS Problems 27 Solving NBX Telephone Problems 30 Solving Wireless Access Point Problems 32 A SAFETY INFORMATION Important Safety Information 36 L'information de Sécurité Importante 37 Wichtige Sicherheitsinformationen 39 B TECHNICAL SPECIFICATIONS AND PIN ASSIGNMENTS 3COM - 3Com 3C10220 | User Guide - Page 5
provides all the information that you need to install and use either of the Ethernet Power Source (EPS) units: I 3C10220 - with 12 10BASE-T/100BASE-TX ports I 3C10222 - with 24 10BASE-T/100BASE-TX ports The guide is intended for use by installers or network administrators who are responsible for - 3Com 3C10220 | User Guide - Page 6
. They will help make our documentation more useful for you. Please e-mail comments about this guide to us at this address: [email protected] Please include the following information when you comment: I 3Com® Ethernet Power Source Guide I Part Number 10038538-01 Rev B I Page number For - 3Com 3C10220 | User Guide - Page 7
3Com Support 7 3Com Support For information about these topics: I Product Troubleshooting I Software Downloads I Documentation I 3Com Service use your web browser to access this web site: http://support.3com.com/ and look for Network Telephony Products. - 3Com 3C10220 | User Guide - Page 8
8 ABOUT THIS GUIDE - 3Com 3C10220 | User Guide - Page 9
Supplies (UPS), and AC/DC adapters I Can be used with the 3Com NBX 100 Communications System business telephones and with 3Com's wireless access points. I Is easy to add to your network I Allows you to manage power centrally This chapter covers these topics: I Overview of the Ethernet Power Source - 3Com 3C10220 | User Guide - Page 10
10 CHAPTER 1: 3COM ETHERNET POWER SOURCE OVERVIEW Overview The power source is designed for use with a standard 10BASE-T/100BASE-TX Ethernet network over standard TIA/EIA-568, Category 5 cable. The DC operating power for the data terminal units is fed through the unused pairs (7/8) and (4/5). You - 3Com 3C10220 | User Guide - Page 11
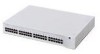
row connectors are output ports (data and power). Figure 2 12-Port Ethernet Power Source - Front View Note: Bottom row connectors are input ports (data only). Top row connectors are output ports (data and power). Both the 12-port (P/N 3C10220) and the 24-port (P/N 3C10222) versions of the EPS have - 3Com 3C10220 | User Guide - Page 12
CHAPTER 1: 3COM ETHERNET POWER SOURCE OVERVIEW 10/100BASE-TX Data and Power Output Ports The EPS output ports (top row) carry two kinds of transmissions: I Ethernet data on the standard two wire pairs on an RJ-45 connector (Transmit on pins 1 and 2; Receive on pins 3 and 6) and I DC power on the - 3Com 3C10220 | User Guide - Page 13
the AC inlet and no redundant DC power supply is connected. or I An AC power supply fault has occurred and no redundant DC power supply is connected. I An AC power supply is plugged into the AC inlet and no redundant DC power supply is connected. or I An AC power supply is plugged into the AC inlet - 3Com 3C10220 | User Guide - Page 14
FOR USE WITH SPECIFIED POWER SUPPLY. REFER TO INSTRUCTIONS MANUAL. Power Source Unit P/N S/N SUPPLY DATA V~ Hz A 100-120/200-240 60/50 3/1.5 Caution: Shock Potential. Disconnect the Power Before Servicing. Information Label To facilitate reporting any future problem, record here the Part - 3Com 3C10220 | User Guide - Page 15
far-end NIC device). I 3Com recommends that you use a short UTP cable of 1 to 2 m (6 to 7 ft.) from the switch or hub to the EPS and a longer UTP cable of 1 to 90 m (3 to 300 ft.) from the EPS to the powered device such as the NBX Business Telephone or a 3Com wireless access point. Sample topologies - 3Com 3C10220 | User Guide - Page 16
16 CHAPTER 1: 3COM ETHERNET POWER SOURCE OVERVIEW Figure 4 Sample EPS Topology with the NBX 100 Communications System NBX 100 Switch or Hub 3Com Ethernet Power Source Premises Cabling Wall Jack Wiring Closet Patch Panel - 3Com 3C10220 | User Guide - Page 17
Guidelines for Network Configuration 17 Figure 5 Sample Network Topology with a 3Com Wireless Access Point Servers Switch or Hub 3Com Wireless Access Point Premises Cabling 3Com Ethernet Power Source Wiring Closet Patch Panel Laptop with Wireless PCM Card - 3Com 3C10220 | User Guide - Page 18
18 CHAPTER 1: 3COM ETHERNET POWER SOURCE OVERVIEW - 3Com 3C10220 | User Guide - Page 19
set up the Ethernet Power Source (EPS) and end devices. The following topics are described: I Choosing a Suitable Site I Rack-mounting the EPS I Power-up Sequence I Selecting the Correct Cables I Power Splitter Cable I Connecting an NBX Business Telephone I Connecting a 3Com Wireless Access Point - 3Com 3C10220 | User Guide - Page 20
ETHERNET POWER SOURCE (3C10220 and 3C10222 sources of electrical noise such as: I Radios, transmitters, or broadband amplifiers I Power lines I Fluorescent lighting fixtures I Make sure that no water or moisture can enter the EPS case. The unit is not designed for outdoor use. I Make sure that air - 3Com 3C10220 | User Guide - Page 21
the brackets or mount the unit in the rack, disconnect all cables and power from the EPS. I Verify that no self-adhesive pads are attached to (not provided). You must use the screws supplied with the mounting brackets. Damage to the unit caused by using incorrect screws invalidates your warranty - 3Com 3C10220 | User Guide - Page 22
22 CHAPTER 2: INSTALLING THE ETHERNET POWER SOURCE AND END DEVICES Power-up Sequence The following sections describe how to add power to your EPS and prepare it for operation. Adding Power To add power to the EPS, follow these steps. CAUTION: The EPS has no On/Off switch; the only way to connect - 3Com 3C10220 | User Guide - Page 23
Figure 7 Connecting Other Devices to the Power Source Unit o e ub Switch/Hub RJ-IN RJ-OUT DTE/Splitter RJ45 RJ45 1 2 3 4 5 6 7 8 data data data spare spare data spare spare 1 2 3 4 5 6 7 8 1 2 3 data data data 1 2 3 4 5 6 DC + data 4 5 6 7 8 DC - 7 8 Table 4 and Table 5 list the - 3Com 3C10220 | User Guide - Page 24
path should not exceed 100 meters. See Figure 4 in Chapter 1 for a sample topology using the EPS and the NBX 100 Business Telephone. Figure 8 Connecting the EPS to an NBX Business Telephone Ethernet Power Source NBX Telephone Wiring Closet Patch Panel Wall Jack Premises Cabling Splitter - 3Com 3C10220 | User Guide - Page 25
3Com Wireless Access Point. Using Category 5 cable that has been checked for continuity on all eight wires, connect an EPS output port (a port on the upper row of connectors) to the data jack closest to the 3Com 3Com Wireless Access Point Ethernet Power Source 3Com Wireless Access Point Wiring - 3Com 3C10220 | User Guide - Page 26
CHAPTER 2: INSTALLING THE ETHERNET POWER SOURCE AND END DEVICES When the connection is complete between the EPS and the 3Com Wireless Access Point, verify that: I The power LED continues to flash until the Wireless Access Point completes the bootstrap sequence. I The Power LED then stays illuminated - 3Com 3C10220 | User Guide - Page 27
3 TROUBLESHOOTING Solving EPS Problems If the LEDs on the EPS indicate a problem, see Table 6 for some suggested solutions. Table 6 Solving EPS Problems Problem Possible Cause A Power LED does not Loose AC power light, and you have NO cable external DC voltage supply. No AC available at - 3Com 3C10220 | User Guide - Page 28
28 CHAPTER 3: TROUBLESHOOTING Table 6 Solving EPS Problems (continued) Problem Possible Cause Suggested Action A Power LED does not light, and you have both AC power and an external DC voltage supply. Both AC power and DC power supplies are faulty. I Disconnect the DC power supply, and use the - 3Com 3C10220 | User Guide - Page 29
was connected too soon after being disconnected. I If the cables do not appear to be a problem, and pins 4, 5, 7, and 8 are not grounded, the end device may have been If none of these procedures identifies the problem, contact an authorized 3Com service representative for additional assistance. - 3Com 3C10220 | User Guide - Page 30
30 CHAPTER 3: TROUBLESHOOTING Solving NBX Telephone Problems If power is not reaching an NBX Business Telephone, use the information in Table 7 to resolve the problem. Table 7 Solving NBX Business Telephone Problems Problem Possible Cause Suggested Action No characters appear in Faulty - 3Com 3C10220 | User Guide - Page 31
, premises wiring, hubs, and switches). The NBX NCP is not I Check other telephones. If operating properly. they are working properly, the NCP is functioning properly. If none of these procedures identifies the problem, contact an authorized 3Com service representative for additional assistance. - 3Com 3C10220 | User Guide - Page 32
32 CHAPTER 3: TROUBLESHOOTING Solving Wireless Access Point Problems If power is not reaching a Wireless Access Point, use the information in Table 8 to resolve the problem. Table 8 Solving Wireless Access Point Problems Problem No power to the Wireless Access Point Possible Cause Suggested - 3Com 3C10220 | User Guide - Page 33
LED) does not flash. I Check all physical connections between the Wireless Access Point and the LAN (network). Check patch panels, premises wiring, hubs, and switches. If none of these procedures identifies the problem, contact an authorized 3Com service representative for additional assistance. - 3Com 3C10220 | User Guide - Page 34
34 CHAPTER 3: TROUBLESHOOTING - 3Com 3C10220 | User Guide - Page 35
Carefully read and follow this safety information before you install or remove any components or perform any maintenance procedures on the Ethernet Power Source (EPS). WARNING: Warnings contain directions that you must follow for your personal safety. Follow all directions carefully. You must read - 3Com 3C10220 | User Guide - Page 36
I The power cord set must be approved for the country in which it is used, as indicated in Table 9. Table 9 International Safety Information U.S.A. and Canada Denmark Switzerland I The cord set must be UL-approved and CSA certified. I The flexible cord must meet these minimum specifications: - No - 3Com 3C10220 | User Guide - Page 37
sockets. 3Com suggests that you use unshielded data cables with unshielded jacks when making connections to these data sockets. L'information de Sécurité Importante I L'installation et la dépose de ce groupe doivent être confiés à un personnel qualifié. I Si vous entassez l'unité Power Source avec - 3Com 3C10220 | User Guide - Page 38
é fonctionne dans les mêmes conditions. I Cordon électrique - Il doit être agréé dans le pays d'utilisation: Table 10 Sécurité Importante Etats-Unis et Canada Danemark Suisse I Le cordon doit avoir reçu l'homologation des UL et un certificat de la CSA. I Le cordon souple doit respecter, à titre - 3Com 3C10220 | User Guide - Page 39
Sicherheitsinformationen 39 Wichtige Sicherheitsinformationen I Die Installation und der Ausbau des Geräts darf nur durch Fachpersonal erfolgen. I Wenn die Ethernet Power Source (EPS) Einheit in einer Stapel mit anderen SuperStack II Hub Einheiten eingebaut werden soll, muß die EPS Einheit unter - 3Com 3C10220 | User Guide - Page 40
40 APPENDIX A: SAFETY INFORMATION - 3Com 3C10220 | User Guide - Page 41
Table 11 Technical Specifications for the Ethernet Power Source Physical Dimensions Environmental Requirements Operating Temperature Storage Temperature Operating Humidity Standards Safety Agency Certifications EMC Emissions Immunity Heat Dissipation Power Supply AC Line Frequency Input - 3Com 3C10220 | User Guide - Page 42
42 APPENDIX B: TECHNICAL SPECIFICATIONS AND PIN ASSIGNMENTS Pin assignments are the same for the 10BASE-T and 100BASE-TX RJ45 connectors. Table 12 Pin Assignments Pin Number Signal Input Ports (Data + Power) 1 RxData + 2 RxData - 3 TxData + 4 - 24vDC + 5 - 24vDC + 6 TxData - 7 - - 3Com 3C10220 | User Guide - Page 43
3Com Corporation LIMITED WARRANTY 3COM ETHERNET POWER SOURCE 12-PORT UNIT (3C10220) AND 24-PORT UNIT (3C10222) HARDWARE 3Com warrants this hardware product to be free from defects in workmanship and materials, under normal use and service, for the following length of time from the date of - 3Com 3C10220 | User Guide - Page 44
PURCHASE PRICE PAID, AT 3COM'S DATA, OR OTHER FINANCIAL LOSS ARISING OUT OF OR IN CONNECTION WITH THE SALE, INSTALLATION, MAINTENANCE, USE, PERFORMANCE, FAILURE, OR INTERRUPTION OF ITS PRODUCTS, EVEN IF 3COM supplied you specific legal rights 3Com Corporation 5400 Bayfront Plaza Santa Clara, CA 95054 (408)
-
 1
1 -
 2
2 -
 3
3 -
 4
4 -
 5
5 -
 6
6 -
 7
7 -
8
-
9
-
10
-
11
-
12
-
13
-
14
-
15
-
16
-
17
-
18
-
19
-
20
-
21
-
22
-
23
-
24
-
25
-
26
-
27
-
28
-
29
-
30
-
31
-
32
-
33
-
34
-
35
-
36
-
37
-
38
-
39
-
40
-
41
-
42
-
43
-
44
 |
 |

3Com
®
Ethernet Power Source
Guide
3C10220 - 12-Port Ethernet Power Source
3C10222 - 24-Port Ethernet Power Source
Part Number: 10038538-01 Rev B
Published: November 2000