3Com 3C16476A User Guide
3Com 3C16476A - Baseline Switch 2250 Manual
 |
UPC - 662705475448
View all 3Com 3C16476A manuals
Add to My Manuals
Save this manual to your list of manuals |
3Com 3C16476A manual content summary:
- 3Com 3C16476A | User Guide - Page 1
Baseline Switch 2250 Plus User Guide Installationsanleitung 3C16476CS http://www.3com.com/ Part No. 10015237 Rev. AA Published August 2006 - 3Com 3C16476A | User Guide - Page 2
or deface any portion of any legend provided on any licensed program or documentation contained in, or delivered to you in conjunction with, this User Guide. Unless otherwise indicated, 3Com registered trademarks are registered in the United States and may or may not be registered in other countries - 3Com 3C16476A | User Guide - Page 3
THIS GUIDE Conventions 5 Related Documentation 6 Documentation Comments 6 1 INTRODUCING THE BASELINE SWITCH Overview of the Baseline Switch 2250 Plus 26 DHCP Assigned IP Address 26 Manually Assigned (Static) IP Address 26 4 CONFIGURING THE SWITCH Configuration Overview 27 Device Summary Information - 3Com 3C16476A | User Guide - Page 4
Address 60 Solving LED Issues 60 If the Problem Persists 61 A OBTAINING SUPPORT FOR YOUR PRODUCT Register Your Product 63 Purchase Value-Added Services 63 Troubleshoot Online 63 Access Software Downloads 63 Telephone Technical Support and Repair 64 Contact Us 64 B SAFETY INFORMATION Important Safety - 3Com 3C16476A | User Guide - Page 5
there differs from the information in this guide, follow the instructions in the release notes. Most user guides and release notes are available in Adobe Acrobat Reader Portable Document Format (PDF) on the 3Com World Wide Web site: http://www.3com.com Conventions Table 1 and Table 2 list - 3Com 3C16476A | User Guide - Page 6
number (if appropriate) Example: ■ 3Com Baseline Switch 2250 Plus User Guide ■ Part number: 10015237 ■ Page 25 Please note that we can only respond to comments and questions about 3Com product documentation at this e-mail address. Questions related to technical support or sales should be directed - 3Com 3C16476A | User Guide - Page 7
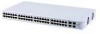
Baseline Switch 2250 Plus The 3Com® Baseline Switch 2250 Plus is a versatile, easy-to-use unmanaged switch. It is ideal for users who want the high-speed performance of 10/100 switching advanced features such as VLAN support and link aggregation. Features and Capabilities The Switch has 48 shielded - 3Com 3C16476A | User Guide - Page 8
ensures that time-sensitive traffic gets the highest level of service. The 802.1D standard specifies eight distinct levels of switches, you can configure 3Com Baseline Switch 2250 Plus to forward or to block and discard bridge protocol data unit (BPDU) packets to another switch. Switches that support - 3Com 3C16476A | User Guide - Page 9
sections in "Front Panel" on page 9 and "Rear Panel" on page 12. Figure 1 Front and Rear Panels Front Panel The front panel of the Switch contains a series of indicator lights (LEDs) that help describe the state of various networking and connection operations. (1) 48 RJ-45 Ports WARNING: RJ-45 - 3Com 3C16476A | User Guide - Page 10
1: INTRODUCING THE BASELINE SWITCH (half-duplex or full-duplex) are automatically determined by the capabilities of the connected device. Each port also supports automatic MDI/MDI-X detection and can be connected to either a 10BASE-T, or a 100BASE-TX device. CAUTION: The Switch supports full-duplex - 3Com 3C16476A | User Guide - Page 11
transmit (TX) cable connectors are not swapped If these checks do not identify the cause of the problem, it may be that the unit or the device connected to the port is faulty. Contact your 3Com network supplier for further advice. (4) Module Active LEDs The Module Active LEDs show the status of - 3Com 3C16476A | User Guide - Page 12
. Package Contents The 3Com Baseline Switch 2250 Plus package includes the following items: ■ One 3Com Baseline Switch 2250 Plus unit ■ One power cord ■ Four standard height, self-adhesive rubber pads ■ One mounting kit ■ One CD-ROM, which contains this User Guide and the 3Com Discovery application - 3Com 3C16476A | User Guide - Page 13
read the safety information provided in Appendix B of this guide. AVERTISSEMENT: Consignes de sécurité. Avant d'installer ou d'enlever tout composant du Switch ou d'entamer une procédure de maintenance, lisez les informations unit and through the vents in the side of the case is not restricted (3Com - 3Com 3C16476A | User Guide - Page 14
problems in your equipment. Aufstellen des Switch Bei der Entscheidung wo Sie den Switch positionieren, stellen Sie sicher das: ■ Der Switch wird. 3Com empfiehlt das Sie den Switch in einer CAUTION: If installing the Switch in a free-standing stack of different size Baseline or SuperStack® 3 units, - 3Com 3C16476A | User Guide - Page 15
on one side of the unit. 3 Insert the two screws supplied in the mounting kit and fully tighten with a suitable screwdriver. Figure 2 Inserting the Screws Baseline Switch 2816-SFP Plus 4 Repeat the two previous steps for the other side of the unit. 5 Insert the unit into the 19-inch rack and secure - 3Com 3C16476A | User Guide - Page 16
are mixing a variety of Baseline and SuperStack units, the smaller units must be positioned at the top. If you are placing Switch units one on top of up with the recesses of the lower unit. Supplying Power to the Switch Power problems can be the cause of serious failures and downtime in your network - 3Com 3C16476A | User Guide - Page 17
is not longer than 100 m (328 ft). Figure 3 Connecting Devices to the Switch Baseline 10/100 switch Endstations on switched 100 Mbps connections Baseline 10/100 switch Endstations on switched 100 Mbps connections Baseline Switch 2250 Plus 1000 Mbps link 10 or 100 Mbps link 1000 Mbps copper or - 3Com 3C16476A | User Guide - Page 18
http://www.3com.com 3Com recommends using 3Com SFPs on the Switch. If you insert an SFP transceiver that is not supported, the Switch will not recognize If the SFP transceiver is faulty, it will not operate within the Switch. See "Troubleshooting" on page 59. To insert an SFP transceiver: 1 Hold the - 3Com 3C16476A | User Guide - Page 19
the Switch. Regular checks can give you an early warning of a possible failure; any problems can then be attended to when there will be least effect on users. 3Com recommends from the front). If you experience any problems operating the Switch, refer to "Troubleshooting" starting on page 59. - 3Com 3C16476A | User Guide - Page 20
20 CHAPTER 2: INSTALLING THE SWITCH - 3Com 3C16476A | User Guide - Page 21
: ■ The Discovery application, which is included on 3Com Baseline Switch 2250 Plus CD-ROM that is supplied with your Switch ■ A computer that is connected to the Switch and that has a Web browser Running the Discovery Application The 3Com Baseline Switch 2250 Plus CD-ROM contains, among others, the - 3Com 3C16476A | User Guide - Page 22
is complete, the Discovered Devices screen displays detected network devices. 3 On the Discovered Devices screen, click Baseline Switch 2250 Plus, and then click Next. The Completing the 3Com Discovery Application screen appears. 4 Click Finish. The logon dialog box for the Web interface appears. - 3Com 3C16476A | User Guide - Page 23
appears is the logon screen. On this screen, you need to enter the administration user name and password to gain access to the Web interface. The logon screen also displays the IP address that the Switch is currently using. Figure 7 Logon Dialog Box Navigating the Web Interface The Web interface - 3Com 3C16476A | User Guide - Page 24
the current firmware via HTTP. Initialize Allows you to reset the Switch to factory default settings. Reboot Allows you to perform system reboot. System Access Contains tabs that allow you to: ■ Display user summary information. ■ Create a new user. ■ Modify existing users. ■ Remove existing - 3Com 3C16476A | User Guide - Page 25
.1X information. ■ Display 802.1X detailed information per port. ■ Configure 802.1X settings. Display Switch monitoring information. Displays MAC address table information for ports and VLANs. Contains tabs that allow you to: ■ Display selected cable diagnostics information for all ports. ■ Display - 3Com 3C16476A | User Guide - Page 26
example, if the DHCP server assigned the IP address 192.168.0.123 to the Switch, start your Web browser, and then type http://192.168.0.123. Manually Assigned (Static) IP Address If you assigned a static IP address to the Switch, you need to use that IP address to access the Web interface the - 3Com 3C16476A | User Guide - Page 27
VLANs ■ Configuring Port Settings ■ QoS VoIP Traffic Settings ■ Security ■ Monitoring Configuration Overview The Switch is shipped ready for use. If you only want the Switch to function as a basic layer 2 switch to the Switch ■ Configure the Switch's advanced features ■ Upgrade the firmware Device - 3Com 3C16476A | User Guide - Page 28
Figure 9 Device View If you request for technical assistance from 3Com Support, you may be asked to print out the information on this screen. Polling Interval Enter the interval in seconds you would like the Switch to refresh. (Range: 10 to 180 seconds; 0 to disable polling). Figure 10 Device - 3Com 3C16476A | User Guide - Page 29
Firmware Upgrade ■ Initialize ■ Reboot ■ System Access ■ System Time ■ SNMP Modifying the IP Address Settings To enable devices on the network to communicate with the Switch 169.254.1.3. 3 The Switch repeats step 2 until an unused IP address is found. 3Com recommends using automatic IP configuration - 3Com 3C16476A | User Guide - Page 30
be used to set system name, location and contact information. Figure 12 IP Settings Screen Backup Configuration To save the Switch configuration settings: 1 Click Administration, then Backup Configuration on the menu. The Backup Configuration screen appears. Figure 13 Backup Configuration 2 Click - 3Com 3C16476A | User Guide - Page 31
Upgrade facility allows you to install on the Switch any new releases of system firmware that 3Com may make available. Newer versions of firmware can be downloaded via HTTP and copied to the Switch; the Switch will restart and apply the newer system firmware version. Figure 15 Upgrade Screen 1 Click - 3Com 3C16476A | User Guide - Page 32
Switch if you are experiencing problems and you want to re-establish your Internet connection. Any network users users do not access the Web interface, 3Com recommends that you set an admin password when you first configure the Switch. Even if you do not intend to actively manage the switch, 3Com - 3Com 3C16476A | User Guide - Page 33
level and password for that user. Figure 17 CreateUser Screen Administration Settings 33 Figure 18 Modify User Screen Modify User This page allows you to modify a user's access level and password. Remove User To remove a user from the Switch, click on the user name, then click Remove. Figure - 3Com 3C16476A | User Guide - Page 34
devices on a network. Equipment commonly managed with SNMP includes switches, routers and host computers. SNMP is typically used to environment, as well as to monitor them to evaluate performance or detect potential problems. Click Administration, then SNMP on the menu. A screen appears with four - 3Com 3C16476A | User Guide - Page 35
logical workgroup with no physical barriers, and allows users to share information and resources as though located on the same LAN. You can use the Switch to create VLANs to organize any group of ports into separate broadcast domains. VLANs confine broadcast traffic to the originating group and help - 3Com 3C16476A | User Guide - Page 36
one port must always be an untagged member of VLAN 1 (the management VLAN). If you choose to connect all ports to VLANs other than VLAN 1, you will no longer be able to access the Web interface. If this happens, you will need to reset the Switch to factory settings. By default, all ports belong to - 3Com 3C16476A | User Guide - Page 37
37 Modify Port Use the Modify Port screen to modify the VLAN membership of a port. Figure 27 Modify Port Screen 1 Enter a set of VLANs or select all VLANs to configure, then click Select. 2 From the drop down menu, select a VLAN to modify. 3 Select a membership use. Available options for each port - 3Com 3C16476A | User Guide - Page 38
38 CHAPTER 4: CONFIGURING THE SWITCH Rename Use the Rename screen to change the name of a VLAN. Figure 28 Rename Screen Remove Use the Remove screen to remove a VLAN. Figure 29 Remove Screen 1 Enter a set of VLANs or select all VLANs to add to the rename list, then click Select. 2 From the list - 3Com 3C16476A | User Guide - Page 39
details list, then click Select. 2 From drop down menu, choose a VLAN to display the tagged and untagged VLAN memberships it is associated with the ports on the switch. Forwarding Tagged/Untagged Frames Each port on the Switch is capable of passing tagged or untagged frames. The following describes - 3Com 3C16476A | User Guide - Page 40
how you can set up a simple VLAN on the Switch using desktop connections. Figure 32 Desktop VLAN Configuration Endstations in VLAN 2 Endstations in VLAN 1 Port 1 Port 3 BaselBinaeseSlwinietcSh w2i2tc5h0 2250 Plus Port 26 Server Server in VLAN 2 in VLAN 1 If you want to add ports - 3Com 3C16476A | User Guide - Page 41
41 Figure 33 Tagged VLAN Configuration To set up the configuration shown in Figure 33, do the following: 1 Create VLAN2 on both Switch 1 and Switch 2. You need not create VLAN1 since it exists by default. 2 On Switch 1, set the ports that you want to be part of VLAN2 to Untagged. Set one port - 3Com 3C16476A | User Guide - Page 42
in the subnet (VLAN). Choose enable or disable from the IGMP Snooping Mode drop down menu. Figure 35 IGMP Snooping Setup Screen IGMP Snooping This switch uses IGMP (Internet Group Management Protocol) to query for any attached hosts that want to receive a specific multicast service. It identifies - 3Com 3C16476A | User Guide - Page 43
Broadcast Storm Use the Broadcast Storm page to set the Switch's broadcast storm control and threshold limits. A broadcast storm Setup Summary Use the Summary tab to display Port State, Flow Control, Speed, Default VLAN ID, Link Type, or Duplex for all the ports. Configuring Port Settings Using the - 3Com 3C16476A | User Guide - Page 44
the port. ■ Flow Control - Enables and disables flow control for the entire Switch. When flow control is enabled, the Switch regulates the packet flow so that a sending device does not transmit more packets the optimum combination of speed and duplex that can be supported by both ends of the link. - 3Com 3C16476A | User Guide - Page 45
If connecting link partners are left to autonegotiate for a link manually set on this switch to full-duplex, they will always negotiate to half-duplex, settings of ports that are members of a trunk or aggregated link. Supported SFP transceivers only operate at 1000 Mbps full-duplex. Inserting an - 3Com 3C16476A | User Guide - Page 46
for Creating Trunks ■ Any port on the Switch can be used for creating a trunk. ■ This switch supports a maximum of four trunks. ■ Each trunk may contain up to four members. ■ A port may only be a member of one trunk at any one time. ■ All - 3Com 3C16476A | User Guide - Page 47
the link aggregation group list, select the aggregated group to remove. 2 Click Remove. Spanning Tree per Port This administrative tool supports the configuration of the Switch to forward, or block and discard 802.1D spanning tree BPDU packets. Spanning tree is a bridge-based system for providing - 3Com 3C16476A | User Guide - Page 48
48 CHAPTER 4: CONFIGURING THE SWITCH the Root Bridge generates BPDUs (Bridge Protocol Data Units) on all ports at a regular interval known as the Hello Time. All other spanning tree-compliant - 3Com 3C16476A | User Guide - Page 49
However, if all devices have the same priority, the Port Mirroring The Switch allows you to monitor traffic going in and out of a particular port monitored). Once the pair is defined, and you enable traffic monitoring, the Switch takes all the traffic going in and out of the monitor port and copies - 3Com 3C16476A | User Guide - Page 50
50 CHAPTER 4: CONFIGURING THE SWITCH Figure 48 Port Mirroring Screen To set up port mirroring: 1 Connect a network analyzer to a port. 2 Access ■ Port Detail ■ OUI Summary ■ OUI Modify Summary Use the Summary tab to display the global settings for Voice VLAN. Figure 49 QoS VoIP Summary Screen - 3Com 3C16476A | User Guide - Page 51
VLAN. The following options are available: ■ Voice VLAN Status - Enable or disable Voice VLAN for the switch. ■ Voice VLAN ID - Input the Voice VLAN ID for the switch. ■ Voice VLAN VLAN. The following options are available: ■ Voice VLAN Port Mode - Select between None, Manual, or Auto. ■ Voice VLAN - 3Com 3C16476A | User Guide - Page 52
52 CHAPTER 4: CONFIGURING THE SWITCH Figure 52 QoS Port Detail Screen OUI Summary Use the OUI Summary tab to display the list of Organizational Unique Identifier for a company and their - 3Com 3C16476A | User Guide - Page 53
Client ■ 802.1X Settings RADIUS Client Remote Authentication Dial-in User Service (RADIUS) is a logon authentication protocol that uses software running of multiple user name/password pairs with associated privilege levels for each user or group that require management access to a switch. The - 3Com 3C16476A | User Guide - Page 54
CHAPTER 4: CONFIGURING THE SWITCH Figure 56 RADIUS Client Configure Screen Figure 57 802.1X Summary Screen 802.1X Settings The IEEE 802.1X (dot1x) standard defines a port-based access control procedure that prevents unauthorized access to a network by requiring users to first submit credentials - 3Com 3C16476A | User Guide - Page 55
- Forces the port to deny access to all clients, either dot1x-aware or otherwise. ■ Maximum Request - Sets the maximum number of times the switch port will retransmit an EAP request packet to the client before it times out the authentication session. (Range: 1-10; Default 2) ■ Mode Reauthentication - 3Com 3C16476A | User Guide - Page 56
to display the Address Table information. You can query by selecting a port, choosing a VLAN, or entering in a MAC Address, then click Select. Figure 60 Address Table Screen Cable Diagnostics The Switch provides cable diagnostic, which helps you detect and resolve issues with the attached cables - 3Com 3C16476A | User Guide - Page 57
Diagnostics Use the Diagnostics tab to display individual port information on Test Result, Cable Fault Distance, and Last Update. Figure 62 Cable Diagnostic Screen Monitoring 57 - 3Com 3C16476A | User Guide - Page 58
58 CHAPTER 4: CONFIGURING THE SWITCH - 3Com 3C16476A | User Guide - Page 59
.3com.com before contacting your local technical support representative. For more information on how to obtain support for your Switch, refer to Appendix A. Resetting to Factory Defaults If the Switch does not operate normally or if the firmware becomes corrupted, you can reset the Switch - 3Com 3C16476A | User Guide - Page 60
TROUBLESHOOTING Forgotten Static IP Address If you forget the static IP address that you assigned to the Switch off. There is a problem with this connection. Verify correctly inserted. ■ A 3Com SFP module is being Switch supports full-duplex autonegotiation. If the connected device does not support - 3Com 3C16476A | User Guide - Page 61
that accompanies the device for information on disabling the broadcast operation. If the Problem Persists If the problem persists and the unit still does not operate successfully, contact your 3Com network supplier with the following information before returning the unit: ■ Product number and - 3Com 3C16476A | User Guide - Page 62
62 CHAPTER 5: TROUBLESHOOTING - 3Com 3C16476A | User Guide - Page 63
.com/ Contact your authorized 3Com reseller or 3Com for a complete list of the value-added services available in your area. Troubleshoot Online You will find support tools posted on the 3Com web site at http://www.3com.com/ 3Com Knowledgebase helps you troubleshoot 3Com products. This query-based - 3Com 3C16476A | User Guide - Page 64
obtain an RMA number online at http://eSupport.3com.com/. First time users will need to apply for a user name and password. Contact Us 3Com offers telephone, e-mail and internet access to technical support and repair services. To access these services for your region, use the appropriate telephone - 3Com 3C16476A | User Guide - Page 65
611 2000 You can also obtain support in this region using the following e-mail: [email protected] Or request a repair authorization Support and Repair From anywhere in these regions, call: +44 (0)1442 435529 From the following countries, you may use the numbers shown: Contact Us - 3Com 3C16476A | User Guide - Page 66
speakers, enter the URL: http://lat.3com.com/lat/support/form.html Portuguese speakers, enter the URL: http://lat.3com.com/br/support/form.html English speakers in Latin America should send e-mail to: [email protected] US and Canada Telephone Technical Support and Repair 1 800 876 3266 - 3Com 3C16476A | User Guide - Page 67
found in the 3Com Switch Family Safety and Regulatory Information manual included with this product. You can find the 3Com Switch Family Safety and Regulatory Information manual on the product CD-ROM that was included with your switch. You can also download the safety manual from the 3Com Web site - 3Com 3C16476A | User Guide - Page 68
68 APPENDIX B: SAFETY INFORMATION - 3Com 3C16476A | User Guide - Page 69
C TECHNICAL INFORMATION Related Standards The 3Com Baseline Switch 2250 Plus has been designed to the following standards: Functional MAC Address Safety EMC Emissions Immunity ISO 8802-3, IEEE 802.3 (Ethernet), IEEE 802.3u (Fast Ethernet), - 3Com 3C16476A | User Guide - Page 70
70 APPENDIX C: TECHNICAL INFORMATION - 3Com 3C16476A | User Guide - Page 71
-TX) and can transmit data at speeds of up to 100 Mbps. Category 5 cabling is better to use for network cabling than Category 3, because it supports both Ethernet (10 Mbps) and Fast Ethernet (100 Mbps) speeds. - 3Com 3C16476A | User Guide - Page 72
and received, but not at the same time. Half-duplex is not supported for 1000 Mbps. Contrast with full-duplex. IEEE Institute of Electrical and Tree Protocol. IEEE 802.1Q VLAN Tagging - Defines Ethernet frame tags that carry VLAN information. It allows switches to assign endstations to different - 3Com 3C16476A | User Guide - Page 73
GLOSSARY 73 standard way for VLANs to communicate across switched networks. IEEE 802.1p An IEEE standard for providing quality of service (QoS) in Ethernet networks. The standard uses packet tags that define up to eight traffic classes and allows switches to transmit packets based on the tagged - 3Com 3C16476A | User Guide - Page 74
multiple end stations. Servers provide end stations with access to shared network services such as computer files and printer queues. SFP Small Form Factor Pluggable A network that is a component of a larger network. switch A device that interconnects several LANs to form a single logical LAN - 3Com 3C16476A | User Guide - Page 75
standard, TCP/IP is now supported on almost all platforms, and Switch. trunking A method which specifies how to create a single high-speed logical link that combines several lower-speed physical links. VLAN . A VLAN serves as a logical workgroup with no physical barriers, and allows users to share - 3Com 3C16476A | User Guide - Page 76
76 GLOSSARY - 3Com 3C16476A | User Guide - Page 77
7 B bandwidth 71 C client 72 configuration overview 27 connecting network device 17 SFP transceivers 18 conventions notice icons, About This Guide 5 text, About This Guide 5 D DHCP 72 Discovery 21 dynamic host control protocol See DHCP E Ethernet 72 F Fast Ethernet 72 forgotten IP address 59 - 3Com 3C16476A | User Guide - Page 78
74 switch defined 74 T TCP/IP 73 defined 74 traffic 75 monitoring 49 troubleshooting 59 forgotten IP address 59 forgotten password 59 LED-related issues 60 POST failed 17 trunking See link aggregation U user name default 32 V viewing status information 27 VLANs 35 creating 41 maximum supported 35 - 3Com 3C16476A | User Guide - Page 79
and, if not installed and used in accordance with the instructions, may cause harmful interference to radio communications. Operation of this user may find the following booklet prepared by the Federal Communications Commission helpful: How to Identify and Resolve Radio-TV Interference Problems
-
 1
1 -
 2
2 -
 3
3 -
 4
4 -
 5
5 -
 6
6 -
 7
7 -
8
-
9
-
10
-
11
-
12
-
13
-
14
-
15
-
16
-
17
-
18
-
19
-
20
-
21
-
22
-
23
-
24
-
25
-
26
-
27
-
28
-
29
-
30
-
31
-
32
-
33
-
34
-
35
-
36
-
37
-
38
-
39
-
40
-
41
-
42
-
43
-
44
-
45
-
46
-
47
-
48
-
49
-
50
-
51
-
52
-
53
-
54
-
55
-
56
-
57
-
58
-
59
-
60
-
61
-
62
-
63
-
64
-
65
-
66
-
67
-
68
-
69
-
70
-
71
-
72
-
73
-
74
-
75
-
76
-
77
-
78
-
79
 |
 |

Baseline Switch 2250 Plus
User Guide
Installationsanleitung
3C16476CS
Part No. 10015237 Rev. AA
Published August 2006