3Com 3C17708-US Getting Started Guide
3Com 3C17708-US - Switch 4050 Manual
 |
UPC - 662705427355
View all 3Com 3C17708-US manuals
Add to My Manuals
Save this manual to your list of manuals |
3Com 3C17708-US manual content summary:
- 3Com 3C17708-US | Getting Started Guide - Page 1
3Com® Switch 40x0 Family Getting Started Guide 3C17707, 3C17708, 3C17709 http://www.3com.com/ Part No. DUA1770-9AAA05 Published September 2003 - 3Com 3C17708-US | Getting Started Guide - Page 2
, or delivered to you in conjunction with, this User Guide. Unless otherwise indicated, 3Com registered trademarks are registered in the United States and may in the United States and other countries, licensed exclusively through X/Open Company, Ltd. Netscape Navigator is a registered trademark of - 3Com 3C17708-US | Getting Started Guide - Page 3
Ports 15 SFP Ports 16 10BASE-T/100BASE-TX/1000BASE-T Ports 16 Console Port 16 LEDs 17 3Com Switch 40x0 Family - Rear View Detail 19 Expansion Module Slot 19 Replaceable Power Supplies (PSUs) 19 Power Socket 20 Replaceable Fan Trays 20 Default Settings 21 2 INSTALLING THE SWITCH Package Contents 24 - 3Com 3C17708-US | Getting Started Guide - Page 4
-up Sequence 29 Powering-up the 3Com Switch 40x0 29 Checking for Correct MANAGEMENT Setting Up Overview 38 IP Configuration 39 Preparing for Management 40 Manually Configuring IP Information 41 Connecting to a Front Panel Port 41 Connecting 55 Pre-requisites 55 Default Users and Passwords 55 - 3Com 3C17708-US | Getting Started Guide - Page 5
-45 Pin Assignments 78 C TECHNICAL SPECIFICATIONS Switch 40x0 Family 81 D OBTAINING SUPPORT FOR YOUR PRODUCT Register Your Product to Gain Service Benefits 83 Purchase Value-Added Services 83 Troubleshoot Online 83 Access Software Downloads 84 Contact Us 84 Telephone Technical Support and Repair 84 - 3Com 3C17708-US | Getting Started Guide - Page 6
INDEX REGULATORY NOTICES - 3Com 3C17708-US | Getting Started Guide - Page 7
in the release notes that are shipped with your product differ from the information in this guide, follow the instructions in the release notes. Most user guides and release notes are available in Adobe Acrobat Reader Portable Document Format (PDF) or HTML on the 3Com World Wide Web site: http://www - 3Com 3C17708-US | Getting Started Guide - Page 8
syntax" means that you must evaluate the syntax provided and then supply the appropriate values for the placeholders that appear in angle brackets word "enter" in this guide, you must type something, and then press Return or Enter. Do not press Return or Enter when an instruction simply says "type." - 3Com 3C17708-US | Getting Started Guide - Page 9
problems. ■ Switch Implementation Guide This guide contains information on the features supported by your Switch and how they can be used to optimize your network. It is supplied SFP Transceivers. ■ Documentation accompanying 3Com Network Supervisor. This is supplied on the CD-ROM that accompanies - 3Com 3C17708-US | Getting Started Guide - Page 10
.htm file. ■ The PDF Implementation Guide is stored in the Docs/implementation directory of the CD-ROM. 3Com recommends that you copy the Docs/referenceguide us. They will help make our documentation more useful to you. Please e-mail comments about this document to 3Com at: pddtechpubs_comments@3com - 3Com 3C17708-US | Getting Started Guide - Page 11
contains introductory information about the 3Com® Switch 40x0 Family and how it can be used in your network. It covers summary information about the hardware and the following topics: ■ About the 3Com Switch 40x0 Family ■ 3Com Switch 40x0 Family - Front View Detail ■ 3Com Switch 40x0 Family - Rear - 3Com 3C17708-US | Getting Started Guide - Page 12
about interconnecting Switches, see "Creating an XRN Distributed Fabric" on page 26. For more information about 3Com XRN Technology and how to use it in your network, refer to the Implementation Guide on the CD-ROM that accompanies the Switch. For information about using the software features of the - 3Com 3C17708-US | Getting Started Guide - Page 13
40x0 Family 13 Summary of Table 3 summarizes the hardware features that are supported by the Hardware Features Switch 40x0. Table 3 Hardware features Feature 3Com Switch 40x0 Family Addresses Up to 12,000 supported Up to 64 permanent entries Forwarding Modes Store and Forward Duplex Modes - 3Com 3C17708-US | Getting Started Guide - Page 14
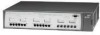
Switch 4050 GBIC 6 GBIC LEDs 10BASE-T/100BASE-TX/1000BASE-T Ports 10BASE-T/100BASE-TX/1000BASE-T Ports 3C17708 1000BASE-SX Ports Front Fan Tray (behind door) Figure 2 3Com Switch 4060 - front view Unit Status LED and Layer 3 LED Module Status LEDs Fan LEDs 10BASE-T/100BASE-TX/1000BASE-T LEDs - 3Com 3C17708-US | Getting Started Guide - Page 15
2 3 4 5 6 7 8 13 14 15 16 17 18 19 20 SFP Ports Console Port S9 P S 21 P 3Com Switch 4070 Console (max) 19200,8,1,N S 10 P S 22 P S 11 P S 23 P S 12 P S 24 P flow control setting can be manually configured. GBIC Ports The 6 GBIC ports support fiber Gigabit Ethernet short-wave - 3Com 3C17708-US | Getting Started Guide - Page 16
CHAPTER 1: INTRODUCING THE 3COM SWITCH 40X0 FAMILY SFP Ports The 24 SFP (Small Form Factor Pluggable) ports support fiber Gigabit Ethernet short partner. Alternatively, auto-negotiation can be disabled. These ports can be manually configured to 10 Mbps half duplex, 100 Mbps half duplex, 10 Mbps - 3Com 3C17708-US | Getting Started Guide - Page 17
3Com Switch 40x0 Family - Front View Detail 17 LEDs Table 4 lists LEDs visible on the front of the Switch, and how to read their status according to color. For information on using the LEDs for problem port Module. The Module is installed but not supported. Note that the unit will continue to - 3Com 3C17708-US | Getting Started Guide - Page 18
Test and continues to operate normally. Off The Switch is not receiving power or there is a fault with the Power Supply unit. Layer 3 LED Green The Switch software supports Layer 3. Off The Switch software does not support Layer 3. PSU LEDs (Front of Switch)* Green PSU fitted and enabled - 3Com 3C17708-US | Getting Started Guide - Page 19
and removal, please refer to the documentation that accompanies the replacement PSU. The Switch 40x0 supports the 3Com AC power supply unit (3C17718). WARNING: The system must not be left without a power supply or a blanking plate in either of the two slots (except during replacement of the - 3Com 3C17708-US | Getting Started Guide - Page 20
3COM SWITCH 40X0 FAMILY WARNING: Care must be taken when removing a PSU as it may be hot. The replacement of power supplies should be completed within two minutes to avoid normal cooling being disturbed. Power Socket Each Power Supply automatically adjusts its power 40x0 supports the 3Com Fan - 3Com 3C17708-US | Getting Started Guide - Page 21
Filtering Rapid Spanning Tree Protocol Link Aggregation Control Protocol (LACP) Spanning Tree Protocol Smart Auto-sensing IP Address Subnet Mask 3Com Switch 40x0 Family Enabled Auto-negotiated Auto-negotiated Auto-negotiated Enabled High threshold: 3000 broadcast frames per second - Notify and - 3Com 3C17708-US | Getting Started Guide - Page 22
22 CHAPTER 1: INTRODUCING THE 3COM SWITCH 40X0 FAMILY - 3Com 3C17708-US | Getting Started Guide - Page 23
On Top of Each Other ■ Creating an XRN Distributed Fabric ■ The Power-up Sequence ■ GBIC Operation ■ SFP Operation WARNING: Safety Information. Before A of this guide. AVERTISSEMENT: Consignes de sécurité. Avant d'installer ou d'enlever tout composant de la gamme des Switch 3Com 40x0 ou d' - 3Com 3C17708-US | Getting Started Guide - Page 24
3Com Switch 4050 (3C17708), Switch 4060 (3C17709) or Switch 4070 (3C17707) ■ CD-ROM ■ This Guide ■ Management Quick Reference Guide ■ Release Notes ■ Warranty Flyer ■ Power side of the Switch. 3Com recommends that you provide a minimum of 25 mm (1 in.) clearance. ■ Air temperature around the Switch - 3Com 3C17708-US | Getting Started Guide - Page 25
laser printers. ■ The unit is installed in a clean, air conditioned environment. ■ The AC supply used by the Switch is separate to that used by units have been fitted. CAUTION: If you use a shelf or support ensure that it will not obstruct the air flow through the side panels of the Switch. To rack- - 3Com 3C17708-US | Getting Started Guide - Page 26
one on top of the other, you must use the self-adhesive rubber pads supplied. Apply the pads to the underside of each Switch, sticking one in the Switch units on top of each other. Creating an XRN Distributed Fabric 3Com Switch 40x0 Family units and the SuperStack 3 Switch 4900 Family units can be - 3Com 3C17708-US | Getting Started Guide - Page 27
these methods, please refer to the user documentation that accompanies the Kit or the GBIC Module. The documentation can also be located on the 3Com Web site. Figure 6 Two Switch are NOT hot-swappable or hot-insertable. Ensure that the Switch is powered off before inserting or removing a Module. - 3Com 3C17708-US | Getting Started Guide - Page 28
3Com Switch 40x0 units with any other 3Com device. ■ 3Com 3Com recommends that you initialize a Switch unit that has previously been used elsewhere in your network before you interconnect to an existing unit. If you do not initialize the unit, problems XRN mode connections are supported when the GBIC - 3Com 3C17708-US | Getting Started Guide - Page 29
. 3Com Switch 40x0 1 Plug the power cord into the power socket at the rear of the Switch. 2 Plug the other end of the power cord into your power outlet. The Switch powers-up and runs through its Power On Self Test (POST), which takes approximately 10 seconds. Repeat for the second power supply if - 3Com 3C17708-US | Getting Started Guide - Page 30
port, you need to use a standard straight-through cable. See Table 7. 3Com recommends that you use at least Category 5 twisted pair cable - the maximum to install the Switch using a Category 5E or Category 6 cable, 3Com recommends that you briefly connect the cable to a grounded port before - 3Com 3C17708-US | Getting Started Guide - Page 31
3Com recommends that you use MT-RJ cables that do not contain alignment pins as these are provided by the fiber socket. Cables that contain alignment pins can cause damage to your Switch. For detailed information on fiber cable specifications, refer to the Implementation Guide to power down the - 3Com 3C17708-US | Getting Started Guide - Page 32
EEPROM fitted. If the GBIC transceiver is faulty, it will not operate within the Switch. See "Solving Hardware Problems" on page 60. 3Com recommends that you only use GBICs supplied by 3Com. If the GBIC transceiver is invalid it will not be recognised by the Switch. Use the following sequence of - 3Com 3C17708-US | Getting Started Guide - Page 33
SFP port. SFP transceivers are hot-insertable and hot-swappable. You can remove them from and insert them into any SFP port without having to power down the Switch. Approved SFP Transceivers The following list of approved SFP transceivers is correct at the time of publication. ■ 3CSFP91 SFP (SX - 3Com 3C17708-US | Getting Started Guide - Page 34
Fiber LC connector If the SFP transceiver is faulty, it will not operate within the Switch. See "Solving Hardware Problems" on page 60. 3Com recommends that you only use SFPs supplied by 3Com. If the SFP transceiver is invalid it will not be recognised by the Switch. Use the following sequence of - 3Com 3C17708-US | Getting Started Guide - Page 35
. Refer to "LEDs" on page 17 for more information. Removing an SFP If you wish to remove the transceiver (it is not necessary to power-down Transceiver your Switch): 1 Disconnect the cable from the transceiver. 2 Move the wire release lever downwards until it is pointing toward you. 3 Pull the - 3Com 3C17708-US | Getting Started Guide - Page 36
36 CHAPTER 2: INSTALLING THE SWITCH - 3Com 3C17708-US | Getting Started Guide - Page 37
the different methods of accessing the management software to manage a Switch. It covers the following topics: ■ Setting Up Overview ■ Manually Configuring IP Information ■ Viewing Automatically Configured IP Information ■ Methods of Managing a Switch ■ Setting Up Command Line Interface Management - 3Com 3C17708-US | Getting Started Guide - Page 38
Initial Switch Setup and Management Flow diagram Power Up the Switch. Plug and Play Setup configured. See page 39 Do you want to manually Yes configure the IP information? No How do and use the Command Line Interface. See page 41 Use 3Com Network Supervisor (3NS). See page 47 Connect to the - 3Com 3C17708-US | Getting Started Guide - Page 39
For most installations, 3Com recommends that you configure the Switch IP information manually. This makes management simpler Manually Configuring IP Information" section on page 41. Automatic IP Configuration By default the Switch tries to configure itself with IP information without requesting user - 3Com 3C17708-US | Getting Started Guide - Page 40
itself with an appropriate IP address, instead of you having to manually reconfigure the Switch. If you use the automatic IP configuration method commands and problem solving, refer to the "Management Interface Reference Guide" on the CD-ROM that is supplied with the Switch or on the 3Com Web site. - 3Com 3C17708-US | Getting Started Guide - Page 41
To set up your Switch manually you can make a connection to a front Panel Port panel port. You must do this whilst the Switch is offline, that is, before you connect the Switch to a network. The procedure described in this section assumes the unit has been powered up in standalone mode and has - 3Com 3C17708-US | Getting Started Guide - Page 42
.255.0.0 Setting Up the Switch with IP Information You are now ready to manually set up the Switch with IP information. You can do this using the CLI) via telnet. Using the Web Interface 1 Power-up the Switch. This takes approximately one minute. 2 Open a suitable Web browser and enter 169.254.100 - 3Com 3C17708-US | Getting Started Guide - Page 43
user name and password). If you have logged on correctly, a set of Getting Started pages are displayed. 4 The Getting Started pages allow you to enter basic setup information for the Switch. Select Manual 254.100.100 c Click OK. 2 Press Enter to open a login prompt. If the login prompt does not begin - 3Com 3C17708-US | Getting Started Guide - Page 44
up your chosen management method. See "Methods of Managing a Switch" on page 50. Connecting to the Console Port To set up your Switch manually you can alternatively make a connection to the console port (this example describes a local connection to the console port, rather than a remote one via - 3Com 3C17708-US | Getting Started Guide - Page 45
Manually Configuring IP Information 45 ■ Documentation supplied with the terminal emulation software. ■ A suitable cable: ■ of the serial ports (also known as a COM port) on your workstation. 2 Open your terminal emulation software and configure the COM port settings to which you have connected the - 3Com 3C17708-US | Getting Started Guide - Page 46
Setting Up the Switch with IP Information You are now ready to manually set up the Switch with IP information using the command line interface until it starts. 2 At the login and password prompts, enter admin as your user name and press Return at the password prompt. If you have logged on correctly, - 3Com 3C17708-US | Getting Started Guide - Page 47
to discover the automatically allocated IP information. 1 Connect your Switch to the network. 2 Power-up the Switch and wait for two minutes. 3 Launch 3Com Network Supervisor and run the Auto-discovery wizard. 3Com Network Supervisor will auto-discover the new Switch and display the IP information - 3Com 3C17708-US | Getting Started Guide - Page 48
network does not have a DHCP or BootP server, the workstation running 3Com Network Supervisor must be on the same subnet as the Switch, because Switch via the console port directly, or through a modem. ■ Documentation supplied with the terminal emulation software. ■ A suitable cable: ■ A standard - 3Com 3C17708-US | Getting Started Guide - Page 49
the serial ports (also known as a COM port) on your workstation. 2 Open your terminal emulation software and configure the COM port settings to which you have it starts. 3 At the login and password prompts, enter admin as your user name and press Return at the password prompt. If you have logged on - 3Com 3C17708-US | Getting Started Guide - Page 50
50 CHAPTER 3: SETTING UP FOR MANAGEMENT Figure 15 Example top-level command line interface menu 4 At the Select menu option prompt enter the protocol ip interface summary command. At the Select IP interfaces prompt enter all. A summary of the automatically allocated IP information is displayed. - 3Com 3C17708-US | Getting Started Guide - Page 51
manage a Switch using any network management workstation running the Simple Network Management Protocol (SNMP) as shown in Figure 19. For example, you can use the 3Com Network Supervisor software that is provided on the CD-ROM that accompanies your Switch. - 3Com 3C17708-US | Getting Started Guide - Page 52
the IP address of the Switch) If you get an error message, check that your IP information has been entered correctly and the Switch is powered up. - 3Com 3C17708-US | Getting Started Guide - Page 53
is the IP address of the Switch) If opening a Telnet session via third party software you will login and password prompts, enter admin as your user name and press Return at the password prompt Web browser and platform combinations: Table 8 Supported Web Browsers and Platforms Netscape 4.76 Netscape - 3Com 3C17708-US | Getting Started Guide - Page 54
correctly and the Switch is powered up. 3 Open your web browser and enter the IP address of the Switch that you wish to manage in the URL locator, for example, in the following format: http://xxx.xxx.xxx.xxx 4 At the login and password prompts, enter admin as your user - 3Com 3C17708-US | Getting Started Guide - Page 55
3Com Network Supervisor it automatically loads the correct MIBs and necessary files onto your workstation. Pre-requisites ■ Documentation supplied line interface section of the "Management Interface Reference Guide" for more information. Default Users and Passwords If you intend to manage the - 3Com 3C17708-US | Getting Started Guide - Page 56
gettingStarted command on the CLI, or ■ The security device user modify command on the CLI, or ■ The Security > Device > User > Modify operation on the web interface. For more information about default users and passwords, refer to the "Management Interface Reference Guide" on the Switch CD-ROM. - 3Com 3C17708-US | Getting Started Guide - Page 57
Indicated by LEDs ■ Solving Hardware Problems ■ Solving Communication Problems ■ Solving Software Upgrade Problems If you experience a problem that is not listed here, it may be included in the support section of the Switch Management Interface Reference Guide on the CD-ROM that accompanies your - 3Com 3C17708-US | Getting Started Guide - Page 58
to the Switch and to the supply outlet. If the connection is secure and there is still no power, you may have a faulty power cord or an internal fault. Firstly, check the power cord by: ■ testing it in another device ■ connecting a working power cord to the 'problem' device ■ installing and testing - 3Com 3C17708-US | Getting Started Guide - Page 59
link (or cable) are connected securely. ■ The devices at both ends of the link are powered-up ■ The quality of cable is satisfactory ■ Auto-negotiation settings are the same at both ends. Link problems will occur with 10BASE-T or 100BASE-T where auto-negotiation is disabled and incorrect cables are - 3Com 3C17708-US | Getting Started Guide - Page 60
PROBLEM SOLVING Solving Hardware Problems In the rare event of your Switch unit experiencing a hardware failure, refer to the list of suggested solutions below. An expansion module is installed and the unit will not power is powered up. Short Message Service), or pager Guide supplied in - 3Com 3C17708-US | Getting Started Guide - Page 61
Problems 61 3 Power cycle the unit. To do this, remove and reconnect the AC mains supply. If the unit has no AC main supply, remove and reconnect the DC RPS supply ■ A second PSU or blanking plate fitted 3 Check that the air vents are not obstructed. 4 Check that the ambient temperatures and - 3Com 3C17708-US | Getting Started Guide - Page 62
62 CHAPTER 4: PROBLEM SOLVING 6 Power cycle the unit. If a further thermal shutdown trap is received, return the unit. An SNMP fan fail trap and email is received 1 If the fail trap is for the front fan tray: a Open the door where the bulge is at the front of the Switch. b Remove the screws securing - 3Com 3C17708-US | Getting Started Guide - Page 63
Problems 63 4 Power cycle the unit. If a further thermal shutdown occurs, and all environmental conditions are satisfactory, return the unit to 3Com Alternatively, insert another identical GBIC. If the problem persists, contact 3Com Technical Support. Error message indicating that the SFP transceiver - 3Com 3C17708-US | Getting Started Guide - Page 64
PROBLEM SOLVING Solving Communication Problems If you experience communication problems correctly in your network management application (for example 3Com Network Supervisor). The following is an brief overview Registration Services is the organization responsible for supplying registered IP - 3Com 3C17708-US | Getting Started Guide - Page 65
the command line interface. For details on these options, refer to the Management Interface Reference Guide supplied in HTML format on the CD-ROM that accompanies your Switch. If you have problems with your software upgrade, refer to the Problem Solving section in the Management Interface Reference - 3Com 3C17708-US | Getting Started Guide - Page 66
66 CHAPTER 4: PROBLEM SOLVING - 3Com 3C17708-US | Getting Started Guide - Page 67
carrying out any installation or removal of components, or any maintenance procedures on the 3Com Switch 40x0 Family units. WARNING: Warnings contain directions that you must follow for your ' sorgfältig durchlesen, bevor Sie das Gerät installieren oder ausbauen. Power Cord Set - Japan - 3Com 3C17708-US | Getting Started Guide - Page 68
3Com Switch 40x0 units must be installed below the narrower units. WARNING: The unit must be earthed (grounded). WARNING: Connect the unit to an earthed power supply to ensure compliance with safety standards. WARNING: Power , 250V) configuration. ■ The supply plug must comply with BS1363 (3-pin - 3Com 3C17708-US | Getting Started Guide - Page 69
your supplies are of IT type, this unit must be powered by 230V (2P+T) via an isolation transformer ratio 1:1, with the secondary connection point labelled Neutral, connected directly to earth (ground). †Impédance à la terre. WARNING: U.K. only: If connecting a modem to the console port of the 3Com - 3Com 3C17708-US | Getting Started Guide - Page 70
Tighten all screws with a suitable screwdriver. WARNING: Care must be taken when removing a PSU as it may be hot. The replacement of power supplies should be completed within two minutes to avoid normal cooling being disturbed. WARNING: A fan tray can be temporarily removed and replaced whilst the - 3Com 3C17708-US | Getting Started Guide - Page 71
tre confiés à un personnel qualifié. AVERTISSEMENT: Si vous entassez l'unité Switch avec les unités SuperStack® 3 Hub, l'unité de la gamme des Switch 3Com 40x0 doit être installée en dessous des unités Hub plus étroites. AVERTISSEMENT: Vous devez mettre l'appareil à la terre (à la masse) ce groupe - 3Com 3C17708-US | Getting Started Guide - Page 72
72 APPENDIX A: SAFETY INFORMATION AVERTISSEMENT: La prise secteur doit se trouver à proximité de l'appareil et son accès doit être facile. Vous ne pouvez mettre l'appareil hors circuit qu'en débranchant son cordon électrique au niveau de cette prise. AVERTISSEMENT: L'appareil fonctionne à une - 3Com 3C17708-US | Getting Started Guide - Page 73
d'installer le éventez le porteur, lisez les informations relatives à la sécurité qui se trouvent dans le guide d'utilisation (de la gamme des Switch 3Com 40x0). AVERTISSEMENT: Un support de ventilateur peut être démonté provisoirement et remplacé pendant le fonctionnement du système sans que cela - 3Com 3C17708-US | Getting Started Guide - Page 74
durch Fachpersonal erfolgen. VORSICHT: Wenn die Switch 40x0 Einheit in einer Stapel mit anderen SuperStack® 3 Hub Einheiten eingebaut werden soll, muß der 3Com Switch 40x0 Reihe Einheit unter die schmaleren Hub Einheiten eingebaut werden. VORSICHT: Das Gerät muß geerdet sein. VORSICHT: Das Gerät mu - 3Com 3C17708-US | Getting Started Guide - Page 75
Weise kann zu gefährlichen Laseremissionen führen. VORSICHT: Bevor Sie den PSU hinzufuegen, lesen Sie die Sicherheitsanweisungen, die im Handbuch aufgefuehrt sind (3Com Switch 40x0 Reihe). VORSICHT: Die PSU muss vor dem Ausbauen von der Stromversorgung getrennt werden. Eine PSU darf erst an die - 3Com 3C17708-US | Getting Started Guide - Page 76
76 APPENDIX A: SAFETY INFORMATION VORSICHT: Bevor Sie den hinzufuegen steinbrecherfan, lesen Sie die Sicherheitsanweisungen, die im Handbuch aufgefuehrt sind (3Com Switch 40x0 Reihe). VORSICHT: Ein Lüfterträger kann vorübergehend ausgebaut und ersetzt werden, während das System läuft, ohne dass - 3Com 3C17708-US | Getting Started Guide - Page 77
B PIN-OUTS Null Modem Cable 9-pin to RS-232 25-pin PC-AT Serial Cable 9-pin to 9-pin - 3Com 3C17708-US | Getting Started Guide - Page 78
78 APPENDIX B: PIN-OUTS Modem Cable 9-pin to RS-232 25-pin RJ-45 Pin Assignments Pin assignments are identical for 10/100 and 1000 RJ-45 connectors. Table 10 Pin assignments Pin Number 10/100 Ports configured as MDI 1 Transmit Data + 2 Transmit Data + 3 Receive Data + 4 Not assigned - 3Com 3C17708-US | Getting Started Guide - Page 79
Table 11 Pin assignments Pin Number 10/100 Ports configured as MDIX 1 Receive Data + 2 Receive Data - 3 Transmit Data + 4 Not assigned 5 Not assigned 6 Transmit Data 7 Not assigned 8 Not assigned RJ-45 Pin Assignments 79 1000 Bidirectional Data B+ Bidirectional Data - 3Com 3C17708-US | Getting Started Guide - Page 80
80 APPENDIX B: PIN-OUTS - 3Com 3C17708-US | Getting Started Guide - Page 81
EMC Emissions Immunity Power Consumption Heat Dissipation Power Supply AC Line Frequency Input °F) -10 ° to +70 °C (14 ° to 158 °F) 10-95% relative humidity, non-condensing EN60068 to 3Com schedule (package testing: paras 2.1, 2.2, 2.30 and 2.32. Operational testing: paras 2.1, 2.2, 2.30 and 2.13. - 3Com 3C17708-US | Getting Started Guide - Page 82
82 APPENDIX C: TECHNICAL SPECIFICATIONS - 3Com 3C17708-US | Getting Started Guide - Page 83
and Professional Services is available at http://www.3com.com/ Contact your authorized 3Com reseller or 3Com for additional product and support information. You will find support tools posted on the 3Com web site at http://www.3com.com/ ■ 3Com Knowledgebase helps you troubleshoot 3Com products. This - 3Com 3C17708-US | Getting Started Guide - Page 84
upgrades and related documentation you must first purchase a service contract from 3Com or your reseller. Contact Us 3Com offers telephone, e-mail and internet access to technical support and repair services. To access these services for your region, use the appropriate telephone number, URL - 3Com 3C17708-US | Getting Started Guide - Page 85
online at http://eSupport.3com.com/. First time users will need to apply for a user name and password. Telephone numbers are correct at the time of publication. Find a current directory of support telephone numbers posted on the 3Com web site at http://csoweb4.3com.com/contactus/ Country Telephone - 3Com 3C17708-US | Getting Started Guide - Page 86
speakers, enter the URL: http://lat.3com.com/lat/support/form.html Portuguese speakers, enter the URL: http://lat.3com.com/br/support/form.html English speakers in Latin America should send e-mail to: [email protected] US and Canada Telephone Technical Support and Repair 1 800 876 3266 - 3Com 3C17708-US | Getting Started Guide - Page 87
port 41 MDI configuration 29 MDIX configuration 29 P passwords of default users 55 pin assignments modem cable 78 null modem cable 77 RJ45 78 serial cable 77 pin-outs 77 ports 10/100/1000 15 1000BASE-SX 15 GBIC 15 SFP 16 power supplies (PSUs) 19 powering-up a Switch 40x0 Family 29 problem solving 57 - 3Com 3C17708-US | Getting Started Guide - Page 88
88 INDEX communication problems 64 hardware problems 60 IP addressing 60 LEDs 58 R rack mounting a Switch 13 installation 23, 25 interconnecting 26 powering-up 29 rack mounting 25 size 81 weight 81 XRN Distributed Fabric 26 system specifications 81 T troubleshooting 57 W web interface management 51 - 3Com 3C17708-US | Getting Started Guide - Page 89
the instructions, may the user will and on, the user is encouraged to try user may find the following booklet prepared by the Federal Communications Commission helpful: How to Identify and Resolve Radio-TV Interference Problems user may be required to take adequate measures. You must only insert a 3Com - 3Com 3C17708-US | Getting Started Guide - Page 90
-
 1
1 -
 2
2 -
 3
3 -
 4
4 -
 5
5 -
 6
6 -
 7
7 -
8
-
9
-
10
-
11
-
12
-
13
-
14
-
15
-
16
-
17
-
18
-
19
-
20
-
21
-
22
-
23
-
24
-
25
-
26
-
27
-
28
-
29
-
30
-
31
-
32
-
33
-
34
-
35
-
36
-
37
-
38
-
39
-
40
-
41
-
42
-
43
-
44
-
45
-
46
-
47
-
48
-
49
-
50
-
51
-
52
-
53
-
54
-
55
-
56
-
57
-
58
-
59
-
60
-
61
-
62
-
63
-
64
-
65
-
66
-
67
-
68
-
69
-
70
-
71
-
72
-
73
-
74
-
75
-
76
-
77
-
78
-
79
-
80
-
81
-
82
-
83
-
84
-
85
-
86
-
87
-
88
-
89
-
90
 |
 |

Part No. DUA1770-9AAA05
Published September 2003
3Com
®
Switch 40x0 Family
Getting Started Guide
3C17707, 3C17708, 3C17709