3Com 3CRWPS10075 User Guide
3Com 3CRWPS10075 Manual
 |
View all 3Com 3CRWPS10075 manuals
Add to My Manuals
Save this manual to your list of manuals |
3Com 3CRWPS10075 manual content summary:
- 3Com 3CRWPS10075 | User Guide - Page 1
3Com OfficeConnect Wireless 54Mbps 11g Print Server User Guide 3CRWPS10075 http://www.3com.com/ Part No.: DUA1007-5AAA01 Rev. 01 Published July 2004 - 3Com 3CRWPS10075 | User Guide - Page 2
software User Guide. Unless otherwise indicated, 3Com Windows, and Windows NT are registered trademarks of Microsoft Corporation. Novell and NetWare are registered trademarks of Novell, Inc. UNIX is a registered trademark in the United States and other countries, licensed exclusively through X/Open - 3Com 3CRWPS10075 | User Guide - Page 3
this User Guide 10 1 INTRODUCTION Features 13 Safety Instructions 14 Package Contents 15 Physical Details 15 Print Server Connection 15 LED Indicators 16 Diagnostic Push Button 16 2 LAN INSTALLATION Before You Begin 17 Installation Procedure 17 Preparation 17 Power Up 18 Check the LEDs 19 3 WIRELESS - 3Com 3CRWPS10075 | User Guide - Page 4
(AppleTalk) 38 Software Requirements 38 AppleTalk Setup 38 Printing 38 Macintosh OS X 39 LPR printing Setup 39 5 WEB-BASED MANAGEMENT Overview 41 Preparation 41 Connecting to the Print Server 42 Configuration Screens 42 Configure Server 42 AppleTalk 43 NetBEUI 44 TCP/IP 45 Wireless Configuration 46 - 3Com 3CRWPS10075 | User Guide - Page 5
No. 1 59 Solution No. 1 59 Problem No. 2 59 Solution No. 2 59 Problem No. 3 59 Solution No. 3 59 Problem No. 4 59 Solution No. 4 59 Problem No. 5 59 Solution No. 5 60 Problem No. 6 60 Solution No. 6 60 Problem No. 7 60 Solution No. 7 60 Windows Printing Problems 61 Problem No. 1 61 Solution No. 1 61 - 3Com 3CRWPS10075 | User Guide - Page 6
71 CE Marking Warning 71 B WINDOWS SERVER CONFIGURATION Windows NT4.0 Server 73 Adding TCP/IP Printing Support 73 Adding a TCP/IP Remote Printer 73 Windows 2000/2003 Server 74 C UNIX SYSTEMS Overview 77 Print Server IP Address Configuration 77 Other Print Server Configuration 77 LPD Configuration 77 - 3Com 3CRWPS10075 | User Guide - Page 7
85 Creating an NDPS Manager Object 85 Creating an NDPS Printer Agent 87 E OBTAINING SUPPORT FOR YOUR PRODUCT Register Your Product to Gain Service Benefits 89 Purchase Value-Added Services 89 Troubleshoot Online 89 Access Software Downloads 90 Contact Us 90 Telephone Technical Support and Repair 90 - 3Com 3CRWPS10075 | User Guide - Page 8
- 3Com 3CRWPS10075 | User Guide - Page 9
ABOUT THIS GUIDE This guide describes how to install and configure the 3Com OfficeConnect Wireless 54Mbps 11g Print Server. This guide is intended for use by those responsible for installing and setting up network equipment; consequently, it assumes a basic working knowledge of LANs (Local Area - 3Com 3CRWPS10075 | User Guide - Page 10
enter" in this guide, you must type something, and then press Return or Enter. Do not press Return or Enter when an instruction simply says "type software button names. Examples: From the Help menu, select Contents. Click OK. Feedback about this User Guide Your suggestions are very important to us - 3Com 3CRWPS10075 | User Guide - Page 11
Conventions 11 Example: ■ 3Com OfficeConnect Wireless 54Mbps 11g Print Server User Guide ■ Part Number DUA1007-5AAA01 ■ Page 24 Do not use this e-mail address for technical support questions. For information about contacting Technical Support, please refer to the Support and Safety Information sheet - 3Com 3CRWPS10075 | User Guide - Page 12
12 ABOUT THIS GUIDE - 3Com 3CRWPS10075 | User Guide - Page 13
: ■ Wireless LAN Support. Wireless stations supporting the IEEE 802.11b or IEEE 802.11g standard can interoperate with the Print Server. Both LAN and WLAN users can print to the attached printer or printers. ■ Versatility. The Print Server supports up to four protocols: TCP/IP, SMB (Service Message - 3Com 3CRWPS10075 | User Guide - Page 14
Safety Instructions For your own safety, and to protect your Print Server, service this device, as opening or removing casing may expose you to dangerous voltage points or other risks. Refer all servicing to qualified service personnel. 8 The Print Server should be serviced by qualified service - 3Com 3CRWPS10075 | User Guide - Page 15
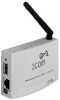
all support programs and this user guide. ■ Quick Install Guide. Physical Details This section has details of the LEDs and connectors. Further details are contained in Appendix A. Figure 1 The Print Server Print Server Connection ■ 1 x USB 2.0 Printer Port ■ IEEE 802.11g/802.11b Wireless Station - 3Com 3CRWPS10075 | User Guide - Page 16
Port. During a Firmware Upgrade, both LEDs will blink. Diagnostic Push Button The Print Server is fitted with a Diagnostic Push Button. The button is recessed; a pin or paper clip can be used to press it. This button has 2 functions: ■ Restore the factory default settings ■ Print a test page - 3Com 3CRWPS10075 | User Guide - Page 17
the following items to complete the installation and configuration of the Print Server. ■ The 3Com OfficeConnect Wireless 54Mbps 11g Print Server ■ The Print Server Setup CD ■ A laptop or desktop computer with an Ethernet interface and Windows operating system installed. ■ An Ethernet cable (not - 3Com 3CRWPS10075 | User Guide - Page 18
INSTALLATION ■ Find the Default Server Name for your Print Server. The Default Server Name is shown on a sticker on the base of the device. It consists of 8 letters and/or digits. Record this name; it may be needed during configuration. 1 Make sure the Print Server Wireless interfaces, the Wireless - 3Com 3CRWPS10075 | User Guide - Page 19
Check the LEDs Once start-up is complete: ■ The Status LED should be On. ■ The Error LED should be Off. Installation Procedure 19 - 3Com 3CRWPS10075 | User Guide - Page 20
20 CHAPTER 2: LAN INSTALLATION - 3Com 3CRWPS10075 | User Guide - Page 21
-to-peer Printing installed by the Install 3Com Print Server Utilities option on the CD-ROM. Configuration Methods The following methods are available to perform the required Print Server configuration: ■ Windows-based Wizard - see "Using the Windows Wizard" for details. ■ Web-based setup - see - 3Com 3CRWPS10075 | User Guide - Page 22
Windows XP. Using this Wizard is the recommended method to configure the Print Server. It can be used configure the Print Server for your Network environment, even if the Print Server does not have a valid IP address. Procedure 1 Insert the supplied CD-ROM into your drive. If the setup program - 3Com 3CRWPS10075 | User Guide - Page 23
section "Wireless Configuration". 8 Click Finish to save the data to the Print Server. To install the Wizard on your PC, use the Install 3Com Print Server Utilities option. If the desired Print Server is not listed ■ Check all cables to the Print Server. ■ Check that the Print Server's Error - 3Com 3CRWPS10075 | User Guide - Page 24
the group using the SSID assigned to it. The Print Server will join any group with Access Point sets the the same Channel number. Channel used. If there is no existing Ad-Hoc group Wireless stations available, the Print Server will create the automatically locate the group using its own - 3Com 3CRWPS10075 | User Guide - Page 25
. No additional software needs to be installed on your Windows PC, and printing from MS-DOS programs is supported. However, because the Print Server can not store files, large print jobs may cause problems. ■ AppleTalk is also supported, and normally no configuration of the Print Server is required - 3Com 3CRWPS10075 | User Guide - Page 26
The Print Server can print via a queue located on a Network server, if desired. ■ Unix users - refer to Appendix C. ■ Macintosh users - refer to "Macintosh (AppleTalk)" in this chapter. Checking your Network Protocols (Windows 9x) Your PC must have EITHER the TCP/IP or NetBEUI protocols installed - 3Com 3CRWPS10075 | User Guide - Page 27
4 Peer-to-Peer Printing Windows 2000 & XP require no additional software. For other versions of Windows, the supplied PTP (Peer-to-Peer) Printer Port software must be installed on each PC. Windows 2000/XP The recommended printing method is to use LPR, as follows: Setup 1 Open your Printers folder - 3Com 3CRWPS10075 | User Guide - Page 28
28 CHAPTER 4: CLIENT PC CONFIGURATION Figure 5 Printer Ports Screen 3 Choose Standard TCP/IP Port, then click New Port. Figure 6 Add Port Screen - 3Com 3CRWPS10075 | User Guide - Page 29
Windows Peer-to-peer Printing 29 4 On the Add Standard TCP/IP Printer Port screen above, enter the IP address of the Print Server in the Printer Name or IP Address field, then click Next. Figure 7 Additional Port Information Screen 5 On this screen, select Custom, and click Settings. Figure 8 Port - 3Com 3CRWPS10075 | User Guide - Page 30
of the Peer-to-peer Printer Port Driver. (Refer to the "Windows Printing Problems" in Chapter 7 if there is a problem with the installation.) 4 The Print Driver Setup will then run. In future, you can use Start - Programs - 3Com Print Server Utilities - Print Driver Setup to run the program again. - 3Com 3CRWPS10075 | User Guide - Page 31
details. 2 Select the desired port on a Print Server, then click Next. A pop-up message will inform you if the port has been created successfully. If you see the following error message, either install Internet Explorer 4 or later, or follow the procedure in "Windows Printing Problems" in Chapter 7. - 3Com 3CRWPS10075 | User Guide - Page 32
Figure 12 Configure Printer Port 4 Select the correct Windows printer in the Existing Printers list, and click Connect. Printer to run the Windows Add Printer wizard. Step through the Wizard and install the required printer: . d When the Printer installation is finished, it will be listed in - 3Com 3CRWPS10075 | User Guide - Page 33
Windows Peer-to-peer Printing 33 Use the Start menu to run this program in future. The default installation is Start - Programs - 3Com Print Server Utilities - Print Driver Setup. If using the Epson Spooler Manager, this program must be disabled, as follows: 1 Run the Epson Spooler Manager. 2 Select - 3Com 3CRWPS10075 | User Guide - Page 34
Peer-to-peer Driver) Items shown on this screen are as follows: ■ Port: If desired, click Browse to select a different Print Server. If the selected device has multiple ports, the Select Device Port button can be used to select the port. The Port Name can not be changed after installation. This name - 3Com 3CRWPS10075 | User Guide - Page 35
Windows SMB Printing 35 Windows SMB Printing This method requires no additional software to be installed, but the NetBEUI or TCP/IP protocol must be installed on your PC. Use the following procedure to install the Print Server's printer as a Windows SMB network printer: 1 Double-click the Network - 3Com 3CRWPS10075 | User Guide - Page 36
. Windows with Server-based Print Queues With a Server-based Print Queue, the Print Server is installed on an existing Network Server (Windows, Unix, or NetWare), rather than on your PC. If your Network Administrator uses this system, each Windows client must be set up as follows: 1 Open your - 3Com 3CRWPS10075 | User Guide - Page 37
37 Figure 16 Network Path - Windows 98/ME Figure 17 Network Path - Windows XP 4 Browse the network, and locate the Server and Printer (or Print Queue) which your Network Administrator will be listed with any other installed printers, and may be selected when printing from any Windows application. - 3Com 3CRWPS10075 | User Guide - Page 38
The Print Server supports AppleTalk (EtherTalk), PAP, ATP, NBP, ZIP and DDP protocols, enabling Macintosh computers on the network to view and use the Print Server as a regular AppleTalk printer. Normally, no configuration is required. Software System 9.x OS or newer. Requirements AppleTalk Setup - 3Com 3CRWPS10075 | User Guide - Page 39
ensure the Print Server has a valid IP address before configuring your Mac as follows. LPR printing Setup 1 Select the Printer List icon. Figure 18 Printer List 2 Click the Add Printer button. 3 Choose LPR Printers Using IP. Figure 19 LPR Screen 4 Enter the IP address of the Print Server in the - 3Com 3CRWPS10075 | User Guide - Page 40
40 CHAPTER 4: CLIENT PC CONFIGURATION 6 Click Add. Configuration is now complete. - 3Com 3CRWPS10075 | User Guide - Page 41
using your Web Browser. Most browsers should work, provided they support tables and forms. Because it supports dynamic IP Address allocation using DHCP, BOOTP, or RARP, the Print Server ships with an IP Address of 0.0.0.0. This is NOT a valid IP Address. Therefore, you must do ONE of the following - 3Com 3CRWPS10075 | User Guide - Page 42
:81 Example (Windows): arp -s 192.168.0.21 00−0B−AC−E6−5A−81 The MAC address of the Print Server is shown on a sticker on the base of the device. Connecting to the Print Server 1 Start your Web Browser. 2 In the Address box, enter http:// followed by the IP Address of the Print Server. for example - 3Com 3CRWPS10075 | User Guide - Page 43
Configuration Screens 43 3Com recommends that you set up a password for this Print Server as this prevents unauthorized users accessing the unit via the Web Management interface. When you use this screen to change the password, you will be asked to authenticate by entering a - 3Com 3CRWPS10075 | User Guide - Page 44
Communication Protocol Sets whether the USB printer port uses ASCII or Binary. The default is Binary. NetBEUI Figure 22 NetBEUI Screen Domain Name Domain Name Enter the designated work group to be serviced by the Print Server. This field is not case sensitive, so names with different case will - 3Com 3CRWPS10075 | User Guide - Page 45
a Router). Connection Delay before reconnection attempts Sets how long the Print Server should wait before retrying a TCP/IP connection which is lost. Allowable values are from 0 to 255 seconds, with 2 as the default. Number of reconnection attempts Set how many attempts at reconnection will - 3Com 3CRWPS10075 | User Guide - Page 46
station communicates directly with other Wireless stations. ■ Infrastructure mode is used when each Wireless station connects to the Wireless Access point. This also provides access to the wired LAN. To communicate, all Wireless stations MUST use the same SSID. The default value is blank (null - 3Com 3CRWPS10075 | User Guide - Page 47
with different channels to see which is the best. Link Info Button Click this button to open a sub screen displaying link information. Wireless Security Screen There are 3 options for Wireless security: ■ Disabled - no data encryption is used. ■ WEP - data is encrypted using the WEP standard - 3Com 3CRWPS10075 | User Guide - Page 48
used on your Wireless LAN Open System or Shared Key. Key Size Keys Passphrase Select the WEP Encryption level: ■ 64-bit (sometimes called 40-bit) encryption ■ 128-bit encryption (sometimes called 104 bit encryption) Hex or ASCII. ■ Use the radio buttons to select the default - 3Com 3CRWPS10075 | User Guide - Page 49
be from 8 to 63 characters in length. Encryption Select the desired option. Other Wireless Stations must use the same method. Other Screens HTTP Upgrade This screen allows you to upgrade software for the selected Print Server. Before you use this option, you will need to obtain the .bin file - 3Com 3CRWPS10075 | User Guide - Page 50
job. This string cannot exceed 15 characters. Post-String (Hex) The printer control string (in hex) to be sent to the printer after each print job. This string cannot exceed 15 characters. Convert LF to If checked, LF (line feed) characters are changed to CR+LF (carriage CR/LF return + - 3Com 3CRWPS10075 | User Guide - Page 51
need a compatible IPP Client program. Windows 2000 and XP include a suitable IPP client. For other versions of Windows, a client program is supplied on the Print Server's CD-ROM. The Client must also know the IP Address or URL or the IPP Server. IPP Server Configuration The Print Server contains - 3Com 3CRWPS10075 | User Guide - Page 52
the setup program (IPP_CLIENT.EXE) to users via E-mail. Installing from the CD-ROM 1 Insert the CD-ROM in your drive. If the program does not start automatically, run the Autorun.exe program in the top-level folder. 2 Follow the prompts until you reach the Install 3Com Print Server Utilities - 3Com 3CRWPS10075 | User Guide - Page 53
Internet Printing Protocol (IPP) 53 2 If Internet access from your location is via a Proxy Server, check Access IPP Server via Proxy Server, and enter details of your Proxy Server. This will be the same as your Browser configuration. 3 Enter the IP Address or URL of the IPP Server. 4 Click Select - 3Com 3CRWPS10075 | User Guide - Page 54
Figure 27 using the Windows Port Settings button: 1 Open the Printers folder ( server is very busy. IPP Client Setup Windows 2000/XP Windows 2000 and XP have their own IPP Client, and there is no need to install the supplied IPP Client Software. To use the Windows IPP Client with the Print Server - 3Com 3CRWPS10075 | User Guide - Page 55
Internet Printing Protocol (IPP) 55 Figure 29 Windows 2000 - Locate your Printer 3 Select Connect to a printer on the Internet or on your Intranet, and enter the URL of the IPP Server as follows: Port 1 ip_address:631/ipp/P1 where ip_address represents the IP Address of the IPP Server, and 631 is - 3Com 3CRWPS10075 | User Guide - Page 56
IPP Printer can be selected and used like any other Windows printer. If the IPP Server is not on your network, your Internet connection needs to be active. If using the supplied IPP Client software, you can use the Query IPP Printer program installed with Add IPP Port to check the availability of - 3Com 3CRWPS10075 | User Guide - Page 57
Problem No. 2 Print Server's RED status LED continuously stays on. Solution No. 2 Reset the Print Server by disconnecting the power supply and connecting it again. Problem No. 3 The Print Server unit can not be found on the LAN, so configuration is not possible. Solution No. 3 If using the Wireless - 3Com 3CRWPS10075 | User Guide - Page 58
58 CHAPTER 7: TROUBLESHOOTING ■ If using Ad-hoc mode, it is not possible for Wireless stations to connect to the Print Server, because its default mode is Infrastructure. You must use the wired interface for initial configuration. ■ If using Infrastructure mode, ensure that your Access Point allows - 3Com 3CRWPS10075 | User Guide - Page 59
. Try to use ASCII encoding. ■ Some of the fonts, which are in your print file may not be supported by the printer. Try selecting LaserWriter 7 instead of LaserWriter 8. Problem No. 2 Can not find the Print Server's name in the Chooser. Solution No. 2 Try the following: 1 Make sure that AppleTalk - 3Com 3CRWPS10075 | User Guide - Page 60
sure all settings (for example, brightness) are adjusted correctly. Problem No. 7 When I send a print job, I get a PostScript Command error or no print out. Solution No. 7 Check the communication protocols. The computer, Print Server and printer must all be configured to the same communication - 3Com 3CRWPS10075 | User Guide - Page 61
: 1 Open Start - Settings - Control Panel - Add/Remove Programs 2 Look for an entry with a name like Shared Port, Shared Printer Port, Print Server Driver or Print Server Port. 3 Select this item, click Add/Remove, and confirm the deletion. Problem No. 2 On Windows 98, I installed the Print Port - 3Com 3CRWPS10075 | User Guide - Page 62
62 CHAPTER 7: TROUBLESHOOTING 4 The printer wizard will display a message stating that The Network Printer is off-line. This is OK. Continue the Add Printer Wizard until finished. If - 3Com 3CRWPS10075 | User Guide - Page 63
Windows Printing Problems 63 7 Click Add Port. On the resulting screen, select Other, then Printer Server, as the port to add, as shown below. 8 Click OK to see the Print Port Configuration screen, as shown below. 9 Click the Browse Device button, select the desired Print Server, and click OK. 10 - 3Com 3CRWPS10075 | User Guide - Page 64
can not be networked. Problem No. 4 Using Windows 2000/XP, I installed the printer using LPD as recommended, but I can not print. Solution No. 4 ■ Check that the correct Printer driver is being used. ■ Try disabling the Bidirectional printing support, as follows: ■ Open the Printers folder - 3Com 3CRWPS10075 | User Guide - Page 65
OK. Problem No. 7 How Do I Print to the Print Server's printer from a MS-DOS program? Solution No. 7 Set the MS-DOS program to use LPT1 (parallel port 1) then Capture the output and re-direct it to the Print Server's printer. Windows 98/ME 1 Select Start - Settings - Printers to open the Printers - 3Com 3CRWPS10075 | User Guide - Page 66
66 CHAPTER 7: TROUBLESHOOTING 4 On this dialog: ■ Select the Device, normally LPT1 (parallel port 1). not done, the capture setting will be lost when Windows is restarted. Windows 2000/XP 1 Login as Administrator. 2 Open the command prompt window. 3 Enter the following command: net use lpt1 \\ - 3Com 3CRWPS10075 | User Guide - Page 67
the ping command to see if the Print Server is a valid device on the network. Problem No. 2 The Print Server's IP address is forgotten and it needs to be installed in a new environment. Solution No. 2 Use the Reset button to restore the factory default settings, as described below, then configure - 3Com 3CRWPS10075 | User Guide - Page 68
68 CHAPTER 7: TROUBLESHOOTING - 3Com 3CRWPS10075 | User Guide - Page 69
A SPECIFICATIONS General Specifications Protocol Support Print Server Power Consumption External Power Adapter LEDs USB 2.0 Port Ethernet % Storage Humidity 5 ~ 90% Shipping Humidity 5 ~ 100% TCP/IP NetBeui AppleTalk Feature Support HTTP Setup E-mail Printing IPP Support AutoIP - 3Com 3CRWPS10075 | User Guide - Page 70
installation. This equipment generates, uses and can radiate radio frequency energy and, if not installed and used in accordance with the instructions expressly approved by the party responsible for compliance could void the user's authority to operate this equipment. (Example - use only shielded - 3Com 3CRWPS10075 | User Guide - Page 71
with any other antenna or transmitter. The antennas used for this transmitter must be installed to provide a separation distance of at least 20 cm from all persons and must domestic environment this product may cause radio interference in which case the user may be required to take adequate measures. - 3Com 3CRWPS10075 | User Guide - Page 72
72 APPENDIX A: SPECIFICATIONS - 3Com 3CRWPS10075 | User Guide - Page 73
Windows NT4.0 Server If using Windows Windows NT 4.0, Microsoft TCP/IP Printing Support must be installed. ■ If it is already installed, add a TCP/IP Remote Printer, as described below. ■ Otherwise, install TCP/IP printing support, then add a TCP/IP Remote Printer. Adding TCP/IP Printing Support - 3Com 3CRWPS10075 | User Guide - Page 74
the Print Server, select the desired port, and click Next. A message like the following will be displayed: Figure 31 Windows 2000 Message Figure 32 Windows2003 Message 3 Click OK, and select the correct Manufacturer and Model for this printer. 4 Follow the prompts to complete the installation - 3Com 3CRWPS10075 | User Guide - Page 75
2000/2003 Server 75 ■ If desired, click Additional Drivers and install printer drivers for other versions of Windows, such as Windows 98. This will assist users during the installation process. 6 Click OK to close this Window. Configuration is now complete. Client PCs can now be configured as - 3Com 3CRWPS10075 | User Guide - Page 76
76 APPENDIX B: WINDOWS SERVER CONFIGURATION - 3Com 3CRWPS10075 | User Guide - Page 77
you have one), to provide an IP address to the Print Server, then restart the Print Server. ■ Use a Windows platform and run the Setup Wizard to allocate a valid IP Address to the Print Server. Other Print Server Configuration The recommended method to configure the Print Server is to use the Web - 3Com 3CRWPS10075 | User Guide - Page 78
/etc/hosts.lpd. Name of queue on remote server Logical printer number, for example, L1 to service this queue. Type of print spooler on remote Use default value (AIX Version xxx). server Ensure that the logical printers are configured in the Print Server. 6 Print using the following command: lp - 3Com 3CRWPS10075 | User Guide - Page 79
, printer_name is the name of the Print Queue serviced by the Print Server, and Spooler_directory is the name of the directory, which is used to spool the print jobs. Procedure Action Stop Print Services Add a System Printer Restart the Print Services Enable printing to the new printer device Start - 3Com 3CRWPS10075 | User Guide - Page 80
PS_NAME is the Print Server name defined in /etc/hosts. ■ Logical_Printer_name is the logical printer name on the Print Server, for example, L1 below, but may vary according to your version of Linux. 1 Start your X-windows shell. 2 Select Control Panel, then Printer Configuration. 3 Select Add. For - 3Com 3CRWPS10075 | User Guide - Page 81
(for example, SC3000014) Note: host file entry is required to use the name instead of IP Address Ln Where n is the Logical Printer number By default, L1 is port 1, and L2 is port 2 if the Print Server has 2 ports. Save this data, and exit the Printer Configuration. Configuration is now completed - 3Com 3CRWPS10075 | User Guide - Page 82
used to store jobs for the corresponding logical printer. ■ PS_NAME is the Print Server name defined in /etc/hosts. ■ Logical_Printer_name is the logical printer name on the Print Server, for example, L1. ■ Spooler_directory is the directory you created in Step 6. Example: Marketing|RP1_PS123456 - 3Com 3CRWPS10075 | User Guide - Page 83
using LPD For LPD printing instructions, refer to your UNIX manual. The following example is for a BSD system: lpr -P printer_name filename where: ■ printer_name is the name of the Print Queue defined on the Unix host. ■ filename is the name of the file you wish to print. Example: lpr -P Marketing - 3Com 3CRWPS10075 | User Guide - Page 84
84 APPENDIX C: UNIX SYSTEMS - 3Com 3CRWPS10075 | User Guide - Page 85
Print Server must be configured as a valid device on your TCP/IP network. This printing method uses LPR over TCP/IP, not the Netware protocol. ■ To use NDPS (Novell Distributed Printing Services), the Novell server the object to create. The Create NDPS Manager Object window shown below will appear. - 3Com 3CRWPS10075 | User Guide - Page 86
Name (for example, SerMGR in Figure 33 above). 6 Browse the Resident Server and select where you want the NDPS Manager object to be assigned (for ). 8 Click Create. The new NDPS Manager will appear in the main browser window. ■ To start the NDPS Manager in future, enter the following command at - 3Com 3CRWPS10075 | User Guide - Page 87
page, click the Printer Agent List. 3 Click New to see the Create Printer Agent window, as shown below. Figure 34 Create Printer Agent 4 Enter the desired name for the Printer . 8 Select Remote (LPR on IP) in the Connection Type. 9 Click Next to see the following Configure Port Handler screen. - 3Com 3CRWPS10075 | User Guide - Page 88
10 In the Host address IP field, enter the IP Address previously assigned to the Print Server device. 11 In the Printer Name field, enter the Logical Port name on the Print Server (L1 for Port 1, L2 for port 2). 12 Click Finish, then select appropriate drivers for Windows 98 etc as required. 13 - 3Com 3CRWPS10075 | User Guide - Page 89
you troubleshoot 3Com products. This query-based interactive tool is located at http://knowledgebase.3com.com and contains thousands of technical solutions written by 3Com support engineers. ■ Connection Assistant helps you install, configure and troubleshoot 3Com desktop and server NICs, wireless - 3Com 3CRWPS10075 | User Guide - Page 90
on the 3Com web site at http://eSupport.3com.com/. First time users will need to apply for a user name and password. A link to software downloads can be found at http://eSupport.3com.com/, or under the Product Support heading at http://www.3com.com/ Software Upgrades are the software releases that - 3Com 3CRWPS10075 | User Guide - Page 91
online at http://eSupport.3com.com/. First time users will need to apply for a user name and password. Telephone numbers are correct at the time of publication. Find a current directory of support telephone numbers posted on the 3Com web site at http://csoweb4.3com.com/contactus/ Country Telephone - 3Com 3CRWPS10075 | User Guide - Page 92
speakers, enter the URL: http://lat.3com.com/lat/support/form.html Portuguese speakers, enter the URL: http://lat.3com.com/br/support/form.html English speakers in Latin America should send e-mail to: [email protected] US and Canada Telephone Technical Support and Repair 1 800 876 3266 AT - 3Com 3CRWPS10075 | User Guide - Page 93
- 3Com 3CRWPS10075 | User Guide - Page 94
Drive, Marlborough, MA USA 01752-3064 To learn more about 3Com products and services, visit our World Wide Web site at www.3com.com Copyright © 2004 3Com Corporation. All rights reserved. 3Com and are registered trademarks of 3Com Corporation. All other company and product names may be trademarks
-
 1
1 -
 2
2 -
 3
3 -
 4
4 -
 5
5 -
 6
6 -
 7
7 -
8
-
9
-
10
-
11
-
12
-
13
-
14
-
15
-
16
-
17
-
18
-
19
-
20
-
21
-
22
-
23
-
24
-
25
-
26
-
27
-
28
-
29
-
30
-
31
-
32
-
33
-
34
-
35
-
36
-
37
-
38
-
39
-
40
-
41
-
42
-
43
-
44
-
45
-
46
-
47
-
48
-
49
-
50
-
51
-
52
-
53
-
54
-
55
-
56
-
57
-
58
-
59
-
60
-
61
-
62
-
63
-
64
-
65
-
66
-
67
-
68
-
69
-
70
-
71
-
72
-
73
-
74
-
75
-
76
-
77
-
78
-
79
-
80
-
81
-
82
-
83
-
84
-
85
-
86
-
87
-
88
-
89
-
90
-
91
-
92
-
93
-
94
 |
 |

Part No.: DUA1007-5AAA01
Rev. 01
Published July 2004
3Com OfficeConnect
Wireless 54Mbps 11g
Print Server
User Guide
3CRWPS10075