3Ware 9550SXU-16ML User Guide - Page 158
Start > Administrative Tools > Computer, Management, Disk Management., Maintenance, Remove Unit
 |
UPC - 693494971606
View all 3Ware 9550SXU-16ML manuals
Add to My Manuals
Save this manual to your list of manuals |
Page 158 highlights
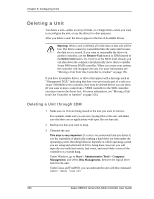
Chapter 8. Configuring Units Note: This step can only be done after the system has completed the migration or online capacity process. The operating system will not see the capacity until that process is complete. To inform the operating system that secondary storage has been upgraded: 1 If you change the configuration of the boot unit (the unit containing the operating system), you must reboot the system in order to see the new unit capacity. 2 Unmount all file systems. Under Windows, go to Start > Administrative Tools > Computer Management, and select Disk Management. Remove the logical drive letter for the unit. Under Linux and FreeBSD, from a command prompt, type sync , sync , sync . You can then unmount the unit with this command: umount 3 If the reconfigured unit is secondary storage, you must have the controller rescan, in order to update unit information. a In 3DM2, select the appropriate unit and choose Management > Maintenance. Click the Remove Unit button. b After the unit has been removed, click the Rescan button. The new unit capacity displays. 4 Resize the partition and file system or create a new partition. In Windows, use the disk management utility to determine whether the disk is a basic disk or a dynamic disk. „ Go to Administrative Tools > Computer Management, and then select Disk Management in the list on the left. Only dynamic disks can be expanded with Windows Disk Management. If the unit is shown as a basic disk, you must either convert it to a dynamic disk or use a 3rd party tool to rubrication the unit. „ If the unit is shown as a dynamic disk, right-click on it and choose Extend Volume to launch the Extend Volume wizard. In Linux and FreeBSD, the tools to expand the partition and file system can vary, depending on the kernel version and file system that you are using. Please consult your Linux/FreeBSD documentation and the 3ware Knowledgebase for more information. 148 3ware 9550SX Serial ATA RAID Controller User Guide
-
 1
1 -
2
-
3
-
4
-
5
-
6
-
7
-
8
-
9
-
10
-
11
-
12
-
13
-
14
-
15
-
16
-
17
-
18
-
19
-
20
-
21
-
22
-
23
-
24
-
25
-
26
-
27
-
28
-
29
-
30
-
31
-
32
-
33
-
34
-
35
-
36
-
37
-
38
-
39
-
40
-
41
-
42
-
43
-
44
-
45
-
46
-
47
-
48
-
49
-
50
-
51
-
52
-
53
-
54
-
55
-
56
-
57
-
58
-
59
-
60
-
61
-
62
-
63
-
64
-
65
-
66
-
67
-
68
-
69
-
70
-
71
-
72
-
73
-
74
-
75
-
76
-
77
-
78
-
79
-
80
-
81
-
82
-
83
-
84
-
85
-
86
-
87
-
88
-
89
-
90
-
91
-
92
-
93
-
94
-
95
-
96
-
97
-
98
-
99
-
100
-
101
-
102
-
103
-
104
-
105
-
106
-
107
-
108
-
109
-
110
-
111
-
112
-
113
-
114
-
115
-
116
-
117
-
118
-
119
-
120
-
121
-
122
-
123
-
124
-
125
-
126
-
127
-
128
-
129
-
130
-
131
-
132
-
133
-
134
-
135
-
136
-
137
-
138
-
139
-
140
-
141
-
142
-
143
-
144
-
145
-
146
-
147
-
148
-
149
-
150
-
151
-
152
-
 153
153 -
 154
154 -
 155
155 -
 156
156 -
 157
157 -
 158
158 -
 159
159 -
 160
160 -
 161
161 -
 162
162 -
 163
163 -
164
-
165
-
166
-
167
-
168
-
169
-
170
-
171
-
172
-
173
-
174
-
175
-
176
-
177
-
178
-
179
-
180
-
181
-
182
-
183
-
184
-
185
-
186
-
187
-
188
-
189
-
190
-
191
-
192
-
193
-
194
-
195
-
196
-
197
-
198
-
199
-
200
-
201
-
202
-
203
-
204
-
205
-
206
-
207
-
208
-
209
-
210
-
211
-
212
-
213
-
214
-
215
-
216
-
217
-
218
-
219
-
220
-
221
-
222
-
223
-
224
-
225
-
226
-
227
-
228
-
229
-
230
-
231
-
232
-
233
-
234
-
235
-
236
-
237
-
238
-
239
-
240
-
241
-
242
-
243
-
244
-
245
-
246
-
247
-
248
-
249
-
250
-
251
-
252
-
253
-
254
-
255
-
256
-
257
-
258
-
259
-
260
 |
 |