3Ware 9550SXU-16ML User Guide - Page 32
Enter, arrow keys, Stripe Size, Create Disk Array Display, RAID 0 Example
 |
UPC - 693494971606
View all 3Ware 9550SXU-16ML manuals
Add to My Manuals
Save this manual to your list of manuals |
Page 32 highlights
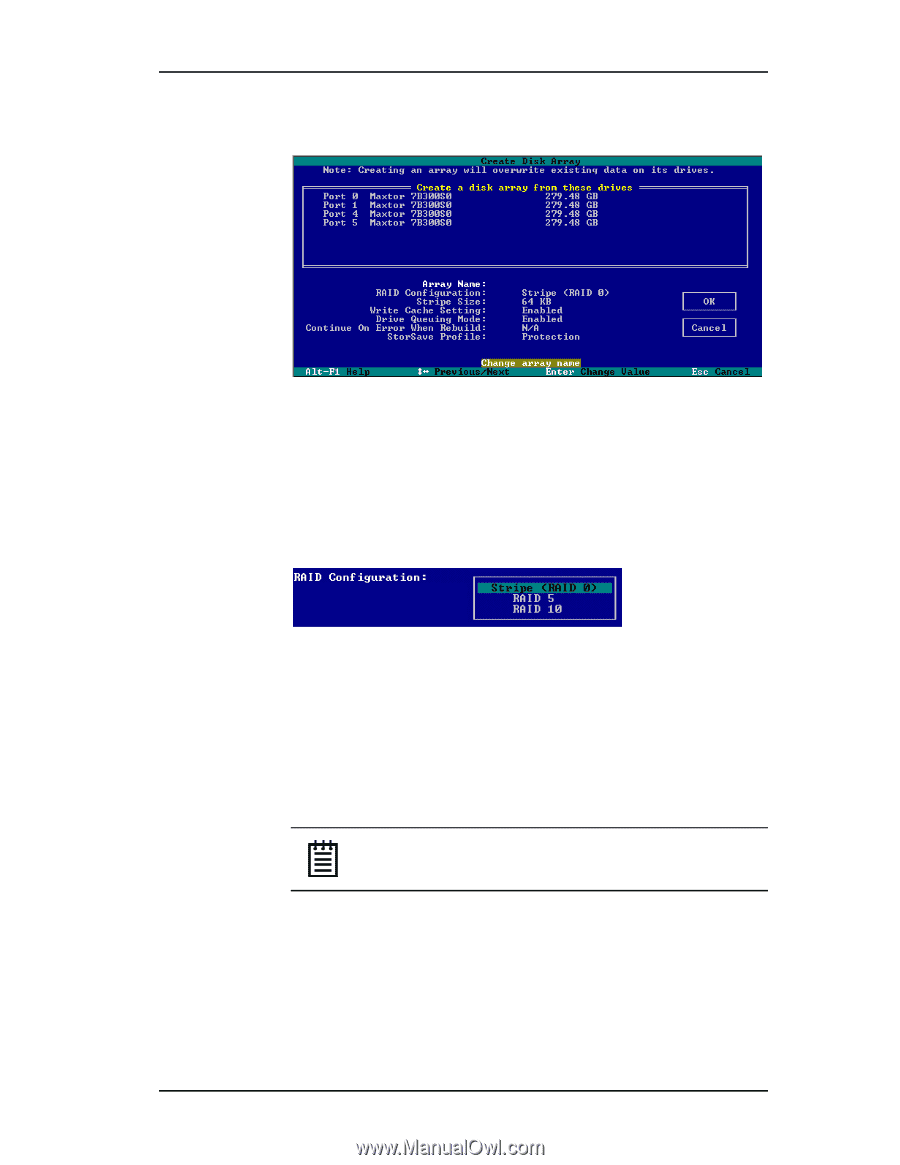
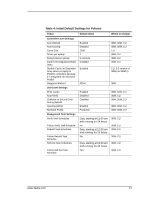
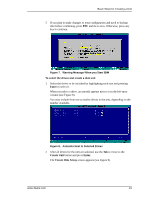
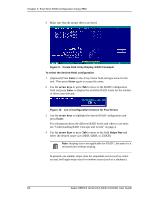
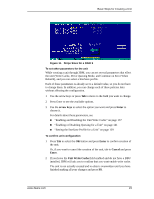
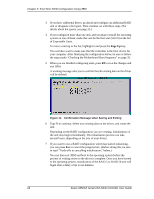
Chapter 3. First-Time RAID Configuration Using 3BM 3 Make sure that the proper drives are listed. Figure 9. Create Disk Array Display, RAID 0 Example To select the desired RAID configuration 1 (Optional) Press Enter in the Array Name field and type name for the unit. Then press Enter again to accept the name. 2 Use the arrow keys or press Tab to move to the RAID Configuration field and press Enter to display the available RAID levels for the number of drives you selected. Figure 10. List of Configuration Choices for Four Drives 3 Use the arrow keys to highlight the desired RAID configuration and press Enter. For information about the different RAID levels and when to use each, see "Understanding RAID Concepts and Levels" on page 4. 4 Use the arrow keys or press Tab to move to the field Stripe Size and select the desired stripe size (16KB, 64KB, or 256KB). Note: Striping size is not applicable for RAID 1, because it is a mirrored unit without striping. In general, use smaller stripe sizes for sequential access (such as video access) and larger stripe sizes for random access (such as a database). 22 3ware 9550SX Serial ATA RAID Controller User Guide
-
 1
1 -
2
-
3
-
4
-
5
-
6
-
7
-
8
-
9
-
10
-
11
-
12
-
13
-
14
-
15
-
16
-
17
-
18
-
19
-
20
-
21
-
22
-
23
-
24
-
25
-
26
-
 27
27 -
 28
28 -
 29
29 -
 30
30 -
 31
31 -
 32
32 -
 33
33 -
 34
34 -
 35
35 -
 36
36 -
 37
37 -
38
-
39
-
40
-
41
-
42
-
43
-
44
-
45
-
46
-
47
-
48
-
49
-
50
-
51
-
52
-
53
-
54
-
55
-
56
-
57
-
58
-
59
-
60
-
61
-
62
-
63
-
64
-
65
-
66
-
67
-
68
-
69
-
70
-
71
-
72
-
73
-
74
-
75
-
76
-
77
-
78
-
79
-
80
-
81
-
82
-
83
-
84
-
85
-
86
-
87
-
88
-
89
-
90
-
91
-
92
-
93
-
94
-
95
-
96
-
97
-
98
-
99
-
100
-
101
-
102
-
103
-
104
-
105
-
106
-
107
-
108
-
109
-
110
-
111
-
112
-
113
-
114
-
115
-
116
-
117
-
118
-
119
-
120
-
121
-
122
-
123
-
124
-
125
-
126
-
127
-
128
-
129
-
130
-
131
-
132
-
133
-
134
-
135
-
136
-
137
-
138
-
139
-
140
-
141
-
142
-
143
-
144
-
145
-
146
-
147
-
148
-
149
-
150
-
151
-
152
-
153
-
154
-
155
-
156
-
157
-
158
-
159
-
160
-
161
-
162
-
163
-
164
-
165
-
166
-
167
-
168
-
169
-
170
-
171
-
172
-
173
-
174
-
175
-
176
-
177
-
178
-
179
-
180
-
181
-
182
-
183
-
184
-
185
-
186
-
187
-
188
-
189
-
190
-
191
-
192
-
193
-
194
-
195
-
196
-
197
-
198
-
199
-
200
-
201
-
202
-
203
-
204
-
205
-
206
-
207
-
208
-
209
-
210
-
211
-
212
-
213
-
214
-
215
-
216
-
217
-
218
-
219
-
220
-
221
-
222
-
223
-
224
-
225
-
226
-
227
-
228
-
229
-
230
-
231
-
232
-
233
-
234
-
235
-
236
-
237
-
238
-
239
-
240
-
241
-
242
-
243
-
244
-
245
-
246
-
247
-
248
-
249
-
250
-
251
-
252
-
253
-
254
-
255
-
256
-
257
-
258
-
259
-
260
 |
 |