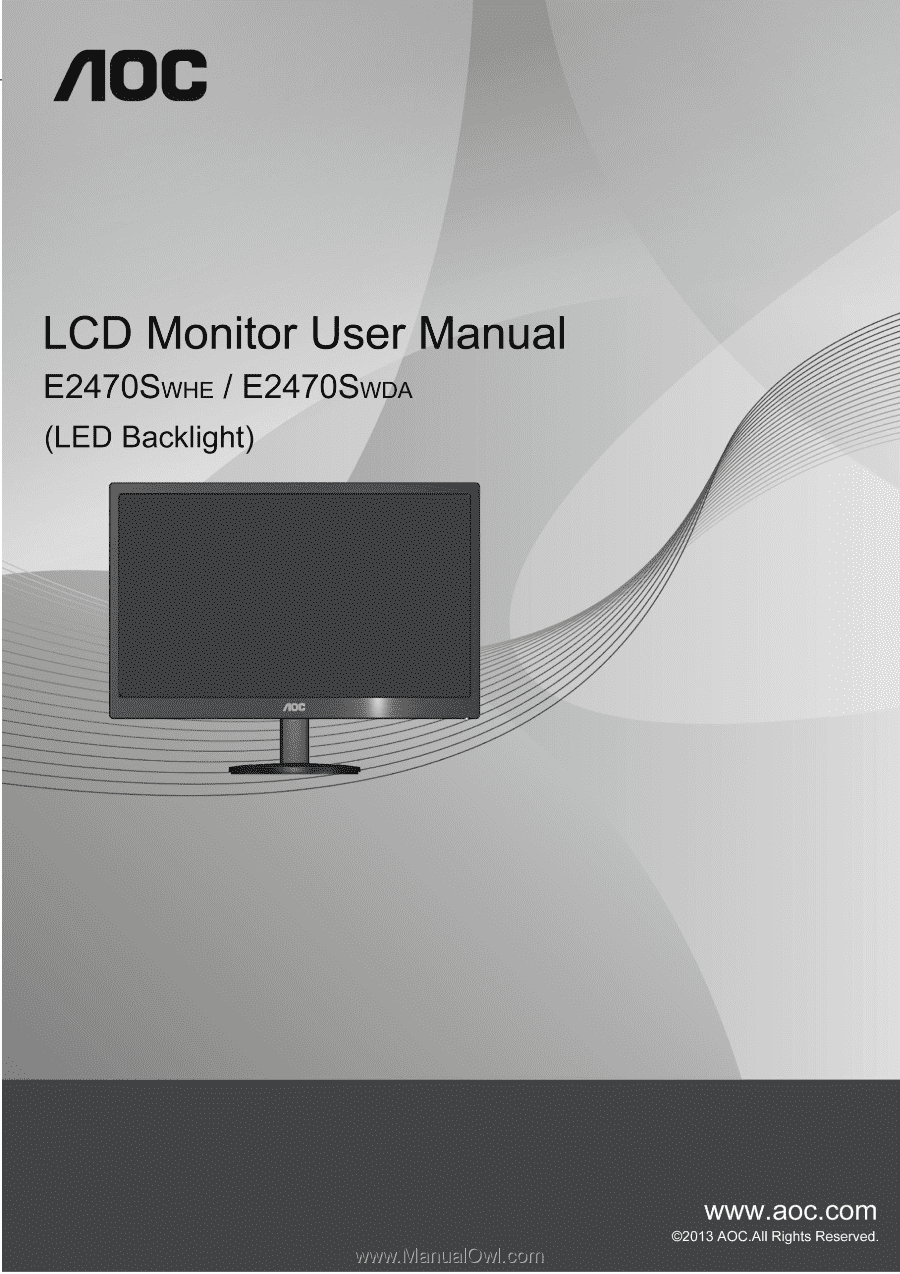
AOC E2470SWHE E2470SWHE User Manual
AOC E2470SWHE Manual
 |
View all AOC E2470SWHE manuals
Add to My Manuals
Save this manual to your list of manuals |
AOC E2470SWHE manual content summary:
- AOC E2470SWHE | E2470SWHE User Manual - Page 1
- AOC E2470SWHE | E2470SWHE User Manual - Page 2
Extra ...28 Exit...29 LED Indicator ...29 Driver ...30 Monitor Driver ...30 Windows 8 ...30 Windows 7 ...34 Windows Vista ...38 Windows XP ...40 Windows 2000 ...43 Windows ME...43 i-Menu ...44 e-Saver ...45 Screen+ ...46 Troubleshoot ...47 Specification...48 General Specification...48 Preset Display - AOC E2470SWHE | E2470SWHE User Manual - Page 3
FCC Notice ...52 WEEE Declaration ...53 WEEE Declaration for India ...53 EPA Energy Star ...54 EPEAT Declaration ...55 TCO DOCUMENT ...56 Service ...57 Warranty Statement for Europe ...57 Warranty Statement for North & South America (excluding Brazil 59 3 - AOC E2470SWHE | E2470SWHE User Manual - Page 4
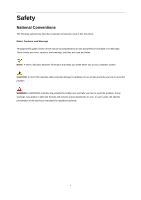
, Cautions, and Warnings Throughout this guide, blocks of text may be accompanied problem. WARNING: A WARNING indicates the potential for bodily harm and tells you how to avoid the problem. Some warnings may appear in alternate formats and may be unaccompanied by an icon. In such cases, the specific - AOC E2470SWHE | E2470SWHE User Manual - Page 5
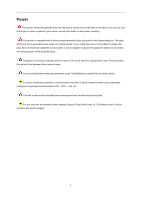
the grounded plug. Unplug the unit during a lightning storm or when it will not be used for long periods of time. This will protect the monitor from damage due to power surges. Do not overload power strips and extension cords. Overloading can result in fire or electric shock. To ensure satisfactory - AOC E2470SWHE | E2470SWHE User Manual - Page 6
not place the front of the product on the floor. If you mount the monitor on a wall or shelf, use a mounting kit approved by the manufacturer and follow the kit instructions. Leave some space around the monitor as shown below. Otherwise, air-circulation may be inadequate hence overheating may cause - AOC E2470SWHE | E2470SWHE User Manual - Page 7
Cleaning Clean the cabinet regularly with cloth. You can use soft-detergent to wipe out the stain, instead of strong-detergent which will cauterize the product cabinet. When cleaning, make sure no detergent is leaked into the product. The cleaning cloth should not be too rough as it will scratch the - AOC E2470SWHE | E2470SWHE User Manual - Page 8
emitting a strange smell, sound or smoke, disconnect the power plug IMMEDIATELY and contact a Service Center. Make sure that the ventilating openings are not blocked by a table or curtain. Do not engage the LCD monitor in severe vibration or high impact conditions during operation. Do not knock or - AOC E2470SWHE | E2470SWHE User Manual - Page 9
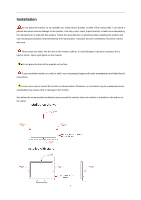
Contents in Box CD Manual Monitor Monitor Base Stand Power Cable DVI Cable Analog Cable Audio Cable HDMI Cable Not all signal cables (Audio,Analog, DVI and HDMI cables) will be provided for all countries and regions. Please check with the local dealer or AOC branch office for confirmation - AOC E2470SWHE | E2470SWHE User Manual - Page 10
Setup Stand & Base Please setup or remove the base following the steps as below. Setup: Remove: 10 - AOC E2470SWHE | E2470SWHE User Manual - Page 11
optimal viewing it is recommended to look at the full face of the monitor, then adjust the monitor's angle to your own preference. Hold the stand so you will not topple the monitor when you change the monitor's angle. You are able to adjust the monitor's angle from -5°to 25 °. NOTE: Do not touch the - AOC E2470SWHE | E2470SWHE User Manual - Page 12
‟s HDMI port. 5 Connect one end of the Audio cable to the back of the monitor and connect the other end to the computer‟s Audio port. 6 Turn on your monitor and computer. If your monitor displays an image, installation is complete. If it does not display an image, please refer Troubleshooting. 12 - AOC E2470SWHE | E2470SWHE User Manual - Page 13
arm with the holes in the back of the monitor. 4 Insert the 4 screws into the holes and tighten. 5 Reconnect the cables. Refer to the user's manual that came with the optional wall mounting arm for instructions on attaching it to the wall. Noted : VESA mounting screw holes are not available for all - AOC E2470SWHE | E2470SWHE User Manual - Page 14
Adjusting Setting Optimal Resolution Windows Vista For Windows Vista: 1 Click START. 2 Click CONTROL PANEL. 3 Click Appearance and Personalization. 4 Click Personalization 14 - AOC E2470SWHE | E2470SWHE User Manual - Page 15
5 Click Display Settings. 6 Set the resolution SLIDE-BAR to 1920 by 1080. 15 - AOC E2470SWHE | E2470SWHE User Manual - Page 16
Windows XP For Windows XP: 1 Click START. 2 Click SETTINGS. 3 Click CONTROL PANEL. 4 Click Appearance and Themes. 5 Double click DISPLAY. 16 - AOC E2470SWHE | E2470SWHE User Manual - Page 17
6 Click SETTINGS. 7 Set the resolution SLIDE-BAR to 1920 by 1080. Windows ME/2000 For Windows ME/2000: 1 Click START. 2 Click SETTINGS. 3 Click CONTROL PANEL. 4 Double click DISPLAY. 5 Click SETTINGS. 6 Set the resolution SLIDE-BAR to 1920 by 1080. 17 - AOC E2470SWHE | E2470SWHE User Manual - Page 18
Windows 8 For Windows 8: 1. Right click and click All apps at the bottom-right of the screen. 2. Set the "View by" to "Category". 3. Click Appearance and Personalization. 18 - AOC E2470SWHE | E2470SWHE User Manual - Page 19
4. Click DISPLAY. 5. Set the resolution SLIDE-BAR to 1920x1080. 19 - AOC E2470SWHE | E2470SWHE User Manual - Page 20
Hotkeys 1 Source/Auto/Exit 2 Clear vision /3 Volume /+ 4 Menu/Enter 5 Power Power Press the Power button to turn on/off the monitor. Menu/Enter Press to display the OSD or confirm the selection. Volume adjustment hot key: When there is no OSD,press Volume + to active volume - AOC E2470SWHE | E2470SWHE User Manual - Page 21
Clear Vision 1. When there is no OSD, Press the "-" button to activate Clear Vision. 2. Use the "-" or "+" buttons to select between weak, medium, strong, or off settings. Default setting is always "off". 3. Press and hold "-" button for 5 seconds to activate the Clear Vision Demo, and a message of - AOC E2470SWHE | E2470SWHE User Manual - Page 22
OSD Setting Basic and simple instruction on the control keys. 1) Press the MENU-button to activate the OSD Function: To lock the OSD, press and hold the MENU button while the monitor is off and then press power button to turn the monitor on. To un-lock the OSD - press and hold the MENU button while - AOC E2470SWHE | E2470SWHE User Manual - Page 23
submenu, and press MENU to enter. 4. Press - or + to adjust. 5. Press AUTO to exit. Brightness Contrast Eco mode Gamma DCR 0-100 0-100 Standard Text Internet Game Movie Sports Gamma1 Gamma2 Gamma3 Off On Backlight Adjustment Contrast from Digital-register. Standard Mode Text Mode Internet Mode - AOC E2470SWHE | E2470SWHE User Manual - Page 24
. Adjust Picture Phase to reduce Horizontal-Line noise Adjust picture sharpness Adjust the horizontal position of the picture. Adjust the vertical position of the picture. 24 - AOC E2470SWHE | E2470SWHE User Manual - Page 25
AUTO to exit. Color Temp. DCB Mode DCB Demo Warm Normal Cool sRGB User Full Enhance Nature Skin Green Field Sky-blue AutoDetect Red Green Blue on or off on Digital-register. Blue Gain from Digital-register Disable or Enable Full Enhance Mode Disable or Enable Nature Skin Mode Disable or Enable - AOC E2470SWHE | E2470SWHE User Manual - Page 26
Picture Boost 1. Press MENU (Menu) to display menu. 2. Press - or + to select (Picture Boost), and press MENU to enter. 3. Press - or + to select submenu, and press MENU to enter. 4. Press - or + to adjust. 5. Press AUTO to exit. Frame Size Brightness Contrast H. position V.position Bright - AOC E2470SWHE | E2470SWHE User Manual - Page 27
OSD Setup 1. Press MENU (Menu) to display menu. 2. Press - or + to select (OSD Setup), and press MENU to enter. 3. Press - or + to select submenu, and press MENU to enter. 4. Press - or + to adjust. 5. Press AUTO to exit. H.Position V.Position Timeout Transparence Language 0-100 0-100 5-120 - AOC E2470SWHE | E2470SWHE User Manual - Page 28
Ratio DDC-CI Reset Information Auto / D-SUB / HDMI1/ HDMI2 Select Input Signal Source (E2470SWHE) Auto / D-SUB / DVI Select Input Signal Source (E2470SWDA) yes or no Auto for display yes or no Turn ON/OFF DDC-CI Support Yes or no Reset the menu to default Show the information of the main image - AOC E2470SWHE | E2470SWHE User Manual - Page 29
Exit 1. Press MENU (Menu) to display menu. 2. Press - or + to select 3. Press AUTO to exit. (Exit), and press MENU to enter. Exit Exit the main OSD LED Indicator Status Full Power Mode Active-off Mode Green Orange LED Color 29 - AOC E2470SWHE | E2470SWHE User Manual - Page 30
Driver Monitor Driver Windows 8 1. Start Windows® 8 2. Right click and click All apps at the bottom-right of the screen. 3. Click on the "Control panel" icon 4. Set the "View by" to "Large icons" or "Small icons". 30 - AOC E2470SWHE | E2470SWHE User Manual - Page 31
5. Click on the "Display" icon. 6. Click on the "Change display settings" button. 7. Click the "Advanced Settings" button. 31 - AOC E2470SWHE | E2470SWHE User Manual - Page 32
8. Click the "Monitor" tab and then click the "Properties" button. 9. Click the "Driver" tab. 10. Open the "Update Driver Software-Generic PnP Monitor" window by clicking on "Update Driver... " and then click the "Browse my computer for driver software" button. 32 - AOC E2470SWHE | E2470SWHE User Manual - Page 33
to the following directory: X:\Driver\module name (where X is monitor model and click the "Next" button. The files will be copied from the CD to your hard disk drive. 15. Close all open windows and remove the CD. 16. Restart the system. The system will automatically select the maximum refresh rate - AOC E2470SWHE | E2470SWHE User Manual - Page 34
Windows 7 1.Start Windows® 7 2.Click on the 'Start' button and then click on 'Control Panel'. 3. Click on the 'Display' icon. 34 - AOC E2470SWHE | E2470SWHE User Manual - Page 35
4.Ckick on the "Change display settings" button. Click the "Advanced Settings" button. Click the "Monitor" tab and then click the "Properties" button. 35 - AOC E2470SWHE | E2470SWHE User Manual - Page 36
7.Click the "Driver" tab. 8. Open the "Update Driver Software-Generic PnP Monitor" window by clicking on "Update Driver... "and then click the "Browse my computer for driver software" button. 9. Select "Let me pick from a list of device drivers on my computer". 36 - AOC E2470SWHE | E2470SWHE User Manual - Page 37
"OK" button. 12. Select your monitor model and click the "Next" button. The files will be copied from the CD to your hard disk drive. 3. Close all open windows and remove the CD. 14. Restart the system. The system will automatically select the maximum refresh rate and corresponding Color Matching - AOC E2470SWHE | E2470SWHE User Manual - Page 38
Windows Vista 1. Click "Start " and "Control Panel". Then, double-click on "Appearance and Personalization". 2. Click "Personalization" and then "Display Settings". 3. Click "Advanced Settings...". 38 - AOC E2470SWHE | E2470SWHE User Manual - Page 39
computer". 7. Click on the 'Have disk...' button, then click on the 'Browse...' button and then select the appropriate drive F:\Driver (CD-ROM Drive). 8. Select your monitor model and click on the 'Next' button. 9. Click "Close" → "Close" → "OK" → "OK" on the following screens displayed in sequence - AOC E2470SWHE | E2470SWHE User Manual - Page 40
Windows XP 1. Start Windows® XP 2. Click on the 'Start' button and then click on 'Control Panel'. 3. Select and click on the category „Appearance and Themes‟ 4. Click on the 'Display' Item. 40 - AOC E2470SWHE | E2470SWHE User Manual - Page 41
Advanced' button. 6. Select 'Monitor' tab - If the 'Properties' button is inactive, it means your monitor is properly configured. Please stop installation. - If the 'Properties' button is active, click on 'Properties' button. Please follow the steps below. 7. Click on the 'Driver' tab and then click - AOC E2470SWHE | E2470SWHE User Manual - Page 42
or specific location [advanced]' radio button and then click on the 'Next' button. 9. Select the 'Don't Search. I will choose the driver to install . 12. Select your monitor model and click on the 'Next' button. - If you can see the 'has not passed Windows® Logo testing to verify its compatibility - AOC E2470SWHE | E2470SWHE User Manual - Page 43
on 'Advanced...'. 5. Select the 'Monitor' button, then click on 'Change...' button. 6. Select 'Specify the location of the driver(Advanced)' and click on the 'Next' button. 7. Select 'Display a list of all the drivers in a specific location, so you can choose the driver you want', then click on - AOC E2470SWHE | E2470SWHE User Manual - Page 44
i-Menu Welcome to "i-Menu" software by AOC. i-Menu makes it easy to adjust your monitor display setting by using on screen menus instead of the OSD button on the monitor. To complete installation, please follow the installation guide. 44 - AOC E2470SWHE | E2470SWHE User Manual - Page 45
software! The AOC e-Saver features Smart Shutdown functions for your monitors, allows your monitor to timely shutdown when PC unit is at any status (On, Off, Sleep or Screen Saver); the actual shutdown time depends on your preferences (see example below). Please click on "driver/e-Saver/setup.exe - AOC E2470SWHE | E2470SWHE User Manual - Page 46
"Screen+" software by AOC, Screen+ software is a desktop screen splitting tool, it splits the desktop into different panes, each pane displays a different window. You only need to drag the window to a corresponding pane, when you want to access it. It supports multiple monitor display to make your - AOC E2470SWHE | E2470SWHE User Manual - Page 47
Troubleshoot Problem & Question Possible Solutions Power LED Is Not ON No images on the screen Picture Is Fuzzy & Has Ghosting Shadowing Problem Picture Bounces, Flickers Or Wave Pattern Appears In The Picture Monitor Is Stuck In Active Off-Mode" Missing one of the primary colors (RED, GREEN, or - AOC E2470SWHE | E2470SWHE User Manual - Page 48
Speakers (E2470SWDA) Physical Characteristics Connector Type (E2470SWHE) Connector Type (E2470SWDA) Signal Cable Type Temperature Environmental Humidity Altitude E2470SWHE 1080 (60 Hz) VESA DDC2B/CI D-Sub 15pin, HDMI1, (E2470SWHE) Active 27 W (typical) (E2470SWDA) Standby < 0.5 W 0~24 - AOC E2470SWHE | E2470SWHE User Manual - Page 49
Preset Display Modes STAND VGA MAC MODE VGA IBM-MODE DOS SVGA MAC MODE SVGA XGA SXGA WXGA WXGA+ WSXGA+ FHD HD(DVI only) RESOLUTION 640×480 @60Hz 640×480 @72Hz 640×480 @75Hz 640 × 480@67Hz 720×400@70Hz 800×600 @56Hz 800×600 @60Hz 800× - AOC E2470SWHE | E2470SWHE User Manual - Page 50
Detect Pin No. Signal Name 17. TMDS Data 018. TMDS Data 0+ 19. TMDS Data 0/5 Shield 20. TMDS Data 5- / N.C. 21. TMDS Data 5+ / N.C. 22. TMDS Clock Shield 23. TMDS Clock + 24. TMDS Clock - 50 - AOC E2470SWHE | E2470SWHE User Manual - Page 51
CEC 14. Reserved (N.C. on device) 15. SCL 16. SDA Plug and Play Plug & Play DDC2B Feature This monitor is equipped with VESA DDC2B capabilities according to the VESA DDC STANDARD. It allows the monitor to inform the host system of its identity and, depending on the level of DDC used, communicate - AOC E2470SWHE | E2470SWHE User Manual - Page 52
Statement WARNING: (FOR FCC CERTIFIED MODELS) NOTE: This equipment has been tested and found to comply with the limits for a Class B digital device, , and if not installed and used in accordance with the instructions, may cause harmful interference to radio communications. However, there - AOC E2470SWHE | E2470SWHE User Manual - Page 53
more information about where you can drop off your waste equipment for recycling, please contact your local city office, your household waste disposal service or the shop where you purchased the product . WEEE Declaration for India This symbol on the product or on its packaging indicates that this - AOC E2470SWHE | E2470SWHE User Manual - Page 54
EPA Energy Star ENERGY STAR® is a U.S. registered mark. As an ENERGY STAR® Partner, AOC International (Europe) BV and Envision Peripherals, Inc. have determined that this product meets the ENERGY STAR® guidelines for energy efficiency. 54 - AOC E2470SWHE | E2470SWHE User Manual - Page 55
foam filler and carton. AOC Display solution will only recycle AOC monitor packaging. Please refer to the following website address: Only for North and South American, excluding Brazil: http://us.aoc.com/about/environmental_impact For Germany: http://www.aoc-europe.com/en/service/tco.php For Brazil - AOC E2470SWHE | E2470SWHE User Manual - Page 56
TCO DOCUMENT 56 - AOC E2470SWHE | E2470SWHE User Manual - Page 57
the service and support section onwww.aoc-europe.comfor the warranty instructions in your country. The freight cost for the warranty is pre-paid by AOC for Improper installation or maintenance other then in accordance with AOC‟s user manual Misuse Neglect Any cause other than ordinary - AOC E2470SWHE | E2470SWHE User Manual - Page 58
AOC LCD Monitors are produced according to the ISO 9241-307 Class 1 pixel policy standards. If your warranty has expired, you still have access to all available service options, but you will be responsible for the cost of service, including parts, labor, shipping (if any) and applicable taxes. AOC - AOC E2470SWHE | E2470SWHE User Manual - Page 59
South America (excluding Brazil) WARRANTY STATEMENT for AOC Color Monitors Including those Sold within North America as Specified Envision your Dealer or EPI Customer Service, RMA Department at the toll free number (888) 662-9888. Or you can request an RMA Number online at www.aoc.com/na-warranty. * - AOC E2470SWHE | E2470SWHE User Manual - Page 60
SPECIFIC aoc.com/support/warranty EL SALVADOR: http://sv.aoc.com/support/warranty GUATEMALA: http://gt.aoc.com/support/warranty HONDURAS: http://hn.aoc.com/support/warranty NICARAGUA: http://ni.aoc.com/support/warranty PANAMA: http://pa.aoc.com/support/warranty PARAGUAY: http://py.aoc.com/support
-
 1
1 -
 2
2 -
 3
3 -
 4
4 -
 5
5 -
 6
6 -
 7
7 -
8
-
9
-
10
-
11
-
12
-
13
-
14
-
15
-
16
-
17
-
18
-
19
-
20
-
21
-
22
-
23
-
24
-
25
-
26
-
27
-
28
-
29
-
30
-
31
-
32
-
33
-
34
-
35
-
36
-
37
-
38
-
39
-
40
-
41
-
42
-
43
-
44
-
45
-
46
-
47
-
48
-
49
-
50
-
51
-
52
-
53
-
54
-
55
-
56
-
57
-
58
-
59
-
60
 |
 |