ASRock 870iCafe RAID Installation Guide
ASRock 870iCafe Manual
 |
View all ASRock 870iCafe manuals
Add to My Manuals
Save this manual to your list of manuals |
ASRock 870iCafe manual content summary:
- ASRock 870iCafe | RAID Installation Guide - Page 1
/ 7 64-bit / Vista / Vista 64-bit With RAID Funtions 4 1.4 Create Disk Array 5 2. AMD Windows RAID Installation Guide 10 2.1 Components of RAIDXpert Installation Software 10 2.2 Browser Support 10 2.3 Installing RAIDXpert 10 2.4 Logging into RAIDXpert 13 2.5 Regular Connection 13 2.6 Secure - ASRock 870iCafe | RAID Installation Guide - Page 2
make a SATA / SATAII / SATA3 driver diskette, press or to enter BIOS setup to set the option to RAID mode by following the detailed instruction of the "User Manual" in our support CD or "Quick Installation Guide", then you can start to use the onboard RAID Option ROM Utility to configure - ASRock 870iCafe | RAID Installation Guide - Page 3
JBOD. RAID Ready RAID Ready arranges individual physical drives the same as if they were attached to the PC's motherboard controller. The advantage is that the AMD SB850 60GB, and the total storage capacity for this RAID 0 set is 120GB. 2. You may use two new drives, or use an existing drive and - ASRock 870iCafe | RAID Installation Guide - Page 4
functions, please follow below steps. STEP 1: Set up BIOS. A. Enter BIOS SETUP UTILITY → Advanced screen →Storage Configuration. B. Set the "SATA Operation Mode" option to [RAID]. STEP 2: Make a SATA / SATAII / SATA3 driver diskette. A. Insert the ASRock Support CD into your optical drive to boot - ASRock 870iCafe | RAID Installation Guide - Page 5
, please follow below steps. STEP 1: Set up BIOS. A. Enter BIOS SETUP UTILITY → Advanced screen →Storage Configuration. B. Set the "SATA Operation Mode" option to [RAID]. STEP 2: Use "RAID Installation Guide" to set RAID configuration. Before you start to configure RAID function, you need to check - ASRock 870iCafe | RAID Installation Guide - Page 6
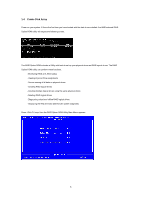
Array Power on your system. If this is the first time you have booted with the disk drives installed, the AMD onboard RAID Option ROM Utility will display the following screen. The RAID Option ROM includes a Utility with tools to set up your physical drives as RAID logical drives. The RAID Option - ASRock 870iCafe | RAID Installation Guide - Page 7
press the spacebar to cycle through logical drive types, including RAID 0, RAID 1, RAID 5, RAID Ready, JBOD and RAID 10. WARNING!! While you are allowed to use any available RAID level for your bootable logical drive, it is recommended to use RAID 1 for most applications. Press the arrow key to move - ASRock 870iCafe | RAID Installation Guide - Page 8
to restart your computer. You have successfully created a new RAID logical drive. Please install the operating system to your computer by following the detailed instruction of the "User Manual" in our support CD or "Quick Installation Guide". Two Logical Drives After selecting the logical drive in - ASRock 870iCafe | RAID Installation Guide - Page 9
. Press again to exit the Utility. 6. Press to restart the computer. You have successfully created a new RAID logical drive. Please install the operating system to your computer by following the detailed instruction of the "User Manual" in our support CD or "Quick Installation Guide". 9 - ASRock 870iCafe | RAID Installation Guide - Page 10
2. AMD Windows RAID Installation Guide AMD Windows RAID Installation Guide is an instruction for you to configure RAID functions by using RAIDXpert RAID management software under Windows environment. The RAIDXpert software offers local and remote management and monitoring of all AMD SB850 SATA - ASRock 870iCafe | RAID Installation Guide - Page 11
7. When the Welcome screen appears, click the Next button. 8. When the License Agreement screen appears, click the "I accept the terms of the license agreement" option to proceed with installation. Then click the Next button to continue. Note: If you leave the "I do not accept the terms of the - ASRock 870iCafe | RAID Installation Guide - Page 12
you are installing. For example, the Windows default folder is: C:\Program Files\AMD\RAIDXpert If you want a different folder, type its location or click the Choose... button and select a new location. Click the Next button when you are finished. 10 - ASRock 870iCafe | RAID Installation Guide - Page 13
Finish button. 2.4 Logging into RAIDXpert Choose RAIDXpert in the Windows Programs menu. Or, log on manually with your browser: 1. Launch the Browser. 2. In the localhost • Enter the Port number 25902 • Add to launch RAIDXpert amd Together, your entry looks like this: http://127.0.0.1:25902/ati or - ASRock 870iCafe | RAID Installation Guide - Page 14
8443 • Add to launch RAIDXpert amd Together, your entry looks like this: https://127.0.0.1:8443/amd or https://localhost:8443/amd Note that the IP address shown Logical Drive A logical drive is a collection of physical drives in a RAID. To create a new logical drive: 1. Click Logical Drive View in - ASRock 870iCafe | RAID Installation Guide - Page 15
drive in the Logical Drive Size field. Or, to use the maximum capacity of the physical drives, check the Use Maximum Capacity box. For RAID Ready and JBOD, the system will check the Use Maximum Capacity Box automatically. 7. Click the physical drives to select them. Available drives have a black - ASRock 870iCafe | RAID Installation Guide - Page 16
Click the Next button. The Assign a Name screen appears. 9. Enter a name for the logical drive in the field provided. 10. Click the Next button. The Final Settings screen appears. 11. RAID 0, 5, and 10. Choose a Stripe Block Size from the dropdown menu. The choices are 64 and 128 KB. The Write Cache - ASRock 870iCafe | RAID Installation Guide - Page 17
system. 2.8 Connecting to RAIDXpert from the Internet The above instructions cover connections between the Host PC and other PCs using RAIDXpert the Host PC. Follow this procedure: 1. Choose RAIDXpert in the Windows Programs menu.Or choose RAIDXpert in the Linux Applications menu.Your browser
-
 1
1 -
 2
2 -
 3
3 -
 4
4 -
 5
5 -
 6
6 -
 7
7 -
8
-
9
-
10
-
11
-
12
-
13
-
14
-
15
-
16
-
17
 |
 |

1
AMD RAID Installation Guide
1.
AMD BIOS RAID Installation Guide …………………………………………………………………….. 2
1.1
Introduction to RAID ……………………………………………………………………………….. 2
1.2
RAID Configurations Precautions ………………………………………………………………… 3
1.3
Installing Windows 7 / 7 64-bit / Vista / Vista 64-bit / XP / XP 64-bit With RAID Funtions …. 3
1.3.1
Installing Windows XP / XP 64-bit With RAID Funtions …………………………………. 3
1.3.2
Installing Windows 7 / 7 64-bit / Vista / Vista 64-bit With RAID Funtions ……….…….. 4
1.4
Create Disk Array ………………………………………………………………………………….. 5
2.
AMD Windows RAID Installation Guide ……………………………………………………………… 10
2.1
Components of RAIDXpert Installation Software ……………………………………………. 10
2.2
Browser Support ………………………………………………………………………………… 10
2.3
Installing RAIDXpert ……………………………………………………………………………. 10
2.4
Logging into RAIDXpert ………………………………………………………………………… 13
2.5
Regular Connection……………………………………………………………………………... 13
2.6
Secure Connection………………………………………………………………………………. 13
2.7
Creating a New Logical Drive
………………………………………………………………….. 14
2.8
Connecting to RAIDXpert from the Internet ………………………………………………….. 17
2.9
Running RAIDXpert without Network Connection …………………………………………… 17