ASRock 890FX Deluxe3 Quick Installation Guide
ASRock 890FX Deluxe3 Manual
 |
View all ASRock 890FX Deluxe3 manuals
Add to My Manuals
Save this manual to your list of manuals |
ASRock 890FX Deluxe3 manual content summary:
- ASRock 890FX Deluxe3 | Quick Installation Guide - Page 1
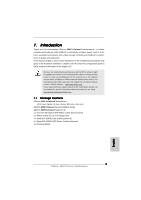
by ASRock. ASRock assumes no responsibility for any errors or omissions that may appear in this guide. With respect to the contents of this guide, ASRock does ASRock Website: http://www.asrock.com Published July 2010 Copyright©2010 ASRock INC. All rights reserved. 1 ASRock 890FX Deluxe3 Motherboard - ASRock 890FX Deluxe3 | Quick Installation Guide - Page 2
(PCIE1; White) 19 SATA3 Connector (SATA3_3_4, White) 45 Front Panel Audio Header 20 SATA3 Connector (SATA3_1_2, White) (HD_AUDIO1, White) 21 SPI Flash Memory (8Mb) 46 USB_PW2 Jumper 22 USB_PW3 Jumper 23 Chassis Speaker Header (SPEAKER 1, White) 2 ASRock 890FX Deluxe3 Motherboard English - ASRock 890FX Deluxe3 | Quick Installation Guide - Page 3
type of speaker you use. TABLE for Audio Output Connection Audio Output Channels Front Speaker Rear Speaker Central / Bass Side Speaker (No. 9) (No. 6) (No. 7) (No. 5) 2 V -- -- -- 4 V V -- -- 6 V V V -- 8 V V V V 3 ASRock 890FX Deluxe3 Motherboard English - ASRock 890FX Deluxe3 | Quick Installation Guide - Page 4
"Independent Headphone". For Windows® 7 / 7 64-bit / VistaTM / VistaTM 64-bit OS: Please click "VIA HD Audio Deck" icon. Click "Advanced Options" on the right side on the bottom. In "Advanced Options" screen, please check the item "Independent Headphone". 4 ASRock 890FX Deluxe3 Motherboard English - ASRock 890FX Deluxe3 | Quick Installation Guide - Page 5
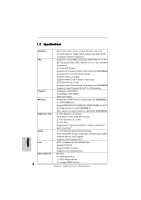
information about the model you are using. www.asrock.com/support/index.asp 1.1 Package Contents ASRock 890FX Deluxe3 Motherboard (ATX Form Factor: 12.0-in x 9.6-in, 30.5 cm x 24.4 cm) ASRock 890FX Deluxe3 Quick Installation Guide ASRock 890FX Deluxe3 Support CD 1 x Ultra ATA 66/100/133 IDE Ribbon - ASRock 890FX Deluxe3 | Quick Installation Guide - Page 6
- Supports CPU up to 140W - Supports AMD's Cool 'n' QuietTM Technology - FSB 2600 MHz (5.2 GT/s) - Supports Untied Overclocking Technology (see CAUTION 2) - Supports Hyper-Transport 3.0 (HT 3.0) Technology Chipset - Northbridge: AMD 890FX - Southbridge: AMD SB850 - AMD Vision Black Memory - ASRock 890FX Deluxe3 | Quick Installation Guide - Page 7
x SATA3 6.0 Gb/s connectors by AMD SB850, support RAID (RAID 0, RAID 1, RAID BIOS - AMI Legal BIOS - Supports "Plug and Play" - ACPI 1.1 Compliance Wake Up Events - Supports jumperfree - SMBIOS 2.3.1 Support - CPU, VCCM, NB, SB Voltage Multi-adjustment English 7 ASRock 890FX Deluxe3 Motherboard - ASRock 890FX Deluxe3 | Quick Installation Guide - Page 8
overclocking tools. Overclocking may affect your system stability, or even cause damage to the components and devices of your system. It should be done at your own risk and expense. We are not responsible for possible damage caused by overclocking. English 8 ASRock 890FX Deluxe3 Motherboard - ASRock 890FX Deluxe3 | Quick Installation Guide - Page 9
the upgrade CPU performance with a better price. Please be noted that UCC feature is supported with AM3 CPU only, and in addition, not every AM3 CPU can support this function because some CPU's hidden core may be malfunctioned. 2. This motherboard supports Untied Overclocking Technology. Please - ASRock 890FX Deluxe3 | Quick Installation Guide - Page 10
BIOS update tool allows you to update system BIOS without entering operating systems first like MS-DOS or Windows®. With this utility, you can press key during the POST or press key to BIOS setup menu to access ASRock for more details. 10 ASRock 890FX Deluxe3 Motherboard English - ASRock 890FX Deluxe3 | Quick Installation Guide - Page 11
of the following precautions before you install motherboard components or change any motherboard settings. Before you install or remove any secure the motherboard to the chassis, please do not over-tighten the screws! Doing so may damage the motherboard. 11 ASRock 890FX Deluxe3 Motherboard English - ASRock 890FX Deluxe3 | Quick Installation Guide - Page 12
heatsink are securely fastened and in good contact with each other. Then connect the CPU fan to the CPU FAN connector (CPU_FAN1, see Page 2, No. 7). For proper installation, please kindly refer to the instruction manuals of the CPU fan and the heatsink. English 12 ASRock 890FX Deluxe3 Motherboard - ASRock 890FX Deluxe3 | Quick Installation Guide - Page 13
is not allowed to install a DDR or DDR2 memory module into DDR3 slot; otherwise, this motherboard and DIMM may be damaged. 5. If you adopt DDR3 1800/1600 memory modules on this motherboard, it is recommended to install them on DDR3_A2 and DDR3_B2 slots. English 13 ASRock 890FX Deluxe3 Motherboard - ASRock 890FX Deluxe3 | Quick Installation Guide - Page 14
permanent damage to the motherboard and the DIMM if you force the DIMM into the slot at incorrect orientation. Step 3. Firmly insert the DIMM into the slot until the retaining clips at both ends fully snap back in place and the DIMM is properly seated. 14 ASRock 890FX Deluxe3 Motherboard English - ASRock 890FX Deluxe3 | Quick Installation Guide - Page 15
width graphics cards, or used to install PCI Express graphics cards to support CrossFireXTM function. PCIE5 (PCIE x16 slot; White) is used for settings for the card before you start the installation. Step 2. Remove the system unit cover (if your motherboard ASRock 890FX Deluxe3 Motherboard English - ASRock 890FX Deluxe3 | Quick Installation Guide - Page 16
the future, please refer to ATITM graphics card manuals for detailed installation guide. Step 1. Insert one Radeon graphics card into PCIE2 slot and the other Radeon graphics card to PCIE4 slot. Make sure that the cards are properly seated on the slots. 16 ASRock 890FX Deluxe3 Motherboard English - ASRock 890FX Deluxe3 | Quick Installation Guide - Page 17
cards. (CrossFire Bridge is provided with the graphics card you purchase, not bundled with this motherboard. Please refer to your graphics card vendor for details.) CrossFire Bridge or Step 3. Connect D-Sub monitor cable to the DVI to D-Sub adapter.) English 17 ASRock 890FX Deluxe3 Motherboard - ASRock 890FX Deluxe3 | Quick Installation Guide - Page 18
Bridge to connect Radeon graphics cards on PCIE4 and PCIE5 slots. (CrossFireTM Bridge is provided with the graphics card you purchase, not bundled with this motherboard. Please refer to your graphics card vendor for details.) 18 ASRock 890FX Deluxe3 Motherboard - ASRock 890FX Deluxe3 | Quick Installation Guide - Page 19
D-Sub adapter to convert the DVI connector to D-Sub interface, and then connect the D-Sub monitor cable to the DVI to D-Sub adapter.) English 19 ASRock 890FX Deluxe3 Motherboard - ASRock 890FX Deluxe3 | Quick Installation Guide - Page 20
AMD website for ATITM driver updates. Step 3. Step 4. Step 5. Install the required drivers to your system. For Windows® XP OS: A. ATITM recommends Windows® XP Service Pack 2 or higher to be installed (If you have Windows® XP Service graphics cards). English 20 ASRock 890FX Deluxe3 Motherboard - ASRock 890FX Deluxe3 | Quick Installation Guide - Page 21
is used only for identification or explanation and to the owners' benefit, without intent to infringe. * For further information of ATITM CrossFireXTM technology, please check AMD website for updates and details. 21 ASRock 890FX Deluxe3 Motherboard English - ASRock 890FX Deluxe3 | Quick Installation Guide - Page 22
upgrade. With the external add-on PCI Express VGA cards, you can easily enjoy the benefits of Surround Display feature. For the detailed instruction, please refer to the document at the following path in the Support CD: ..\ Surround Display Information 22 ASRock 890FX Deluxe3 Motherboard English - ASRock 890FX Deluxe3 | Quick Installation Guide - Page 23
(Suspend to RAM) state. To support ErP/EuP requirement, please set this jumper update the BIOS. If you need to clear the CMOS when you just finish updating the BIOS, you must boot up the system first, and then shut it down before you do the clear-CMOS action. 23 ASRock 890FX Deluxe3 Motherboard - ASRock 890FX Deluxe3 | Quick Installation Guide - Page 24
Serial ATA3 (SATA3) connectors support SATA data cables for internal eSATA port on the rear I/O, the internal SATA3_8 will not function. Either end of the SATA data cable can be connected to the SATA3 hard disk or the SATA3 connector on this motherboard. English 24 ASRock 890FX Deluxe3 Motherboard - ASRock 890FX Deluxe3 | Quick Installation Guide - Page 25
the instruction in our manual and chassis manual to install your system. 2. If you use AC'97 audio panel, please install it to the front panel audio header as below: A. Connect Mic_IN (MIC) to MIC2_L. B. Connect Audio_R (RIN) to OUT2_R and Audio_L (LIN) to OUT2_L. 25 ASRock 890FX Deluxe3 Motherboard - ASRock 890FX Deluxe3 | Quick Installation Guide - Page 26
pin CHA_FAN3) (see p.2 No. 30) (3-pin PWR_FAN1) (see p.2 No. 42) CPU Fan Connector (4-pin CPU_FAN1) (see p.2 No. 7) 1 2 3 4 Please connect BIOS or OC Tuner utility. Please connect the CPU fan cable to this connector and match the black wire to the ground pin. 26 ASRock 890FX Deluxe3 Motherboard - ASRock 890FX Deluxe3 | Quick Installation Guide - Page 27
4-Pin ATX 12V Power Supply Installation 5 8 Besides one default IEEE 1394 port on the I/O panel, there is one IEEE 1394 header (FRONT_1394) on this motherboard. This IEEE 1394 header can support one IEEE 1394 port. This COM1 header supports a serial port module. English 27 ASRock 890FX Deluxe3 - ASRock 890FX Deluxe3 | Quick Installation Guide - Page 28
the CMOS values You are not allowed to use Clear CMOS switch function if you set up the system password. If you want to clear the CMOS values, please clean your system password in advance or refer to page 23 "Clear CMOS jumper" description instead. English 28 ASRock 890FX Deluxe3 Motherboard - ASRock 890FX Deluxe3 | Quick Installation Guide - Page 29
Uncompressed pointer for future use in PMM. Copying Main BIOS into memory. Leaves all RAM below 1MB Read-Write including E000 and F000 shadow areas but closing SMRAM. Restore CPUID value back into register. Give control to BIOS POST (ExecutePOSTKernel). English 29 ASRock 890FX Deluxe3 Motherboard - ASRock 890FX Deluxe3 | Quick Installation Guide - Page 30
adapter installed in the system that have optional ROMs. Initializes all the output devices. Allocate memory for ADM module and uncompress it. Give control to ADM module for initialization. Initialize language and font modules for ADM. Activate ADM module. ASRock 890FX Deluxe3 Motherboard English - ASRock 890FX Deluxe3 | Quick Installation Guide - Page 31
CPU, etc.) successfully installed in the system and update the BDA, EBDA, etc. 50 Programming the memory hole or any kind of implementation that needs an adjustment in system RAM size if needed. 52 Updates CMOS memory size from memory found in memory test. Allocates memory for Extended BIOS - ASRock 890FX Deluxe3 | Quick Installation Guide - Page 32
HDDs without NCQ and Hot Plug functions (IDE mode) STEP 1: Set up BIOS. A. Enter BIOS SETUP UTILITY Advanced screen Storage Configuration. B. Set the "SATA Operation Mode" option to [IDE]. STEP 2: Install Windows® XP / XP 64-bit OS on your system. English 32 ASRock 890FX Deluxe3 Motherboard - ASRock 890FX Deluxe3 | Quick Installation Guide - Page 33
STEP 1: Set Up BIOS. A. Enter BIOS SETUP UTILITY Advanced screen Storage Configuration. B. Set the "SATA Operation Mode" option to [AHCI]. STEP 2: Install Windows® 7 / 7 64-bit / VistaTM / VistaTM 64-bit OS on your system. 2.14 Untied Overclocking Technology This motherboard supports Untied - ASRock 890FX Deluxe3 | Quick Installation Guide - Page 34
about BIOS Setup, please refer to the User Manual (PDF file) contained in the Support CD. 4. Software Support CD information This motherboard supports various Microsoft® Windows® operating " from the "BIN" folder in the Support CD to display the menus. 34 ASRock 890FX Deluxe3 Motherboard English - ASRock 890FX Deluxe3 | Quick Installation Guide - Page 35
ötigen, besuchen Sie bitte unsere Webseite: www.asrock.com/support/index.asp 1.1 Kartoninhalt ASRock 890FX Deluxe3 Motherboard (ATX-Formfaktor: 30.5 cm x 24.4 cm; 12.0 Zoll x 9.6 Zoll) ASRock 890FX Deluxe3 Schnellinstallationsanleitung ASRock 890FX Deluxe3 Support-CD Ein 80-adriges Ultra-ATA 66/100 - ASRock 890FX Deluxe3 | Quick Installation Guide - Page 36
-ray-Audio-Unterstützung - Unterstützt THX TruStudio ProTM - PCIE x1 Gigabit LAN 10/100/1000 Mb/s - Realtek RTL8111E - Unterstützt Wake-On-LAN 36 ASRock 890FX Deluxe3 Motherboard Deutsch - ASRock 890FX Deluxe3 | Quick Installation Guide - Page 37
- 6 x SATA 3-Anschluss mit 6,0 Gb/s durch AMD SB850, unterstützt RAID- (RAID 0, RAID 1, Betriebs-LED-Header - CPU/Gehäuse/Stromlüfter-Anschluss - 24-pin ATX-Netz-Header - 8-pin anschluss für 12V-ATX-Netzteil - Interne Rücksetzschalter (Reset) mit LED Deutsch 37 ASRock 890FX Deluxe3 Motherboard - ASRock 890FX Deluxe3 | Quick Installation Guide - Page 38
- AMI legal BIOS mit Unterstützung für "Plug and Play" - ACPI 1.1-Weckfunktionen - JumperFree-Modus - SMBIOS 2.3.1 - CPU, VCCM, NB, SB Stromspannung Multianpassung Support-CD - Treiber, Dienstprogramme, Antivirussoftware (Probeversion), AMD OverDriveTM-Dienstprogramm, ASRock Software Suite - ASRock 890FX Deluxe3 | Quick Installation Guide - Page 39
die aufgrund von Overclocking verursacht wurden. VORSICHT! 1. Die ASRock UCC-Funktion (Unlock CPU Core; zu Deutsch: CPU-Kern freigeben) vereinfacht die AMD-CPU-Aktivierung. Zur Freigabe des zusätzlichen CPU-Kerns müssen Sie lediglich die BIOS-Option „Unlock CPU Core" (zu Deutsch: CPU-Kern freigeben - ASRock 890FX Deluxe3 | Quick Installation Guide - Page 40
bertaktungsprofil auf ihren eigenen Systemen laden, um dieselben Übertaktungseinstellungen wie Sie zu erhalten! Beachten Sie bitte, dass das Übertaktungsprofil nur bei einem identischen Motherboard gemeinsam genutzt und funktionsfähig gemacht werden kann. 40 ASRock 890FX Deluxe3 Motherboard Deutsch - ASRock 890FX Deluxe3 | Quick Installation Guide - Page 41
Motherboard stufenlose Steuerung bietet, wird Overclocking nicht empfohlen. Frequenzen, die von den empfohlenen CPU-Busfrequenzen abweichen, können Instabilität des Systems verursachen oder die CPU beschädigen. 12. Wird eine Überhitzung der CPU abzufragen. 41 ASRock 890FX Deluxe3 Motherboard Deutsch - ASRock 890FX Deluxe3 | Quick Installation Guide - Page 42
Unterlage, oder zurück in die Tüte, mit der die Komponente geliefert wurde. 5. Wenn Sie das Motherboard mit den Schrauben an dem Computergehäuse befestigen, überziehen Sie bitte die Schrauben nicht! Das Motherboard kann sonst beschädigt werden. Deutsch 42 ASRock 890FX Deluxe3 Motherboard - ASRock 890FX Deluxe3 | Quick Installation Guide - Page 43
sind und einen guten Kontakt zueinander haben. Verbinden Sie dann den CPULüfter mit dem CPU-LÜFTER-Anschluss (CPU_FAN1, siehe Seite 2, Nr. 7). Beziehen Sie sich für eine richtige Installation auf die Handbücher des CPULüfters und des Kühlkörpers. Deutsch 43 ASRock 890FX Deluxe3 Motherboard - ASRock 890FX Deluxe3 | Quick Installation Guide - Page 44
einen DDR3 Steckplatz zu installieren; andernfalls könnten Motherboard und DIMMs beschädigt werden. 5. Wenn Sie DDR3 1800/1600-Speichermodule für dieses Motherboard übernehmen, wird empfohlen, sie in den DDR3_A2- und DDR3_B2Steckplätzen zu installieren. 44 ASRock 890FX Deluxe3 Motherboard Deutsch - ASRock 890FX Deluxe3 | Quick Installation Guide - Page 45
ätze zu zwingen, führt dies zu dauerhaften Schäden am Mainboard und am DIMM-Modul. Schritt 3: Drücken Sie die DIMM-Module fest in die Steckplätze, so dass die Halteklammern an beiden Enden des Moduls einschnappen und das DIMM-Modul fest an Ort und Stelle sitzt. 45 ASRock 890FX Deluxe3 Motherboard - ASRock 890FX Deluxe3 | Quick Installation Guide - Page 46
PCI- und PCI Express-Slots): Es stehen 2 PCI- und 5 PCI Express-Slot auf dem 890FX Deluxe3 Motherboard zur Verfügung. PCI-Slots: PCI-Slots werden zur Installation von Erweiterungskarten mit dem 32bit PCI 4: Befestigen Sie die Karte mit der Schraube aus Schritt 2. 46 ASRock 890FX Deluxe3 Motherboard - ASRock 890FX Deluxe3 | Quick Installation Guide - Page 47
Service Pack 2 / VistaTM / 7 unterstützt. Die 3-Way CrossFireXTM-und Quad CrossFireXTM-Funktion wird nur vom Betriebssystem Windows® VistaTM / 7 unterstützt. Schauen Sie auf der AMDWebsite nach, ob es ATITM CrossFireXTM-Treiber-Updates to RAM) aufwecken. 47 ASRock 890FX Deluxe3 Motherboard Deutsch - ASRock 890FX Deluxe3 | Quick Installation Guide - Page 48
nicht, den Jumper wieder zu entfernen, nachdem das CMOS gelöscht wurde. Wenn Sie den CMOSInhalt gleich nach dem Aktualisieren des BIOS löschen müssen, müssen Sie zuerst das System starten und dann wieder ausschalten, bevor Sie den CMOS-Inhalt löschen. Deutsch 48 ASRock 890FX Deluxe3 Motherboard - ASRock 890FX Deluxe3 | Quick Installation Guide - Page 49
ATA- (SATA-) SJedes Ende des SATA Datenkabel Datenkabels kann an die (Option) SATA3 Festplatte oder das SATA3 Verbindungsstück auf dieser Hauptplatine angeschlossen werden. 49 ASRock 890FX Deluxe3 Motherboard - ASRock 890FX Deluxe3 | Quick Installation Guide - Page 50
vier üblichen USB 2.0-Ports an den I/O-Anschlüssen befinden sich zwei USB 2.0Anschlussleisten am Motherboard. Pro USB 2.0Anschlussleiste werden zwei USB 2.0-Ports unterstützt. Infrarot-Modul-Header (5-pin IR1 eine bequeme Kontrolle über Audio-Geräte. Deutsch 50 ASRock 890FX Deluxe3 Motherboard - ASRock 890FX Deluxe3 | Quick Installation Guide - Page 51
blinkt im S1Zustand. Im S3-/S4- oder S5Zustand (ausgeschaltet) leuchtet die LED nicht. Schließen Sie den Gehäuselautsprecher an diesen Header an. Deutsch 51 ASRock 890FX Deluxe3 Motherboard - ASRock 890FX Deluxe3 | Quick Installation Guide - Page 52
dreipoligen CPU-Lüfter an den CPU-Lüferanschluss dieses Motherboards anschließ ATX-Netzteil verwendet werden. Um ein 20-pol. ATX-Netzteil zu verwenden, stecken Sie den Stecker mit Pin 1 und Pin 13 ein. Installation eines 20-pol. ATX-Netzteils 1 13 Deutsch 52 ASRock 890FX Deluxe3 Motherboard - ASRock 890FX Deluxe3 | Quick Installation Guide - Page 53
Sie bitte Ihre Energieversorgung zusammen mit dem Pin 1 und Pin 5 ein. 1 4 Installation der 4-Pin ATX 12V Energieversorgung 5 8 IEEE-1394 Header (9-pin FRONT_1394) (siehe S.2 - No. 14) COM-Anschluss-Header Projektoren, LCD-Geräten an das System. Deutsch 53 ASRock 890FX Deluxe3 Motherboard - ASRock 890FX Deluxe3 | Quick Installation Guide - Page 54
2.8 Schnellschalter Dieses Motherboard besitzt drei Schnellschalter: Netzschalter, Rücksetzschalter (Reset) und CMOS löschen-Schalter, mit denen Benutzer das System . Siehe die Abbildungen auf den Seiten 29, 30 und 31 zum Ablesen der Debug-LED-Codes. Deutsch 54 ASRock 890FX Deluxe3 Motherboard - ASRock 890FX Deluxe3 | Quick Installation Guide - Page 55
. A. Rufen Sie im BIOS-DIENSTPROGRAMM den Bildschirm „Erweitert" und „Storage-Konfiguration" auf. B. Setzen Sie die Option "SATA Operation Mode" (SATA-Betriebsmodus) auf [IDE]. SCHRITT 2: Installieren Sie Windows® XP / XP 64-Bit in Ihrem System. Deutsch 55 ASRock 890FX Deluxe3 Motherboard - ASRock 890FX Deluxe3 | Quick Installation Guide - Page 56
DIENSTPROGRAMM den Bildschirm „Erweitert" und „Storage-Konfiguration" auf. B. Setzen Sie die Option "SATA Operation Mode" (SATA-Betriebsmodus) auf [AHCI]. SCHRITT 2: Installieren Sie Windows® 7 / 7 64-Bit / VistaTM / VistaTM 64-Bit in Ihrem System. Deutsch 56 ASRock 890FX Deluxe3 Motherboard - ASRock 890FX Deluxe3 | Quick Installation Guide - Page 57
der Support-CD, um die Menüs aufzurufen. Das Setup-Programm soll es Ihnen so leicht wie möglich machen. Es ist menügesteuert, d.h. Sie können in den verschiedenen Untermenüs Ihre Auswahl treffen und die Programme werden dann automatisch installiert. 57 ASRock 890FX Deluxe3 Motherboard Deutsch - ASRock 890FX Deluxe3 | Quick Installation Guide - Page 58
au modèle que vous utilisez. www.asrock.com/support/index.asp 1.1 Contenu du paquet Carte mère ASRock 890FX Deluxe3 (Facteur de forme ATX: 12.0 pouces x 9.6 pouces, 30.5 cm x 24.4 cm) Guide d'installation rapide ASRock 890FX Deluxe3 CD de soutien ASRock 890FX Deluxe3 Un câble ruban IDE Ultra ATA 66 - ASRock 890FX Deluxe3 | Quick Installation Guide - Page 59
Supporte UCC (Unlock CPU Core) (voir ATTENTION 1) - Conception avancée V8 + 2 Power Phase - Supporte les processeurs jusqu'à 140W - Supporte la technologie Cool 'n' QuietTM d'AMD - FSB 2600 MHz (5.2 GT/s) - Prend en charge la technologie Untied Overclocking çais 59 ASRock 890FX Deluxe3 Motherboard - ASRock 890FX Deluxe3 | Quick Installation Guide - Page 60
RTL8111E - Support du Wake connecteurs 6,0 Gb/s SATA3 par AMD SB850, prise en charge des CPU/Châssis/Ventilateur - br. 24 connecteur d'alimentation ATX - br. 8 connecteur d'alimentation 12V ATX - Connecteurs audio internes - Connecteur audio panneau avant 60 ASRock 890FX Deluxe3 Motherboard - ASRock 890FX Deluxe3 | Quick Installation Guide - Page 61
Prêt pour ErP/EuP requise) (voir ATTENTION 13) * Pour de plus amples informations sur les produits, s'il vous plaît visitez notre site web: http://www.asrock.com Français 61 ASRock 890FX Deluxe3 Motherboard - ASRock 890FX Deluxe3 | Quick Installation Guide - Page 62
entrée microphone, cette carte mère supporte les deux modes stéréo et mono. Pour la sortie audio, cette carte mère supporte les modes 2-canaux, 4-canaux, 6-canaux et 8-canaux. Veuillez vous référer au tableau en page 3 pour effectuer la bonne connexion. 62 ASRock 890FX Deluxe3 Motherboard Français - ASRock 890FX Deluxe3 | Quick Installation Guide - Page 63
liorer le rendement lorsque les noyaux du CPU sont en veille. En d'autre termes, Windows®. Com este utilitário, poderá premir a tecla durante o teste de arranque POST ou premir a tecla para exibir o menu de configuração do BIOS para aceder ao ASRock ASRock 890FX Deluxe3 Motherboard Français - ASRock 890FX Deluxe3 | Quick Installation Guide - Page 64
UC recommandées risquent de déstabiliser le système ou d'endommager l'UC. 12. Lorsqu'une surchauffe du CPU est détectée, le système s'arrête automatiquement. Avant de redémarrer le système, veuillez vé votre fournisseur de courant pour plus de détails. 64 ASRock 890FX Deluxe3 Motherboard Français - ASRock 890FX Deluxe3 | Quick Installation Guide - Page 65
re à facteur de forme ATX (12,0 po x support antistatique ou dans son sachet d'origine. 5. Lorsque vous placez les vis dans les orifices pour vis pour fixer la carte mère sur le châssis, ne serrez pas trop les vis ! Vous risquez sinon d'endommager la carte mère. 65 ASRock 890FX Deluxe3 Motherboard - ASRock 890FX Deluxe3 | Quick Installation Guide - Page 66
avec l'autre. Ensuite, connectez le ventilateur du CPU à la prise du VENTILATEUR DU CPU (CPU_FAN1, reportez-vous en page 2, No. 7). Pour une bonne installation, veuillez vous référer aux manuels d'instruction sur le ventilateur du CPU et le dissipateur. Français 66 ASRock 890FX Deluxe3 Motherboard - ASRock 890FX Deluxe3 | Quick Installation Guide - Page 67
modules m émoire [DIMM] La carte mère 890FX Deluxe3 dispose de quatre emplacements DIMM DDR3 (Double Data Rate 3) de 240-broches, et supporte la Technologie de Mémoire à Canal Double. Pour effectuer la carte mère et les DIMM pourraient être endommagés. Français 67 ASRock 890FX Deluxe3 Motherboard - ASRock 890FX Deluxe3 | Quick Installation Guide - Page 68
jusqu'à ce que les clips de maintien situés aux deux extrémités se ferment complètement et que le module DIMM soit inséré correctement. 68 ASRock 890FX Deluxe3 Motherboard - ASRock 890FX Deluxe3 | Quick Installation Guide - Page 69
et Slots PCI Express) Il y a 2 ports PCI et 5 ports PCI Express sur la carte mère 890FX Deluxe3. Slots PCI: Les slots PCI sont utilisés pour installer des cartes d'extension dotées d'une interface PCI 32 Fixez la carte sur le châssis à l'aide d'une vis. Français 69 ASRock 890FX Deluxe3 Motherboard - ASRock 890FX Deluxe3 | Quick Installation Guide - Page 70
service 2 / VistaTM / 7. CrossFireXTM 3voies et Quad CrossFireXTM est pris en charge par Windows® VistaTM / 7 uniquement. Veuillez consulter le site d'AMD pour les mises à jour de driver ATITM CrossFireXTM. Veuillez suivre les instructions 70 (Suspension a la RAM). ASRock 890FX Deluxe3 Motherboard - ASRock 890FX Deluxe3 | Quick Installation Guide - Page 71
suite après avoir mis le BIOS à jour. Si vous avez besoin d'effacer la CMOS lorsque vous avez fini de mettre le BIOS à jour, vous devez d'abord initialiser le système, puis le mettre hors tension avant de procéder à l'opération d'effacement de la CMOS. Français 71 ASRock 890FX Deluxe3 Motherboard - ASRock 890FX Deluxe3 | Quick Installation Guide - Page 72
reporter aux instructions du eSATA sur les E/S à l'arrière, le SATA3_8 interne ne fonctionnera pas. Câble de données Série ATA (SATA) (en option) Toute cote du cable de data SATA peut etre connecte au disque dur SATA3 ou au connecteur SATA3 sur la carte mere. 72 ASRock 890FX Deluxe3 Motherboard - ASRock 890FX Deluxe3 | Quick Installation Guide - Page 73
p.2 No. 43) Connecteur audio panneau avant (HD_AUDIO1 br. 9) (voir p.2 fig. 45) Cet en-tête supporte un module infrarouge optionnel de transfert et de réception sans fil. Ils vous permettent de gérer des CD1 entré commodes de périphériques audio. Français 73 ASRock 890FX Deluxe3 Motherboard - ASRock 890FX Deluxe3 | Quick Installation Guide - Page 74
panneau sur le châssis doit prendre en charge le HDA pour fonctionner correctement. Veuillez suivre les instructions dans notre manuel et le manuel de châssis afin installer votre système. 2. Si vous correspondre le fil noir à la broche de terre. 74 ASRock 890FX Deluxe3 Motherboard Français - ASRock 890FX Deluxe3 | Quick Installation Guide - Page 75
si vous adoptez une approche traditionnelle à 4 broches ATX 12V alimentation. Pour utiliser l'alimentation des 4 broches ATX, branchez votre alimentation 1 4 avec la broche 1 et la broche 5. 4-Installation d'alimentation à 4 broches ATX 12V 5 8 Français 75 ASRock 890FX Deluxe3 Motherboard - ASRock 890FX Deluxe3 | Quick Installation Guide - Page 76
I/O, il y a un header de IEEE1394 (FRONT_1394) sur cette carte mere. Le header de IEEE 1394 peut supporter un port de IEEE 1394. Cette en-tête de port COM est utilisée pour prendre en charge un module HDMI_SPDIF de la carte VGA HDMI sur ce connecteur. Français 76 ASRock 890FX Deluxe3 Motherboard - ASRock 890FX Deluxe3 | Quick Installation Guide - Page 77
)" de la page 71. 2.9 LED de débogage La LED de débogage intégrée sert à fournir des informations de code, ce qui rend le dépannage encore plus facile. Veuillez consulter les diagrammes des pages 29, 30 et 31 pour la lecture des codes LED de débogage. Français 77 ASRock 890FX Deluxe3 Motherboard - ASRock 890FX Deluxe3 | Quick Installation Guide - Page 78
le BIOS. A. Entrez dans UTILITAIRE DE CONFIGURATION BIOS écran Avancé Configuration Storage. B. Réglez l'option "SATA Operation Mode"« Mode de fonctionnement SATA » sur [IDE]. ETAPE 2: Installer le système d'exploitation Windows® XP / XP 64-bit sur votre système. 78 ASRock 890FX Deluxe3 Motherboard - ASRock 890FX Deluxe3 | Quick Installation Guide - Page 79
DE CONFIGURATION BIOS écran Avancé Configuration Storage. B. Réglez l'option "SATA Operation Mode"« Mode de fonctionnement SATA » sur [AHCI]. ETAPE 2: Installer le système d'exploitation Windows® 7 / 7 64-bit / VistaTM / VistaTM 64-bit sur votre système. 79 ASRock 890FX Deluxe3 Motherboard Français - ASRock 890FX Deluxe3 | Quick Installation Guide - Page 80
le BIOS, veuillez consulter le Guide de l'utilisateur (fichier PDF) dans le CD technique. 4. Informations sur le CD de support Cette carte mère supporte divers systèmes d'exploitation Microsoft® Windows®: 7 double-cliquez dessus pour afficher les menus. 80 ASRock 890FX Deluxe3 Motherboard Français - ASRock 890FX Deluxe3 | Quick Installation Guide - Page 81
sul modello che si sta usando. www.asrock.com/support/index.asp 1.1 Contenuto della confezione Scheda madre ASRock 890FX Deluxe3 (ATX Form Factor: 12.0-in x 9.6-in, 30.5 cm x 24.4 cm) Guida di installazione rapida ASRock 890FX Deluxe3 CD di supporto ASRock 890FX Deluxe3 Un cavo IDE 80-pin Ultra ATA - ASRock 890FX Deluxe3 | Quick Installation Guide - Page 82
-ray Premium - Supporto THX TruStudio ProTM - PCIE x1 Gigabit LAN 10/100/1000 Mb/s - Realtek RTL8111E - Supporta Wake-On-LAN - Supporta il rilevamento cavo LAN ASRock 890FX Deluxe3 Motherboard Italiano - ASRock 890FX Deluxe3 | Quick Installation Guide - Page 83
vedi ATTENZIONE 6) SATA3 - 6 x connettori SATA3 6,0 Gb/s tramite AMD SB850, supporto di RAID (RAID 0, RAID 1, RAID 0+1 e Connettore CPU/Chassis/Alimentazione ventola - 24-pin collettore alimentazione ATX - 8-pin connettore ATX 12V di reset con LED Italiano 83 ASRock 890FX Deluxe3 Motherboard - ASRock 890FX Deluxe3 | Quick Installation Guide - Page 84
- Predisposto ErP/EuP (è necessaria l'alimentazione predisposta per il sistema ErP/EuP) (vedi ATTENZIONE 13) * Per ulteriori informazioni, prego visitare il nostro sito internet: http://www.asrock.com Italiano 84 ASRock 890FX Deluxe3 Motherboard - ASRock 890FX Deluxe3 | Quick Installation Guide - Page 85
overclocking. ATTENZIONE! 1. La funzione ASRock UCC (Unlock CPU Core, Sblocca CPU Core) semplifica l'attivazione della CPU AMD. È una semplice voce d'attivazione delle opzioni BIOS chiamata "Unlock CPU Core" (Sblocca CPU il collegamento appropriato. 85 ASRock 890FX Deluxe3 Motherboard Italiano - ASRock 890FX Deluxe3 | Quick Installation Guide - Page 86
scheda madre. 11. Anche se questa motherboard offre il controllo stepless, non si consiglia di effettuare l'overclocking. L'uso di frequenze diverse da quelle raccomandate per il bus CPU possono provocare l'instabilità del sistema o danneggiare la CPU. 86 ASRock 890FX Deluxe3 Motherboard Italiano - ASRock 890FX Deluxe3 | Quick Installation Guide - Page 87
si chiude automaticamente. Prima di riavviare il sistema, assicurarsi che la ventolina CPU della scheda madre funzioni correttamente; scollegare e ricollegare il cavo d'alimentazione. Per consigliamo di verificare ulteriori dettagli con il produttore. 87 ASRock 890FX Deluxe3 Motherboard Italiano - ASRock 890FX Deluxe3 | Quick Installation Guide - Page 88
2. Installazione Questa è una scheda madre con Form Factor ATX (12.0 pollici x 9.6 pollici; 30,5 cm x 24,4 cm). Prima di installare la scheda madre, al telaio non serrare eccessivamente le viti! Altrimenti si rischia di danneggiare la scheda madre. 88 ASRock 890FX Deluxe3 Motherboard Italiano - ASRock 890FX Deluxe3 | Quick Installation Guide - Page 89
tra i due. Quindi collegare la ventolina CPU al connettore PU FAN (CPU_FAN1, fare riferimento a pagina 2, Numero 7). Per eseguire un'installazione appropriata, fare riferimento al manuale d'istruzioni della ventolina CPU e del dispersore di calore. Italiano 89 ASRock 890FX Deluxe3 Motherboard - ASRock 890FX Deluxe3 | Quick Installation Guide - Page 90
memoria, oppure sono installati tre moduli di memoria, è impossibile attivare la tecnologia Dual Channel Memory. 3. Se una coppia di moduli di memoria NON è installata nello stesso "canale doppio", consiglia di installarli sugli slot DDR3_A2 e DDR3_B2. Italiano 90 ASRock 890FX Deluxe3 Motherboard - ASRock 890FX Deluxe3 | Quick Installation Guide - Page 91
DIMM nello slot fino a far scattare completamente in posizione i fermagli di ritegno alle due estremità e fino ad installare correttamente la DIMM nella sua sede. 91 ASRock 890FX Deluxe3 Motherboard - ASRock 890FX Deluxe3 | Quick Installation Guide - Page 92
2.4 Slot di espansione (Slot PCI ed Slot PCI Express) Sulla scheda madre 890FX Deluxe3 c'è 2 slot PCI ed 5 slot PCI Express. Slot PCI: Sono utilizzati per installare schede di inserita nello slot. Step 4. Agganciare la scheda allo chassis con le viti. 92 ASRock 890FX Deluxe3 Motherboard Italiano - ASRock 890FX Deluxe3 | Quick Installation Guide - Page 93
Windows® XP con Service Pack 2 / VistaTM / 7. La funzione 3-Way CrossFireXTM e Quad CrossFireXTM è supportata solo dal sistema operativo Windows® VistaTM / 7. Visitare il sito AMD per gli aggiornamenti dei driver sistema dallo stato S3 (Suspend to RAM). Italiano 93 ASRock 890FX Deluxe3 Motherboard - ASRock 890FX Deluxe3 | Quick Installation Guide - Page 94
. Non cancellare la CMOS subito dopo aver aggiornato il BIOS. Se è necessario cancellare la CMOS una volta completato l'aggiornamento del BIOS, è necessario riavviare prima il sistema, e poi spegnerlo prima di procedere alla cancellazione della CMOS. Italiano 94 ASRock 890FX Deluxe3 Motherboard - ASRock 890FX Deluxe3 | Quick Installation Guide - Page 95
eSATA del pannello I/O posteriore, la porta interna SATA3_8 non funzionerà. Cavi dati Serial ATA (SATA) Una o altra estremità del cavo (Opzionale) di dati SATA può essere collegata al disco rigido SATA3 o al connettore di SATA3 su questa cartolina base. 95 ASRock 890FX Deluxe3 Motherboard - ASRock 890FX Deluxe3 | Quick Installation Guide - Page 96
dei cavi sul telaio deve supportare la funzione HDA (High Definition Audio) per far sì che questa operi in modo corretto. Attenersi alle istruzioni del nostro manuale e del manuale del telaio per installare il sistema. 96 ASRock 890FX Deluxe3 Motherboard Italiano - ASRock 890FX Deluxe3 | Quick Installation Guide - Page 97
). Collegare le casse del telaio a questo collettore. Collegare i cavi della ventola ai corrispondenti connettori facendo combaciare il cavo nero col pin di terra. Italiano 97 ASRock 890FX Deluxe3 Motherboard - ASRock 890FX Deluxe3 | Quick Installation Guide - Page 98
un supporto per ventola CPU a 4 piedini (ventola silenziosa), la ventola CPU a 3 piedini è ATX 12V. Per usare tale fornitura elettrica 4-pin ATX 12V, prego collegare la presa elettrica al Pin 1 e Pin 5. 1 4 Installazione elettrica 4-Pin ATX 12V 5 8 Italiano 98 ASRock 890FX Deluxe3 Motherboard - ASRock 890FX Deluxe3 | Quick Installation Guide - Page 99
VGA, consente al sistema di collegare dispositivi per TV digitale HDMI/proiettori/ LCD . Collegare il connettore HDMI_SPDIF della scheda VGA HDMI a questo header. Italiano 99 ASRock 890FX Deluxe3 Motherboard - ASRock 890FX Deluxe3 | Quick Installation Guide - Page 100
vengono rilevati automaticamente ed elencati nella pagina del driver del CD in dotazione. Per l'installazione dei driver necessari, procedere in base ad un ordine dall'alto verso il basso. In tal modo, i driver installati funzioneranno correttamente. Italiano 100 ASRock 890FX Deluxe3 Motherboard - ASRock 890FX Deluxe3 | Quick Installation Guide - Page 101
e Hot Plug 1° PASSO: Configurare il BIOS. A. Entrare in UTILIT BIOS SETUP Avanzate Configurazione Storage. B. Impostare l'opzione "SATA Operation Mode" (Modalità operativa SATA) su [IDE]. 2° PASSO: Installazione di Windows® XP / XP 64-bit sul sistema. Italiano ASRock 890FX Deluxe3 Motherboard 101 - ASRock 890FX Deluxe3 | Quick Installation Guide - Page 102
il BIOS. A. Entrare in UTILIT BIOS SETUP Avanzate Configurazione Storage. B. Impostare l'opzione "SATA Operation Mode" (Modalità operativa SATA) su [AHCI]. Passo 2: Installazione di Windows® 7 / 7 64-bit / VistaTM / VistaTM 64-bit sul sistema. Italiano 102 ASRock 890FX Deluxe3 Motherboard - ASRock 890FX Deluxe3 | Quick Installation Guide - Page 103
BIOS La Flash Memory sulla scheda madre contiene le Setup Utility. Quando si avvia il computer, premi durante il Power-On-Self-Test (POST) della Setup utility del BIOS; altrimenti, POST continua con i suoi test di routine. Per entrare il BIOS ù. Italiano ASRock 890FX Deluxe3 Motherboard 103 - ASRock 890FX Deluxe3 | Quick Installation Guide - Page 104
de modelo específico de su placa. www.asrock.com/support/index.asp 1.1 Contenido de la caja Placa base ASRock 890FX Deluxe3 (Factor forma ATX: 30,5 cm x 24,4 cm, 12,0" x 9,6") Guía de instalación rápida de ASRock 890FX Deluxe3 CD de soporte de ASRock 890FX Deluxe3 Una cinta de datos IDE de conducci - ASRock 890FX Deluxe3 | Quick Installation Guide - Page 105
con THX TruStudio ProTM - PCIE x1 Gigabit LAN 10/100/1000 Mb/s - Realtek RTL8111E - Soporta Wake-On-LAN - Admite detección de conexión de cable LAN ASRock 890FX Deluxe3 Motherboard 105 Español - ASRock 890FX Deluxe3 | Quick Installation Guide - Page 106
con chip AMD SB850 compatibles ATX - 8-pin conector de ATX 12V power - Conector de Audio Interno - Conector de audio de panel frontal - 2 x Cabezal USB 2.0 (admite 4 puertos USB 2.0 adicionales) - 1 x Dr. Debug (indicador LED de avería de 7 segmentos) Español 106 ASRock 890FX Deluxe3 Motherboard - ASRock 890FX Deluxe3 | Quick Installation Guide - Page 107
de alimentación que cumpla con la directiva ErP/EuP) (vea ATENCIÓN 13) * Para más información sobre los productos, por favor visite nuestro sitio web: http://www.asrock.com ASRock 890FX Deluxe3 Motherboard 107 - ASRock 890FX Deluxe3 | Quick Installation Guide - Page 108
ASRock UCC (Unlock CPU Core, desbloquear núcleo la CPU) simplifica la activación de una CPU AMD. Con sólo activar la opción "Unlock CPU Core" (desbloquear núcleo la CPU) en el BIOS, es posible desbloquear el núcleo de CPU página 3 para una conexión correcta. ASRock 890FX Deluxe3 Motherboard Español - ASRock 890FX Deluxe3 | Quick Installation Guide - Page 109
overclock sus dispositivos de hardware para obtener el mejor funcionamiento del sistema bajo el entorno de Windows®. Por favor visite nuestro sitio web para los procedimientos de operación de Sintonizador de ASRock OC. Sitio web de ASRock: http://www.asrock CPU ASRock 890FX Deluxe3 Motherboard 109 - ASRock 890FX Deluxe3 | Quick Installation Guide - Page 110
va a apagarse automaticamente. Antes de reanudar el sistema, compruebe si el ventilador de la CPU de la placa base funciona apropiadamente y desconecte el cable de alimentación, a continuación, vuelva fuente de alimentación para obtener más detalles. Español 110 ASRock 890FX Deluxe3 Motherboard - ASRock 890FX Deluxe3 | Quick Installation Guide - Page 111
2. Instalación Esta placa base tiene un factor de forma ATX (12,0 pulgadas x 9,6 pulgadas, 30,5 cm. x 24,4 cm). Antes de instalar la placa base, estudie la configuración de madre en el chasis, no los apriete demasiado. Eso podría dañar la placa madre. Español ASRock 890FX Deluxe3 Motherboard 111 - ASRock 890FX Deluxe3 | Quick Installation Guide - Page 112
y hacen buen contacto entre sí. Conecte entonces el ventilador de la CPU al conector CPU FAN (CPU_FAN1, consulte Página 2, N. 7). Para realizar la instalación correctamente, consulte el manual de instrucciones del ventilador de la CPU y el radiador. Español 112 ASRock 890FX Deluxe3 Motherboard - ASRock 890FX Deluxe3 | Quick Installation Guide - Page 113
2.3 Instalación de Memoria La placa 890FX Deluxe3 ofrece cuatro ranuras DIMM DDR3 de 240 pines, y soporta Tecnología de Memoria de Doble Canal. Para la DDR3 1800/1600 en esta placa base, se recomienda instalarlos en las ranuras DDR3_A2 y DDR3_B2. Español ASRock 890FX Deluxe3 Motherboard 113 - ASRock 890FX Deluxe3 | Quick Installation Guide - Page 114
de la ranura hasta que los clips de sujeción de ambos lados queden completamente introducidos en su sitio y la DIMM se haya asentado apropiadamente. 114 ASRock 890FX Deluxe3 Motherboard - ASRock 890FX Deluxe3 | Quick Installation Guide - Page 115
2.4 Ranuras de Expansión (ranuras PCI y ranuras PCI Express) La placa madre 890FX Deluxe3 cuenta con 2 ranuras PCI y 5 ranuras PCI Express. Ranura PCI: Para instalar tarjetas firmemente la tarjeta en la ranura. Paso 4. Asegure la tarjeta con tornillos. Español ASRock 890FX Deluxe3 Motherboard 115 - ASRock 890FX Deluxe3 | Quick Installation Guide - Page 116
Manual Service Pack 2 / VistaTM / 7. La función 3-Way CrossFireXTM y Quad CrossFireXTM es compatible únicamente con el sistema operativo Windows® VistaTM / 7. Consulte el sitio web de AMD Short Open Jumper Setting PS2_USB_PW1 Ponga en RAM). 116 ASRock 890FX Deluxe3 Motherboard Español - ASRock 890FX Deluxe3 | Quick Installation Guide - Page 117
acuérdase de quitar el jumper cap después de limpiar el COMS. Si necesita borrar la CMOS cuando acabe de finalizar la actualización de la BIOS, debe arrancar primero el sistema y, a continuación, apagarlo antes de realizar la acción de borrado de CMOS. Español ASRock 890FX Deluxe3 Motherboard 117 - ASRock 890FX Deluxe3 | Quick Installation Guide - Page 118
Si conecta la unidad HDD al puerto eSATA del panel posterior de E/S, el puerto interno SATA3_8 no funcionará. Cualquier extremo del cable de los datos de SATA puede ser conectado con el disco duro de SATA3 o el conectador de SATA3 en esta placa base. 118 ASRock 890FX Deluxe3 Motherboard Español - ASRock 890FX Deluxe3 | Quick Installation Guide - Page 119
y en el manual de chasis para instalar su sistema. 2. Si utiliza el panel de sonido AC'97, instálelo en la cabecera de sonido del panel frontal de la siguiente manera: A. Conecte Mic_IN (MIC) a MIC2_L. B. Conecte Audio_R (RIN) a OUT2_R y Audio_L (LIN) en OUT2_L. ASRock 890FX Deluxe3 Motherboard 119 - ASRock 890FX Deluxe3 | Quick Installation Guide - Page 120
la patilla de masa. (3-pin PWR_FAN1) (vea p.2, N. 42) Conector del ventilador de la CPU (4-pin CPU_FAN1) (vea p.2, No. 7) 1 2 3 4 Conecte el cable del ventilador de la CPU a este conector y haga coincidir el cable negro con el conector de tierra. 120 ASRock 890FX Deluxe3 Motherboard Español - ASRock 890FX Deluxe3 | Quick Installation Guide - Page 121
trabajar si usted adopta un fuente tradicional de energía de 4-pin ATX 12V. Para usar el fuente de energía de 4-pin ATX 12V, por favor conecte su fuente de 1 4 energía junto con Pin 1 y Pin 5. Instalación de Fuente de Energía de 4-Pin ATX 12V 5 8 Español ASRock 890FX Deluxe3 Motherboard 121 - ASRock 890FX Deluxe3 | Quick Installation Guide - Page 122
al sistema conectarse a dispositivos de TV Digital HDMI / proyectores / Dispositivos LCD. Conecte el conector HDMI_SPDIF de la tarjeta VGA HDMI a esta cabecera. Español 122 ASRock 890FX Deluxe3 Motherboard - ASRock 890FX Deluxe3 | Quick Installation Guide - Page 123
diagramas de las páginas 29, 30 y 31 si desea obtener más información acerca de la lectura de los códigos del indicador LED de depuración. Español ASRock 890FX Deluxe3 Motherboard 123 - ASRock 890FX Deluxe3 | Quick Installation Guide - Page 124
Guide 2.12 Instalación de Windows® BIOS pantalla de Avanzada Configuración Storage. B. Establezca la opción "SATA Operation Mode"(Modo de funcionamiento SATA) en [IDE]. PASO 2: Instale el sistema operativo Windows® XP / XP 64 bits en su sistema. Español 124 ASRock 890FX Deluxe3 Motherboard - ASRock 890FX Deluxe3 | Quick Installation Guide - Page 125
ón de BIOS pantalla de Avanzada Configuración Storage. B. Establezca la opción "SATA Operation Mode"(Modo de funcionamiento SATA) en [AHCI]. PASO 2: Instale el sistema operativo Windows® 7 / 7 64 bits / VistaTM / VistaTM 64 bits en su sistema. Español ASRock 890FX Deluxe3 Motherboard 125 - ASRock 890FX Deluxe3 | Quick Installation Guide - Page 126
configurar la BIOS, por favor refiérase al Manual del Usuario (archivo PDF) contenido en el CD. 4.Información de Software Support CD Esta placa-base soporta diversos tipos de sistema operativo Windows®: 7 archivo ASSETUP.EXE para iniciar la instalación. Español 126 ASRock 890FX Deluxe3 Motherboard - ASRock 890FX Deluxe3 | Quick Installation Guide - Page 127
. . ASRock. (- ASRock ATX: 12,0 x 9,6 / 30,5 x 24,4 ) ASRock ASRock Serial ATA (SATA) ( ) Serial ATA (SATA) ( ) - I/O ASRock 890FX Deluxe3 Motherboard 127 - ASRock 890FX Deluxe3 | Quick Installation Guide - Page 128
12,0 x 9,6 / 30,5 x 24,4 128 ASRock 890FX Deluxe3 Motherboard - ASRock 890FX Deluxe3 | Quick Installation Guide - Page 129
ASRock 890FX Deluxe3 Motherboard 129 - ASRock 890FX Deluxe3 | Quick Installation Guide - Page 130
130 ASRock 890FX Deluxe3 Motherboard - ASRock 890FX Deluxe3 | Quick Installation Guide - Page 131
ASRock 890FX Deluxe3 Motherboard 131 - ASRock 890FX Deluxe3 | Quick Installation Guide - Page 132
132 ASRock 890FX Deluxe3 Motherboard - ASRock 890FX Deluxe3 | Quick Installation Guide - Page 133
ASRock 890FX Deluxe3 Motherboard 133 - ASRock 890FX Deluxe3 | Quick Installation Guide - Page 134
134 ASRock 890FX Deluxe3 Motherboard - ASRock 890FX Deluxe3 | Quick Installation Guide - Page 135
DDR3_A1 DDR3_B1 (1) (2) (3)* DDR3_A2 DDR3_B2 - ASRock 890FX Deluxe3 Motherboard 135 - ASRock 890FX Deluxe3 | Quick Installation Guide - Page 136
DIMM DIMM 136 DIMM ASRock 890FX Deluxe3 Motherboard - ASRock 890FX Deluxe3 | Quick Installation Guide - Page 137
890FX Deluxe3 ASRock 890FX Deluxe3 Motherboard 137 - ASRock 890FX Deluxe3 | Quick Installation Guide - Page 138
Short Open 138 ASRock 890FX Deluxe3 Motherboard - ASRock 890FX Deluxe3 | Quick Installation Guide - Page 139
CMOS CMOS la banda roja debe quedar en el mismo lado que el contacto 1 IDE ASRock 890FX Deluxe3 Motherboard 139 - ASRock 890FX Deluxe3 | Quick Installation Guide - Page 140
SATA3_1_2 SATA3_3_4 SATA3_5_6 S ATA3_8 SATA3_7 (5- 140 IR1) ASRock 890FX Deluxe3 Motherboard - ASRock 890FX Deluxe3 | Quick Installation Guide - Page 141
CD1 (9- PANEL1) ASRock 890FX Deluxe3 Motherboard 141 - ASRock 890FX Deluxe3 | Quick Installation Guide - Page 142
1 2 3 4 ATX 12 24 1 13 ATX. 142 ASRock 890FX Deluxe3 Motherboard - ASRock 890FX Deluxe3 | Quick Installation Guide - Page 143
12 24 12V-ATX 1 4 5 8 1 13 , ATX 12 , . . 1 4 5 8 COM- ASRock 890FX Deluxe3 Motherboard 143 - ASRock 890FX Deluxe3 | Quick Installation Guide - Page 144
RESET clr CMOS 144 ASRock 890FX Deluxe3 Motherboard - ASRock 890FX Deluxe3 | Quick Installation Guide - Page 145
ASRock 890FX Deluxe3 Motherboard 145 - ASRock 890FX Deluxe3 | Quick Installation Guide - Page 146
146 ASRock 890FX Deluxe3 Motherboard - ASRock 890FX Deluxe3 | Quick Installation Guide - Page 147
BIOS Setup F Power-On-Self-Test - POST POST BIOS Setup POST Ctrl> + + - ASRock 890FX Deluxe3 | Quick Installation Guide - Page 148
148 ASRock 890FX Deluxe3 Motherboard - ASRock 890FX Deluxe3 | Quick Installation Guide - Page 149
'' ® ASRock 890FX Deluxe3 Motherboard 149 - ASRock 890FX Deluxe3 | Quick Installation Guide - Page 150
" " " " 150 ASRock 890FX Deluxe3 Motherboard - ASRock 890FX Deluxe3 | Quick Installation Guide - Page 151
® ASRock 890FX Deluxe3 Motherboard 151 - ASRock 890FX Deluxe3 | Quick Installation Guide - Page 152
" " " " ® ® ® 152 ASRock 890FX Deluxe3 Motherboard - ASRock 890FX Deluxe3 | Quick Installation Guide - Page 153
® ASRock 890FX Deluxe3 Motherboard 153 - ASRock 890FX Deluxe3 | Quick Installation Guide - Page 154
154 ASRock 890FX Deluxe3 Motherboard - ASRock 890FX Deluxe3 | Quick Installation Guide - Page 155
ASRock 890FX Deluxe3 Motherboard 155 - ASRock 890FX Deluxe3 | Quick Installation Guide - Page 156
- - - - " "( 156 ASRock 890FX Deluxe3 Motherboard - ASRock 890FX Deluxe3 | Quick Installation Guide - Page 157
ASRock 890FX Deluxe3 Motherboard 157 - ASRock 890FX Deluxe3 | Quick Installation Guide - Page 158
158 ASRock 890FX Deluxe3 Motherboard - ASRock 890FX Deluxe3 | Quick Installation Guide - Page 159
® ® "" "" "" "" "" ASRock 890FX Deluxe3 Motherboard 159 - ASRock 890FX Deluxe3 | Quick Installation Guide - Page 160
160 SATA3_8 SATA3_7 ASRock 890FX Deluxe3 Motherboard SATA3_1_2 SATA3_3_4 SATA3_5_6 - ASRock 890FX Deluxe3 | Quick Installation Guide - Page 161
CD1 ASRock 890FX Deluxe3 Motherboard 161 - ASRock 890FX Deluxe3 | Quick Installation Guide - Page 162
162 ASRock 890FX Deluxe3 Motherboard - ASRock 890FX Deluxe3 | Quick Installation Guide - Page 163
1 2 3 4 12 24 1 13 1 4 5 8 12 24 1 13 1 4 5 8 ASRock 890FX Deluxe3 Motherboard 163 - ASRock 890FX Deluxe3 | Quick Installation Guide - Page 164
164 ASRock 890FX Deluxe3 Motherboard - ASRock 890FX Deluxe3 | Quick Installation Guide - Page 165
RESET clr CMOS " " ASRock 890FX Deluxe3 Motherboard 165 - ASRock 890FX Deluxe3 | Quick Installation Guide - Page 166
® ® \ ® ® ® ® 166 ® ASRock 890FX Deluxe3 Motherboard - ASRock 890FX Deluxe3 | Quick Installation Guide - Page 167
® ® ® ® ASRock 890FX Deluxe3 Motherboard 167 - ASRock 890FX Deluxe3 | Quick Installation Guide - Page 168
" " \\ " " 168 ASRock 890FX Deluxe3 Motherboard - ASRock 890FX Deluxe3 | Quick Installation Guide - Page 169
ASRock 890FX Deluxe3 Motherboard 169 - ASRock 890FX Deluxe3 | Quick Installation Guide - Page 170
'' ® 170 ASRock 890FX Deluxe3 Motherboard - ASRock 890FX Deluxe3 | Quick Installation Guide - Page 171
ASRock 890FX Deluxe3 Motherboard 171 - ASRock 890FX Deluxe3 | Quick Installation Guide - Page 172
® ® ® 172 ASRock 890FX Deluxe3 Motherboard - ASRock 890FX Deluxe3 | Quick Installation Guide - Page 173
" " ® ® ® ASRock 890FX Deluxe3 Motherboard 173 - ASRock 890FX Deluxe3 | Quick Installation Guide - Page 174
® - 174 ASRock 890FX Deluxe3 Motherboard - ASRock 890FX Deluxe3 | Quick Installation Guide - Page 175
ASRock 890FX Deluxe3 Motherboard 175 - ASRock 890FX Deluxe3 | Quick Installation Guide - Page 176
176 ASRock 890FX Deluxe3 Motherboard - ASRock 890FX Deluxe3 | Quick Installation Guide - Page 177
ASRock 890FX Deluxe3 Motherboard 177 - ASRock 890FX Deluxe3 | Quick Installation Guide - Page 178
178 ASRock 890FX Deluxe3 Motherboard - ASRock 890FX Deluxe3 | Quick Installation Guide - Page 179
ASRock 890FX Deluxe3 Motherboard 179 - ASRock 890FX Deluxe3 | Quick Installation Guide - Page 180
® ® 180 ASRock 890FX Deluxe3 Motherboard - ASRock 890FX Deluxe3 | Quick Installation Guide - Page 181
SATA3_8 SATA3_7 ASRock 890FX Deluxe3 Motherboard SATA3_1_2 SATA3_3_4 SATA3_5_6 181 - ASRock 890FX Deluxe3 | Quick Installation Guide - Page 182
CD1 182 ASRock 890FX Deluxe3 Motherboard - ASRock 890FX Deluxe3 | Quick Installation Guide - Page 183
ASRock 890FX Deluxe3 Motherboard 183 - ASRock 890FX Deluxe3 | Quick Installation Guide - Page 184
1 2 3 4 12 24 1 13 1 4 5 8 12 24 1 13 1 4 5 8 184 ASRock 890FX Deluxe3 Motherboard - ASRock 890FX Deluxe3 | Quick Installation Guide - Page 185
RESET clr CMOS ASRock 890FX Deluxe3 Motherboard 185 - ASRock 890FX Deluxe3 | Quick Installation Guide - Page 186
® ® \ ® ® ® ® 186 ® ASRock 890FX Deluxe3 Motherboard - ASRock 890FX Deluxe3 | Quick Installation Guide - Page 187
® ® ® ® ASRock 890FX Deluxe3 Motherboard 187 - ASRock 890FX Deluxe3 | Quick Installation Guide - Page 188
® ® TM TM 188 ASRock 890FX Deluxe3 Motherboard - ASRock 890FX Deluxe3 | Quick Installation Guide - Page 189
ASRock 890FX Deluxe3 Motherboard 189 - ASRock 890FX Deluxe3 | Quick Installation Guide - Page 190
'' ™ ® 190 ASRock 890FX Deluxe3 Motherboard - ASRock 890FX Deluxe3 | Quick Installation Guide - Page 191
ASRock 890FX Deluxe3 Motherboard 191 - ASRock 890FX Deluxe3 | Quick Installation Guide - Page 192
® ® 192 ASRock 890FX Deluxe3 Motherboard - ASRock 890FX Deluxe3 | Quick Installation Guide - Page 193
® ® ® ® ASRock 890FX Deluxe3 Motherboard 193 - ASRock 890FX Deluxe3 | Quick Installation Guide - Page 194
® 194 ASRock 890FX Deluxe3 Motherboard - ASRock 890FX Deluxe3 | Quick Installation Guide - Page 195
ASRock 890FX Deluxe3 Motherboard 195 - ASRock 890FX Deluxe3 | Quick Installation Guide - Page 196
196 ASRock 890FX Deluxe3 Motherboard - ASRock 890FX Deluxe3 | Quick Installation Guide - Page 197
ASRock 890FX Deluxe3 Motherboard 197 - ASRock 890FX Deluxe3 | Quick Installation Guide - Page 198
198 ASRock 890FX Deluxe3 Motherboard - ASRock 890FX Deluxe3 | Quick Installation Guide - Page 199
ASRock 890FX Deluxe3 Motherboard 199 - ASRock 890FX Deluxe3 | Quick Installation Guide - Page 200
® ® 200 ASRock 890FX Deluxe3 Motherboard - ASRock 890FX Deluxe3 | Quick Installation Guide - Page 201
ASRock 890FX Deluxe3 Motherboard 201 - ASRock 890FX Deluxe3 | Quick Installation Guide - Page 202
SATA3_1_2 SATA3_3_4 SATA3_5_6 SATA3_8 SATA3_7 202 ASRock 890FX Deluxe3 Motherboard - ASRock 890FX Deluxe3 | Quick Installation Guide - Page 203
CD1 ASRock 890FX Deluxe3 Motherboard 203 - ASRock 890FX Deluxe3 | Quick Installation Guide - Page 204
1 2 3 4 204 ASRock 890FX Deluxe3 Motherboard - ASRock 890FX Deluxe3 | Quick Installation Guide - Page 205
12 24 1 13 1 4 5 8 12 24 1 13 1 4 5 8 ASRock 890FX Deluxe3 Motherboard 205 - ASRock 890FX Deluxe3 | Quick Installation Guide - Page 206
RESET clr CMOS ® ® 206 ASRock 890FX Deluxe3 Motherboard - ASRock 890FX Deluxe3 | Quick Installation Guide - Page 207
® ® ® ® ® ASRock 890FX Deluxe3 Motherboard 207 - ASRock 890FX Deluxe3 | Quick Installation Guide - Page 208
® ® ® ® 208 ASRock 890FX Deluxe3 Motherboard - ASRock 890FX Deluxe3 | Quick Installation Guide - Page 209
® ® ASRock 890FX Deluxe3 Motherboard 209 - ASRock 890FX Deluxe3 | Quick Installation Guide - Page 210
X O O O X O O O O: X: O O O O 210 ASRock 890FX Deluxe3 Motherboard - ASRock 890FX Deluxe3 | Quick Installation Guide - Page 211
ASRock 890FX Deluxe3 Motherboard 211 - ASRock 890FX Deluxe3 | Quick Installation Guide - Page 212
® 212 ASRock 890FX Deluxe3 Motherboard - ASRock 890FX Deluxe3 | Quick Installation Guide - Page 213
ASRock 890FX Deluxe3 Motherboard 213 - ASRock 890FX Deluxe3 | Quick Installation Guide - Page 214
® ® 214 ASRock 890FX Deluxe3 Motherboard - ASRock 890FX Deluxe3 | Quick Installation Guide - Page 215
® ® ® ® ASRock 890FX Deluxe3 Motherboard 215 - ASRock 890FX Deluxe3 | Quick Installation Guide - Page 216
® 216 ASRock 890FX Deluxe3 Motherboard - ASRock 890FX Deluxe3 | Quick Installation Guide - Page 217
ASRock 890FX Deluxe3 Motherboard 217 - ASRock 890FX Deluxe3 | Quick Installation Guide - Page 218
218 ASRock 890FX Deluxe3 Motherboard - ASRock 890FX Deluxe3 | Quick Installation Guide - Page 219
ASRock 890FX Deluxe3 Motherboard 219 - ASRock 890FX Deluxe3 | Quick Installation Guide - Page 220
220 ASRock 890FX Deluxe3 Motherboard - ASRock 890FX Deluxe3 | Quick Installation Guide - Page 221
ASRock 890FX Deluxe3 Motherboard 221 - ASRock 890FX Deluxe3 | Quick Installation Guide - Page 222
222 ASRock 890FX Deluxe3 Motherboard - ASRock 890FX Deluxe3 | Quick Installation Guide - Page 223
ASRock 890FX Deluxe3 Motherboard 223 - ASRock 890FX Deluxe3 | Quick Installation Guide - Page 224
SATA3_1_2 SATA3_3_4 SATA3_5_6 SATA3_8 SATA3_7 224 ASRock 890FX Deluxe3 Motherboard - ASRock 890FX Deluxe3 | Quick Installation Guide - Page 225
CD1 ASRock 890FX Deluxe3 Motherboard 225 - ASRock 890FX Deluxe3 | Quick Installation Guide - Page 226
1 2 3 4 226 ASRock 890FX Deluxe3 Motherboard - ASRock 890FX Deluxe3 | Quick Installation Guide - Page 227
12 24 1 13 1 4 5 8 12 24 1 13 1 4 5 8 ASRock 890FX Deluxe3 Motherboard 227 - ASRock 890FX Deluxe3 | Quick Installation Guide - Page 228
RESET clr CMOS ® ® 228 ASRock 890FX Deluxe3 Motherboard - ASRock 890FX Deluxe3 | Quick Installation Guide - Page 229
® ® ® ® ® ® ® ® ASRock 890FX Deluxe3 Motherboard 229 - ASRock 890FX Deluxe3 | Quick Installation Guide - Page 230
® 230 ASRock 890FX Deluxe3 Motherboard - ASRock 890FX Deluxe3 | Quick Installation Guide - Page 231
® ® ® ASRock 890FX Deluxe3 Motherboard 231
-
 1
1 -
 2
2 -
 3
3 -
 4
4 -
 5
5 -
 6
6 -
 7
7 -
8
-
9
-
10
-
11
-
12
-
13
-
14
-
15
-
16
-
17
-
18
-
19
-
20
-
21
-
22
-
23
-
24
-
25
-
26
-
27
-
28
-
29
-
30
-
31
-
32
-
33
-
34
-
35
-
36
-
37
-
38
-
39
-
40
-
41
-
42
-
43
-
44
-
45
-
46
-
47
-
48
-
49
-
50
-
51
-
52
-
53
-
54
-
55
-
56
-
57
-
58
-
59
-
60
-
61
-
62
-
63
-
64
-
65
-
66
-
67
-
68
-
69
-
70
-
71
-
72
-
73
-
74
-
75
-
76
-
77
-
78
-
79
-
80
-
81
-
82
-
83
-
84
-
85
-
86
-
87
-
88
-
89
-
90
-
91
-
92
-
93
-
94
-
95
-
96
-
97
-
98
-
99
-
100
-
101
-
102
-
103
-
104
-
105
-
106
-
107
-
108
-
109
-
110
-
111
-
112
-
113
-
114
-
115
-
116
-
117
-
118
-
119
-
120
-
121
-
122
-
123
-
124
-
125
-
126
-
127
-
128
-
129
-
130
-
131
-
132
-
133
-
134
-
135
-
136
-
137
-
138
-
139
-
140
-
141
-
142
-
143
-
144
-
145
-
146
-
147
-
148
-
149
-
150
-
151
-
152
-
153
-
154
-
155
-
156
-
157
-
158
-
159
-
160
-
161
-
162
-
163
-
164
-
165
-
166
-
167
-
168
-
169
-
170
-
171
-
172
-
173
-
174
-
175
-
176
-
177
-
178
-
179
-
180
-
181
-
182
-
183
-
184
-
185
-
186
-
187
-
188
-
189
-
190
-
191
-
192
-
193
-
194
-
195
-
196
-
197
-
198
-
199
-
200
-
201
-
202
-
203
-
204
-
205
-
206
-
207
-
208
-
209
-
210
-
211
-
212
-
213
-
214
-
215
-
216
-
217
-
218
-
219
-
220
-
221
-
222
-
223
-
224
-
225
-
226
-
227
-
228
-
229
-
230
-
231
 |
 |

1
ASRock
890FX Deluxe3
Motherboard
English
English
English
English
English
Copyright Notice:
Copyright Notice:
Copyright Notice:
Copyright Notice:
Copyright Notice:
No part of this installation guide may be reproduced, transcribed, transmitted, or trans-
lated in any language, in any form or by any means, except duplication of documen-
tation by the purchaser for backup purpose, without written consent of ASRock Inc.
Products and corporate names appearing in this guide may or may not be registered
trademarks or copyrights of their respective companies, and are used only for identifica-
tion or explanation and to the owners’ benefit, without intent to infringe.
Disclaimer:
Disclaimer:
Disclaimer:
Disclaimer:
Disclaimer:
Specifications and information contained in this guide are furnished for informational
use only and subject to change without notice, and should not be constructed as a
commitment by ASRock. ASRock assumes no responsibility for any errors or omissions
that may appear in this guide.
With respect to the contents of this guide, ASRock does not provide warranty of any kind,
either expressed or implied, including but not limited to the implied warranties or
conditions of merchantability or fitness for a particular purpose. In no event shall
ASRock, its directors, officers, employees, or agents be liable for any indirect, special,
incidental, or consequential damages (including damages for loss of profits, loss of
business, loss of data, interruption of business and the like), even if ASRock has been
advised of the possibility of such damages arising from any defect or error in the guide
or product.
This device complies with Part 15 of the FCC Rules. Operation is subject to the
following two conditions:
(1)
this device may not cause harmful interference, and
(2)
this device must accept any interference received, including interference that
may cause undesired operation.
Published
July
2010
Copyright
©
2010 ASRock INC. All rights reserved.
CALIFORNIA, USA ONLY
The Lithium battery adopted on this motherboard contains Perchlorate, a toxic
substance controlled in Perchlorate Best Management Practices (BMP) regulations
passed by the California Legislature. When you discard the Lithium battery in
California, USA, please follow the related regulations in advance.
“Perchlorate Material-special handling may apply, see
www
.dtsc.ca.gov/hazardouswa
ste/perchlorate”
ASRock Website: http://www.asrock.com