ASRock AM2NF4G-SATA2 RAID Installation Guide
ASRock AM2NF4G-SATA2 Manual
 |
View all ASRock AM2NF4G-SATA2 manuals
Add to My Manuals
Save this manual to your list of manuals |
ASRock AM2NF4G-SATA2 manual content summary:
- ASRock AM2NF4G-SATA2 | RAID Installation Guide - Page 1
2 1.1 Serial ATA (SATA) Hard Disks Installation 2 1.2 Making a SATA Driver Diskette 3 2. Guide to RAID Configurations 4 2.1 Introduction of RAID 4 2.2 RAID Configuration Precautions 6 2.3 BIOS Configuration Utility 7 2.3.1 Enter BIOS Configuration Utility 7 2.3.2 Create Disk Array 8 1 - ASRock AM2NF4G-SATA2 | RAID Installation Guide - Page 2
with RAID functions, including RAID 0, RAID 1, and JBOD. You may install SATA hard disks on this motherboard for internal storage devices. For SATA installation guide, please refer to Serial ATA (SATA) Hard Disks Installation of "U ser Manual " in the support CD. This section will guide you how - ASRock AM2NF4G-SATA2 | RAID Installation Guide - Page 3
without RAID functions, there is no need to make a SATA driver diskette. However, if you want to install Windows 2000, Windows XP or Windows XP 64bit on your SATA HDDs with RAID functions, you will need to make an SATA driver diskette before you start the OS installation. STEP 1: Insert the Support - ASRock AM2NF4G-SATA2 | RAID Installation Guide - Page 4
2.1 Introduction of RAID This motherboard adopts nVidia nForce3 chipset that integrates RAID controller supporting RAID 0 / RAID 1 / JBOD function with two independent Serial ATA (SATA) channels. This section will introduce the basic knowledge of RAID, and the guide to configure RAID 0, RAID - ASRock AM2NF4G-SATA2 | RAID Installation Guide - Page 5
next drive in the array. When any member disk fails, it will affect the entire array. JBOD is not really a RAID, and it does not support fault tolerance. 5 - ASRock AM2NF4G-SATA2 | RAID Installation Guide - Page 6
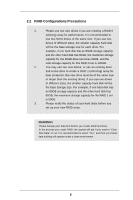
verify the status of your hard disks before you set up your new RAID array. WARNING!! Please backup your data first before you create RAID functions. In the process you create RAID, the system will ask if you want to "Clear Disk Data" or not. It is recommended to select "Yes - ASRock AM2NF4G-SATA2 | RAID Installation Guide - Page 7
General Help Save and Exit Exit v02.53 (C) Copyright 1985-2004. American Megatrends, Inc. After the below window appears, please press to enter the NVIDIA RAID Utility. NVIDIA RAID IDE ROM BIOS 4.81 Copyright (C) 2004 NVIDIA Corp. Detecting array . . . Press F10 to enter RAID setup utility - ASRock AM2NF4G-SATA2 | RAID Installation Guide - Page 8
Item Change Option General Help Save and Exit Exit v02.53 (C) Copyright 1985-2004. American Megatrends, Inc. Then, the below window appears. NVIDIA RAID IDE ROM BIOS 4.81 Copyright (C) 2004 NVIDIA Corp. Detecting array . . . 0 Healthy NVIDIA RAID 0 74.54G Press F10 to enter RAID setup utility - ASRock AM2NF4G-SATA2 | RAID Installation Guide - Page 9
After you press , the NVIDIA RAID Utility - Define a New Array window appears. By default, RAID Mode is set to Mirroring, but please set it to Striping if you want to create RAID 0. And the Striping Block - ASRock AM2NF4G-SATA2 | RAID Installation Guide - Page 10
you have to assign the disks. The disks that you enabled from the RAID Config BIOS setup page appear in the Free Disks block. These are the drives that are array disk, 1. Tab to the Free Disks section. The first disk in the list is selected. 2. Move it from the Free Disks block to the Array Disks - ASRock AM2NF4G-SATA2 | RAID Installation Guide - Page 11
ATA 1 . 0 . M Channel 1, controller 0, Master 1 . 1 . M Channel 1, controller 1, Master Finally, the Array List window appears, where you can review the RAID arrays that you have set up. NVIDIA RAID Utility - Array List - Boot Id Status Yes 2 Healthy Vendor NVIDIA Array Model Name STRIPING 74 - ASRock AM2NF4G-SATA2 | RAID Installation Guide - Page 12
Item Change Option General Help Save and Exit Exit v02.53 (C) Copyright 1985-2004. American Megatrends, Inc. Then, the below window appears. NVIDIA RAID IDE ROM BIOS 4.81 Copyright (C) 2004 NVIDIA Corp. Detecting array . . . 0 Healthy NVIDIA RAID 1 74.54G Press F10 to enter RAID setup utility - ASRock AM2NF4G-SATA2 | RAID Installation Guide - Page 13
] Select [ENTER] Popup Then, for the following steps, please to refer to the detail description in RAID 0. And you will see the below windows. NVIDIA RAID Utility Jan 12 2005 - Define a New Array - RAID Mode : Mirroring Free Disks Loc Disk Model Name 1.0.M Maxt 6Y120M0 1.1.M Maxt 6Y120M0 Stripimg - ASRock AM2NF4G-SATA2 | RAID Installation Guide - Page 14
Maxtor 6Y120M0 [ ]Add 1.1.M Maxtor 6Y120M0 [ ]Del [ESC] Quit [F6] Back [F7] Finish [TAB] Navigate [ ] Select [ENTER] Popup NVIDIA RAID Utility - Array List - Boot Id Status Yes 2 Healthy Vendor NVIDIA Array Model Name MIRRORING 74.53G [Ctrl-X]Exit [ ]Select [B]Set Boot [N]New Array [ENTER - ASRock AM2NF4G-SATA2 | RAID Installation Guide - Page 15
Select Item Change Option General Help Save and Exit Exit v02.53 (C) Copyright 1985-2004. American Megatrends, Inc. Then, the below window appears. NVIDIA RAID IDE ROM BIOS 4.81 Copyright (C) 2004 NVIDIA Corp. Detecting array . . . 0 Healthy NVIDIA JBOD 74.54G Press F10 to enter RAID setup utility - ASRock AM2NF4G-SATA2 | RAID Installation Guide - Page 16
] Select [ENTER] Popup Then, for the following steps, please to refer to the detail description in RAID 0. And you will see the below windows. NVIDIA RAID Utility Jan 12 2005 - Define a New Array - RAID Mode : Spanning Free Disks Loc Disk Model Name 1.0.M Maxt 6Y120M0 1.1.M Maxt 6Y120M0 Stripimg - ASRock AM2NF4G-SATA2 | RAID Installation Guide - Page 17
1.0.M Maxtor 6Y120M0 [ ]Add 1.1.M Maxtor 6Y120M0 [ ]Del [ESC] Quit [F6] Back [F7] Finish [TAB] Navigate [ ] Select [ENTER] Popup NVIDIA RAID Utility - Array List - Boot Id Status Yes 2 Healthy Vendor NVIDIA Array Model Name SPANNING 74.53G [Ctrl-X]Exit [ ]Select [B]Set Boot [N]New Array [ENTER
-
 1
1 -
 2
2 -
 3
3 -
 4
4 -
 5
5 -
 6
6 -
 7
7 -
8
-
9
-
10
-
11
-
12
-
13
-
14
-
15
-
16
-
17
 |
 |

1
Guide to SATA Hard Disks
Installation and RAID Configuration
1.
Guide to SATA Hard Disks Installation
.............................
2
1.1
Serial ATA (SATA) Hard Disks Installation
...............
2
1.2
Making a SATA Driver Diskette
.................................
3
2.
Guide to RAID Configurations
..........................................
4
2.1
Introduction of RAID
................................................
4
2.2
RAID Configuration Precautions
............................
6
2.3
BIOS Configuration Utility
.......................................
7
2.3.1
Enter BIOS Configuration Utility
................
7
2.3.2
Create Disk Array
.......................................
8