ASRock FM2A55M-HD RAID Installation Guide - Page 20
Free Drives
 |
View all ASRock FM2A55M-HD manuals
Add to My Manuals
Save this manual to your list of manuals |
Page 20 highlights
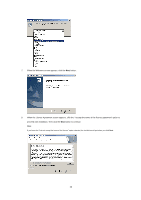
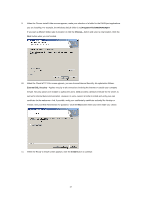
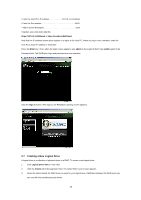
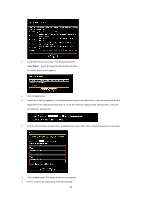
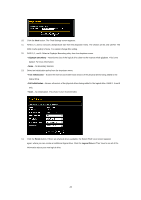
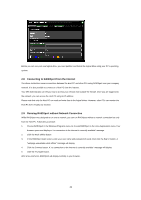
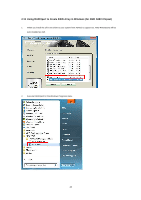
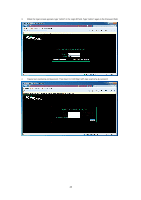
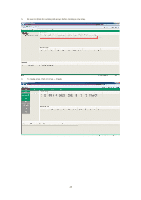
4. In the Select Drive Type screen, click the following option: • Free Drives - Select all Free (unassigned) physical drives The Select Drives screen appears. 5. Click the Next button. 6. If you want to split the capacity of your physical drives between two logical drives, enter the capacity for the first logical drive in the Logical Drive Size field. Or, to use the maximum capacity of the physical drives, check the Use Maximum Capacity box. 7. Click the physical drives to select them. Available drives have a black frame. Selected drives have a red frame. 8. Click the Next button. The Assign a Name screen appears. 9. Enter a name for the logical drive in the field provided. 20
-
 1
1 -
2
-
3
-
4
-
5
-
6
-
7
-
8
-
9
-
10
-
11
-
12
-
13
-
14
-
 15
15 -
 16
16 -
 17
17 -
 18
18 -
 19
19 -
 20
20 -
 21
21 -
 22
22 -
 23
23 -
 24
24 -
 25
25 -
26
-
27
 |
 |

20
4.
In the Select Drive Type screen, click the following option:
•
Free Drives
– Select all Free (unassigned) physical drives
The Select Drives screen appears.
5.
Click the
Next
button.
6.
If you want to split the capacity of your physical drives between two logical drives, enter the capacity for the first
logical drive in the Logical Drive Size field. Or, to use the maximum capacity of the physical drives, check the
Use Maximum Capacity box.
7.
Click the physical drives to select them. Available drives have a black frame. Selected drives have a red frame.
8.
Click the
Next
button. The Assign a Name screen appears.
9.
Enter a name for the logical drive in the field provided.