ASRock FM2A88X Extreme6 User Manual
ASRock FM2A88X Extreme6 Manual
 |
View all ASRock FM2A88X Extreme6 manuals
Add to My Manuals
Save this manual to your list of manuals |
ASRock FM2A88X Extreme6 manual content summary:
- ASRock FM2A88X Extreme6 | User Manual - Page 1
User Manual - ASRock FM2A88X Extreme6 | User Manual - Page 2
and should not be constructed as a commitment by ASRock. ASRock assumes no responsibility for any errors or omissions that may appear in this documentation. With CALIFORNIA, USA ONLY The Lithium battery adopted on this motherboard contains Perchlorate, a toxic substance controlled in Perchlorate Best - ASRock FM2A88X Extreme6 | User Manual - Page 3
The terms HDMI™ and HDMI High-Definition Multimedia Interface, and the HDMI logo are trademarks or registered trademarks of HDMI Licensing LLC in the United States and other countries. Manufactured under license under U.S. Patent Nos: 5,956,674; 5,974,380; 6,487,535; 7,003,467 & other U.S. and - ASRock FM2A88X Extreme6 | User Manual - Page 4
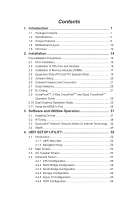
Package Contents 1 1.2 Specifications 2 1.3 Unique Features 6 1.4 Motherboard Layout 10 1.5 I/O Panel 12 2. Installation 14 Pre-installation Precautions 14 2.1 CPU Installation 15 2.2 Installation of CPU Fan and Heatsink 16 2.3 Installation of Memory Modules (DIMM 17 2.4 Expansion Slots - ASRock FM2A88X Extreme6 | User Manual - Page 5
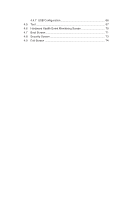
4.4.7 USB Configuration 66 4.5 Tool 67 4.6 Hardware Health Event Monitoring Screen 70 4.7 Boot Screen 71 4.8 Security Screen 73 4.9 Exit Screen 74 - ASRock FM2A88X Extreme6 | User Manual - Page 6
information about the model you are using. www.asrock.com/support/index.asp 1.1 Package Contents ASRock FM2A88X Extreme6+ Motherboard (ATX Form Factor) ASRock FM2A88X Extreme6+ Quick Installation Guide ASRock FM2A88X Extreme6+ Support CD 4 x Serial ATA (SATA) Data Cables (Optional) 1 x I/O Panel - ASRock FM2A88X Extreme6 | User Manual - Page 7
polymer capacitors) - Home Cloud - Purity SoundTM - HDMI-In - Supports Socket FM2+ 95W / FM2 100W processors - Digi Power design - 8 + 2 Power Phase design - AMD A88X (Bolton-D4) - Dual Channel DDR3 Memory Technology - 4 x DDR3 DIMM Slots - Supports DDR3 2600+(OC)/2400(OC)/2133(OC)/1866/1600/ 1333 - ASRock FM2A88X Extreme6 | User Manual - Page 8
® Atheros® AR8171 - Supports Qualcomm® Atheros® Security Wake On Internet Technology - Supports Wake-On-LAN - Supports Energy Efficient Ethernet 802.3az - Supports PXE Rear Panel I/O - 1 x PS/2 Mouse/Keyboard Port - 1 x D-Sub Port - 1 x DVI-D Port - 1 x HDMI-Out Port - 1 x HDMI-In Port - ASRock FM2A88X Extreme6 | User Manual - Page 9
Storage Connector BIOS Feature Support CD Hardware Monitor - 1 x Optical SPDIF Out Port - 2 x USB 2.0 Ports - 1 x eSATA Connector - 2 x USB 3.0 Ports (AMD A88X (Bolton-D4)) - 2 x USB 3.0 Ports (ASMedia ASM1042) - 1 x RJ-45 LAN Port with LED (ACT/LINK LED and SPEED LED) - HD Audio Jacks: Rear - ASRock FM2A88X Extreme6 | User Manual - Page 10
memory speed is supported depends on the CPU you adopt. If you want to adopt DDR3 2600/2400/2133/1866/1600 memory module on this motherboard, please refer to the memory support list on our website for the compatible memory modules. ASRock website http://www.asrock.com 2. Due to the operating system - ASRock FM2A88X Extreme6 | User Manual - Page 11
you to enter your Windows® desktop in a few seconds. ASRock Instant Flash ASRock Instant Flash is a BIOS flash utility embedded in Flash ROM. This convenient BIOS update tool allows you to update system BIOS without entering operating systems first like MSDOS or Windows®. With this utility, you can - ASRock FM2A88X Extreme6 | User Manual - Page 12
loss occurs during the BIOS update process, ASRock Crashless BIOS will automatically finish the BIOS update procedure after regaining power. Please note that BIOS files need to be placed in the root directory of your USB disk. Only USB2.0 ports support this feature. ASRock OMG (Online Management - ASRock FM2A88X Extreme6 | User Manual - Page 13
can easily examine the current system configuration in UEFI setup. ASRock UEFI Tech Service Contact ASRock Tech Service by sending a support request from the UEFI setup utility if you are having trouble with your PC. ASRock Dehumidifier Function Users may prevent motherboard damages due to dampness - ASRock FM2A88X Extreme6 | User Manual - Page 14
. Simply press "X" when turning on the PC, X-Boost will automatically overclock the relative components to get up to 15.77% performance boost! With the smart X-Boost, overclocking CPU can become a near one-button process. ASRock Restart to UEFI Windows® 8 brings the ultimate boot up experience. The - ASRock FM2A88X Extreme6 | User Manual - Page 15
FM2A88X Extreme6+ LAN PCIE2 Purity SoundTM Super I/O HD_AUDIO1 1 PCIE3 CMOS BATTERY PCI1 PCIE4 PCI2 CLRCMOS1 1 RoHS COM1 PCIE5 CI1 IR1 1 1 USB_4_5 1 USB_2_3 1 USB_0_1 1 AMD A88X (Bolton-D4) Chipset SATA3_3_4 SATA3_1_2 PLED1 1 PANEL 1 PLED PWRBTN 1 HDLED RESET BIOS_A_LED1 64Mb BIOS - ASRock FM2A88X Extreme6 | User Manual - Page 16
CPU Fan Connector (CPU_FAN1) 4 CPU Fan Connector (CPU_FAN2) 5 2 x 240-pin DDR3 DIMM Slots (DDR3_A1, DDR3_B1) 6 2 x 240-pin DDR3 DIMM Slots (DDR3_A2, DDR3_B2) 7 ATX (RSTBTN1) 16 BIOS Selection Switch (BIOS_SEL1) 17 Chassis Fan Connector (CHA_FAN1) 18 Power LED Header (PLED1) 19 System Panel Header ( - ASRock FM2A88X Extreme6 | User Manual - Page 17
1 USB 2.0 Ports (USB_6_7)* 2 D-Sub Port 3 DisplayPort (DP_1) 4 eSATA Connector 5 LAN RJ-45 Port** 6 Central / Bass (Orange) 7 Rear Speaker (Black) 8 Line In 3.0 Ports (USB3_34) 12 (AMD A88X (Bolton-D4)) 13 USB 3.0 Ports (USB3_1_2) (ASMedia ASM1042) 14 HDMI-In Port 15 HDMI-Out Port 16 DVI-D Port - ASRock FM2A88X Extreme6 | User Manual - Page 18
LEDs on the LAN port. Please refer to the table below for the LAN port LED indications. ACT/LINK LED SPEED LED LAN Port Activity / Link After restarting your computer, you will find the "Mixer" tool on your system. Please select "Mixer ToolBox" , click "Enable playback multi-streaming", and click - ASRock FM2A88X Extreme6 | User Manual - Page 19
, peripherals, and/or components. 1. Unplug the power cord from the wall socket before touching any component. 2. To avoid damaging the motherboard components due to static electricity, NEVER place your motherboard directly on the carpet or the like. Also remember to use a grounded wrist strap - ASRock FM2A88X Extreme6 | User Manual - Page 20
up to a 90o angle. Step 2. Step 3. Position the CPU directly above the socket such that the CPU corner with the golden triangle matches the socket corner with a small triangle. Carefully insert the CPU into the socket until it fits in place. The CPU fits only in one correct orientation. DO NOT - ASRock FM2A88X Extreme6 | User Manual - Page 21
and the heatsink are securely fastened and in good contact with each other. Then connect the CPU fan to the CPU FAN connector (CPU_FAN1, see Page 10, No. 3 or CPU_FAN2, see Page 10, No. 4). For proper installation, please kindly refer to the instruction manuals of the CPU fan and the heatsink. 16 - ASRock FM2A88X Extreme6 | User Manual - Page 22
module installed. 3. It is not allowed to install a DDR or DDR2 memory module into a DDR3 slot; otherwise, this motherboard and DIMM may be damaged. 4. If you adopt DDR3 2600/2400/2133/1866/1600 memory modules on this motherboard, it is recommended to install them on DDR3_A2 and DDR3_ B2 slots - ASRock FM2A88X Extreme6 | User Manual - Page 23
1 2 3 18 - ASRock FM2A88X Extreme6 | User Manual - Page 24
Mode PCIE2 x16 PCIE4 N/A PCIE5 N/A x8 x8 N/A x8 x8 x4 1. For a better thermal environment, please connect a chassis fan to the motherboard's chassis fan connector (CHA_FAN1, CHA_FAN2 or CHA_ FAN3) when using multiple graphics cards. 2. When PCIE2 slot is occupied, the DisplayPort cannot be - ASRock FM2A88X Extreme6 | User Manual - Page 25
need to clear the CMOS when you just finish updating the BIOS, you must boot up the system first, and then shut it down before you do the clear-CMOS ac- tion. Please be noted that the password, date, time, user default profile, 1394 GUID and MAC address will be cleared only if the - ASRock FM2A88X Extreme6 | User Manual - Page 26
connectors. Placing jumper caps over the headers and connectors will cause permanent damage of the motherboard! Serial ATA3 Connectors (SATA3_1_2: see p.10, No. 11) (SATA3_3_4: see I/O panel, there are three USB 2.0 headers on this motherboard. Each USB 2.0 header can support two USB 2.0 ports. 21 - ASRock FM2A88X Extreme6 | User Manual - Page 27
connection and control of audio devices. 1. High Definition Audio supports Jack Sensing, but the panel wire on the chassis must support HDA to function correctly. Please follow the instruction in our manual and chassis manual to install your system. 2. If you use AC'97 audio panel, please - ASRock FM2A88X Extreme6 | User Manual - Page 28
connecting the cables. PWRBTN (Power Switch): Connect to the power switch on the chassis front panel. You may configure the way to turn off your system using the power switch. RESET (Reset Switch): Connect to the reset switch on the chassis front panel. Press the reset switch to restart the computer - ASRock FM2A88X Extreme6 | User Manual - Page 29
) CPU_FAN_SPEED +12V (see p.10 No. 3) GND 1 2 3 4 Please connect the CPU fan cable to the connector and match the black wire to the ground pin. Though this motherboard provides 4-Pin CPU fan (Quiet Fan) support, the 3-Pin CPU fan still can work successfully even without the fan speed - ASRock FM2A88X Extreme6 | User Manual - Page 30
and Pin 5. 4-Pin ATX 12V Power Supply Installation 1 5 Serial port Header (9-pin COM1) (see p.10 No. 26) This COM1 header supports a serial port module. Chassis Intrusion Header (2-pin CI1) (see p.10, No. 25) 1 GND Signal This motherboard supports CASE OPEN detection feature - ASRock FM2A88X Extreme6 | User Manual - Page 31
"Secure Backup UEFI" in the UEFI Setup Utility to duplicate a working copy of the BIOS files to the primary BIOS to ensure normal system operation. For safety issues, users are not able to update the backup BIOS manually. Users may refer to the BIOS LEDs (BIOS_A_LED or BIOS_B_ LED) to identify which - ASRock FM2A88X Extreme6 | User Manual - Page 32
see the diagrams below for reading the Dr. Debug codes. Code 00 Description Please check if the CPU is installed correctly and then clear CMOS. 0d Problem related to memory, VGA card or other devices. Please clear CMOS, re-install the memory and VGA card, and remove other USB, PCI devices - ASRock FM2A88X Extreme6 | User Manual - Page 33
to USB devices. Please try removing all USB devices. b7 Problem related to memory. Please re-install the CPU and memory then clear CMOS. If the problem still exists, please install only one memory module or try using other memory modules. d6 The VGA could not be recognized. Please clear - ASRock FM2A88X Extreme6 | User Manual - Page 34
sure that your graphics card driver supports AMD CrossFireXTM technology. Download the drivers from the AMD's website: www.amd.com 3. Make sure that your power supply unit (PSU) can provide at least the minimum power your system requires. It is recommended to use a AMD certified PSU. Please refer to - ASRock FM2A88X Extreme6 | User Manual - Page 35
graphics cards on PCIE2 and PCIE4 slots, and use the other CrossFire Bridge to connect the graphics cards on PCIE4 and PCIE5 slots. (The CrossFire Bridge is provided with the graphics card you purchase, not bundled with this motherboard. Please refer to your graphics card vendor for details.) Step - ASRock FM2A88X Extreme6 | User Manual - Page 36
Step 2 Remove the AMD drivers if you have any VGA drivers installed in your system. The Catalyst Uninstaller is an optional download. We recommend using this utility to uninstall any previously installed Catalyst drivers prior to installation. Please check AMD's website for AMD driver updates. Step - ASRock FM2A88X Extreme6 | User Manual - Page 37
-fast frame rates. Currently, AMD Dual Graphics Technology is only supported with Windows® 8 / 7 OS. What does an AMD Dual Graphics system include? An AMD Dual Graphics system includes an AMD Radeon HD 8000/7000 graphics processor and a motherboard based on an AMD A88X (Bolton-D4) integrated chipset - ASRock FM2A88X Extreme6 | User Manual - Page 38
Enable CrossFireTM" and click "Apply" to save your change. Step 10. Reboot your system. Then you can freely enjoy the benefit of Dual Graphics feature. * Dual Graphics appearing here is a registered trademark of AMD Technologies Inc., and is used only for identification or explanation and to the - ASRock FM2A88X Extreme6 | User Manual - Page 39
2.11 Using the HDMI-In Port The HDMI-In port on this motherboard lets you easily switch between PC screen (on-board VGA) and external video source on the same monitor. This function saves you the hassle of switching cables back and forth when you want to - ASRock FM2A88X Extreme6 | User Manual - Page 40
USB 3.0 USB 3.0 Connection Diagram HDMI Adapter Power Source 35 - ASRock FM2A88X Extreme6 | User Manual - Page 41
external devices with HDMI output to the HDMI-In port on the motherboard via an HDMI cable. Step 3 Double-click the "A-Tuning" icon on the desktop and find "HDMI-IN" function in "Tools" tab. Drag the switch right or left to enable Onboard (on-board PC screen) or HDMI (HDMI-In Source). or - ASRock FM2A88X Extreme6 | User Manual - Page 42
Support CD to display the menu. Drivers Menu The drivers compatible to your system will be auto-detected and listed on the support CD driver drivers. Therefore, the drivers you install can work properly. Utilities Menu The Utilities Menu shows the application software that the motherboard supports - ASRock FM2A88X Extreme6 | User Manual - Page 43
RAM, Dehumidifier, Good Night LED, FAN-Tastic Tuning, OC Tweaker and a whole lot more. 3.2.1 Installing A-Tuning When you install the all-in-one driver to your system from ASRock's support , OC Tweaker, System Info and Tech Service. Operation Mode Choose an operation mode for your computer. 38 - ASRock FM2A88X Extreme6 | User Manual - Page 44
the VBIOS must support UEFI GOP if you are using an external graphics card. OMG Schedule the starting and ending hours of Internet access granted to other users. Place X marks on the time table to disable the Internet. Good Night LED Switch off the Power/HDD/LAN LEDs when the system is on - ASRock FM2A88X Extreme6 | User Manual - Page 45
Prevent motherboard damages HDMI-IN Connect two different devices to one monitor and toggle between the primary and secondary screen without replugging the connectors every time. Please set a hotkey for switching between the two devices. OC Tweaker Configurations for overclocking the system. System - ASRock FM2A88X Extreme6 | User Manual - Page 46
Tech Service Contact Tech Service. 41 - ASRock FM2A88X Extreme6 | User Manual - Page 47
3.3 Qualcomm® Atheros® Security Wake On Internet Technology Qualcomm® Atheros® Security Wake On Internet Technology allows you to wake up and remote control your home computer from energy efficient sleep mode. Before configuring this feature, make sure that the "PCI Device Power On" is enabled - ASRock FM2A88X Extreme6 | User Manual - Page 48
Step 3 Click on Remote Client and follow the onscreen instructions to complete the installation. Step 4 Double-click the Sunlogin Remote Control icon tray. in the Windows system Step 5 Make sure that "Remote wakeup module" and "Remote control module" is set to On. 43 - ASRock FM2A88X Extreme6 | User Manual - Page 49
Installing Sunlogin control client Step 1 For Windows users: Download "Control Client" from the Download section of sunlogin.oray.com and execute it. Log-in with your Sunlogin Account and Password. For iPad/iPhone users: Download "Sunlogin" from the App Store and install the app. Then fill in your - ASRock FM2A88X Extreme6 | User Manual - Page 50
For Andriod mobile device users: Search "Sunlogin" in Google PLAY and then install the app. Then fill in your Sunlogin Account and Password. Using Remote Wakeup For Windows users: Select one Host (Offline with Gray power button) on the control client panel to wake up your home computer. For iPad/ - ASRock FM2A88X Extreme6 | User Manual - Page 51
For Andriod mobile device users: Tap one Host (Offline with Blue power button ) on the Host List. Then tap the Power button to wakeup your home computer. 46 - ASRock FM2A88X Extreme6 | User Manual - Page 52
Using Remote Control For Windows users: Right-click on a Host (Online with Blue Windows logo) on the control client panel. Then key in your remote access password. For iPad/iPhone users: Tap one online machine on the Host List and fill in the Access password to start using remote control. 47 - ASRock FM2A88X Extreme6 | User Manual - Page 53
For Andriod mobile device users: Tap one online machine and fill in the Access password to start using remote control. Tutorial Video 48 - ASRock FM2A88X Extreme6 | User Manual - Page 54
greater efficiency. 3.4.1 Installing Start8 Install Start8�, �w��h�ic��h��is��l�o�c�a��te��d�i�n��t�h�e��f�o�l�d�e�r��a�t�t�h�e��f�o�l�lo��w��in�g��p��a�t�h��o�f�t�h�e��S��u�p��port CD: \ ASRock Utility > Start8. 3.4.2 Configuring Start8 Style Select between the Windows 7 style and Windows 8 style - ASRock FM2A88X Extreme6 | User Manual - Page 55
Configure Configure provides configuration options, including icon sizes, which shortcuts you want Start Menu to display, quick access to recently used apps, the functionality of the power button, and more. Control 50 - ASRock FM2A88X Extreme6 | User Manual - Page 56
. Desktop Desktop allows you to disable the hot corners when you are working on the desktop. It also lets you choose whether or not the system boots directly into desktop mode and bypass the Metro user interface. About Displays information about Start8. 51 - ASRock FM2A88X Extreme6 | User Manual - Page 57
ASRock Interactive UEFI is a blend of system configuration tools, cool sound effects and stunning visuals. Not only will it make BIOS setup less difficult but also a lot more amusing. This section explains how to use the UEFI SETUP UTILITY to configure your system. The UEFI chip on the motherboard - ASRock FM2A88X Extreme6 | User Manual - Page 58
the Exit Screen or exit the current screen 4.2 Main Screen When you enter the UEFI SETUP UTILITY, the Main screen will appear and display the system overview. Active Page on Entry This allows you to select the default page when entering UEFI setup utility. 53 - ASRock FM2A88X Extreme6 | User Manual - Page 59
Please note that overclocing may cause damage to your components and motherboard. It should be done at your own risk and expense. CPU Configuration Overclock Mode Use this to select Overclock Mode. Configuration options: [Auto] and [Manual]. The default value is [Auto]. APU/PCIE Frequency (MHz) This - ASRock FM2A88X Extreme6 | User Manual - Page 60
by default. If it is set to [Manual], you may adjust the value of Processor Frequency system is under heavy load. GFX Engine Clock Use this to adjust GFX Engine Clock. The default value is [Auto]. DRAM Timing Configuration DRAM Frequency If [Auto] is selected, the motherboard will detect the memory - ASRock FM2A88X Extreme6 | User Manual - Page 61
this item to control DRAM timing. Power Down Enable Use this item to enable or disable DDR power down mode. Bank Interleaving Interleaving allows memory accesses to be spread out over banks on the same node, or accross nodes, decreasing access contention. Channel Interleaving It allows you to enable - ASRock FM2A88X Extreme6 | User Manual - Page 62
4.4 Advanced Screen In this section, you may set the configurations for the following items: CPU Configuration, Nouth Bridge Configuration, South Bridge Configuration, Storage Configuration, Super IO Configuration, ACPI Configuration and USB Configuration. Setting wrong values in this section may - ASRock FM2A88X Extreme6 | User Manual - Page 63
is [Disabled]. Cool 'n' Quiet Use this item to enable or disable AMD's Cool 'n' QuietTM technology. The default value is [Enabled]. Configuration options: function may reduce CPU voltage and memory frequency, and lead to system stability or compatibility issue with some memory modules or power - ASRock FM2A88X Extreme6 | User Manual - Page 64
or disable IOMMU support. Primary Graphics Adapter ], [PCI] and [PCI Express]. Share Memory This allows you to set the share memory feature. The default value is [Auto]. HDMI HD Audio" feature. Dual Graphics This item appears only when you install AMD RADEON graphics card on this motherboard. - ASRock FM2A88X Extreme6 | User Manual - Page 65
Display Play Port Function Use this to select Display Play Port function. Configuration options: [as Display Play Port] and [as HDMI]. The default value is [as Display Play Port]. PCIex16_1/DP Output Use this to select the PCIex16_1 slot/DP port output type. Configuration options: [Auto], [ - ASRock FM2A88X Extreme6 | User Manual - Page 66
Select [Auto] or [Disabled] for the onboard HD Audio Front Panel. Onboard LAN This allows you to enable or disable the onboard LAN feature. Good Night LED Enable this option to turn off Power LED and Port80 LED when the system is power on. The keyboard LED will also be turned off in - ASRock FM2A88X Extreme6 | User Manual - Page 67
[IDE Mode]. If you set this item to RAID mode, it is suggested to install SATA ODD driver on SATA3_5, SATA3_7, SATA3_8 and eSATA ports. AMD AHCI BIOS ROM Use this item to enable or disable AMD AHCI BIOS ROM. The default value of this option is [Disabled]. SATA IDE Combined Mode This item is - ASRock FM2A88X Extreme6 | User Manual - Page 68
4.4.5 Super IO Configuration Serial Port Use this item to enable or disable the onboard serial port. Serial Port Address Use this item to set the address for the onboard serial port. Configuration options: [3F8h / IRQ4] and [3E8h / IRQ4]. Infrared Port Use this item to enable or disable the - ASRock FM2A88X Extreme6 | User Manual - Page 69
Suspend to RAM Use this item to select whether to auto-detect or disable the Suspend-toRAM feature. Select [Auto] will enable this feature if the OS supports it. Deep Sleep Configure deep sleep mode for power saving when the computer is shut down. We recommend disabling Deep Sleep for better system - ASRock FM2A88X Extreme6 | User Manual - Page 70
to enable or disable USB Mouse to power on the system. ACPI HPET table Use this item to enable or disable ACPI HPET Table. The default value is [Enabled]. Please set this option to [Enabled] if you plan to use this motherboard to submit Windows® certification. CSM Please disable CSM when you - ASRock FM2A88X Extreme6 | User Manual - Page 71
Use this item to enable or disable the use of USB 2.0 controller. A88X USB 3.0 Controller Use this item to enable or disable the use of USB 3.0 controller. Legacy USB Support Use this option to select legacy support for USB devices. There are four confi guration options: [Enabled], [Auto], [Disabled - ASRock FM2A88X Extreme6 | User Manual - Page 72
to modify the system time are required. UEFI Tech Service Contact ASRock Tech Service if you are having trouble with your PC. Please setup network configuration before using UEFI Tech Service. Easy RAID Installer Easy RAID Installer helps you to copy the RAID driver from the support CD to your - ASRock FM2A88X Extreme6 | User Manual - Page 73
system after the UEFI update process is completed. Secure Backup UEFI For users that don't have an optical disk drive to install the drivers from our support CD, Easy Driver Installer is a handy tool in the UEFI that installs the LAN driver to your system Users may prevent motherboard damages due to - ASRock FM2A88X Extreme6 | User Manual - Page 74
Duration This allows users to configure the duration of the dehumidifying process before it returns to S4/S5 state. Dehumidifier CPU Fan Setting Use this setting to configure CPU fan speed while "Dehumidifier" is enabled. Would you like to save current setting user defaults? In this option, you are - ASRock FM2A88X Extreme6 | User Manual - Page 75
system, including the parameters of the CPU temperature, motherboard temperature, CPU fan speed, chassis fan speed, and the critical voltage. CPU Fan 1 & 2 Setting This allows you to set the CPU speed. Confi guration options: [Full On] and [Manual Mode]. The default is value [Full On]. Over - ASRock FM2A88X Extreme6 | User Manual - Page 76
few restrictions. 1. Only supports Windows® 8 UEFI operating system. 2. You will not be able to enter BIOS Setup (Clear CMOS or run utility in Widows® to enter BIOS Setup). 3. If you are using an external graphics card, the VBIOS must support UEFI GOP in order to boot. Boot From Onboard LAN Use this - ASRock FM2A88X Extreme6 | User Manual - Page 77
Option ROM Messages [Force BIOS] - The third-party ROM messages will be forced to Count Enable or disable the feature of Boot Failure Guard Count. CSM (Compatibility Support Module) CSM Enable to launch the Compatibility Support Module. Please do not disable unless you're running a WHCK test. - ASRock FM2A88X Extreme6 | User Manual - Page 78
4.8 Security Screen In this section, you may set or change the supervisor/user password for the system. For the user password, you may also clear it. Secure Boot Enable to support Windows® 8 Secure Boot. 73 - ASRock FM2A88X Extreme6 | User Manual - Page 79
4.9 Exit Screen Save Changes and Exit When you select this option, it will pop-out the following message, "Save configuration changes and exit setup?" Select [OK] to save the changes and exit the UEFI SETUP UTILITY. Discard Changes and Exit When you select this option, it will pop-out the following - ASRock FM2A88X Extreme6 | User Manual - Page 80
or want to know more about ASRock, you're welcome to visit ASRock's website at http://www.asrock.com; or you may contact your dealer for further information. For technical questions, please submit a support request form at http://www.asrock.com/support/tsd.asp ASRock Incorporation 2F., No.37, Sec
-
 1
1 -
 2
2 -
 3
3 -
 4
4 -
 5
5 -
 6
6 -
 7
7 -
8
-
9
-
10
-
11
-
12
-
13
-
14
-
15
-
16
-
17
-
18
-
19
-
20
-
21
-
22
-
23
-
24
-
25
-
26
-
27
-
28
-
29
-
30
-
31
-
32
-
33
-
34
-
35
-
36
-
37
-
38
-
39
-
40
-
41
-
42
-
43
-
44
-
45
-
46
-
47
-
48
-
49
-
50
-
51
-
52
-
53
-
54
-
55
-
56
-
57
-
58
-
59
-
60
-
61
-
62
-
63
-
64
-
65
-
66
-
67
-
68
-
69
-
70
-
71
-
72
-
73
-
74
-
75
-
76
-
77
-
78
-
79
-
80
 |
 |

User Manual