ASRock P43ME Quick Installation Guide
ASRock P43ME Manual
 |
View all ASRock P43ME manuals
Add to My Manuals
Save this manual to your list of manuals |
ASRock P43ME manual content summary:
- ASRock P43ME | Quick Installation Guide - Page 1
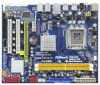
purchaser for backup purpose, without written consent of ASRock Inc. Products and corporate names appearing in this guide may or may not be registered trademarks or " ASRock Website: http://www.asrock.com Published May 2009 Copyright©2009 ASRock INC. All rights reserved. 1 ASRock P43ME Motherboard - ASRock P43ME | Quick Installation Guide - Page 2
12V Connector (ATX12V1) 3 775-Pin CPU Socket 4 CPU Fan Connector (CPU_FAN1) 5 19 USB 2.0 Header (USB8_9, Blue) 20 SPI BIOS Chip 21 Chassis Speaker Header (SPEAKER 1, Purple) (FLOPPY1) 25 Internal Audio Connector: CD1 (Black) 26 Front Panel Audio Header (HD_AUDIO1, Lime) ASRock P43ME Motherboard - ASRock P43ME | Quick Installation Guide - Page 3
in accordance with the type of speaker you use. TABLE for Audio Output Connection Audio Output Channels Front Speaker Rear Speaker Central / Bass Side Speaker (No. 7) (No. 4) (No. 5) (No. 3) 2 V -- -- -- 4 V V -- -- 6 V V V -- 8 V V V V 3 ASRock P43ME Motherboard English - ASRock P43ME | Quick Installation Guide - Page 4
connect a front panel audio cable to the front panel audio header. After restarting your computer, you will find "VIA HD Audio Deck" tool on your system. Please follow below instructions according to the OS Multi-Streaming function or Side Speaker function. English 4 ASRock P43ME Motherboard - ASRock P43ME | Quick Installation Guide - Page 5
and the BIOS software might be updated, the content of this manual will be subject to change without notice. In case any modifications of this manual occur, the updated version will be available on ASRock website without further notice. You may find the latest VGA cards and CPU support lists on - ASRock P43ME | Quick Installation Guide - Page 6
Yorkfield and Dual Core Wolfdale processors - Supports FSB1600/1333/1066/800 MHz (see CAUTION 1) - Supports Hyper-Threading Technology (see CAUTION 2) - Supports Untied Overclocking Technology (see CAUTION 3) - Supports EM64T CPU - Northbridge: Intel® P43 - Southbridge: Intel® ICH10 - Dual Channel - ASRock P43ME | Quick Installation Guide - Page 7
Plug and Play" - ACPI 1.1 Compliance Wake Up Events - AMBIOS 2.3.1 Support - CPU, VCCM, NB, VTT Voltage Multi-adjustment - Supports Smart BIOS Support CD - Drivers, Utilities, AntiVirus Software (Trial Version) Unique Feature - ASRock OC Tuner (see CAUTION 10) - Intelligent Energy Saver (see - ASRock P43ME | Quick Installation Guide - Page 8
Manual" in the support CD to adjust your SATAII hard disk drive to SATAII mode. You can also connect SATA hard disk to SATAII connector directly. 9. Power Management for USB 2.0 works fine under Microsoft® Windows® VistaTM 64-bit / VistaTM / XP 64-bit / XP SP1 or SP2 / 2000 SP4. 8 ASRock P43ME - ASRock P43ME | Quick Installation Guide - Page 9
grease between the CPU and the heatsink when you install the PC system. 15. AHCI function is not supported under Windows® 2000 OS. It is recommended to use IDE mode under Windows® 2000. Please refer to page 47 of "User Manual" in the support CD for detailed setup. 9 ASRock P43ME Motherboard English - ASRock P43ME | Quick Installation Guide - Page 10
775-Pin Socket Overview Before you insert the 775-LAND CPU into the socket, please check if the CPU surface is unclean or if there is any bent pin on the socket. Do not force to insert the CPU into the socket if above situation is found. Otherwise, the CPU will be seriously damaged. 10 ASRock P43ME - ASRock P43ME | Quick Installation Guide - Page 11
approximately 100 degrees. Step 2. Insert the 775-LAND CPU: Step 2-1. Hold the CPU by the edges where are marked with black lines support the load plate edge, engage PnP cap with right hand thumb and peel the cap from the socket while pressing on center of PnP cap to assist in removal. 11 ASRock P43ME - ASRock P43ME | Quick Installation Guide - Page 12
motherboard for after service. Step 4. Close the socket: Step 4-1. instruction manuals of your CPU fan and heatsink. Below is an example to illustrate the installation of the heatsink for 775-LAND CPU. Step 1. Apply thermal interface material onto center of IHS on the socket the CPU fan connector - ASRock P43ME | Quick Installation Guide - Page 13
2.3 Installation of Memory Modules (DIMM) P43ME motherboard provides two 240-pin DDR2 (Double Data Rate 2) DIMM slots, and supports Dual Channel Memory Technology. For dual channel configuration, you always need to install back in place and the DIMM is properly seated. 13 ASRock P43ME Motherboard - ASRock P43ME | Quick Installation Guide - Page 14
firmly until the card is completely seated on the slot. Step 5. Fasten the card to the chassis with screws. Step 6. Replace the system cover. 14 ASRock P43ME Motherboard English - ASRock P43ME | Quick Installation Guide - Page 15
just finish updating the BIOS, you must boot up the system first, and then shut it down before you do the clearCMOS action. FSB1 / FSB2 / FSB3 Jumper (FSB1, 3-pin jumper, see p.2 No. 33) (FSB2, 5-pin jumper, see p.2 No. 33) (FSB3, 5-pin jumper, see p.2 No. 33) Default If you want to overclock the - ASRock P43ME | Quick Installation Guide - Page 16
or FSB1066 CPU, and try to overclock to FSB1333 orFSB1600 (by BIOS setting) you may face the problem, that DRAM frequency will beoverclocked very high. Please use jumper to force NB to be strapped at higherfrequency, so the DRAM can work at lower frequency. If you want to overclock the CPU you adopt - ASRock P43ME | Quick Installation Guide - Page 17
conductor ATA 66/100/133 cable Note: Please refer to the instruction of your IDE device vendor for the details. Serial ATAII 14) SATAII_5 SATAII_6 These six Serial ATAII (SATAII) connectors support SATA data cables for internal storage devices. The current SATAII ASRock P43ME Motherboard - ASRock P43ME | Quick Installation Guide - Page 18
motherboard. Each USB 2.0 header can support two USB 2.0 ports. Print Port audio input from sound sources such as a CD-ROM, DVD-ROM, TV tuner card, or MPEG card. This is an interface for front panel audio cable that allows convenient connection and control of audio devices. 18 ASRock P43ME - ASRock P43ME | Quick Installation Guide - Page 19
Sensing, but the panel wire on the chassis must support HDA to function correctly. Please follow the instruction in our manual and chassis manual to install your system. 2. If you use AC'97 audio panel, please install it to the front panel audio header as below: A. Connect Mic_IN (MIC) to MIC2_L - ASRock P43ME | Quick Installation Guide - Page 20
an ATX 12V power supply to this connector. This COM1 header supports a serial port module. HDMI_SPDIF Header (3-pin HDMI_SPDIF1) (see p.2 A. black end C B A HDMI_SPDIF header, providing SPDIF audio output to HDMI VGA card, allows the system to con (3-pin) 20 ASRock P43ME Motherboard English - ASRock P43ME | Quick Installation Guide - Page 21
Driver Installation Guide To install the drivers to your system, please insert the support CD to your optical drive first. Then, the drivers compatible to your system can be auto-detected and listed on the support CD driver Set up BIOS. A. Enter BIOS SETUP UTILITY up BIOS. A. Enter BIOS SETUP UTILITY - ASRock P43ME | Quick Installation Guide - Page 22
drive to boot your system, and follow the instruction to install Windows® VistaTM / VistaTM 64-bit OS on your system. When you see "Where do you want to install Windows?" page, please insert the ASRock Support CD into your optical drive, and click the "Load Driver" button on the left on the bottom - ASRock P43ME | Quick Installation Guide - Page 23
detailed information about BIOS Setup, please refer to the User Manual (PDF file) contained in the Support CD. 4. Software Support CD information This motherboard supports various Microsoft® Windows EXE" from the BIN folder in the Support CD to display the menus. 23 ASRock P43ME Motherboard English - ASRock P43ME | Quick Installation Guide - Page 24
Modell benötigen, besuchen Sie bitte unsere Webseite: www.asrock.com/support/index.asp 1.1 Kartoninhalt ASRock P43ME Motherboard (Micro ATX-Formfaktor: 24.4 cm x 21.1 cm; 9.6 Zoll x 8.3 Zoll) ASRock P43ME Schnellinstallationsanleitung ASRock P43ME Support-CD Ein 80-adriges Ultra-ATA 66/100/133 IDE - ASRock P43ME | Quick Installation Guide - Page 25
CPU Chipsatz Speicher Erweiterungssteckplätze Audio LAN E/A-Anschlüsse an der Rückseite - Micro ATX-Formfaktor: 24.4 cm x 21.1 cm; 9.6 Zoll x 8.3 Zoll - LGA 775 CPU - Northbridge: Intel® P43 Level HD Audio (VIA® VT1708S Audio Codec) - PCIE x1 Gigabit LAN 10/100/1000 Mb/s - ASRock P43ME Motherboard - ASRock P43ME | Quick Installation Guide - Page 26
- SMBIOS 2.3.1 - Zentraleinheit, VCCM, NB VTT Stromspannung Multianpassung - Unterstützt Smart BIOS Support-CD - Treiber, Dienstprogramme, Antivirussoftware (Probeversion) Einzigartige - ASRock OC Tuner (siehe VORSICHT 10) Eigenschaft - Intelligent Energy Saver (Intelligente - ASRock P43ME | Quick Installation Guide - Page 27
asrock.com WARNUNG Beachten Sie bitte, dass Overclocking, einschließlich der Einstellung im BIOS, Anwenden der Untied Overclocking-Technologie oder Verwenden von Overclocking von Overclocking Support CPU FSB-Frequenz entnehmen Sie bitte der nachstehenden Tabelle. CPU 64-Bit-CPU besteht diese - ASRock P43ME | Quick Installation Guide - Page 28
Support ein benutzerfreundlicher ASRock Übertaktenswerkzeug, das ASRock OC Tuner. ASRock-Website: http://www.asrock BIOS-Setup-Menü Zugang zu ASRock Instant Flash. Sie brauchen dieses Werkzeug einfach nur zu starten und die neue BIOS Overclocking CPU beschädigen. 14. Wird eine Überhitzung der CPU CPU-Lü - ASRock P43ME | Quick Installation Guide - Page 29
) (Sockel) Deutsch 775-Pin Sockel Übersicht Bevor Sie die 775-Pin CPU in den Sockel sitzen, prüfen Sie bitte, ob die CPU-Oberfläche sauber ist und keine der Kontakte verbogen sind. Setzen Sie die CPU nicht mit Gewalt in den Sockel, dies kann die CPU schwer beschädigen. 29 ASRock P43ME Motherboard - ASRock P43ME | Quick Installation Guide - Page 30
Orientierungskerbe 775-Pin Sockel 775-Pin CPU Um die CPU ordnungsgemäß einsetzen zu können, richten Sie die zwei Orientierungskerben der CPU mit den beiden Markierungen des Sockels aus. Schritt 2-3. Drücken Sie die CPU vorsichtig in vertikaler Richtung in den Sockel. 30 ASRock P43ME Motherboard - ASRock P43ME | Quick Installation Guide - Page 31
Schritt 2-4. Prüfen Sie, dass die CPU ordnungsgemäß im Sockel sitzt und die Orientierungskerben einwandfrei in den entsprechenden Auskerbungen sitzen. Schritt ßen Sie den Ladehebel. Schritt 4-3. Sichern Sie Ladehebel und Ladeplatte mithilfe des Hebelverschlusses. 31 ASRock P43ME Motherboard Deutsch - ASRock P43ME | Quick Installation Guide - Page 32
-Lüfters und Kühlkörpers. Unten stehend ein Beispiel zur Installation eines Kühlkörpers für den 775-Pin CPU. Schritt 1. Geben Sie Wärmeleitmaterial auf die Mitte des IHS, auf die Sockeloberfläche. ( rung des Lüfters oder Kontakt mit anderen Teilen zu vermeiden. Deutsch 32 ASRock P43ME Motherboard - ASRock P43ME | Quick Installation Guide - Page 33
2.3 Installation der Speichermodule (DIMM) Das P43ME Motherboard bietet zwei 240polige DDR2 (Double Data Rate 2) DIMMSteckplätze und unterstützt Zweikanal-Speichertechnologie. Es müssen beiden Enden des Moduls einschnappen und das DIMM-Modul fest an Ort und Stelle sitzt. 33 ASRock P43ME Motherboard - ASRock P43ME | Quick Installation Guide - Page 34
-Steckplätze) Es gibt einen 2 PCI-Steckplätze und 2 PCI Express-Steckplätze am P43ME Motherboard. PCI-Slots: PCI-Slots werden zur Installation von Erweiterungskarten mit dem 32bit PCI-Interface genutzt eine JumperKappe auf diesen beiden Pins. Gebrückt Offen Deutsch 34 ASRock P43ME Motherboard - ASRock P43ME | Quick Installation Guide - Page 35
entfernen, nachdem das CMOS gelöscht wurde. Wenn Sie den CMOSInhalt gleich nach dem Aktualisieren des BIOS löschen müssen, müssen Sie zuerst das System starten und dann wieder ausschalten, bevor Sie den Beziehen Sie sie auf die nachstehenden JumperEinstellungen. Deutsch 35 ASRock P43ME Motherboard - ASRock P43ME | Quick Installation Guide - Page 36
- oder FSB1066-CPU installieren und versuchen, (mithilfe einer BIOS-Einstellung) auf FSB1333 oder FSB1600 zu übertakten, könnte das Problem auftreten, dass funktioniert die CPU nicht richtig auf diesem Motherboard. Siehe die nachstehenden Jumper-Einstellungen. 36 ASRock P43ME Motherboard Deutsch - ASRock P43ME | Quick Installation Guide - Page 37
übertragungsrate bis 3,0 Gb/s. SJedes Ende des SATA Datenkabels kann an die SATA / SATAII Festplatte oder das SATAII Verbindungsstück auf dieser Hauptplatine angeschlossen werden. 37 ASRock P43ME Motherboard - ASRock P43ME | Quick Installation Guide - Page 38
Weise anschließen können. Infrarot-Modul-Header (5-pin IR1) (siehe S.2 - No. 30) Interne Audio-Anschlüsse (4-Pin CD1) (CD1: siehe S.2 - No. 25) Dieser Header unterstützt ein optionales -ROM, DVD-ROM, TV-Tuner oder MPEG-Karten mit Ihrem System zu verbinden. 38 ASRock P43ME Motherboard Deutsch - ASRock P43ME | Quick Installation Guide - Page 39
bequeme Anschlussmöglichkeit und Kontrolle über Audio-Geräte. 1. High Definition Audio unterstützt Jack Sensing (automatische Erkennung AC'97-Audioleiste angeschlossen werden. E. Rufen Sie das BIOS-Setup-Dienstprogramm auf. Wechseln Sie zu Erweiterte Einstellungen und . 39 ASRock P43ME Motherboard - ASRock P43ME | Quick Installation Guide - Page 40
angeschlossen werden; auch ohne Geschwindigkeitsregulierung. Wenn Sie einen dreipoligen CPU-Lüfter an den CPU-Lüferanschluss dieses Motherboards anschließen möchten, verbinden Sie ihn AnschlussHeader wird verwendet, um ein COM-Anschlussmodul zu unterstützen. Deutsch 40 ASRock P43ME Motherboard - ASRock P43ME | Quick Installation Guide - Page 41
(B oder C) des HDMI_SPDIF-Kabels an den HDMI_SPDIF-Anschluss der HDMI-VGA-Karte an. A. Schwarzes Ende B. Weißes Ende (zweipolig) C. Weißes Ende (dreipolig) Deutsch 41 ASRock P43ME Motherboard - ASRock P43ME | Quick Installation Guide - Page 42
vor. Verwendung von SATA / SATAII-Festplatten ohne NCQ-Funktionen SCHRITT 1: BIOS einrichten. A. Rufen Sie das BIOS SETUP UTILITY auf, wählen Sie den „Advanced"- Bildschirm (Erweitert), dann folgt vor. Verwendung von SATA / SATAII-Festplatten ohne NCQ-Funktionen 42 ASRock P43ME Motherboard Deutsch - ASRock P43ME | Quick Installation Guide - Page 43
?" erscheint, legen Sie bitte die ASRock Support CD in Ihr optisches Laufwerk ein. Overclock Mode" (Übertaktungsmodus) im BIOS von [Auto] auf [CPU, PCIE, Async.] um. Dadurch wird der CPU Overclocking-Risiken auf Seite 27, bevor Sie die Untied Overclocking-Technologie anwenden. 43 ASRock P43ME - ASRock P43ME | Quick Installation Guide - Page 44
BIOS-Information Das Flash Memory dieses Motherboards speichert das Setup-Utility. Drücken Sie während des POST (Power-On-Self-Test BIOS-Setup, siehe bitte das Benutzerhandbuch (PDF Datei) auf der Support CD. 4. Software Support beigefügte Support-CD enth Support- -Verzeichnis der Support-CD, um - ASRock P43ME | Quick Installation Guide - Page 45
particulières au modèle que vous utilisez. www.asrock.com/support/index.asp 1.1 Contenu du paquet Carte mère ASRock P43ME (Facteur de forme Micro ATX: 9.6 pouces x 8.3 pouces, 24.4 cm x 21.1 cm) Guide d'installation rapide ASRock P43ME CD de soutien ASRock P43ME Un câble ruban IDE Ultra ATA 66/100 - ASRock P43ME | Quick Installation Guide - Page 46
charge la technologie Untied Overclocking (voir ATTENTION 3) - Prise en charge de la technologie EM64T par le CPU - Northbridge: Intel® P43 - Southbridge: Intel® ICH10 - Compatible avec la Technologie de Mémoire à Canal Double (voir ATTENTION 4) - 2 x slots DIMM DDR2 - Supporter DDR2 1200/1066/800 - ASRock P43ME | Quick Installation Guide - Page 47
and Play" - Compatible pour événements de réveil ACPI 1.1 - Support SMBIOS 2.3.1 - CPU, VCCM, NB, VTT Tension Multi-ajustement - Prise en charge du Smart BIOS - Pilotes, utilitaires, logiciel anti-virus (Version d'essai) - Tuner ASRock OC (voir ATTENTION 10) - Économiseur d'énergie intelligent (voir - ASRock P43ME | Quick Installation Guide - Page 48
® VistaTM. Avec Windows® XP 64 bits et Windows® VistaTM 64 bits avec CPU 64 bits, il n'y a pas ce genre de limitation. 7. Pour l'entrée microphone, cette carte mère supporte les deux modes stéréo et mono. Pour la sortie audio, cette carte mère supporte les 48 ASRock P43ME Motherboard Français - ASRock P43ME | Quick Installation Guide - Page 49
®. Com este utilitário, poderá premir a tecla durante o teste de arranque POST ou premir a tecla para exibir o menu de configuração do BIOS para aceder ao ASRock Instant Flash. Execute esta ferramenta para guardar o novo ficheiro de BIOS numa unidade flash USB, numa disquete ou num disco - ASRock P43ME | Quick Installation Guide - Page 50
® 2000. Veuillez consulter la page 47 du "Guide d'utilisation" dans le CD de support pour le détail des réglages. 2. Installation Pr circuits intégrés. 4. A chaque désinstallation de composant, placez-le sur un support antistatique ou dans son sachet d'origine. 5. Lorsque vous placez les vis dans - ASRock P43ME | Quick Installation Guide - Page 51
2.1 Installation du CPU Pour l'installation du processeur Intel 775 broches, veuillez suivre la procédure (Plaque de chargement) ci-dessous. (Barrette de contact) (Corps du socket) Vue d'ensemble du socket 775 broches Avant d'insérer le processeur 775 broches dans le socket, veuillez vérifier que - ASRock P43ME | Quick Installation Guide - Page 52
775 broches Socket 775 broches Pour une insertion correcte, veuillez vérifier que vous faites bien correspondre les deux encoches d'orientation sur le processeur avec les deux détrompeurs du socket si vous renvoyez la carte mère pour service après vente. Français Etape 4. ASRock P43ME Motherboard - ASRock P43ME | Quick Installation Guide - Page 53
reporter aux manuels d'instructions de votre ventilateur installation du dissipateur thermique pour un processeur 775 broches. (Appliquez le matériau mère) Etape 2. Placez le dissipateur thermique sur le socket. Vérifiez que les câbles du ventilateur sont orient ASRock P43ME Motherboard Français - ASRock P43ME | Quick Installation Guide - Page 54
2.3 Installation des modules mémoire (DIMM) La carte mère P43ME possède deux emplacements DIMM DDR2 (Double Débit de données 2) 240 broches, et prend en charge la maintien situés aux deux extrémités se ferment complètement et que le module DIMM soit inséré correctement. 54 ASRock P43ME Motherboard - ASRock P43ME | Quick Installation Guide - Page 55
Slots PCI Express) Il y a 2 ports PCI et 2 ports PCI Express sur la carte mère P43ME. Slots PCI: Les slots PCI sont utilisés pour installer des cartes d'extension dotées d'une interface PCI obligatoirement 2 Amp et un courant standby supérieur fourni par l'alimentation. 55 ASRock P43ME Motherboard - ASRock P43ME | Quick Installation Guide - Page 56
après avoir mis le BIOS à jour. Si vous avez besoin d'effacer la CMOS lorsque vous avez fini de mettre le BIOS à jour, vous devez FSB3, voir p.2 No. 33) Paramètres par défaut Si vous voulez overclocker la barrette de mémoire choisie en DDR2 1200 sur cette carte mère, vous ASRock P43ME Motherboard - ASRock P43ME | Quick Installation Guide - Page 57
glant le BIOS) Vous pouvez fréquence plus basse. Si vous voulez overclocker le CPU que vous avez choisi vers un FSB1066 cavaliers. Si vous voulez overclocker le CPU que vous avez choisi . Si vous voulez overclocker le CPU que vous avez choisi cas contraire, le CPU peut ne pas fonctionner correctement sur cette - ASRock P43ME | Quick Installation Guide - Page 58
carte mère vers le disque dur Câble ATA 66/100/133 80 conducteurs Note: Veuillez vous reporter aux instructions du fabricant de votre IDE périphérique pour les détails. Connecteurs Série ATAII (SATAII_1: voir p.2 ou au connecteur SATAII sur la carte mere. ASRock P43ME Motherboard Français - ASRock P43ME | Quick Installation Guide - Page 59
(CD1 br. 4) (CD1: voir p.2 No. 25) Cet en-tête supporte un module infrarouge optionnel de transfert et de réception sans fil. Ils vous permettent de gérer des entrées audio à partir de sources CD1 stéréo comme un CD-ROM, DVD-ROM, un tuner TV ou une carte MPEG. 59 ASRock P43ME Motherboard Français - ASRock P43ME | Quick Installation Guide - Page 60
. Veuillez suivre les instructions dans notre manuel et le manuel de châssis afin installer votre système. 2. Si vous utilisez le panneau audio AC'97, installez-le sur l'adaptateur audio du panneau avant conform correspondre le fil noir à la broche de terre. Français 60 ASRock P43ME Motherboard - ASRock P43ME | Quick Installation Guide - Page 61
la broche de terre. ien que cette carte mère offre un support de (Ventilateur silencieux) ventilateur de CPU à 4 broches , le ventilateur de CPU à 3 broches peut bien fonctionner même sans la fonction de utilisée pour prendre en charge un module de port COM. 61 ASRock P43ME Motherboard Français - ASRock P43ME | Quick Installation Guide - Page 62
HDMI_SPDIF (HDMI_SPDIF1 3-pin) (voir p.2 No. 27) Connecteur HDMI_SPDIF, fournissant une sortie audio SPDIF vers la carte VGA HDMI, et permettant au système de se connecter au la carte VGA HDMI. B. extrémité blanche (2 briches) C. extrémité blanche (3 briches) Français 62 ASRock P43ME Motherboard - ASRock P43ME | Quick Installation Guide - Page 63
Guide fourni par le fabricant de puces, les functions AHCI ne sont pas supportées sous Windows® 2000. 2.8.1 Installation de Windows® 2000 / XP ETAPE 1 : Configurez le BIOS. A. Accédez à BIOS SETUP UTILITY (Utilitaire de configuration BIOS) écran Avancé Configuration ASRock P43ME Motherboard Français - ASRock P43ME | Quick Installation Guide - Page 64
instructions pour installer l'OS Windows® VistaTM / VistaTM 64-bits sur votre système. Lorsque vous voyez la page "Où souhaitez-vous installer Windows ?", veuillez insérer le CD Support d' ASRock du BIOS pour établir la sélection de [Auto] à [CPU, PCIE, Async.]. Par conséquent, le CPU FSB - ASRock P43ME | Quick Installation Guide - Page 65
entrer dans le BIOS; sinon, le POST continue ses tests de routine. Si vous désirez entrer dans le BIOS après le POST BIOS, veuillez consulter le Guide de l'utilisateur (fichier PDF) dans le CD technique. 4. Informations sur le CD de support Cette carte mère supporte ASRock P43ME Motherboard Français - ASRock P43ME | Quick Installation Guide - Page 66
. Nel caso in cui questo manuale sia modificato, la versione aggiornata sarà disponibile sul sito di ASRock senza altro avviso. Sul sito ASRock si possono anche trovare le più recenti schede VGA e gli elenchi di CPU supportate. ASRock website http://www.asrock.com Se si necessita dell'assistenza - ASRock P43ME | Quick Installation Guide - Page 67
Audio LAN Pannello posteriore I/O - Micro ATX Form Factor: 9.6-in x 8.3-in, 24.4 cm x 21.1 cm - LGA 775 overclocking "slegata" (vedi ATTENZIONE 3) - Supporto CPU EM64T - Northbridge: Intel® P43 Audio HD CH Windows® VistaTM Premium Level (VIA® VT1708S Audio Codec) - PCIE x1 Gigabit LAN 10/100/1000 Mb - ASRock P43ME | Quick Installation Guide - Page 68
con ACPI 1.1 wake up events - Supporta SMBIOS 2.3.1 - Regolazione multi-voltaggio CPU, VCCM, NB, VTT - Smart BIOS supportato - Driver, utilità, software antivirus (Versione dimostrativa) - Sintonizzatore ASRock OC (vedi ATTENZIONE 10) - Intelligent Energy Saver (Risparmio intelligente dell'energia - ASRock P43ME | Quick Installation Guide - Page 69
, prego visitare il nostro sito internet: http://www.asrock.com AVVISO Si prega di prendere atto che la procedura di overclocking implica dei rischi, come anche la regolazione delle impostazioni del BIOS, l'applicazione della tecnologia Untied Overclocking Technology, oppure l'uso di strumenti di - ASRock P43ME | Quick Installation Guide - Page 70
si installa il sistema. 15. Funzioni AHCI non sono supportate da Windows® 2000 OS. In Windows® 2000 si consiglia l'uso della modalità IDE. Consultare pagina 47 del "Manuale utente" nel CD in dotazione per avere informazioni dettagliate sulla configurazione. 70 ASRock P43ME Motherboard Italiano - ASRock P43ME | Quick Installation Guide - Page 71
componente. 5. Nell'usare i giraviti per fissare la scheda madre al telaio non serrare eccessivamente le viti! Altrimenti si rischia di danneggiare la scheda madre. 71 ASRock P43ME Motherboard Italiano - ASRock P43ME | Quick Installation Guide - Page 72
135 gradi la leva di carico per aprirla completamente. Fase 1-3. Ruotare di circa 100 gradi la piastra di carico per aprirla completamente. Fase 2. Inserire la CPU 775-Pin: Fase 2-1. Tenere la CPU dai bordi segnati con linee nere. Linea nera Linea nera Italiano 72 ASRock P43ME Motherboard - ASRock P43ME | Quick Installation Guide - Page 73
Dente di orientamento Pin1 Dente di Tacca di allineamento orientamento Tacca di allineamento CPU da 775-Pin Socket da 775-Pin Per il corretto inserimento, verificare di far combaciare i due denti di leva di carico mentre si preme leggermente sulla piastra di carico. 73 ASRock P43ME Motherboard - ASRock P43ME | Quick Installation Guide - Page 74
viene presentato un esempio che mostra l'installazione del dissipatore per la CPU da 775-Pin. Fase1. (Applicare il materiale dell'interfaccia termica) Applicare il materiale di interfaccia termica al dell'IHS sulla superficie del socket Fase 2. Fase 3. Collocare il dissipatore di calore nel - ASRock P43ME | Quick Installation Guide - Page 75
2.3 Installazione dei moduli di memoria (DIMM) La motherboard P43ME dispone di due slot DIMM DDR2 (Double Data Rate 2) a 240 pin e supporta la tecnologia Dual Channel i fermagli di ritegno alle due estremità e fino ad installare correttamente la DIMM nella sua sede. 75 ASRock P43ME Motherboard - ASRock P43ME | Quick Installation Guide - Page 76
2.4 Slot di espansione (Slot PCI ed Slot PCI Express) Sulla scheda madre P43ME c'è 2 slot PCI ed 2 slot PCI Express. Slot PCI: Sono utilizzati per installare schede di è completamente inserita nello slot. Step 4. Agganciare la scheda allo chassis con le viti. 76 ASRock P43ME Motherboard Italiano - ASRock P43ME | Quick Installation Guide - Page 77
aver aggiornato il BIOS. Se è necessario cancellare la CMOS una volta completato l'aggiornamento del BIOS, è necessario pin, vedere pagina 2 numero 33) Impostazione predefinita Se si vuole eseguire l'overclocking dei moduli di memoria DDR2 1200 impiegati su questa scheda madre, è necessario - ASRock P43ME | Quick Installation Guide - Page 78
installa una CPU FSB800 o FSB1066, e si prova ad eseguire l'overclock su FSB1333 o FSB1600 (tramite impostazione BIOS) potrebbe verificarsi contrario la CPU potrebbe non funzionare correttamente su questa scheda madre. Fare riferimento alle seguenti impostazioni jumper. 78 ASRock P43ME Motherboard - ASRock P43ME | Quick Installation Guide - Page 79
) Una o altra estremità del cavo di dati SATA può essere collegata al disco rigido SATA / SATAII o al connettore di SATAII su questa cartolina base. 79 ASRock P43ME Motherboard - ASRock P43ME | Quick Installation Guide - Page 80
Collettore modulo infrarossi (5-pin IR1) (vedi p.2 Nr. 30) Connettori audio interni (4-pin CD1) (vedi p.2 Nr. 25) Questo collettore supporta Permettono di ricevere input CD1 stereo audio da fonti di suono come CD-ROM, DVD - ROM,TV tuner, o schede MPEG. Italiano 80 ASRock P43ME Motherboard - ASRock P43ME | Quick Installation Guide - Page 81
della ventola ai corrispondenti connettori facendo combaciare il cavo nero col pin di terra. Connettore ventolina CPU (4-pin CPU_FAN1) 4 3 2 1 Collegare il cavo della ventolina CPU a questo connettore e far (vedi p.2 Nr. 4) combaciare il filo nero al pin terra. 81 ASRock P43ME Motherboard - ASRock P43ME | Quick Installation Guide - Page 82
ventola. Se si intende collegare la ventola CPU a 3 piedini al connettore della ventola CPU su questa scheda madre, collegarla ai piedini (3-pin HDMI_SPDIF1) (vedi p.2 Nr. 27) Header HDMI_SPDIF, con uscita audio SPDIF su scheda HDMI VGA, consente al sistema di collegare dispositivi per TV - ASRock P43ME | Quick Installation Guide - Page 83
madre. Quindi collegare l'estremità bianca (B o C) del cavo HDMI_SPDIF al connettore HDMI_SPDIF della scheda HDMI VGA. A. estremità nera B. estremità bianca (2 pin) C. estremità bianca (3 pin) Italiano 83 ASRock P43ME Motherboard - ASRock P43ME | Quick Installation Guide - Page 84
. Dal momento che il driver di Windows® 2000 AHCI non viene fornito dal venditore, le funzioni AHCI non sono supportate in Windows® 2000. 2.8.1 1: Configurare il BIOS. A. Entrare in BIOS SETUP UTILITY (UTILITÀ DI CONFIGURAZIONE DEL BIOS) Advanced screen ( 84 ASRock P43ME Motherboard Italiano - ASRock P43ME | Quick Installation Guide - Page 85
PCI / PCIE fissati. Prima di abilitare la funzione Untied Overclocking inserire l'opzione "Modalità Overclock" nelle impostazioni del BIOS per impostare la selezione da [Auto] a [CPU, PCIE, Async.]. A questo punto, la CPU FSB è "libera" durante l'overclocking, ma i bus PCI / PCIE sono nella modalit - ASRock P43ME | Quick Installation Guide - Page 86
test di routine. Per entrare il BIOS Setup dopo il POST, riavvia il sistema premendo + + , o premi il tasto di reset sullo chassis del sistema. Per informazioni più dettagliate circa il Setup del BIOS, fare riferimento al Manuale i menù. 86 ASRock P43ME Motherboard Italiano - ASRock P43ME | Quick Installation Guide - Page 87
número de modelo específico de su placa. www.asrock.com/support/index.asp 1.1 Contenido de la caja Placa base ASRock P43ME (Factor forma Micro ATX: 24,4 cm x 21,1 cm, 9,6" x 8,3") Guía de instalación rápida de ASRock P43ME CD de soporte de ASRock P43ME Una cinta de datos IDE de conducción 80 Ultra - ASRock P43ME | Quick Installation Guide - Page 88
Audio LAN Entrada/Salida de Panel Trasero - Factor forma Micro ATX: 24,4 cm x 21,1 cm, 9,6" x 8,3" - LGA 775 Admite CPU EM64T - North Bridge: Intel® P43 - PCIE x1 Gigabit LAN 10/100/1000 Mb/s - Realtek RTL8111DL - Soporta Wake-On- de VELOCIDAD) - Conexión de audio: Altavoz lateral / Altavoz trasero - ASRock P43ME | Quick Installation Guide - Page 89
de port COM - 1 x cabecera HDMI_SPDIF - Conector de ventilador de CPU / chasis / alimentacion BIOS - 24-pin cabezal de alimentación ATX - 4-pin conector de ATX 12V power - Conector de Audio Interno - Conector de audio de panel frontal - 2 x Cabezal USB 2.0 (admite 4 puertos USB 2.0 adicionales - ASRock P43ME | Quick Installation Guide - Page 90
® VistaTM. Para equipos con Windows® XP 64-bit y Windows® VistaTM 64-bit con CPU de 64-bit, no existe dicha limitación. 7. Para la entrada de micrófono, esta placa madre ofrece soporte para modos estéreo y mono. Para salida de audio, este placa madre ofrece 90 ASRock P43ME Motherboard Español - ASRock P43ME | Quick Installation Guide - Page 91
gina 26 del "Manual de usuario" que overclocking de ASRock de usuario-fácil que le permite a supervisar su sistema por la función de monitor de hardware y overclock ASRock: http://www.asrock.com 12. ASRock Instant Flash es una utilidad de programación del BIOS la CPU de ASRock P43ME Motherboard Español - ASRock P43ME | Quick Installation Guide - Page 92
"Manual del CPU de 775 agujas en el socket, compruebe que la superficie de la CPU se encuentra limpia y no hay ninguna aguja torcida en el socket. No introduzca la CPU en el socket por la fuerza si se produce la situación anterior. Si lo hace, puede producir daños graves en la CPU. 92 ASRock P43ME - ASRock P43ME | Quick Installation Guide - Page 93
de la CPU coinciden con las teclas de alineación del socket. Step 2-3. Coloque con cuidado la CPU en el socket con un movimiento totalmente vertical. Step 2-4. Compruebe que la CPU se encuentra en el socket y la orientación coincide con la indicada por las muescas. 93 ASRock P43ME Motherboard Espa - ASRock P43ME | Quick Installation Guide - Page 94
de la CPU. A continuación se ofrece un ejemplo para ilustrar la instalación del disipador para la CPU de 775 agujas. (Aplique el material termal de interfaz) Paso 1. Aplique el material termal de interfaz en el centro del IHS de la superficie del socket. Español 94 ASRock P43ME Motherboard - ASRock P43ME | Quick Installation Guide - Page 95
socket. Asegúrese (Cables del ventilador en el lado más próximo al cabezal de la placa madre) de que los cables del ventilador están orientados hacia el lado más cercano del conector del ventilador de la CPU del ventilador con el conector del ventilador de la CPU en la placa madre. Fije el cable que - ASRock P43ME | Quick Installation Guide - Page 96
2.3 Instalación de Memoria La placa base P43ME proporciona dos ranuras DIMM DDR2 (Double Data Rate 2, es decir, Tasa doble de datos) de 240 contactos y sujeción de ambos lados queden completamente introducidos en su sitio y la DIMM se haya asentado apropiadamente. 96 ASRock P43ME Motherboard Español - ASRock P43ME | Quick Installation Guide - Page 97
2.4 Ranuras de Expansión (ranuras PCI y ranuras PCI Express) La placa madre P43ME cuenta con 2 ranuras PCI y 2 ranuras PCI Express. Ranura PCI: Para instalar tarjetas de expansi . Empuje firmemente la tarjeta en la ranura. Paso 4. Asegure la tarjeta con tornillos. 97 ASRock P43ME Motherboard Español - ASRock P43ME | Quick Installation Guide - Page 98
borrar la CMOS cuando acabe de finalizar la actualización de la BIOS, debe arrancar primero el sistema y, a continuación, apagarlo antes de 33) Valor predeterminado Si desea utilizar el módulo de memoria en modo overclock, seleccione DDR2 1200 en esta placa base, para lo cual necesitará cambiar - ASRock P43ME | Quick Installation Guide - Page 99
del reloj a FSB1333 o FSB1600 (mediante la configuración del BIOS) puede encontrarse el problema de que la frecuencia de la contrario, la CPU no funcionará correctamente en esta placa base. Por favor, consulte la configuración de los puentes a continuación. 99 ASRock P43ME Motherboard Español - ASRock P43ME | Quick Installation Guide - Page 100
del cable de los datos de SATA puede ser conectado con el disco duro de SATA / SATAII o el conectador de SATAII en esta placa base. ASRock P43ME Motherboard Español - ASRock P43ME | Quick Installation Guide - Page 101
ón y recepción wireless opcional. Permite recepción de input CD1 audio de fuente sónica como CD- ROM, DVD-ROM, TV tuner, o tarjeta MPEG. Este es una interface para cable de audio de panel frontal que permite conexión y control conveniente de apparatos de Audio. ASRock P43ME Motherboard 101 - ASRock P43ME | Quick Installation Guide - Page 102
los cables del ventilador a los conectores de ventilador, haciendo coincidir el cable negro con la patilla de masa. Conecte el cable del ventilador de la CPU a este conector y haga coincidir el cable negro con el conector de tierra. Español 102 ASRock P43ME Motherboard - ASRock P43ME | Quick Installation Guide - Page 103
suficiente electricidad. De lo contrario no se podrá encender. Este cabezal del puerto COM se utiliza para admitir un módulo de puerto COM. Español ASRock P43ME Motherboard 103 - ASRock P43ME | Quick Installation Guide - Page 104
extremo blanco (B o C) del cable HDMI_SPDIF en el conector HDMI_SPDIF de la tarjeta VGA HDMI. A. Extremo negro B. Extremo blanco (2 patillas) C. Extremo blanco (3 patillas) Español 104 ASRock P43ME Motherboard - ASRock P43ME | Quick Installation Guide - Page 105
Uso de dispositivos SATA / SATAII sin funciones NCQ PASO 1: Configuración de la BIOS. A. Entre en BIOS SETUP UTILITY Òpantalla Avanzada ÒIDE Configuración. B. Configure la "SATAII Configuration" (" . Uso de dispositivos SATA / SATAII sin funciones NCQ Español ASRock P43ME Motherboard 105 - ASRock P43ME | Quick Installation Guide - Page 106
de ASRock en la unidad óptica y haga clic en el botón "Load Driver" ( Overclocking) no relacionado, por favor entre a la opción de "Modo de Forzado de Reloj" de la configuración de BIOS para establecer la selección de [Auto] a [CPU, PCIE, Async.]. Por lo tanto, FSB de CPU ASRock P43ME Motherboard - ASRock P43ME | Quick Installation Guide - Page 107
Para información detallada sobre como configurar la BIOS, por favor refiérase al Manual del Usuario (archivo PDF) contenido en el CD. 4.Información de Software Support CD Esta placa-base soporta diversos tipos archivo "ASSETUP.EXE" para iniciar la instalación. Español ASRock P43ME Motherboard 107 - ASRock P43ME | Quick Installation Guide - Page 108
fica acerca do modelo que está a utilizar. www.asrock.com/support/index.asp 1.1 Este pacote contém Placa-mãe ASRock P43ME (Formato Micro ATX: 9,6 pol. x 8,3 pol., 24,4 cm x 21,1 cm) Guia de instalação rápida da ASRock P43ME CD de suporte da placa ASRock P43ME Um cabo-fita IDE Ultra ATA 66/100/133 de - ASRock P43ME | Quick Installation Guide - Page 109
/ Celeron® de 775 pinos com suporte para o processador Dual Core Wolfdale - Suporta FSB1600/1333/1066/800 MHz (veja o AVISO 1) - Suporta a tecnologia Hyper-Threading (veja o AVISO 2) - Suporta a tecnologia Untied Overclocking (veja o AVISO 3) - Suporta a CPU EM64T - North Bridge: Intel® P43 - South - ASRock P43ME | Quick Installation Guide - Page 110
(suporta 4 portas USB 2.0) (veja o AVISO 9) BIOS - 8Mb BIOS AMI - BIOS AMI - Suporta dispositivos "Plug and Play" - ACPI ASRock Instant Flash (veja o AVISO 12) - Booster híbrido: - Frequência da CPU com controle contínuo (veja o AVISO 13) - ASRock asrock.com 130 ASRock P43ME Motherboard - ASRock P43ME | Quick Installation Guide - Page 111
BIOS, à aplicação da tecnologia Untied Overclocking ou à utilização de ferramentas de overclocking de terceiros. O overclocking âmbito do Windows® XP e do Windows® VistaTM. No caso da CPU de 64 bits do Windows® XP de 64 bits e do Windows® ligação correcta. ASRock P43ME Motherboard 131 Português - ASRock P43ME | Quick Installation Guide - Page 112
10. É uma ferramenta de overclocking da ASRock fácil de utilizar que lhe permite vigiar i BIOS pour accéder à ASRock Instant Flash. Lancez simplement cet outil et enregistrez le nouveau fichier BIOS Manual do utilizador" no CD de suporte para obter detalhes de configuração. ASRock P43ME Motherboard - ASRock P43ME | Quick Installation Guide - Page 113
do soquete de 775 pinos Antes de inserir a CPU de 775 pinos no soquete, verifique se a superfície da CPU está limpa e se há pinos tortos no soquete. Não force para inserir a CPU no soquete na situação acima. Do contrário, a CPU será seriamente danificada. Português ASRock P43ME Motherboard 133 - ASRock P43ME | Quick Installation Guide - Page 114
Insira a CPU de 775 pinos: Passo 2-1. Segure a CPU pelas CPU com as duas marcas de alinhamento no soquete. 134 Passo 2-3. Com cuidado, instale a CPU no soquete verticalmente. Passo 2-4. Verifique se a CPU está dentro do soquete e devidamente alinhada com as marcas de posicionamento. ASRock P43ME - ASRock P43ME | Quick Installation Guide - Page 115
da CPU e do dissipador de calor. Veja abaixo um exemplo que ilustra a instalação do dissipador de calor para a CPU de 775 pinos. (Aplique o material termocondutor) Passo 1. Aplique o material termocondutor no centro do IHS na superfície do soquete. Português ASRock P43ME Motherboard 135 - ASRock P43ME | Quick Installation Guide - Page 116
placa-mãe) voltados para o lado mais próximo ao conector do ventilador da CPU na placa-mãe (CPU_FAN1, consulte a página 2, n.º 4). Passo 3. não ficará firme na placa-mãe. Passo 5. Ligue o cabo do ventilador da CPU ao respectivo conector na placa-mãe. Passo 6. Fixe o excesso de cabo com uma - ASRock P43ME | Quick Installation Guide - Page 117
2.3 Instalação dos Módulos de Memória (DIMM) A placa-mãe P43ME possui dois slots DIMM DDR2 (taxa de dados dupla 2) de 240 pinos e suporta a tecnologia de memória de em ambos os lados se encaixem totalmente em seus locais e a DIMM esteja encaixada de modo apropriado. ASRock P43ME Motherboard 137 - ASRock P43ME | Quick Installation Guide - Page 118
de PCI e PCI Express) Há 2 slots de PCI e 2 de PCI Express na placa-mãe do P43ME. Slots PCI: Os slots PCI se usam para instalar placas de expansão com uma interface de PCI de encaixada no slot. 4º passo: Aparafuse a placa no chasss com os parafusos. Português 138 ASRock P43ME Motherboard - ASRock P43ME | Quick Installation Guide - Page 119
Se precisar limpar o CMOS ao concluir a atualização do BIOS, deverá reiniciar o sistema primeiro e, em seguida, desligá-lo veja a folha 2, No. 33) Predefinido Português Se desejar efectuar overclock ao modulo de memória adoptado para DDR2 1200 nesta placa principal, ASRock P43ME Motherboard 139 - ASRock P43ME | Quick Installation Guide - Page 120
ou FSB1600 (ajustando o BIOS) poderá originar o problema de overclock demasiado alto da frequência DRAM. Utilize o jumper para forçar o NB a fixar-se a uma frequência mais alta, para que a DRAM possa funcionar a uma frequência mais baixa. Se desejar efectuar overclock à CPU adoptada para FSB1066 - ASRock P43ME | Quick Installation Guide - Page 121
ATA (SATA) (opcional) Tanto a saída do cabo de Serial dados SATA pode ser conectado ao disco rígido SATA / SATAII quanto o conector SATAII na placa mãe. ASRock P43ME Motherboard 141 - ASRock P43ME | Quick Installation Guide - Page 122
receba entrada de CD1 áudio em estéreo de fontes de áudio como CD-ROM, DVD-ROM, placa sintonizadora de TV ou placa MPEG. 142 ASRock P43ME Motherboard Português - ASRock P43ME | Quick Installation Guide - Page 123
es que aparecem no manual e no manual do chassis para instalar Entre no utilitário de configuração do BIOS. Vá até à opção Definições avan CPU 4 3 2 1 Ligue o cabo do ventilador da CPU, coincidindo o fio preto com (CPU_FAN1 de 4 pinos) o pino de aterramento. (veja a folha 2, No. 4) ASRock P43ME - ASRock P43ME | Quick Installation Guide - Page 124
controlo de velocidade da ventoinha. Se pretender ligar uma ventoinha de 3 pinos para CPU ao conector de ventoinha do CPU nesta placa-mãe, por favor, ligue-a aos pinos 1-3. Pinos 1-3 ligados Instalação de ãs LCD. Ligue o conector HDMI_SPDIF da placa VGA HDMI a este conector. ASRock P43ME Motherboard - ASRock P43ME | Quick Installation Guide - Page 125
es RAID, siga as etapas a seguir descritas. Use SATA / SATAII HDDs sem NCQ e Hot Plug funções ETAPA 1: Aceda à BIOS. A. Vá até BIOS SETUP UTILITY Advanced screen IDE Configuration (Utilitário de configuração da BIOS - Ecrã avançado - Configuração IDE). ASRock P43ME Motherboard 145 Português - ASRock P43ME | Quick Installation Guide - Page 126
BIOS. A. Vá até BIOS SETUP UTILITY Advanced screen IDE Configuration (Utilitário de configuração da BIOS BIOS. A. Vá até BIOS SETUP UTILITY Advanced screen IDE Configuration (Utilitário de configuração da BIOS CD de suporte da ASRock na unidade óptica e : (Há dois ASRock Suporta CD no pacote - ASRock P43ME | Quick Installation Guide - Page 127
fixos. Antes de activar a função Untied Overclocking, aceda à opção "Overclock Mode" (Modo de overclock) da configuração da BIOS para definir a função de [Auto] para [CPU, PCIE, Async.]. Por outras palavras, o FSB da CPU é separado durante o overclocking, mas os buses PCI e PCIE permanecem fixos - ASRock P43ME | Quick Installation Guide - Page 128
148 ASRock P43ME Motherboard - ASRock P43ME | Quick Installation Guide - Page 129
® ® ® ® ® ® ® ® ASRock P43ME Motherboard 149 - ASRock P43ME | Quick Installation Guide - Page 130
® 150 ASRock P43ME Motherboard - ASRock P43ME | Quick Installation Guide - Page 131
" " " " ® ® ® ® " " " " ® ASRock P43ME Motherboard 151 - ASRock P43ME | Quick Installation Guide - Page 132
® ® ® " " 152 ASRock P43ME Motherboard - ASRock P43ME | Quick Installation Guide - Page 133
ASRock P43ME Motherboard 153 - ASRock P43ME | Quick Installation Guide - Page 134
Pin1 Pin1 154 ASRock P43ME Motherboard - ASRock P43ME | Quick Installation Guide - Page 135
ASRock P43ME Motherboard 155 - ASRock P43ME | Quick Installation Guide - Page 136
156 ASRock P43ME Motherboard - ASRock P43ME | Quick Installation Guide - Page 137
ASRock P43ME Motherboard 157 - ASRock P43ME | Quick Installation Guide - Page 138
"" "" "" "" 158 ASRock P43ME Motherboard - ASRock P43ME | Quick Installation Guide - Page 139
ASRock P43ME Motherboard 159 - ASRock P43ME | Quick Installation Guide - Page 140
SATAII_3 SATAII_1 SATAII_4 SATAII_2 SATAII_5 SATAII_6 160 ASRock P43ME Motherboard - ASRock P43ME | Quick Installation Guide - Page 141
CD1 ASRock P43ME Motherboard 161 - ASRock P43ME | Quick Installation Guide - Page 142
4 3 2 1 162 ASRock P43ME Motherboard - ASRock P43ME | Quick Installation Guide - Page 143
12 24 1 13 12 24 1 13 ASRock P43ME Motherboard 163 - ASRock P43ME | Quick Installation Guide - Page 144
C B A 164 ASRock P43ME Motherboard - ASRock P43ME | Quick Installation Guide - Page 145
® ® ® ® ® ® ® ® ® ASRock P43ME Motherboard 165 - ASRock P43ME | Quick Installation Guide - Page 146
® ® ® ® ® ® \ ® \ ® ® 166 ASRock P43ME Motherboard - ASRock P43ME | Quick Installation Guide - Page 147
" " " " \\ ASRock P43ME Motherboard 167 - ASRock P43ME | Quick Installation Guide - Page 148
168 ASRock P43ME Motherboard - ASRock P43ME | Quick Installation Guide - Page 149
® ® ® ® ® ® ® ® ASRock P43ME Motherboard 169 - ASRock P43ME | Quick Installation Guide - Page 150
® ® 170 ASRock P43ME Motherboard - ASRock P43ME | Quick Installation Guide - Page 151
® ® ® ® ® ® ASRock P43ME Motherboard 171 - ASRock P43ME | Quick Installation Guide - Page 152
® ® ® 172 ASRock P43ME Motherboard - ASRock P43ME | Quick Installation Guide - Page 153
ASRock P43ME Motherboard 173 - ASRock P43ME | Quick Installation Guide - Page 154
174 ASRock P43ME Motherboard - ASRock P43ME | Quick Installation Guide - Page 155
ASRock P43ME Motherboard 175 - ASRock P43ME | Quick Installation Guide - Page 156
176 ASRock P43ME Motherboard - ASRock P43ME | Quick Installation Guide - Page 157
ASRock P43ME Motherboard 177 - ASRock P43ME | Quick Installation Guide - Page 158
178 ASRock P43ME Motherboard - ASRock P43ME | Quick Installation Guide - Page 159
ASRock P43ME Motherboard 179 - ASRock P43ME | Quick Installation Guide - Page 160
SATAII_3 SATAII_1 SATAII_4 SATAII_2 SATAII_5 SATAII_6 180 ASRock P43ME Motherboard - ASRock P43ME | Quick Installation Guide - Page 161
CD1 ASRock P43ME Motherboard 181 - ASRock P43ME | Quick Installation Guide - Page 162
4 3 2 1 182 12 24 1 13 ASRock P43ME Motherboard - ASRock P43ME | Quick Installation Guide - Page 163
12 24 1 13 C B A ASRock P43ME Motherboard 183 - ASRock P43ME | Quick Installation Guide - Page 164
® ® ® ® ® ® ® ® ® ® ® ® ® ® ® ® 184 ASRock P43ME Motherboard - ASRock P43ME | Quick Installation Guide - Page 165
® ® ® ® ® ® ® ® ® ® ® ® ASRock P43ME Motherboard 185 - ASRock P43ME | Quick Installation Guide - Page 166
® ® 186 ASRock P43ME Motherboard - ASRock P43ME | Quick Installation Guide - Page 167
X O O O X O O O O: X: O O O O ASRock P43ME Motherboard 187
-
 1
1 -
 2
2 -
 3
3 -
 4
4 -
 5
5 -
 6
6 -
 7
7 -
8
-
9
-
10
-
11
-
12
-
13
-
14
-
15
-
16
-
17
-
18
-
19
-
20
-
21
-
22
-
23
-
24
-
25
-
26
-
27
-
28
-
29
-
30
-
31
-
32
-
33
-
34
-
35
-
36
-
37
-
38
-
39
-
40
-
41
-
42
-
43
-
44
-
45
-
46
-
47
-
48
-
49
-
50
-
51
-
52
-
53
-
54
-
55
-
56
-
57
-
58
-
59
-
60
-
61
-
62
-
63
-
64
-
65
-
66
-
67
-
68
-
69
-
70
-
71
-
72
-
73
-
74
-
75
-
76
-
77
-
78
-
79
-
80
-
81
-
82
-
83
-
84
-
85
-
86
-
87
-
88
-
89
-
90
-
91
-
92
-
93
-
94
-
95
-
96
-
97
-
98
-
99
-
100
-
101
-
102
-
103
-
104
-
105
-
106
-
107
-
108
-
109
-
110
-
111
-
112
-
113
-
114
-
115
-
116
-
117
-
118
-
119
-
120
-
121
-
122
-
123
-
124
-
125
-
126
-
127
-
128
-
129
-
130
-
131
-
132
-
133
-
134
-
135
-
136
-
137
-
138
-
139
-
140
-
141
-
142
-
143
-
144
-
145
-
146
-
147
-
148
-
149
-
150
-
151
-
152
-
153
-
154
-
155
-
156
-
157
-
158
-
159
-
160
-
161
-
162
-
163
-
164
-
165
-
166
-
167
 |
 |

1
ASRock
P43ME
Motherboard
English
English
English
English
English
Copyright Notice:
Copyright Notice:
Copyright Notice:
Copyright Notice:
Copyright Notice:
No part of this installation guide may be reproduced, transcribed, transmitted, or trans-
lated in any language, in any form or by any means, except duplication of documen-
tation by the purchaser for backup purpose, without written consent of ASRock Inc.
Products and corporate names appearing in this guide may or may not be registered
trademarks or copyrights of their respective companies, and are used only for identifica-
tion or explanation and to the owners’ benefit, without intent to infringe.
Disclaimer:
Disclaimer:
Disclaimer:
Disclaimer:
Disclaimer:
Specifications and information contained in this guide are furnished for informational
use only and subject to change without notice, and should not be constructed as a
commitment by ASRock. ASRock assumes no responsibility for any errors or omissions
that may appear in this guide.
With respect to the contents of this guide, ASRock does not provide warranty of any kind,
either expressed or implied, including but not limited to the implied warranties or
conditions of merchantability or fitness for a particular purpose. In no event shall
ASRock, its directors, officers, employees, or agents be liable for any indirect, special,
incidental, or consequential damages (including damages for loss of profits, loss of
business, loss of data, interruption of business and the like), even if ASRock has been
advised of the possibility of such damages arising from any defect or error in the guide
or product.
This device complies with Part 15 of the FCC Rules. Operation is subject to the
following two conditions:
(1)
this device may not cause harmful interference, and
(2)
this device must accept any interference received, including interference that
may cause undesired operation.
CALIFORNIA, USA ONLY
The Lithium battery adopted on this motherboard contains Perchlorate, a toxic
substance controlled in Perchlorate Best Management Practices (BMP) regulations
passed by the California Legislature. When you discard the Lithium battery in
California, USA, please follow the related regulations in advance.
“Perchlorate Material-special handling may apply, see
www
.dtsc.ca.gov/hazardouswa
ste/perchlorate”
ASRock Website: http://www.asrock.com
Published
May
2009
Copyright
©
2009 ASRock INC. All rights reserved.