Acer A500 User Guide
Acer A500 Manual
 |
View all Acer A500 manuals
Add to My Manuals
Save this manual to your list of manuals |
Acer A500 manual content summary:
- Acer A500 | User Guide - Page 1
User Guide 1 - Acer A500 | User Guide - Page 2
© 2011 All Rights Reserved Acer ICONIA TAB User Guide Model: A500 (Wi-Fi only models) and A501 (Wi-Fi+3G models) First issue: 03/2011 Acer ICONIA TAB Model number Serial number Date of purchase Place of purchase 2 - Acer A500 | User Guide - Page 3
your tablet Using the SIM card slot (only for Wi-Fi+3G models 11 Charging your tablet 11 Turning on for the first time 12 Locking your tablet 12 Using the touchscreen 13 The Home screen 14 The onscreen keyboard 20 Editing text 22 Connecting devices to your tablet Connecting to AC power 24 - Acer A500 | User Guide - Page 4
43 Shooting a video 44 Reading an eBook or pdf LumiRead 46 Using a cellular data network (only for Wi-Fi+3G models) Installing a SIM card (only for Wi-Fi+3G models 51 Adjusting connection settings 52 Internet sharing 53 Advanced settings Sound 55 Screen 55 Putting your tablet in Airplane mode - Acer A500 | User Guide - Page 5
is required for each device on which the Software will be used; 2. Make one copy of the support for the Software. ACER LIVE UPDATE Certain of the software contains elements that enable the use of the Acer Live Update service, which allows for updates for such software to be automatically downloaded - Acer A500 | User Guide - Page 6
SUPPORT SERVICES, will be asked to submit some information to Acer. Please refer to Acer's privacy policy at www.acer.com or your local Acer website. Music recognition technology and related data are provided by Gracenote®. Gracenote®, Gracenote logo and logotype, and the "Powered by Gracenote" logo - Acer A500 | User Guide - Page 7
to register To register your Acer product, please visit mobile.acer.com. Click Product Registration and follow the simple instructions. You can also register directly from your tablet by tapping the Acer Registration icon. After we receive your product registration, you will be sent a confirmation - Acer A500 | User Guide - Page 8
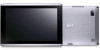
immediately: • Acer ICONIA TAB • Quick Guide • USB cable • AC adapter • Warranty card Getting to know your tablet Front view 1 No. Item 1 Touchscreen 2 Front-facing camera 3 Light sensor 3 2 Description 10.1-inch, 1280 x 800 pixel capacitive touchscreen. A 2-megapixel camera for video chatting and - Acer A500 | User Guide - Page 9
highresolution images. Emits stereo audio 1 4 2 3 5 6 7 No. Item Description 1 Power button Long press to turn the tablet on, press briefly to turn the screen on/off or enter sleep mode; press and hold to turn the tablet off. 2 3.5 mm headphone jack Connect to stereo headphones. Getting - Acer A500 | User Guide - Page 10
a USB cable. (Slave) 6 USB connector (Host) Connects USB devices to your tablet. 7 Reset button Insert a small thin object (such as a paperclip) to reset power to the tablet. Top and bottom views 12 3 4 No. Item 1 Volume control key 2 Screen rotation lock switch 3 Card slot cover 4 Docking - Acer A500 | User Guide - Page 11
before turning on your tablet. See "Installing a SIM card (only for Wi-Fi+3G models)" on page 51. Charging your tablet For first-time use, you need to charge your tablet for four hours. After that you can recharge the battery as needed. Connect the DC-in jack to your tablet and plug the AC adapter - Acer A500 | User Guide - Page 12
on for the first time To turn on your tablet, press and hold the power button for two seconds. You will then be asked some questions before you can use your tablet. To start, tap to select your language, then tap Start. Follow the rest of the instructions as they are displayed. Sign in to or create - Acer A500 | User Guide - Page 13
delay, tap Apps > Settings > Screen > Timeout. Waking your tablet If the screen is off and the tablet does not react to any taps on the screen, then it has been locked and is in sleep mode. To wake your tablet, press the power button. Your tablet will display the Lock screen. Drag the lock symbol to - Acer A500 | User Guide - Page 14
tablet, or wake it from power saving, it will display the Home screen. This screen gives your tablet, while others may be downloaded from the Android Market. The Home screen already be replaced with the hide icon in certain cases (such as if the keyboard or list of recent applications is shown - Acer A500 | User Guide - Page 15
. Tap this icon to open a list of options. The extended Home screen The Home screen extends to either side of the initial Home screen, giving you more room to add widgets or organize shortcuts. To view the extended Home screen, swipe your finger to the left or right. A total of five pages - Acer A500 | User Guide - Page 16
of the screen. This area contains a variety of icons to inform you of your tablet's status. The icons on the right side of the clock indicate connectivity and battery status. The left side of the clock displays the event notification icons. Time Wireless reception Battery charge status 16 - Acer A500 | User Guide - Page 17
waves indicate connection strength) Battery is very low An open wireless network is available Battery is low Bluetooth is on Battery is partially drained Connected to a Bluetooth device Airplane mode (wireless connectivity disconnected) Battery is full Battery is charging The Home screen 17 - Acer A500 | User Guide - Page 18
exceeded Description Speaker is silenced Tablet microphone is off GPS is on Receiving location data from GPS More status notifications Syncing data Sync is on Problem with sign-in or sync Uploading data Downloading data Download finished Description Roaming No signal SIM card is invalid or not - Acer A500 | User Guide - Page 19
or links to specific settings. To move any item on the Home screen, tap and hold the item until it is selected. You may drag the item to any free area on the screen. To move the item to a different home screen, drag it to the side of the screen, the Home screen will switch to the - Acer A500 | User Guide - Page 20
an icon until an image of the Home screens appears. Drag the icon to a Home screen to create a shortcut. The onscreen keyboard When you tap a text box to enter text, an onscreen keyboard will appear. Simply tap on keys to enter text. Tap the ?123 button to see numbers and special characters, and - Acer A500 | User Guide - Page 21
options. Changing the keyboard To use a different keyboard type, tap the Keyboard status icon; this will open a menu listing the text input methods available on your tablet. Tap your preferred input method. Typically three options are available: two types of Android Keyboard (keyboard and voice) and - Acer A500 | User Guide - Page 22
appears briefly above the cursor. Tap the button to paste the text. 3. Modify the text: Type, paste or delete text. 4. Tap Enter on the keyboard, or tap the Close Keyboard button. Selecting text To select text that you want to cut, copy, delete or replace: 1. Tap and hold the text or word you want - Acer A500 | User Guide - Page 23
The selected text is highlighted, with a tab at each end of the selection. 2. Drag either tab to expand or reduce the amount of selected text, or tap Select all. 3. To cut or copy the text, tap the Cut or Copy button. Editing text 23 - Acer A500 | User Guide - Page 24
removing it from the tablet. Take care when removing the card, the slot is spring-loaded. Connecting to a PC as a USB storage device Download and install the latest USB driver on your computer before connecting your tablet to the computer. Visit www.acer.com/worldwide/support/ download.htm for the - Acer A500 | User Guide - Page 25
and video) on USB storage devices with your tablet's multimedia apps. Caution: Before removing USB storage, make sure your device is not using data on the USB storage device. Note: Please check for updates to the tablet's software that may add support for additional USB devices. See "Updating your - Acer A500 | User Guide - Page 26
port. Connecting to the dock (optional) The optional dock holds your tablet and allows you to easily charge the battery with a single connection. The dock provides extra connectors that replace your tablet's built-in connectors while it is docked. Please check the dock's specifications for the exact - Acer A500 | User Guide - Page 27
the bottom-right corner of the screen. If Wi-Fi is not on, tap Turn on Wi-Fi, and wait for your tablet to detect nearby networks. Tap screen, or open the Application menu and select Browser. To enter a website address, tap the address box at the top of the page. Enter the address using the keyboard - Acer A500 | User Guide - Page 28
follow the on screen instructions. Note: You need to activate a Google account before you can use Gmail. Composing an email 1. Make sure your tablet is connected to the Internet. 2. Open the application menu and tap Gmail. 3. Press the Menu button and then tap Compose. 4. Enter the recipient's email - Acer A500 | User Guide - Page 29
Acer Sync: Sync your data between your tablet, your computer and the Google servers. • SocialJogger: View updates to your social networks in one location. • Maps: Get easy-to-follow directions using Google Maps. • Talk*: Chat with your friends, with text, sound and video. • Navigation*: Turn-by-turn - Acer A500 | User Guide - Page 30
Tap the Menu button to access account settings, refresh the page, auto play, and add or remove custom pages. Adobe Flash Player Adobe Flash Player is not installed on your tablet. If you want to use Flash content on in your browser, you can visit the Android Market (see below) to easily download and - Acer A500 | User Guide - Page 31
market by category or tap the search icon to search for a specific application. Once you have selected an application, tap the DOWNLOAD button to download and install the application. You will be told which services (contact information, wireless access, GPS, etc.) the application requires access - Acer A500 | User Guide - Page 32
your contacts connected to Google Talk services. Tap on a contact to open a chat session. After you have connected, you can open a video chat session. Use the front-facing camera so the person you call can see you while you can see them on the screen; hold your tablet in portrait mode to improve the - Acer A500 | User Guide - Page 33
Acer content folders Your tablet includes content folders that allow you to easily organize and access your favorite applications. Choose one of the four categories on the Home screen or application menu: eReading, Games, Multimedia or Social. Tap the shortcut to open a screen containing - Acer A500 | User Guide - Page 34
Application menu give you direct access to any of the four categories. If you have opened a category, you can easily change category by swiping the screen to the left or right. Adding You can add applications to any content folder. Tap the Plus sign in the top right corner and select - Acer A500 | User Guide - Page 35
USB storage device to access media files, the device may not be recognized for a few minutes. Tap clear.fi. Acer clear.fi will automatically detect devices that are connected to the network and are also running Acer clear.fi. These devices are displayed at the bottom of the screen, with your tablet - Acer A500 | User Guide - Page 36
device showing an arrow. Select Play or Save. To upload a photo to Facebook, or Flickr via Acer Photo Uploader, or to paired devices using Bluetooth, tap and hold a photo thumbnail, then tap Share. clear.fi videos Tap a folder under Collection to view the thumbnails. Tap and hold a folder or - Acer A500 | User Guide - Page 37
Note: The Acer clear.fi video player only plays MP4 files. Please check for updates to the tablet's software which may add support for other types of video. See "Updating your tablet's operating system" on page 59. To send video files, for example, to paired devices using Bluetooth or to YouTube, - Acer A500 | User Guide - Page 38
menu to play media you have stored on your tablet. nemoPlayer enables you to listen to music, view video clips and pictures in all the formats supported by your tablet. See "Multimedia" on page 63. Media server Your tablet can act as a digital media server using UPnP technology. This means that you - Acer A500 | User Guide - Page 39
SIM card or your Google account. Tap Contacts from the application menu to view your contacts. If you don't have any contacts stored on your tablet contacts, your contacts will be synchronised automatically. See "Synchronization" on page 57. Importing contacts Tap the Menu button and select Import/ - Acer A500 | User Guide - Page 40
an entry. Tap Add another field for more categories. To assign an image to your contact, tap the silhouette and select an images from your tablet's picture gallery (select Gallery if requested). You may also take and crop a new photo. Tap Done to finish and save the contact. Tip: Set each - Acer A500 | User Guide - Page 41
select and edit contacts from the list; the next time your tablet synchronizes with your computer, these changes will also be made to your tablet's contact list. Warning: Backup your contacts before making any changes. Tap the Menu button and select Import/Export. You may then Export your contact - Acer A500 | User Guide - Page 42
section will take you through all the steps in taking photos and videos with your tablet. Note: It is recommended that you insert a microSD card into the microSD slot before using the camera. Please note you can only save photos and videos to internal memory or a microSD card, not an external USB - Acer A500 | User Guide - Page 43
Picture quality, Restore defaults. Switch camera. Switch between the rear and front cameras. Switches to the camcorder (video recorder). Switches to the camera. Internal memory Saves photos to the tablet's internal memory (this is the default). Memory card Saves photos to the memory card in the - Acer A500 | User Guide - Page 44
Shoot a slow motion 'time lapse' video, set the interval between single frames in this menu. 1. Ensure you the options described above are set to your preferences. 2. Frame your subject and steady your tablet and zoom in or out as needed. 3. Press the camera button down fully to begin recording - Acer A500 | User Guide - Page 45
of the screen. Alternatively, open the application menu and tap Gallery, then Camera. Select the photo or video you want to view (videos are marked with a small play symbol). From the Gallery you can share the file directly using various services. - Acer A500 | User Guide - Page 46
Tap the LumiRead shortcut in the Application menu, or the eReading content folder, to open the LumiRead application. The bookshelves The contents of your tablet are shown on the screen as a series of bookshelves. Each book is shown as an image with a name; this image is either defined by the book or - Acer A500 | User Guide - Page 47
will change to reflect your activity. Favorites / tags As you add books to your tablet, you may find it difficult to find the book you need. You may either search for a specific the tags shown at the top of the screen. Drag the book to the (+) to service. Reading eBooks on your tablet Your tablet - Acer A500 | User Guide - Page 48
bottom of the screen and select Snapshot. An image of the page will be saved to the LumiBooks/ clipbook folder in your tablet's internal memory. Adding books to your tablet You may either add books that you already own, or download new books directly to your tablet. Books you download (see "Shopping - Acer A500 | User Guide - Page 49
and your PC" on page 24 or "Connecting to a PC as a USB storage device" on page 24. Note: Connect your tablet to a computer and add books to the LumiBooks folder on your tablet's internal memory or micro SD card to see them on the LumiRead bookshelves. Instead of using the LumiBooks folder, you may - Acer A500 | User Guide - Page 50
: The email adress you enter will be your Adobe ID. Make sure you remember your password. 6. Select Continue. Your Adobe ID is now registered. Entering your Adobe ID To register your tablet, follow these steps: 1. Open LumiRead. 2. Tap the Settings button 3. Select Device activation. 4. Enter the - Acer A500 | User Guide - Page 51
holding the power button. 2. Insert the SIM card as shown. SIM card 3. Replace the card slot cover. Note: Ensure that the SIM card is inserted all the way into the card slot. Caution: Turn off your tablet before installing or removing a SIM card. You may damage the card or your tablet if power it - Acer A500 | User Guide - Page 52
Your tablet will automatically detect your carrier/network settings when you insert a new SIM card. However, you may prefer to manually select a network. This is often a good idea when roaming. Tip: When you are traveling, manually selecting a network may help to reduce your roaming charges. Check - Acer A500 | User Guide - Page 53
or downloading pictures or video, until you are connected to a faster mobile or other wireless network. 1. Tap Apps > Settings > Wireless & networks > Mobile networks. 2. Tap Use only 2G networks. Creating a new access point When you need to add another GPRS/3G/EDGE connection on your tablet, obtain - Acer A500 | User Guide - Page 54
Wi-Fi hotspot You can turn your tablet into a portable Wi-Fi hotspot to share your mobile Internet connection with up to eight clients. 1. Tap Apps > Settings > Wireless & networks > Tethering & portable hotspot. 2. Tap - Acer A500 | User Guide - Page 55
pressing soft keys and on certain UI interactions. Screen You can adjust your tablet screen settings by tapping Apps > Settings > Screen. Item Brightness Animation Timeout Description Adjust screen brightness. Enable window animations. Set a delay before the screen will be turned off. Sound 55 - Acer A500 | User Guide - Page 56
& networks to manage your connection settings. Each connection will have a green check when turned on. Alternatively, you can tap on the right tablet includes 3G features, some additional options are available: Item Description Tethering & Shares your tablet's mobile data connection via USB - Acer A500 | User Guide - Page 57
using the supplied USB cable. Plug the USB sync cable into the micro USB connector on your tablet. Plug the USB client connector into an available USB port on your computer. Note: You may need to install drivers on your computer before your tablet can be used with your computer. You will now be able - Acer A500 | User Guide - Page 58
videos between your tablet, PC and corresponding Google services. You must install the Acer Sync program on your computer; download and install Acer Sync and Acer PIM for the PC from the mobile.acer Your tablet will set the date to turn it on or off. Tap a preset alarm to edit it. You can: • Turn the - Acer A500 | User Guide - Page 59
> About tablet > System update > Check now. Note: Downloading new firmware can take up to 40 minutes, depending on your network speed. Resetting your tablet You may have to perform a reset if your tablet fails to respond when buttons are pressed or the screen is tapped. To reset your tablet use - Acer A500 | User Guide - Page 60
Clean boot A clean boot will restore your tablet to the factory settings. Warning! This will erase all your personal information, any contacts stored on your tablet and any programs you installed. Open Settings from the application menu, then tap Privacy > Factory data reset; click Reset tablet and - Acer A500 | User Guide - Page 61
not supported. Refer to "Multimedia" on page 63 for more information. Why can't I view my video files? You may be trying to view a video that is not supported. . Power I couldn't turn on the device. The battery power may be depleted. Recharge the device. Refer to "Charging your tablet" - Acer A500 | User Guide - Page 62
up when charging or when charging. When charging is operating for a long complete, it will return to its normal period. temperature. It is also normal for the tablet to heat up during long periods of use, such as watching a video or playing a game. All Acer tablets are factory tested before - Acer A500 | User Guide - Page 63
, MP3, OGG Vorbis, WAV Video recording H.264 BP, MPEG-4 SP, H.263 Video playback H.264 BP, H.264 MP, H.264 HP, MPEG-4 SP, H.263 USB connectors • USB connector (host) • Micro USB connector (slave) Power • DC power-in (12 V, 1.5 A) Connectivity • Bluetooth 2.1+EDR & A2DP support • Wi-Fi 802.11b - Acer A500 | User Guide - Page 64
3G support (only available card slot (up to 32 GB) Battery • Rechargeable high density Li-polymer batteries: 3260 mAh x 2 (24.1 Wh) Note: Length of battery operation will depend on power backlight or using power-demanding applications will shorten battery life between charges. Dimensions Height
-
 1
1 -
 2
2 -
 3
3 -
 4
4 -
 5
5 -
 6
6 -
 7
7 -
8
-
9
-
10
-
11
-
12
-
13
-
14
-
15
-
16
-
17
-
18
-
19
-
20
-
21
-
22
-
23
-
24
-
25
-
26
-
27
-
28
-
29
-
30
-
31
-
32
-
33
-
34
-
35
-
36
-
37
-
38
-
39
-
40
-
41
-
42
-
43
-
44
-
45
-
46
-
47
-
48
-
49
-
50
-
51
-
52
-
53
-
54
-
55
-
56
-
57
-
58
-
59
-
60
-
61
-
62
-
63
-
64
 |
 |

User Guide