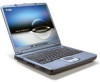
Acer Aspire 1400 Aspire 1400 Notebook Service Guide
Acer Aspire 1400 Manual
 |
View all Acer Aspire 1400 manuals
Add to My Manuals
Save this manual to your list of manuals |
Acer Aspire 1400 manual content summary:
- Acer Aspire 1400 | Aspire 1400 Notebook Service Guide - Page 1
Acer Aspire 1400 Series Service Guide Service guide files and updates are available on the ACER/CSD web; for more information, please refer to http://csd.acer.com.tw PART NO.: VD.A02V5.001 PRINTED IN TAIWAN - Acer Aspire 1400 | Aspire 1400 Notebook Service Guide - Page 2
Revision History Please refer to the table below for the updates made on Aspire 1400 service guide. Date Chapter Updates IV - Acer Aspire 1400 | Aspire 1400 Notebook Service Guide - Page 3
, manual or otherwise, without the prior written permission of Acer Incorporated. Disclaimer The information in this guide is subject to change without notice. Acer Incorporated makes no representations or warranties, either expressed or implied, with respect to the contents hereof and specifically - Acer Aspire 1400 | Aspire 1400 Notebook Service Guide - Page 4
are used in this manual: SCREEN MESSAGES Denotes actual messages that appear on screen. NOTE WARNING CAUTION IMPORTANT Gives bits and pieces of additional information related to the current topic. Alerts you to any damage that might result from doing or not doing specific actions. Gives - Acer Aspire 1400 | Aspire 1400 Notebook Service Guide - Page 5
in the printed Service Guide. For ACER-AUTHORIZED SERVICE PROVIDERS, your Acer office may have a DIFFERENT part number code to those given in the FRU list of this printed Service Guide. You MUST use the list provided by your regional Acer office to order FRU parts for repair and service of customer - Acer Aspire 1400 | Aspire 1400 Notebook Service Guide - Page 6
VIII - Acer Aspire 1400 | Aspire 1400 Notebook Service Guide - Page 7
40 Security 42 Others 45 Boot 46 Exit 47 BIOS Phlash Utility 48 System Diagnostic Diskette 48 Running Diagnostic Program 49 Chapter 3 Machine Disassembly and Replacement 55 General Information 56 Before You Begin 56 Disassembly Procedure Flowchart 57 Removing the HDD Module/FDD - Acer Aspire 1400 | Aspire 1400 Notebook Service Guide - Page 8
View 85 Chapter 6 FRU (Field Replaceable Unit) List 87 Aspire 1400 104 Appendix A Model Definition and Configuration 105 Main Features 105 Appendix B Test Compatible Components 107 Microsoft Windows XP Environment Test 108 Appendix C Online Support Information 109 Index 111 II - Acer Aspire 1400 | Aspire 1400 Notebook Service Guide - Page 9
optical drive (CD-ROM, DVD-ROM, or DVD/CD-RW combo) Audio DJ feature Large LCD display with simultaneous LCD and CRT display support S-video (NTSC/PAL) output Connectivity ! ! ! ! High-speed 56Kbps V.90 fax/data software modem Ethernet/Fast Ethernet (10/100 Mbps) Universal Serial Bus (USB) ports - Acer Aspire 1400 | Aspire 1400 Notebook Service Guide - Page 10
(supports Audio DJ feature) ! Wireless networking (802.11b) option Expansion ! ! Upgradeable memory and hard disk CardBus PC Card slots Keyboard port, Support DDC 2B One TV-out connector One MIC In port One headphone-out One DC-in jack One type III or two type II PCMCIA Card Bus slots Three 4- - Acer Aspire 1400 | Aspire 1400 Notebook Service Guide - Page 11
System Block Diagram Chapter 1 5 - Acer Aspire 1400 | Aspire 1400 Notebook Service Guide - Page 12
Board Layout Top View A-U8 C-U14 E-JP1 G-JP5 I-JP8 K-JP10 M-JP12 VGA Chip ATI M6-p Audio Amplifier Chip TDA0132 LCD Connector SODIMM Connector Earphones Jack Main Board to Touch Pad Board FFC connector JP12 Keyboard Connector B-U9 D-F1 F-JP2 H-JP6 J-JP7, JP9 L-JP11 Clock Generator ICS950805AG - Acer Aspire 1400 | Aspire 1400 Notebook Service Guide - Page 13
Bottom View Chapter 1 7 - Acer Aspire 1400 | Aspire 1400 Notebook Service Guide - Page 14
JU55,U56 L-JP14 N-JP16 P-JP18 R-JP20 T-JP23 V-JP26 X-SW1 BIOS ROM 512K8-90 CARDBUS Controller PCI1420 AC97 Codec CS-4299 USB Power Switch TPS2042DR Parallel Connector S-Video Connector M/B to USB Board Connector MINI PCI Connector SODIMM Connector PCMCIA Connector Wireless LAN Switch 8 Chapter 1 - Acer Aspire 1400 | Aspire 1400 Notebook Service Guide - Page 15
View A general introduction of ports allow you to connect peripheral devices, as you would with a desktop PC. Front View # Icon Item Description 1 Display screen Also called LCD (liquid-crystal display), displays computer output. 2 Power button Turns on the computer power.. Chapter 1 9 - Acer Aspire 1400 | Aspire 1400 Notebook Service Guide - Page 16
function like the right) left and right mouse buttons. 7 Palmrest Comfortable support area for your hands when you use the computer. 8 Lock indicators the status of the ;lock keys. 9 Speaker Outputs sound. 10 Status in dicators LEDs (light emitting diodes) that show the status of - Acer Aspire 1400 | Aspire 1400 Notebook Service Guide - Page 17
Left Panel # Icon Item Description 1 Speaker/headphone- Connects to audio line-out devices (e.g., out jack speakers, headphones). 2 Microphone-in jack Ejects the disc from the optical drive. 3 Volume control slider Adjust the volume level. 4 Security keylock Connects to a Kensington- - Acer Aspire 1400 | Aspire 1400 Notebook Service Guide - Page 18
Accepts a 3.5-inch diskette. 2 Floppy drive eject Press to eject the diskette from the floppy button drive. 3 Wireless networking Enables or disables the wireless button networking feature. 4 Optical drive Depending on your model: --CD-ROM drive reads CDs. --DVD-ROM drive reads CDs - Acer Aspire 1400 | Aspire 1400 Notebook Service Guide - Page 19
(e.g., USB digital camera). 2 Network jack Connects to an Ethernet 10/100-based network. 3 Modem jack Connects a phone line (only for jack printer). 5 Parallel port Connects to a display monitor. 6 External display port Connects t to a display device with S-video input. 7 DC-in jack - Acer Aspire 1400 | Aspire 1400 Notebook Service Guide - Page 20
Bottom Panel # Icon Item Description 1 Hard disk bay Houses the computer's hard disk. 2 Battery bay Houses the computer's battery pack. 3 Battery release latch Slide and hold to unlatch the battery pack. 4 Memory compartment Houses the computer's memory upgrade slot. 14 Chapter 1 - Acer Aspire 1400 | Aspire 1400 Notebook Service Guide - Page 21
Indicators The computer has easy-to-read lock indicators (A) found above the keyboard, and status indicators (B) and Audio DJ mode indicators (C) on the front panel of the computer. The status LCD displays icons that show the status of the ocmpouter and its components.. - Acer Aspire 1400 | Aspire 1400 Notebook Service Guide - Page 22
Icon Function Description Battery charge Battery is being charged. Hard disk activity Hard disk is being accessed. Wireless networking Optical drive activity Wireless networking feature is enabled. Use the wireless networking switch to enable or disable this feature. See "Right view" on page - Acer Aspire 1400 | Aspire 1400 Notebook Service Guide - Page 23
you need to do a lot of numeric data entry. A better solution would be to connect an external keypad. Scroll .When Scroll Lock is on, the screen moves one line up Lock(Fn-Scroll or down when you press w and y respectively. Lk) Scroll Lock does not work with some applications Chapter 1 17 - Acer Aspire 1400 | Aspire 1400 Notebook Service Guide - Page 24
Embedded Numeric Keypad The embedded numeric keypad functions like a desktop numeric keypad. It is indicated by small characters located on the lower edge of the keycaps. The embedded keypad can function in numberic mode or cursor-control mode. Desired Access Num Lock On Number keys on embedded - Acer Aspire 1400 | Aspire 1400 Notebook Service Guide - Page 25
Windows Keys The keyboard has two keys that perform Windows-specific functions. Key Windows logo key Application key Icon Description Start button. Combinations with this key perform special functions. Below are a few examples: + Tab (Activates next - Acer Aspire 1400 | Aspire 1400 Notebook Service Guide - Page 26
, external monitor (if connected) and both the display screen and extenral monitor Increases the screen birghtness. Fn-r Brightness down Decreases the scren brightness. Fn-s Wireless networking toggle Toggles wireless networking on and off. NOTE: When activating hotkeys, press and hold the - Acer Aspire 1400 | Aspire 1400 Notebook Service Guide - Page 27
Keyboard Ergonomics Located below the keyboard, the wide and curved palm rest is ergonomically desinged to provide you with a very comfortable place to rest your hands while you type. Chapter 1 21 - Acer Aspire 1400 | Aspire 1400 Notebook Service Guide - Page 28
cursor responds as you move your finger on the surface of the touchpad. The central location on the palm rest provides you optimum comfort and support. Touchpad Basics The following teaches you how to use the touchpad: ! Move your finger across the touchpad to move the cursor. ! Press the left - Acer Aspire 1400 | Aspire 1400 Notebook Service Guide - Page 29
touchpad is sensitive to finger movements. Hence, the lighter the touch, the better the response. Tapping too hard will not increase the touchpad's responsiveness. Chapter 1 23 - Acer Aspire 1400 | Aspire 1400 Notebook Service Guide - Page 30
Launch Keys Located above the keyboard are launch keys that can used to launch applications. NOTE: To configure the launch keys and the applications they launch.. # 1 Icon Item WWW 2 Application This computer's all-in-one design Description By default, launches your Internet browser. - Acer Aspire 1400 | Aspire 1400 Notebook Service Guide - Page 31
or Northwood upgradable MPGA478 package CPU 1.75V/1.5V Specification Phoenix 1.0 Flash ROM 512KB TSOP ACPI 1.0b,PC Card 95, SM BIOS 2.3, EPP/IEEE 1284, ECP/IEEE 1284 1.7 & 1.9, PCI 2.2, PnP 1.0a, PS/2 keyboard and mouse, USB, VESA VGA BIOS, CD-ROM bootable, Set by setup manual Second Level Cache - Acer Aspire 1400 | Aspire 1400 Notebook Service Guide - Page 32
Above table lists some system memory configurations. You may combine DIMMs with various capacities to form other combinations. . LAN Interface Item Supports LAN protocol LAN connector type LAN connector location Modem Interface 10/100 Mbps RJ45 Rear side Specification Item Data modem data baud - Acer Aspire 1400 | Aspire 1400 Notebook Service Guide - Page 33
DVD-ROM (DVD-5, DVD-9, DVD-10, DVD-18),DVD-R (read, single border) CD: CD-DA, CD+(E)G, CD-MIDI, CD-TEXT, CD-ROM, CD-ROM XA, CD-I, CDI Bridge (Photo-CD, Video-CD) Multisession CD (Photo-CD, CD-EXTRA, CD-R, CD-RW), CD-R (read), CD-RW (read) Load: Manual Release: (a) Electrical Release (Release Button - Acer Aspire 1400 | Aspire 1400 Notebook Service Guide - Page 34
IRQ11 Video Interface Item Chip vendor Chip name Chip voltage Supports ZV (Zoomed Video) port ATI M6-P Core/3.3V No Specification Video Specification FDC47N227 1 Rear side 25-pin D-type connector, in female type Enable/Disable/Auto (BIOS or operating system chooses configuration) by BIOS - Acer Aspire 1400 | Aspire 1400 Notebook Service Guide - Page 35
Number of USB port Location Serial port function control Specification 1.1 USB 1.1 3 Rear side Enable/Disable by BIOS Setup PCMCIA Port Item PCMCIA controller Supports card type Number of slots Access location Supports ZV (Zoomed Video) port Supports 32 bit CardBus PCI142 ∅ Type-III/II One type - Acer Aspire 1400 | Aspire 1400 Notebook Service Guide - Page 36
Number of battery cell Package configuration Package voltage Specification Sony Li-ion 57Wh 3.7V/cell 12 4 cells in series, 3 series in parallel 14.8v LCD Inverter Specification This inverter is designed to light up the CCFL of LCD for Aspire 1400 notebook. It should be supported the following - Acer Aspire 1400 | Aspire 1400 Notebook Service Guide - Page 37
100 % 12 Lamp I zero-PK -- current over-shoot 13 Current Waveform factor 1.27 Ip I rms 14 Unbalance -10% Rate Ip −I−p Irms -- 11 mA 1.56 Multiple 2 0 +10% Mulitple Conditions *Note 1 * Note 2 Backlight on/off signal Low level *Note 1 PWM signal frequency PWM signal amplitude - Acer Aspire 1400 | Aspire 1400 Notebook Service Guide - Page 38
stress should not be over 85% under any condition. (turn on overshoot transient and line transient.) *9. Audio noise should be less than 36dB at 10cm distance. . Electrical specification No . Symbol 1 V oper* Il Il Min. -6.0 2.7 V Voltage form Falling and Rising time f 50 η 80% Typ - Acer Aspire 1400 | Aspire 1400 Notebook Service Guide - Page 39
LCD Item Supports colors 262K Optical Specification Brightness control keyboard hotkey Contrast control No Suspend/Standby Yes control Electrical Specification Supply voltage for 3.3 LCD display (V) Supply voltage for 690 LCD backlight (Vrms) 262K Specification 262K keyboard - Acer Aspire 1400 | Aspire 1400 Notebook Service Guide - Page 40
CPU set power down VGA Suspend PCMCIA Suspend Audio Suspend Hard Disk Power Down Non-operating (unpacked) Specification +5~+35 °C -20~+ supports DDC 2B, 1 TV-out connector, 1 microphone-in port, 1 headphone-out with SPDIF port, 1 AC adapter jack (2 pins), 1 type III or type II PCMCIA card bus slots - Acer Aspire 1400 | Aspire 1400 Notebook Service Guide - Page 41
Channel Chapter 1 Specification Power, Lid, Application/Button Lock/CD-Play, Eject/Stop Button, Play/Pause Button, Reverse Button, Forward Button, Volume Down Button, volume up button Size 64KB 128 KB 640KB Function System BIOS VGA BIOS Video memory (VRAM) Conventional memory Function DMA - Acer Aspire 1400 | Aspire 1400 Notebook Service Guide - Page 42
Standard Floppy Disk Controller Printer Port (LPT1) Real Time Clock SCI IRQ used by ACPI bus Free Audio Controller, SMBus Controller, Carbus Controller, Intel Network Connection and Modem PS/2 Mouse Numeric data processor Ultra ATA storage Controller Primary IDE controller Ultra ATA storage - Acer Aspire 1400 | Aspire 1400 Notebook Service Guide - Page 43
Troubleshooting when problem arises. To activate the BIOS Utility, press m during POST (when "Press to enter Setup" message is prompted on the bottom of screen). Navigating the BIOS Utility There are six menu options: Main, Advanced , Security, Others, Boot and Exit. Follow these instructions - Acer Aspire 1400 | Aspire 1400 Notebook Service Guide - Page 44
-capacity disc drive installed. Determines the display device on startup. Specifies whether or not to expand the image to fill the screen Reports the memory size of system base memory. The size is fixed to 640KB.. Format/Options Format: HH:MM:SS (hour:minute:second)System Time. Format MM/DD/YYYY - Acer Aspire 1400 | Aspire 1400 Notebook Service Guide - Page 45
Extended memory size= Total memory size-1MB-0.5M. BIOS Ver.Product Name Shows the system BIOS version. The items in this screen are important and vital information about your computer. If you experience computer problems and need to contact technical support, this data helps our service personnel - Acer Aspire 1400 | Aspire 1400 Notebook Service Guide - Page 46
parameters involving your hardware devices. The table below describes the parameters in the screen Settings in boldface are the default and suggested parameter settings. Parameter IDE Controller FDD controller Infrared Port (FIR) Base I/O address DMA Channel Description Options Configures - Acer Aspire 1400 | Aspire 1400 Notebook Service Guide - Page 47
the I/O address for the parallel port. Set the interrupt for the parallel port. Set the DMA channel for the paralle port. Eeable or disable support for Legacy Universal Serial Bus. Options Enabled or Disabled Note: Depending on your operating system, disabling an unused device may help free system - Acer Aspire 1400 | Aspire 1400 Notebook Service Guide - Page 48
from unauthorized use. The table below describes the parameters in this screen. Settings in boldface are the default and suggested parameter settings. Parameter User Password/ Supervisor Password Set User Password Set Supervisor Password Password on boot Description Shows the setting of the user - Acer Aspire 1400 | Aspire 1400 Notebook Service Guide - Page 49
Set Supervisor Password Enter current password [ ] Enter New Password [ ] Confirm New Password [ ] IMPORTANT:Be very careful when typing your password because the characters do not appear on the screen. 4. User can type password in field of enter new password, and re-enter password in field - Acer Aspire 1400 | Aspire 1400 Notebook Service Guide - Page 50
changes and exit the BIOS Setup Utility. Changing a Password 1. Use the w and y keys to highlight the Set User Password parameter and press the e key. The Set Password box appears: Set Password Enter Current Password [ ] Enter New Password [ ] Confirm New Password [ ] 2. Type the current - Acer Aspire 1400 | Aspire 1400 Notebook Service Guide - Page 51
contains various parameter settings. The table below describes the parameters in this screen. Settings in boldface are the default and suggested parameter settings. Parameter Low Battery Alarm Panel Close Alarm System Beep Description Determines whether or not the system will alarm when the - Acer Aspire 1400 | Aspire 1400 Notebook Service Guide - Page 52
screen allows you to set the order in which the system looks for bootable devices on startup. The table below describes these devices. Parameter Removable Devices Hard Drive CD-ROM/DVD Drive Network bootable CD or DVD.) The computer attemptes to boot from LAN. NOTE: A plus (+) sign may be shown in - Acer Aspire 1400 | Aspire 1400 Notebook Service Guide - Page 53
use. The table below describes the parameters in this screen. Parameter Exit Saving Changes Exit Discarding Changes Load Setup Description Saves changes made and exits the BIOS Setup Utility (same as u ). Discards changes made and exits the BIOS Setup Utility. Loads default settings for - Acer Aspire 1400 | Aspire 1400 Notebook Service Guide - Page 54
in other model. The system diagnostic utilities is provided by Acer Headquarters. You can utilize it as a basic diagnostic tool. To get this program, find it in the Aspire 1400 service CD kit. To better fit local service requirements, your regional office MAY have other diagnostic program. Please - Acer Aspire 1400 | Aspire 1400 Notebook Service Guide - Page 55
Running Diagnostic Program 1. Test program download Insert TPDL server LAN cable to Aspire 1400 RJ-45 Jack and power on the system via network boot. Download the ASSY/PACK test program image. If you see the message below display on the screen, then the image download is complete. 2. Parallel Port - Acer Aspire 1400 | Aspire 1400 Notebook Service Guide - Page 56
SKU part number in oder to check each SKU configuration. . If the configuration check has no problem, it will go to next test item. If the configuration check fails, the test program . The test program will go to next item. . 6. Video mode Test (LCD/CRT swithc) Run "SS_PIXS.exe and check the - Acer Aspire 1400 | Aspire 1400 Notebook Service Guide - Page 57
7. Direct Button Test Run the "BUTTON.exe" to test Audio DJ controls. Chapter 2 51 - Acer Aspire 1400 | Aspire 1400 Notebook Service Guide - Page 58
/OFF Test Run the"TEST42.exe". You may put a feather in front the fan to see if the fan works or not. 9. CD-ROM and Audio Test Insert test CD to CD-ROM drive. Then run "Compalt.exe" to check CD-ROM function. If you hear sounds from left/right speakers - Acer Aspire 1400 | Aspire 1400 Notebook Service Guide - Page 59
10. Keyboard Test Run "KEY38N2.exe". Press all keys according to this order--from left to right and from up to down to Lk/Fn+Scroll Lk to check LED indicator. 12. Syscard Test (Carbus 32bit) Insert two pieces of Syscard (Card bus) into PCMCIA slots then run "TESTCB.exe" for testing. Chapter 2 53 - Acer Aspire 1400 | Aspire 1400 Notebook Service Guide - Page 60
13. Battery Charge Test Insert AC adapter to the sytem, then run "591NEW2.exe" for testing. 54 Chapter 2 - Acer Aspire 1400 | Aspire 1400 Notebook Service Guide - Page 61
Chapter 3 Machine Disassembly and Replacement This chapter contains step-by-step procedures on how to disassemble the notebook computer for maintenance and troubleshooting. To disassemble the computer, you need the following tools: ! Wrist grounding strap and conductive mat for preventing - Acer Aspire 1400 | Aspire 1400 Notebook Service Guide - Page 62
the battery pack. 4. The two screws that secure the power board LS-1257 on the upper case are M2.5x4. Please make sure you use the right screws. Otherwise, other screws that are too long may damage the main board as you secure the power board to the upper case. NOTE: Aspire 1400 - Acer Aspire 1400 | Aspire 1400 Notebook Service Guide - Page 63
the keyboard, then disassemble the inside assembly frame in that order. Start Battery Ex2 HDD Module Disconnect FDD FPC Ex1 FDD Module Jx4 HDD Drive Jx2 HDD EMI Plate FDD FPC HDD Connector Panasoni: Ex2 MIT: GX2 FDD Panel Ex4 RAM Door Ex2 Antenna Covers Wireless LAN Card Ex1 Optical Drive - Acer Aspire 1400 | Aspire 1400 Notebook Service Guide - Page 64
Lower Ex2 Speakers Ex2 Main Board Ex2 LED Board Assy Touchpad Bracket Ax4 D-sub Bracket Ix4 PCMCIA Slot Touchpad / Touchpad FFC Ex1 Touchpad Board Ex2 Hx4 Heatsink CPU Ex4 CPU Support Plate LED Board LED Bracket LED Board FFC Touchpad 22pins FFC FDD FFC Ex4 Optical Bracket Ex2 Modem - Acer Aspire 1400 | Aspire 1400 Notebook Service Guide - Page 65
Removing the Battery Pack 1. Slide the battery latch to the left. 2. Then remove the battery. Chapter 3 59 - Acer Aspire 1400 | Aspire 1400 Notebook Service Guide - Page 66
Removing the HDD Module/FDD Module/RAM Door and Optical Drive 1. Remove the two screws that secure the HDD module. 2. Then take the HDD module away. 3. Disconnect the FDD FPC. Then turn out the screw that secure the FDD module. Push the FDD module out. 4. Turn out the four screws on the RAM door. - Acer Aspire 1400 | Aspire 1400 Notebook Service Guide - Page 67
Removing the LCD Module/the Power Board and the Keyboard Removing the LCD Module 1. Remove the two (one on each side) screws holding the LCD antenna covers. 2. Then take away the antenna cover. 3. Open the LCD to an angle of 95 degree from the main unit. Then remove the strip cover (middle cover). - Acer Aspire 1400 | Aspire 1400 Notebook Service Guide - Page 68
(one on each side) screws on the button pane... 6. Remove the 5 screw on the right panel. 7. Then separate the logic upper from the logic lower. Disassembling the logic upper 1. Turn out the seven holding the right and the hinge saddles. Then remove the hinge saddles. 2. Remove the five screws that - Acer Aspire 1400 | Aspire 1400 Notebook Service Guide - Page 69
touchpad. 9. Slide the touchpad bracket to left then remove the touchpad bracket. Then you can remove the touchpad (with touchpad FFC) from the upper case. 10. Disconnect the touchpad FFC. 11. Remove the screw that holds the touchpad board. . 12. Take away the touchpad board from the upper case. 13 - Acer Aspire 1400 | Aspire 1400 Notebook Service Guide - Page 70
Disassembling the logic lower 1. Pull the Dimm socket with fingers gentlely and take out the memory from the DIMM socket. 2. Release the modem card cable. 10. Remove the four screws and take the heatsink away. 11. Release the CPU lock with a tool and remove the CPU from CPU support bracket. 12. Turn - Acer Aspire 1400 | Aspire 1400 Notebook Service Guide - Page 71
13. Remove the four screws holding the CPU support plate and CPU support bracket. Then remove these two parts from the main board. 14. Turn out the four screws holding the PCMCIA slot and remove it. 15. Remove the four screwlock holding the D-sub bracket to the main board. Then remove the D-sub - Acer Aspire 1400 | Aspire 1400 Notebook Service Guide - Page 72
Disassembling the LCD Module 1. Remove the two screwpad then turn out the two screws on the the LCD. 9. Turn out the eight screws holding the LCD brackets. And then remove the LCD brackets. 10. Remove the four screws that secure the two LCD hinges. 11. Take away the two LCD hinges from the LCD - Acer Aspire 1400 | Aspire 1400 Notebook Service Guide - Page 73
HDD drive from the carrier. 2. Turn out the two screws holding the HDD EMI plate then remove it. 3. Disconnect the hard disk drive connector. Disassembling the Floppy Disk Drive Module 1. Release the kapton that fastens the FDD FPC, then disconnect the floppy disk drive FFC. 2. Unscrew the two screw - Acer Aspire 1400 | Aspire 1400 Notebook Service Guide - Page 74
68 Chapter 3 - Acer Aspire 1400 | Aspire 1400 Notebook Service Guide - Page 75
Troubleshooting Use the following procedure as a guide for computer problems. NOTE: The diagnostic tests are intended to test this model (Aspire 1400 series). Non-Acer . 3. If any problem occurs, you can perform visual inspection before you fellow this chapter's instructions. You can check the - Acer Aspire 1400 | Aspire 1400 Notebook Service Guide - Page 76
Check Do the following steps to isolate the problem to a controller, driver, or diskette. A write-enabled, diagnostic diskette module. 2. Replace the external diskette drive/CD-ROM module. 3. Replace the main board. External CD-ROM Drive Check Do the following to isolate the problem to a controller - Acer Aspire 1400 | Aspire 1400 Notebook Service Guide - Page 77
, do the following one at a time to correct the problem. Do not replace a non-defective FRU: 1. Reconnect the keyboard cables. 2. Replace the keyboard. 3. Replace the main board. The following auxiliary input devices are supported by this computer: ! Embedded numeric keypad ! External keyboard If - Acer Aspire 1400 | Aspire 1400 Notebook Service Guide - Page 78
the battery pack. If the charge indicator still does not light up, replace the DC/DC charger board. Touchpad Check If the touchpad doesn't work, do the following actions one at a time to correct the problem. Do not replace a non-defective FRU: 1. After rebooting, run Tracking Pad PS2 Mode Driver - Acer Aspire 1400 | Aspire 1400 Notebook Service Guide - Page 79
can also help you determine the next possible FRU to be replaced when servicing a computer. If the symptom is not listed, see "Undetermined Problems" on page 81. The following lists the error messages that the BIOS displays on the screen and the error symptoms classified by function. NOTE: Most of - Acer Aspire 1400 | Aspire 1400 Notebook Service Guide - Page 80
Error 1 CMOS Battery Bad 4 CMOS Checksum Error 1 Battery Is Critical Low 1 Incorrect password specified, CMOS clock battery needs to be replaced. Replace the battery and run BIOS Setup Utility to reconfigure system time, then reboot system. CMOS has been corrupted or modified incorrectly. Run BIOS - Acer Aspire 1400 | Aspire 1400 Notebook Service Guide - Page 81
too long. Main board Specific device has an address conflict. Enter the BIOS Setup Utility and verify the parameters (try loading the default settings); then save and restart the computer. RTC battery Main board Memery test failed. DIMM BIOS ROM Main board Error with NVRAM (CMOS) data. Enter the - Acer Aspire 1400 | Aspire 1400 Notebook Service Guide - Page 82
connected tightly and correctly. Reconnect the DIMM. LED board. Main board. No beep, power-on indicator turns on and LCD is blank. Power source (battery pack and power adapter). See "Power System Check" on page 71. Reconnect the LCD connector Hard disk drive LCD inverter ID LCD cable LCD Inverter - Acer Aspire 1400 | Aspire 1400 Notebook Service Guide - Page 83
lines displayed. Action in Sequence Enter BIOS Utility to execute "Load Setup Defaults" on Exit screen, then reboot system. Reconnect the LCD system doesn't power-on. The system doesn't power-off. Battery can't be charged Action in Sequence Reconnect the inverter board Inverter board - Acer Aspire 1400 | Aspire 1400 Notebook Service Guide - Page 84
Symptom / Error Memory count (size) appears different from actual size. DIMM Main board Action in Sequence Speaker-Related Symptoms Symptom / Error In Windows, multimedia programs, no sound comes from the computer. Internal speakers make noise or emit no sound. Audio driver Speaker Main board - Acer Aspire 1400 | Aspire 1400 Notebook Service Guide - Page 85
work correctly. USB does not work correctly Print problems. Action in Sequence Enter BIOS Setup Utility to execute "Load Setup defaults", then "System Devices" of BIOS Setup Utility is set to Enabled. Onboard Devices Configuration Run printer self-test. Printer driver Printer cable Printer Main - Acer Aspire 1400 | Aspire 1400 Notebook Service Guide - Page 86
, electrostatic discharge, or software errors. FRU replacement should be considered only when a recurring problem exists. When analyzing an intermittent problem, do the following: 1. Run the advanced diagnostic test for the main board in loop mode at least 10 times. 2. If no error is detected - Acer Aspire 1400 | Aspire 1400 Notebook Service Guide - Page 87
1. Power-off the computer. 2. Visually check them for damage. If any problems are found, replace the FRU. 3. Remove or disconnect all of the following devices: ! Non-Acer devices ! Printer, mouse, and other external devices ! Battery pack ! Hard disk drive ! DIMM ! CD-ROM/Diskette drive Module ! PC - Acer Aspire 1400 | Aspire 1400 Notebook Service Guide - Page 88
Error Message Error Message Hardware Error VPD Checksum Error BIOS Update Program Error System Error Without AC adapter Battery Low Action in Sequence See "System Diagnostic Diskette" on page 48 Reboot the system and then restest with this diskette. Turn off the power and - Acer Aspire 1400 | Aspire 1400 Notebook Service Guide - Page 89
Jumper and Connector Locations Top View Chapter 5 Chapter 5 83 - Acer Aspire 1400 | Aspire 1400 Notebook Service Guide - Page 90
Main Board to Touch Pad Board FFC connector JP12 Keyboard Connector F-JP2 H-JP6 J-JP7, JP9 L-JP11 Power Button Board Connetor Microphone Jack Speaker Connector Main Board to Touch Pad Board FPC Connector SW1 Settings (Lid switch) Switch 1 Switch 2 Switch 3 Switch 4 NONE STAND BY HIBERNATE ON - Acer Aspire 1400 | Aspire 1400 Notebook Service Guide - Page 91
Bottom View Chapter 5 85 - Acer Aspire 1400 | Aspire 1400 Notebook Service Guide - Page 92
O-JP17 Q-JP19 S-JP21 U-JP25 W-JP27 HDD Connector CRT Connector Fan Connector LAN/Modem Connector MDC Module Connector CDROM Connector USB Connector L-JP14 N-JP16 P-JP18 R-JP20 T-JP23 V-JP26 Parallel Connector S-Video Connector M/B to USB Board Connector MINI PCI Connector SODIMM Connector PCMCIA - Acer Aspire 1400 | Aspire 1400 Notebook Service Guide - Page 93
FRU (Field Replaceable Unit) listing in global configurations of Aspire 1400. Refer to this chapter whenever ordering for parts to repair or for made, it will not be noted on the printed Service Guide. For ACER AUTHORIZED SERVICE PROVIDERS, your Acer office may have a DIFFERENT part number code from - Acer Aspire 1400 | Aspire 1400 Notebook Service Guide - Page 94
Exploded Diagram THE SYSTEM 88 Chapter 6 - Acer Aspire 1400 | Aspire 1400 Notebook Service Guide - Page 95
LOGIC UPPER ASSY Chapter 6 Aspire 1400 Series 89 - Acer Aspire 1400 | Aspire 1400 Notebook Service Guide - Page 96
LCD 14.1" Model Name Aspire 1400 Series 90 Chapter 6 - Acer Aspire 1400 | Aspire 1400 Notebook Service Guide - Page 97
LCD 15" Aspire 1400 Series Chapter 6 91 - Acer Aspire 1400 | Aspire 1400 Notebook Service Guide - Page 98
DVD ASSY 02 Aspire 1400 Series NOTE: The exploded diagrams for CD-ROM, CD-RW, DVD-ROM and DVD-RW module are the same. Therefor, we put only DVD ASSY exploded - Acer Aspire 1400 | Aspire 1400 Notebook Service Guide - Page 99
FDD ASSY 02 HDD (W/O HDD) ASSY Chapter 6 02 93 - Acer Aspire 1400 | Aspire 1400 Notebook Service Guide - Page 100
Picture CPU/Processor Memory LCD No. Partname And Description Part Number CPU Willamette 1.7Ghz/400FSB, 256OD 478pin 01.WILAM.1GV D-0 256M SDRAM Mitsubishi MH32S64AVS-6TA-PE 72.03264.AON - Acer Aspire 1400 | Aspire 1400 Notebook Service Guide - Page 101
.008 50.A02V5.010 50.A02V5.011 50.A02V5.012 50.A02V5.013 50.A02V5.014 50.A02V5.015 6K.A02V5.001 PCMCIA Slot/PC Card slot NS PCMCIA SLOT 21.A02V5.001 FDD/Floppy Disk Drive FDD ASSY FDD MODULE, MITSUMI FDD MODULE, PANASONIC 6M.A02V5.011 6M.A02V5.012 001-FDD - Acer Aspire 1400 | Aspire 1400 Notebook Service Guide - Page 102
Picture No. 002-FDD ASSY Partname And Description FDD DOOR MITSUMI FDD DOOR PANASONIC Part Number 42.A02V5.018 42.A02V5.019 HDD/ Hard Disk Drive Optical Drive NS HDD 2.5 20G IBM CASCADE IC25N020ATCS04-0 07N8325 FW:A71A DVD ASSY DVD-ROM MODULE 8X TOSHIBA DVD-ROM MODULE 8X MKE DVD-ROM MODULE - Acer Aspire 1400 | Aspire 1400 Notebook Service Guide - Page 103
Picture No. 005-Logic Upper Partname And Description FPC-FDD LF-1252(M/B TO TOUCHPAD BOARD) Part Number 50.A02V5.004 Boards 004-FDD ASSY FDD FPC MITSUMI FDD FPC PANASONIC NS 003-HDD (W/O HDD) ASSY POWER CORD CONTINENTAL POWER CORD DANISH POWER CORD ITALIAN POWER CORD PRC POWER CORD SWISS - Acer Aspire 1400 | Aspire 1400 Notebook Service Guide - Page 104
And Description MODEM CARD Part Number 54.A02V5.001 NS WIRELESS LAN CARD 54.A02V5.002 Adapter Battery Keyboard NS AS1400 90W DELTA ADAPTER(3-PIN) AP.0201.001 ADAPTER-API AP.0201.002 NS BATTERY LI-ION 12 CELL-SONY BT.A0201.002 BATTERY LI-ION 12 CELL-PANASONIC BT.A0201.001 NS AS1400 - Acer Aspire 1400 | Aspire 1400 Notebook Service Guide - Page 105
Picture No. Case/Cover/Bracket Assembly NS Partname And Description AS1400 KEYBOARD CHICONY Thai AS1400 KEYBOARD CHICONY Turkish AS1400 KEYBOARD CHICONY UK AS1400 KEYBOARD CHICONY US MIDDLE COVER Part Number KB.A0203.011 KB.A0203.018 KB.A0203.002 KB.A0203.001 42.A02V5.001 309-The System DIMM - Acer Aspire 1400 | Aspire 1400 Notebook Service Guide - Page 106
A02V5.003 002-Logic Upper LED BRACKET 310-The System D-SUB BRACKET 312-The System CPU SUPPORT BRACKET 33.A02V5.004 33.A02V5.005 33.A02V5.006 006-Logic Upper HINGE SADDLE-R hinge saddles. 34.A02V5.002 NS BATTERY LATCH 42.A02V5.004 NS BATTERY LATCH KNOB V42.A02V5.005 100 Chapter 6 - Acer Aspire 1400 | Aspire 1400 Notebook Service Guide - Page 107
Picture No. NS Partname And Description BATTERY LATCH SPRING Part Number 34.A02V5.003 Others NS ANTENNA COVER-R 42.A02V5.006 Note: The image includes the right and left antenna covers. NS - Acer Aspire 1400 | Aspire 1400 Notebook Service Guide - Page 108
Picture No. 313-The FAN System Partname And Description Part Number 31.A02V5.003 NS HEATSINK 23.A02V5.001 Screws NS ANTENNA LINE-L ANTENNA LINE-R 315-Logic Upper 307-The System 308-The System 002-HDD ASSY SCREWLOCK, 6NUT SCREW, M1.7X2.5L SCREW, TPB 2.0X4 SCREW, M2.5X3 SCREW, M2.5X4 - Acer Aspire 1400 | Aspire 1400 Notebook Service Guide - Page 109
Chapter 6 103 - Acer Aspire 1400 | Aspire 1400 Notebook Service Guide - Page 110
, Aspire 1400 also has 4x AGP support and is suitable LCD and CRT display plus DualView support. It has a hardware 3D graphics engine and an MPEG-2 DVD hardware-assisted capability. Audio ports for speaker/headphone-out jack and microphone/line-in jack devices provide the user the best compatibility - Acer Aspire 1400 | Aspire 1400 Notebook Service Guide - Page 111
life3; 9-hour charge-in-use ! Power management system ! Four Audio DJ music CD control buttons for play/pause, stop/eject, previous track, and next track ! Keyboard has international language support. 3 Actual battery life may be different because of the usage and configuration. 105 Appendix - Acer Aspire 1400 | Aspire 1400 Notebook Service Guide - Page 112
Appendix A 106 - Acer Aspire 1400 | Aspire 1400 Notebook Service Guide - Page 113
Appendix B Test Compatible Components This computer's compatibility is tested and verified by Acer's internal testing department. All of its system functions are tested under Windows XP environment. Refer to the following lists for components, adapter cards, and peripherals which have passed these - Acer Aspire 1400 | Aspire 1400 Notebook Service Guide - Page 114
- ATA PCMCIA - Flash Memory PCMCIA - CardBus Card ViewSonic PS775 Phillips Brilliance 17" Specifications Xircom Modem WinGlobal CBM56WG 3Com10/100with XJACK connector 3 CXFE575CT LINKSYS Ethernet Card EC2T Xircom RealPort Ethernet 10/100+Modem 56RBE56G Xircom Ethernet 10/100+ Modem 56CBEM56 HP - Acer Aspire 1400 | Aspire 1400 Notebook Service Guide - Page 115
! Main manuals ! Bios updates ! Software utilities ! Schematics ! Spare parts lists ! Chips ! TABs (Technical Announcement Bulletin) The service repair section provides you with downloadable information on: ! Troubleshooting guides ! Tooling box information ! Repair instructions for specific models - Acer Aspire 1400 | Aspire 1400 Notebook Service Guide - Page 116
110 Appendix C - Acer Aspire 1400 | Aspire 1400 Notebook Service Guide - Page 117
33 ACPI 1.0a 25 AFLASH Utility 48 Audio 28, 29 B Battery 30 Battery Pack 59 battery pack charging indicator 15, 16 BIOS 25 package 25 password control 25 ROM size 25 ROM type 25 vendor 25 Version 25 BIOS Setup Utility 37 BIOS Supports protocol 25 BIOS Utility 37 Basic System Settings 40 Navigating - Acer Aspire 1400 | Aspire 1400 Notebook Service Guide - Page 118
Diskette 48 System Memory 25 System Specifications Features 105 112 System Utilities 37 System Utility Diskette 48 T Temperature 34 Test Compatible Components 107 Touchpad Check 72 Troubleshooting 69 U Undetermined Problems 81 USB 29 utility BIOS 37 V Video 28 Resolutions 28 Video controller 29