Acer Aspire 5251 Service Guide
Acer Aspire 5251 Manual
 |
View all Acer Aspire 5251 manuals
Add to My Manuals
Save this manual to your list of manuals |
Acer Aspire 5251 manual content summary:
- Acer Aspire 5251 | Service Guide - Page 1
Aspire 5251/5551G/5551 Series Service Guide Service guide files and updates are available on the ACER/CSD web; for more information, please refer to http://csd.acer.com.tw PRINTED IN TAIWAN - Acer Aspire 5251 | Service Guide - Page 2
Revision History Please refer to the table below for the updates made on Aspire 5251/5551G/5551 service guides. Date Chapter Updates II - Acer Aspire 5251 | Service Guide - Page 3
by any means, electronic, mechanical, magnetic, optical, chemical, manual or otherwise, without the prior written permission of Acer Incorporated. Disclaimer The information in this guide is subject to change without notice. Acer Incorporated makes no representations or warranties, either expressed - Acer Aspire 5251 | Service Guide - Page 4
Conventions The following conventions are used in this manual: SCREEN MESSAGES NOTE WARNING CAUTION IMPORTANT Denotes actual or software problems. Reminds you to do specific actions relevant to the accomplishment of procedures. NOTE: This symbol where placed in the Service Guide designates a - Acer Aspire 5251 | Service Guide - Page 5
it will not be noted in the printed Service Guide. For ACER-AUTHORIZED SERVICE PROVIDERS, your Acer office may have a DIFFERENT part number code to those given in the FRU list of this printed Service Guide. You MUST use the list provided by your regional Acer office to order FRU parts for repair and - Acer Aspire 5251 | Service Guide - Page 6
VI - Acer Aspire 5251 | Service Guide - Page 7
1 Features 1 System Block Diagram 5 Your Acer Notebook tour 6 Front View 6 Closed Front BIOS Setup Utility 25 Navigating the BIOS Utility 25 Aspire 5251/5551G/5551 BIOS 26 Information 26 Main 27 Requirements 43 Pre-disassembly Instructions 44 Disassembly Process 45 External - Acer Aspire 5251 | Service Guide - Page 8
Cover 131 Replacing the Logic Lower Door 132 Replacing the ODD Module 133 Replacing the SD Dummy Card 134 Replacing the Battery 135 Troubleshooting 137 Common Problems 137 Power On Issue 138 No Display Issue 139 Random Loss of BIOS Settings 140 LCD Failure 141 Built-In Keyboard Failure - Acer Aspire 5251 | Service Guide - Page 9
Problems 150 Undetermined Problems 150 Post Codes Aspire 5251/5551G/5551 FRU List 165 Screw List 166 Model Definition and Configuration 168 Aspire 5251 168 Aspire 5551G 170 Aspire 5551 179 Test Compatible Components 187 Microsoft® Windows® 7 Environment Test 188 Online Support - Acer Aspire 5251 | Service Guide - Page 10
Table of Contents X - Acer Aspire 5251 | Service Guide - Page 11
and SB820M Chipset (Aspire 5251/5551/5551G) System Memory • Dual-channel DDR3 SDRAM support: • Up to 4 GB of DDR3 1066 MHz memory, upgradeable to 8 GB using two soDIMM modules (for 64-bit OS) Display • • 15.6" HD 1366 x 768 pixel resolution, high-brightness (200-nit) Acer CineCrystal™ LED-backlit - Acer Aspire 5251 | Service Guide - Page 12
(Aspire 5251/5551/5551G) Storage Subsystem • 160/250/320/500/640 GB or larger hard disk drive • Multi-in-1 card reader, supporting: • Secure Digital™ (SD) Card, MultiMediaCard (MMC), Memory Stick™ (MS), Memory Stick PRO™ (MS PRO), xD-Picture Card™ (xD) Audio Two built-in Acer 3DSonic™ stereo - Acer Aspire 5251 | Service Guide - Page 13
DVD+RW, 5X DVD-RAM Communication • Acer Video Conference, featuring: • Acer Crystal Eye 1.3 MP webcam, 1280 x 1024 resolution • WLAN: • Acer InviLink™ Nplify™ 802.11b/g/n Wi-Fi CERTIFIED™ • Acer InviLink™ 802.11b/g Wi-Fi CERTIFIED™ • Supporting Acer SignalUp™ wireless technology • WPAN: • Bluetooth - Acer Aspire 5251 | Service Guide - Page 14
• HDMI™ port with HDCP support • External display (VGA) port • Headphone/speaker/line-out jack • Microphone-in jack • Ethernet (RJ-45) port • DC-in jack for AC adapter Optional Items • 1 GB / 2 - Acer Aspire 5251 | Service Guide - Page 15
System Block Diagram LVDS CRT HDMI Conn. MINI Card 1 WLAN GPP1 LAN(GbE) Broadcom BCM57780 GPP0 RJ45 LED RTC CKT. LID SW / MEDIA/B Power On/Off CKT. DC/DC Interface CKT. Fan Control Extend Card/B 1. USB X2 2. Cardreader Danube AMD S1G4 Processor uPGA-638 Package Champlain Hyper Transport Link - Acer Aspire 5251 | Service Guide - Page 16
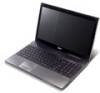
Notebook tour Front View No. 1 2 3 4 5 6 Icon Item Acer Crystal Eye webcam Display screen HDD Description Web camera for video communication (for selected models). Also called Liquid-Crystal Display (LCD), displays computer output. Indicates - Acer Aspire 5251 | Service Guide - Page 17
. 2. Fully charged: The light shows blue when in AC mode. The left and right buttons function like the left and right mouse buttons. Comfortable support area for your hands when you use the computer. Left and right speakers deliver stereo audio output. Internal microphone for recording sound. NOTE - Acer Aspire 5251 | Service Guide - Page 18
No. 6 7 Icon Right View Item USB 2.0 ports Microphone-in jack Headphones/ speaker/line-out jack Description Connect to USB 2.0 devices (e.g. USB mouse, USB camera). Accepts input from external microphones. Connects to audio line-out devices (e.g. speakers, headphones). No. 1 2 3 4 5 6 Icon - Acer Aspire 5251 | Service Guide - Page 19
Bottom View No. 1 2 3 4 5 Icon Item Battery bay Battery release latch Hard disk bay Memory compartment Battery lock Description Houses the computer's battery pack. Releases the battery for removal. Houses the computer's hard disk (secured with screws). Houses the computer's main memory. Locks - Acer Aspire 5251 | Service Guide - Page 20
TouchPad Basics The following items show you how to use the TouchPad: • Move your finger across the TouchPad (1) to move the cursor. • Press the left (2) and right (3) buttons located beneath the TouchPad to perform selection and execution functions. These two buttons are similar to the left and - Acer Aspire 5251 | Service Guide - Page 21
Using the Keyboard The keyboard has full-sized keys and an embedded numeric keypad, separate cursor, lock, Windows, function and special keys. Lock Keys and embedded numeric keypad The keyboard has two lock keys which you can toggle on and off. Lock key Caps Lock Scroll Lock < Fn + F12 > Num Lock - Acer Aspire 5251 | Service Guide - Page 22
provide a variety of functions: < >: Open or close the Start menu < > + : Display the desktop < > + : Open Windows Explore < > + : Search for a file or folder < > + : Cycle through Sidebar gadgets < > + : Lock your computer (if you are connected to a network domain), or switch - Acer Aspire 5251 | Service Guide - Page 23
speakers on and off. Increases the screen brightness. Decreases the screen brightness. Increases the sound volume. Decreases the sound volume. Play or pause a selected media file. Stop playing the selected media file. Return to the previous media file. Jump to the next media - Acer Aspire 5251 | Service Guide - Page 24
2 MB 2 MB 2 MB 2 MB Package S1g4 S1g4 S1g4 S1g4 S1g4 S1g4 S1g4 S1g4 S1g4 Core Voltage 35 W 25 W 25 W 25 W 35 W 35 W 35 W 25 W 25 W Acer P/N CPU Fan True Value Table (Tj = 100 DIS) CPU Temp (°C) Core 0 Fan Speed (rpm) 50 2500 56 2900 63 3200 70 3600 80 4000 95 - Acer Aspire 5251 | Service Guide - Page 25
Fan Speed (rpm) 50 2500 56 2900 63 3200 70 3600 80 4000 95 4000 SPL Spec (dBA) 28 31 34 37 40 40 • Throttling 50%: On=95°C, Off=85°C sku) Fan 4 3DMark06,Prime95, 37 Prime95+Play TV(TV tuner sku), acer screen saver, HDD spinning Fan 5 TAT100% or 40 Thermanow100%,3DMark06, at - Acer Aspire 5251 | Service Guide - Page 26
Suspend to RAM (S3)/Disk (S4) • Various hot-keys for system control • Support SMBIOS 2.3, PCI2.2. • Refer to Acer BIOS specification. • DMI utility for BIOS serial number configurable/asset tag • Support PXE • Support Y2K solution • Support WinFlash • Wake on LAN from S3 • Wake on LAN form S4 in AC - Acer Aspire 5251 | Service Guide - Page 27
-duplex MAC • Receive side scaling(RSS) for multicore processors • Complies with IEEE 802.3, 802.3u, 802.3ab, and 802.1p • Wake on LAN (WOL) support meeting the ACPI requirements • Statistics for SNMP MIB II, Ethernet-like MIB, and Ethernet MIB (IEEE 802.3z, Clause 30) • Self-boot feature, utilizing - Acer Aspire 5251 | Service Guide - Page 28
System Power Management ACPI mode Mech. Off (G3) Soft Off (G2/S5) Working (G0/S0) Sleeping State (S3) Sleeping State (S4) Specification All devices in the system are turned off completely. OS initiated shutdown. All devices in the system are turned off completely. Individual devices such as the CPU - Acer Aspire 5251 | Service Guide - Page 29
Super-Multi Drive Module Item Specification Vendor & model name HLDS GT20N Sony AD7580S Performance Specification With CD Diskette With DVD Diskette With CD Diskette With DVD Diskette Transfer rate (MB/ sec) Sustained: 3,600 KB/s (24x) max. Sustained: 11.08 Mbytes/s (8x) max. Sustained: - Acer Aspire 5251 | Service Guide - Page 30
: 550 MHz / 750 MHz • Memory clock speed: 800 MHz • VGA output support • HDMI output Support VGA Aspire 5251/5551 • All resolutions up to 2456 x 1536: 60 Hz Aspire 5551G • All resolutions up to 2048 x 1536: 85 Hz HDMI™ Aspire 5251/5551/5551G • All resolutions up to 1920 x 1080: 60 Hz LCD - Acer Aspire 5251 | Service Guide - Page 31
Luminance (cd/m2) (also called Brightness) Contrast Ratio Response Time (Optical Rise Time/Fall Time) msec Luminance Uniformity Electrical Interface Support Color Viewing Angle (up/down/right/ left) Temperature Range (°C) Operating Storage (shipping) Specification AUO/CPT/CMO/Samsung/LCD/INL 15 - Acer Aspire 5251 | Service Guide - Page 32
and Over Temperature Protection • Power saving • Power Down when no memory card is inserted • Power Idle (Selective Suspend) • USB2.0 Interface • Support both High-Speed (480 Mbps) and Full-Speed (12 Mbps) Data Transfer • Embedded High Speed/Full Speed Transceiver • Secure Digital/Multimedia Card - Acer Aspire 5251 | Service Guide - Page 33
MONO, BEEP-IN and HP-OUT are stereo input and output retaking. • Supports line level mono output • Supports analog PCBEEP input, and features an integrated digital BEEP generator • Headphone amplifier on operation • HDMI audio driver for AMD platform • Acer exclusive software features Chapter 1 23 - Acer Aspire 5251 | Service Guide - Page 34
24 Chapter 1 - Acer Aspire 5251 | Service Guide - Page 35
if you encounter configuration problems, you may need to run Setup. Please also refer to Chapter 4 Troubleshooting when problem arises. To activate the five menu options: Information, Main, Security, Boot, and Exit. Follow these instructions: • To choose a menu, use the left and right arrow keys. - Acer Aspire 5251 | Service Guide - Page 36
(tm) II N530 Dual-Core Processor 2500 MHz ST9250315AS 5VC8CXKX Slimtype DVD A DS8A2SH V0. 17T01 ATI VER0.12. 017. 000. 000. 034815 123456789 Aspire 5251/5551G/5551 Acer AE088D61-0B71-782C-94D7-705AB6401288 F1 Help ESC Exit Select Item F5/F6 Change Values F9 Setup Default Select Menu Enter Select - Acer Aspire 5251 | Service Guide - Page 37
Main The Main screen allows the user to set the system time and date as well as enable and disable boot options and recovery. Information Main InsydeH20 Setup Utility Security Boot Exit System Time: System Date: Total Memory: Video Memory: Quiet Boot Network Boot F12 Boot Menu D2D Recovery SATA - Acer Aspire 5251 | Service Guide - Page 38
Security The Security screen contains parameters that help safeguard and protect your computer from unauthorized use. NOTE: System BIOS does not support Trusted Platform Module (TPM). InsydeH20 Setup Utility Information Main Security Boot Exit Supervisor Password Is User Password Is SATA Port 0 - Acer Aspire 5251 | Service Guide - Page 39
Setting a Password Follow these steps as you set the user or the supervisor password: 1. Use the ↑ and ↓ keys to highlight the Set Supervisor Password parameter and press the Enter key. The Set Supervisor Password box appears: Set Supervisor Password Enter New Password [ ] Confirm New Password [ - Acer Aspire 5251 | Service Guide - Page 40
Changing a Password 1. Use the ↑ and ↓ keys to highlight the Set Supervisor Password parameter and press the Enter key. The Set Supervisor Password box appears. Set Supervisor Password Enter Current Password [ ] Enter New Password [ ] Confirm New Password [ ] 2. Type the current password in - Acer Aspire 5251 | Service Guide - Page 41
diskette drives, the onboard hard disk drive and the DVD drive in the module bay. Select Boot menu to select specific devices to support boot. InsydeH20 Setup Utility Information Main Security Boot Exit Rev. 3.5 Boot priority order: Item Specific Help 1. Network Boot : LEGACY PCI DEVICE 2. USB - Acer Aspire 5251 | Service Guide - Page 42
Exit The Exit screen allows you to save or discard any changes you made and quit the BIOS Utility. Information Main InsydeH20 Setup Utility Security Boot Exit Rev. 3.5 Exit Saving Changes Exit Discarding Changes Load Setup Defaults Discard Changes Save Changes Item Specific Help Exit System - Acer Aspire 5251 | Service Guide - Page 43
BIOS Flash Utilities The BIOS flash memory update is required for the following conditions: • New versions of system programs • New features or options • Restore a BIOS when it becomes corrupted. Use the Flash utility to update the system BIOS Flash ROM. NOTE: If you do not have a crisis recovery - Acer Aspire 5251 | Service Guide - Page 44
ESC Exit Select Item F5/F6 Change Values F9 Setup Default Select Menu Enter Select SubMenu F10 Save and Exit 3. Execute the BIOS.BAT batch file to update BIOS. The flash process begins as shown. 34 Chapter 2 - Acer Aspire 5251 | Service Guide - Page 45
4. In flash BIOS, the message Please do not remove AC Power Source displays. NOTE: If the AC power is not connected, the following message displays. Plug in the AC power to continue. 5. Flash is complete when the message Flash programming complete displays. Chapter 2 35 - Acer Aspire 5251 | Service Guide - Page 46
WinFlash Utility Perform the following steps to use the WinFlash Utility: 1. Double-click the WinFlash executable. 2. Click OK to begin the update. A progress screen displays. 36 Chapter 2 - Acer Aspire 5251 | Service Guide - Page 47
An Encode key is generated for unlocking utilities. Note down this key. 3. Execute the UnlockHD.EXE file to create the unlock code in DOS Mode using the format UnlockHD [Encode code] with the code noted in the previous step, as follows: UnlockHD 76943488 4. The command generates a password which can - Acer Aspire 5251 | Service Guide - Page 48
Removing BIOS Passwords: To clear the User or Supervisor passwords, open the DIMM door and use a metal instrument to short the J1 point. Cleaning BIOS Passwords To clean the User or Supervisor passwords, perform the following steps: 1. From a DOS prompt, execute clnpwd.exe 2. Press 1 or 2 to clean - Acer Aspire 5251 | Service Guide - Page 49
Using Boot Sequence Selector The Boot Sequence Selector allows the boot order to be changed without accessing the BIOS. To use Boot Sequence Selector, perform the following steps: 1. Enter into DOS. 2. Execute BS.exe to display the usage screen. 3. Select the desired boot sequence by entering the - Acer Aspire 5251 | Service Guide - Page 50
UUID String (Type1, Offset08h): xxxxxxxx-xxxx-xxxx-xxxx-xxxxxxxxxxxx Write Manufacturer Name to EEPROM Input: dmitools /wm Acer Write Product Name to EEPROM Input: dmitools /wp Aspire 4540 Write Serial Number to EEPROM Input: dmitools /ws 01234567890123456789 Write UUID to EEPROM Input: dmitools /wu - Acer Aspire 5251 | Service Guide - Page 51
the LAN MAC EEPROM Utility You can use the MAC.BAT utility to write the MAC.CFG file to the EEPROM under DOS mode. 1. Use a text editor (for example: Notepad) to open the MAC.CFG file. You can see the MAC.CFG contents as below: WriteData = '001122334455' StartAddr=7A WriteLeng=6 KeepByte=0 MAC - Acer Aspire 5251 | Service Guide - Page 52
42 Chapter 2 - Acer Aspire 5251 | Service Guide - Page 53
from the mass produced model. This chapter contains step-by-step procedures on how to disassemble the notebook computer for maintenance and troubleshooting. Disassembly Requirements To disassemble the computer, you need the following tools: • Wrist grounding strap and conductive mat for preventing - Acer Aspire 5251 | Service Guide - Page 54
Pre-disassembly Instructions Before proceeding with the disassembly procedure, make sure that you do the following: 1. Turn off the power to the system and all peripherals. 2. Unplug the - Acer Aspire 5251 | Service Guide - Page 55
Disassembly Process IMPORTANT: The LCD Module cannot be disassembled outside of factory conditions. If any part of the LCD Module is faulty, such as the camera, antenna or LCD panel, the whole module must be replaced. The disassembly process is divided into the following stages: • External module - Acer Aspire 5251 | Service Guide - Page 56
Modules Disassembly Flowchart The flowchart below gives you a graphic representation of the external module disassembly sequence and instructs you on the components that need to be removed during servicing. For example, if you want to remove the keyboard, you must first remove the switch board. Turn - Acer Aspire 5251 | Service Guide - Page 57
Removing the Battery Pack 1. Turn computer over. Slide the battery lock in the direction shown. 2. Slide and hold the battery release latch to the release position (1), then lift out the battery pack from the main unit (2). 2 1 NOTE: Please follow local regulations for disposal. Chapter 3 47 - Acer Aspire 5251 | Service Guide - Page 58
Removing the SD Dummy Card 1. Push the SD dummy card all the way in to eject it. 2. Pull it out from the slot. 48 Chapter 3 - Acer Aspire 5251 | Service Guide - Page 59
Removing the Optical Drive Module 1. See "Removing the Battery Pack" on page 47. 2. Remove the screw securing the ODD module. Step ODD Module Size M2.5*8 Quantity 1 3. Pull the optical drive module out from the chassis. Screw Type Chapter 3 49 - Acer Aspire 5251 | Service Guide - Page 60
4. Remove the two (2) screws securing the ODD bracket and remove the ODD bracket from the optical disk drive module. Step ODD Bracket Size M2*3 Quantity 2 Screw Type 5. Remove the ODD bezel by prying the top edge away and clear of the module. 50 Chapter 3 - Acer Aspire 5251 | Service Guide - Page 61
Removing the Logic Lower Door 1. Remove two (2) screws from the logic lower door. Step Logic lower door Size M2.5*8 Quantity 2 2. Lift the door beginning from the inner edge as shown. Screw Type 3. Lift the door clear of the device, exposing the HDD, DIMM, and WLAN modules. Chapter 3 51 - Acer Aspire 5251 | Service Guide - Page 62
Removing the 3G Cover 1. Remove one (1) screw from the 3G Cover. Step 3G Cover Size M2*3 Quantity 1 2. Lift the 3G Cover from the right edge first, then remove completely. Screw Type 52 Chapter 3 - Acer Aspire 5251 | Service Guide - Page 63
Removing the DIMM Module 1. See "Removing the Logic Lower Door" on page 51. 2. Push out the release latches on both sides of the DIMM socket to release the DIMM module. 3. Remove the DIMM module. 4. Repeat steps 2 and 3 for the second DIMM module if present. Chapter 3 53 - Acer Aspire 5251 | Service Guide - Page 64
Removing the WLAN Module 1. See "Removing the Logic Lower Door" on page 51. 2. Disconnect the antenna cables from the WLAN Board. NOTE: Cable placement is Black to the MAIN terminal and White to the AUX terminal. 3. Move the antenna away and remove the two (1) screws to release the WLAN Board. Step - Acer Aspire 5251 | Service Guide - Page 65
4. Detach the WLAN Board from the WLAN socket. NOTE: When reattaching the antennas, ensure the cables are tucked into the chassis to prevent damage. Chapter 3 55 - Acer Aspire 5251 | Service Guide - Page 66
Removing the Hard Disk Drive Module 1. See "Removing the Logic Lower Door" on page 51. 2. Using the pull-tab, slide the HDD Module in the direction of the arrow to disconnect the interface. 3. Lift the HDD Module clear of the HDD bay. NOTE: To prevent damage to device, avoid pressing down on it or - Acer Aspire 5251 | Service Guide - Page 67
4. Remove the four (4) screws (two each side) securing the hard disk to the carrier. Step HDD Carrier Size M3*3 5. Remove the HDD from the carrier. Quantity 4 Screw Type Chapter 3 57 - Acer Aspire 5251 | Service Guide - Page 68
Main Unit Disassembly Process Main Unit Disassembly Flowchart Remove External Modules before proceeding Remove Keyboard Remove Upper Cover Upper Cover Lower Cover Remove Power Board Remove Left Speaker Module Remove Right Speaker Module Remove USB Board Remove TouchPad Bracket Remove USB - Acer Aspire 5251 | Service Guide - Page 69
Removing the Keyboard 1. Unlock the six (6) keyboard locks. 2. Pry up the centre of the Keyboard and rotate it upward away from the Upper Cover. 3. Turn the keyboard over on to the TouchPad area to expose the FFC connector. Chapter 3 59 - Acer Aspire 5251 | Service Guide - Page 70
4. Open the locking latch and disconnect the FFC from the mainboard. 5. Lift the keyboard clear of the Upper Cover. 60 Chapter 3 - Acer Aspire 5251 | Service Guide - Page 71
Removing the Upper Cover 1. See "External Module Disassembly Process" on page 46. 2. Turn the computer over. Remove the eleven (11) screws on the lower cover and four (4) screws from the battery bay. Step Lower Cover (red callout) Size M2.5*8 Battery Bay (green callout) M2*3 Quantity 11 4 - Acer Aspire 5251 | Service Guide - Page 72
3. Turn the computer over and disconnect the following four (4) cables from the Mainboard. B C A D 62 Chapter 3 - Acer Aspire 5251 | Service Guide - Page 73
4. Release the locking latch on A. 5. Disconnect A as shown. 6. Release the locking latch on B and remove the cable as shown. 7. Release the locking latch on C and remove the cable as shown. 8. Release the locking latch on D and remove the cable as shown. NOTE: Avoid pulling on cables directly - Acer Aspire 5251 | Service Guide - Page 74
9. Remove the seven (7) screws on the Upper Cover as shown. Step Upper Cover Size M2.5*5 Quantity 7 Screw Type 10. Starting at the top right side of the cover, pry apart the Upper and Lower Covers as shown. Work along the front edge of the casing to the left as shown, then lift the Upper Cover - Acer Aspire 5251 | Service Guide - Page 75
Removing the Left Speaker Module 1. See "Removing the Upper Cover" on page 61. 2. Locate the Left Speaker Module on the Upper Cover as shown. 3. Remove two (2) screws from the left speaker module. Step Left Speaker Module Size M2*3 Quantity 2 Screw Type 4. Remove the Speaker cable from the - Acer Aspire 5251 | Service Guide - Page 76
5. Lift the Speaker clear of the Upper Cover. 66 Chapter 3 - Acer Aspire 5251 | Service Guide - Page 77
Removing the Right Speaker Module 1. See "Removing the Upper Cover" on page 61. 2. Locate the Right Speaker Module on the Upper Cover as shown. 3. Remove the two (2) securing screws from the Right Speaker Module. Step Right Speaker Module Size M2*3 Quantity 2 Screw Type 4. Remove the Right - Acer Aspire 5251 | Service Guide - Page 78
5. Lift the Right Speaker Module clear of the device. 68 Chapter 3 - Acer Aspire 5251 | Service Guide - Page 79
Removing the Power Board 1. See "Removing the Upper Cover" on page 61. 2. Turn the upper cover over and remove the power board cable. Pass the cable through the upper cover as shown. 3. Remove two (2) screws from the power board. Step Power board Size M2*3 Quantity 2 Screw Type 4. Remove the - Acer Aspire 5251 | Service Guide - Page 80
Removing the TouchPad Bracket IMPORTANT: The TouchPad Board cannot be removed individually. To replace the TouchPad Board, replace the entire Upper Cover. 1. See "Removing the Upper Cover" on page 61. 2. Lift the FFC to detach the adhesive securing the cable to the Upper Cover. 3. Release the FFC - Acer Aspire 5251 | Service Guide - Page 81
4. Remove the one (1) screw from TouchPad bracket. Step TouchPad Bracket Size M2*3 Quantity 1 5. Pry the Touchpad bracket off the adhesive and remove it as shown. Screw Type Chapter 3 71 - Acer Aspire 5251 | Service Guide - Page 82
Removing the Card Reader Board 1. See "Removing the Upper Cover" on page 61. 2. Unlock the mainboard to card reader cable connector. 3. Remove one (1) screw from the card reader board. Step Card Reader Size M2*3 Quantity 1 4. Lift the card reader board clear of the device. Screw Type 72 - Acer Aspire 5251 | Service Guide - Page 83
Removing the USB Board 1. See "Removing the Upper Cover" on page 61. 2. Unlock the mainboard to USB cable connector. 3. Peel the cable off the adhesive as shown. 4. Remove one (1) screw from the USB board. Step USB Size M2*3 Quantity 1 Screw Type Chapter 3 73 - Acer Aspire 5251 | Service Guide - Page 84
5. Lift the USB board clear of the device. 74 Chapter 3 - Acer Aspire 5251 | Service Guide - Page 85
Removing the Bluetooth Board 1. See "Removing the Upper Cover" on page 61. 2. Pry the Bluetooth board from the adhesive. 3. Disconnect the mainboard to Bluetooth cable. 4. Lift the Bluetooth board away from the cable channel as shown. Chapter 3 75 - Acer Aspire 5251 | Service Guide - Page 86
Removing the Mainboard 1. See "Removing the Upper Cover" on page 61. 2. Disconnect the speaker to mainboard cable. 3. Disconnect the LVDS cable. 76 Chapter 3 - Acer Aspire 5251 | Service Guide - Page 87
4. Remove the one (1) securing screw from the Mainboard. Step Mainboard Size M2.5*5 Quantity 1 Screw Type 5. Place a dust free, protective mat on the lcd screen to aid in the removal of the mainboard. Chapter 3 77 - Acer Aspire 5251 | Service Guide - Page 88
6. Lift the inner edge of the mainboard up and out to free it from the lower case, without removing the mainboard completely from the chassis. CAUTION: Do not remove the mainboard completely. The mainboard is still connected to the chassis. 7. Carefully turn the mainboard over and place it on the - Acer Aspire 5251 | Service Guide - Page 89
8. Disconnect the power cable. 9. Remove the mainboard from the chassis and turn it over. NOTE: Circuit boards >10 cm² have been highlighted with a yellow rectangle as shown in the previous image. Please detach the Circuit board and follow local regulations for disposal. 10. Remove the adhesive tape - Acer Aspire 5251 | Service Guide - Page 90
11. Disconnect the Bluetooth to mainboard cable. 80 Chapter 3 - Acer Aspire 5251 | Service Guide - Page 91
Removing the Thermal Module 1. See "Removing the Upper Cover" on page 61. 2. Disconnect the fan cable. 3. Remove the four (4) securing screws (in reverse numerical order from screw 4 to 1), then the two (2) screws on the GPU. 2 1 4 3 Step Thermal Module Size M2.5*3.2 GPU Quantity 4 2 Screw - Acer Aspire 5251 | Service Guide - Page 92
4. Carefully lift the Thermal Module clear of the Mainboard. 82 Chapter 3 - Acer Aspire 5251 | Service Guide - Page 93
Removing the CPU IMPORTANT: The pins on the underside of the CPU are very delicate. If they are damaged, the CPU may malfunction. Place the CPU on a clean, dry surface when it is not installed. 1. See "Removing the Thermal Module" on page 81. 2. Using a flat-bladed screw driver, rotate the CPU - Acer Aspire 5251 | Service Guide - Page 94
LCD Module Disassembly Process LCD Module Disassembly Flowchart Remove LCD Assembly Remove LCD Bezel Remove Camera Module Remove LCD Panel Remove LCD Brackets and FPC Cable Remove Antennas Screw List Step LCD Assy LCD Bezel LCD Panel LCD Brackets Screw M2.5*5 M2.5*6 M2.5*5 M2*3 Quantity 4 2 - Acer Aspire 5251 | Service Guide - Page 95
Removing the LCD Assembly 1. See "Removing the Upper Cover" on page 61. 2. Turn the device over and pass the black and white antenna cables through the lower cover. 3. Free the black and white antenna cables from the cable channel as shown. 4. Continue removing the white antenna cable from the cable - Acer Aspire 5251 | Service Guide - Page 96
5. Remove the LVDS cable from the cable channel. 6. Remove the adhesive tape from the black antenna cable. 7. Free the cable from the cable channel as shown. 86 Chapter 3 - Acer Aspire 5251 | Service Guide - Page 97
8. Remove four (4) screws from the LCD assembly. Step LCD assembly Size M2.5*5 Quantity 4 9. Remove the LCD assembly from the lower cover. Screw Type Chapter 3 87 - Acer Aspire 5251 | Service Guide - Page 98
Removing the LCD Bezel 1. See "Removing the LCD Assembly" on page 85. 2. Remove the two bezel screw caps and screws. Step LCD Bezel Size M2.5*6 Quantity 2 Screw Type 3. Starting from the bottom edge of the bezel, pry the bezel upwards and away from the panel. Work along the right side toward - Acer Aspire 5251 | Service Guide - Page 99
Removing the Camera Module 1. See "Removing the LCD Assembly" on page 85. 2. Locate the Camera Module at the top of the LCD Module and disconnect the camera cable. 3. Remove the Camera from the module. Chapter 3 89 - Acer Aspire 5251 | Service Guide - Page 100
Removing the LCD Panel 1. See "Removing the Camera Module" on page 89. 2. Remove the four (4) securing screws from the LCD Panel. Step LCD Panel Size M2.5*5 Quantity 4 3. Remove the adhesive strip holding the cables in place. Screw Type 4. Lift the LCD Panel clear of the module. 90 Chapter 3 - Acer Aspire 5251 | Service Guide - Page 101
Removing the LCD Brackets and LVDS Cable 1. See "Removing the LCD Panel" on page 90. 2. Remove the six (6) securing screws (three on each side) from the LCD Panel brackets. Step LCD Brackets Size M2*3 Quantity 6 3. Remove the LCD brackets by pulling away from the LCD Panel. Screw Type Chapter - Acer Aspire 5251 | Service Guide - Page 102
4. Turn the LCD panel over to expose the rear. Pull the cable up as shown. 5. Remove the adhesive tape from the cable. 6. Peel back the mylar securing the LVDS cable. 92 Chapter 3 - Acer Aspire 5251 | Service Guide - Page 103
7. Disconnect the LVDS cable from the panel. Chapter 3 93 - Acer Aspire 5251 | Service Guide - Page 104
Removing the Microphone Cable 1. See "Removing the LCD Panel" on page 90. 2. Remove the cable bundle from the hinge channel. 3. Peel back the foil tabs and remove the microphone cable from the cable channel. 4. Peel back the foil tab on the microphone set. 94 Chapter 3 - Acer Aspire 5251 | Service Guide - Page 105
5. Lift the microphone set and cable clear of the LCD cover. Chapter 3 95 - Acer Aspire 5251 | Service Guide - Page 106
Removing the Antennas 1. See "Removing the LCD Panel" on page 90. 2. Remove the black antenna from the cable channel. 3. Peel back the foil tabs and remove the cable from the cable channel. 4. Pry the antenna assembly clear of the device. 96 Chapter 3 - Acer Aspire 5251 | Service Guide - Page 107
5. Remove the white antenna from the hinge channel. 6. Peel back the foil tabs and remove the cable from the cable channel. 7. Pry the antenna assembly clear of the device. Chapter 3 97 - Acer Aspire 5251 | Service Guide - Page 108
LCD Module Reassembly Procedure Replacing the Antennas 1. Adhere the white antenna assembly to the LCD cover. 2. Run the cable along the cable channel and fold over the foil tabs to secure the cable in place. 3. Run the white antenna along the hinge channel. 98 Chapter 3 - Acer Aspire 5251 | Service Guide - Page 109
4. Adhere the black antenna assembly on the LCD cover. 5. Run the cable along the cable channel and fold over the foil tabs to secure the cable in place. 6. Run the black antenna cable along the cable channel. Chapter 3 99 - Acer Aspire 5251 | Service Guide - Page 110
Replacing the Microphone Cable 1. Place the microphone set in the panel. 2. Run the cable along the cable channel. 3. Fold over the foil tabs and continue running the microphone cable along the cable channel indicated between the red callouts. 4. Run the cable bundle along the hinge channel. - Acer Aspire 5251 | Service Guide - Page 111
Replacing the LCD Brackets and LVDS Cable 1. Connect the LVDS cable to the LCD panel. 2. Adhere the LVDS mylar to the LCD panel. 3. Adhere the LVDS cable to the panel by running it between the callouts as shown. Chapter 3 101 - Acer Aspire 5251 | Service Guide - Page 112
4. Attach the LCD brackets to the LCD Panel. 5. Replace six (6) securing screws (three on each side) of the LCD Panel brackets. 102 Chapter 3 - Acer Aspire 5251 | Service Guide - Page 113
Replacing the LCD Panel 1. Place the LCD Panel in the module as shown. 2. Run the cable along the channel in the LCD Module as shown. 3. Run the cable through the left hinge channel. 4. Secure the panel using four (4) securing screws. Chapter 3 103 - Acer Aspire 5251 | Service Guide - Page 114
Replacing the Camera Module 1. Place the Camera in the module. 2. Connect the camera cable. 104 Chapter 3 - Acer Aspire 5251 | Service Guide - Page 115
Replacing the LCD Bezel 1. Replace the bezel and press down until there are no gaps between the bezel and the LCD Module. IMPORTANT: Ensure that the LCD cables pass through the hinge wells and are not trapped by the bezel. 2. Replace the two (2) screws and screw caps. Chapter 3 105 - Acer Aspire 5251 | Service Guide - Page 116
Replacing the LCD Assembly 1. Place the LCD assembly on the lower cover. 2. Secure the LCD assembly using four (4) screws. 106 Chapter 3 - Acer Aspire 5251 | Service Guide - Page 117
3. Run the black antenna cable along the cable channel. 4. Replace the adhesive tape to secure the cable to the chassis. 5. Near the left hinge, run the LVDS cable along the cable channel. Chapter 3 107 - Acer Aspire 5251 | Service Guide - Page 118
6. Run the white antenna cable along the cable channel as shown. 7. Continue running the black and white antenna cables along the cable channel. 8. Pass the black and white antenna cables through the lower cover. 108 Chapter 3 - Acer Aspire 5251 | Service Guide - Page 119
Main Module Reassembly Procedure Replacing the CPU IMPORTANT: Apply a suitable thermal grease and ensure all heat pads are in place before replacing the CPU. The following thermal grease types are approved for use: • N-302 Dimand TIM Grease • Honeywell IMPORTANT: The CPU has a Pin1 locator that must - Acer Aspire 5251 | Service Guide - Page 120
other approved cleaning agent. 2. Apply a small amount of thermal grease to the centre of the CPU-there is no need to spread the grease manually, the force used during the installation of the Thermal Module is sufficient. 3. Align the screw holes on the Thermal Module and Mainboard then replace the - Acer Aspire 5251 | Service Guide - Page 121
5. Connect the fan cable. Chapter 3 111 - Acer Aspire 5251 | Service Guide - Page 122
Replacing the Mainboard 1. Connect the Bluetooth to mainboard cable. 2. Apply the adhesive tape to the Bluetooth cable. 3. Connect the power cable. 112 Chapter 3 - Acer Aspire 5251 | Service Guide - Page 123
4. Place the left edge of the mainboard in first to line up the I/O ports before lowering the mainboard into the chassis. NOTE: Ensure the I/O ports are positioned correctly through the casing. 5. Secure the one (1) securing screw on the Mainboard. Chapter 3 113 - Acer Aspire 5251 | Service Guide - Page 124
6. Connect the LVDS cable to the mainboard. 7. Connect the microphone cable. 114 Chapter 3 - Acer Aspire 5251 | Service Guide - Page 125
Replacing the Bluetooth Board 1. Run the Bluetooth cable along the channel as shown. 2. Connect the mainboard to Bluetooth cable. 3. Adhere the Bluetooth board to the adhesive. Chapter 3 115 - Acer Aspire 5251 | Service Guide - Page 126
Replacing the USB Board 1. Place the USB board in the device. 2. Secure the one (1) screw on the USB board. 3. Adhere the cable to the chassis as shown. 116 Chapter 3 - Acer Aspire 5251 | Service Guide - Page 127
4. Connect the USB cable to the mainboard and lock the connector. Chapter 3 117 - Acer Aspire 5251 | Service Guide - Page 128
Replacing the Card Reader Board 1. Place the card reader board in the device. 2. Secure one (1) screw on the card reader board. 3. Connect the card reader cable and lock the connector. 118 Chapter 3 - Acer Aspire 5251 | Service Guide - Page 129
Replacing the TouchPad Bracket 1. Replace the TouchPad bracket top edge first to engage the securing clips and press down firmly. 2. Replace the one (1) screws to secure the TouchPad Bracket to the Upper Cover. 3. Replace the TouchPad FFC and close the locking latch on the connector. Chapter 3 119 - Acer Aspire 5251 | Service Guide - Page 130
4. Replace the FFC and press down as indicated to secure it to the Upper Cover. 120 Chapter 3 - Acer Aspire 5251 | Service Guide - Page 131
Replacing the Power Board 1. Place the power board in the upper cover. Ensure that the assembly fits inside the bracket securely. 2. Secure two (2) screws on the power board. 3. Pass the power board cable through the upper cover. Adhere the power board cable as shown. Chapter 3 121 - Acer Aspire 5251 | Service Guide - Page 132
Replacing the Right Speaker Module 1. Place the right speaker module in the chassis as shown. 2. Run the speaker cable along the channel. 3. Secure the two (2) securing screws on the Right Speaker Module. 122 Chapter 3 - Acer Aspire 5251 | Service Guide - Page 133
Replacing the Left Speaker Module 1. Place the module right side first on the Upper Cover as shown. 2. Run the Speaker cable along the cable channel. 3. Secure two (2) screws from the left speaker module. Chapter 3 123 - Acer Aspire 5251 | Service Guide - Page 134
Replacing the Upper Cover 1. Place the Upper Cover on the Lower Cover as shown and press all sides are firmly in place. 2. Secure the seven (7) screws on the Upper Cover as shown. 124 Chapter 3 - Acer Aspire 5251 | Service Guide - Page 135
3. Connect the following cables to the Mainboard. B C A 4. Connect D as shown. D 5. Connect C as shown. Chapter 3 125 - Acer Aspire 5251 | Service Guide - Page 136
6. Connect B as shown. 7. Connect A and lock as shown. 8. Turn the computer over. Remove the eleven (11) screws on the lower cover and four (4) screws from the battery bay. 126 Chapter 3 - Acer Aspire 5251 | Service Guide - Page 137
Replacing the Keyboard 1. Connect the Keyboard FFC to the Mainboard and close the locking latch to secure the cable in place. 2. Replace the Keyboard by first lining up the bottom edge. Press down firmly to lock. Chapter 3 127 - Acer Aspire 5251 | Service Guide - Page 138
Replacing the Hard Disk Drive Module 1. Place the HDD in the HDD carrier. 2. Replace the four (4) screws (two each side) to secure the carrier. 3. Insert the HDD, as indicated and lower it into place. 4. Slide the HDD in the direction of the arrow to connect the interface. 128 Chapter 3 - Acer Aspire 5251 | Service Guide - Page 139
Replacing the WLAN Module 1. Insert the WLAN Module into the WLAN socket. 2. Replace the two (2) screws to secure the module. 3. Connect the two (2) Antenna cables to the module. NOTE: The black cable connects to the upper terminal (MAIN) and the white cable to the lower terminal (MAIN). Chapter - Acer Aspire 5251 | Service Guide - Page 140
Replacing the DIMM Modules 1. Insert the DIMM Module in place. 2. Press down to lock the DIMM module in place. 3. Repeat steps for the second DIMM module if present. 130 Chapter 3 - Acer Aspire 5251 | Service Guide - Page 141
Replacing the 3G Cover 1. Line up the left edge of the 3G cover with the device, before replacing completely. 2. Replace one (1) screw on the 3G Cover. Chapter 3 131 - Acer Aspire 5251 | Service Guide - Page 142
Replacing the Logic Lower Door 1. Replace the lower cover by first lining up the top edge as shown. 2. Secure two (2) screws on the lower cover. 132 Chapter 3 - Acer Aspire 5251 | Service Guide - Page 143
Replacing the ODD Module 1. Press the bezel into the tray, bottom edge first, to 2. Place the bracket on the ODD module. secure it to the ODD Module. 3. Secure the ODD bracket with the two (2) screws. 4. Push the ODD Module into the ODD bay until it is 5. Replace the one (1) screw to secure the - Acer Aspire 5251 | Service Guide - Page 144
Replacing the SD Dummy Card 1. Insert the SD Dummy Card into the slot as shown. 2. Push until the card clicks into place and is flush with the casing. 134 Chapter 3 - Acer Aspire 5251 | Service Guide - Page 145
Replacing the Battery 1. Slide and hold the battery release latch to the release position (1), insert the battery pack and press down (2). 2. Slide the battery lock in the direction shown to secure the battery in place. 2 1 Chapter 3 135 - Acer Aspire 5251 | Service Guide - Page 146
136 Chapter 3 - Acer Aspire 5251 | Service Guide - Page 147
Troubleshooting Chapter 4 Common Problems Use the following procedure as a guide for computer problems. NOTE: The diagnostic tests are intended to test only Acer products. Non-Acer products, If the Issue is still not resolved, see "Online Support Information" on page 195. Chapter 4 137 - Acer Aspire 5251 | Service Guide - Page 148
system powers off at intervals, perform the following actions one at a time to correct the problem. 1. Check the power cable is properly connected to the computer and the electrical outlet. software. 7. If the Issue is still not resolved, see "Online Support Information" on page 195. 138 Chapter 4 - Acer Aspire 5251 | Service Guide - Page 149
POST or video doesn't display, perform the following actions one at a time to correct the problem. 1. Make sure that the internal display is selected. On this notebook model, switching between the ). 8. If the Issue is still not resolved, see "Online Support Information" on page 195. Chapter 4 139 - Acer Aspire 5251 | Service Guide - Page 150
to its highest level. See the User Manual for instructions on adjusting settings. NOTE: Ensure that the If the Issue is still not resolved, see "Online Support Information" on page 195. 10. Run the Windows following actions one at a time to correct the problem. 1. If the computer is more than one year - Acer Aspire 5251 | Service Guide - Page 151
If the LCD fails, perform the following actions one at a time to correct the problem. Do not replace a nondefective FRUs: Built-In Keyboard Failure If the built-in Keyboard fails, perform the following actions one at a time to correct the problem. Do not replace a non-defective FRUs: Chapter 4 141 - Acer Aspire 5251 | Service Guide - Page 152
doesn't work, perform the following actions one at a time to correct the problem. Do not replace a non-defective FRUs: Internal Speaker Failure If the internal Speakers fail, perform the following actions one at a time to correct the problem. Do not replace a non-defective FRUs: 142 Chapter 4 - Acer Aspire 5251 | Service Guide - Page 153
Remove and recently installed hardware or software. 9. Restore system and file settings from a known good date using System Restore. If the the Issue is still not resolved, see "Online Support Information" on page 195. Microphone Problems If internal or external Microphones do no operate correctly, - Acer Aspire 5251 | Service Guide - Page 154
information to resolve the problem. 4. Run the Windows Memory Diagnostic Tool. For more information see Windows Help and Support. 5. Restart the command prompt. For more information see Windows Help and Support. 10. Restore system and file settings from a known good date using System Restore. - Acer Aspire 5251 | Service Guide - Page 155
tray does not eject • Access failure screen displays • The ODD is noisy Perform the following general solutions one at a time to correct the problem. 1. Reboot the computer and retry the operation. 2. Try an alternate disc. 3. Navigate to Start´ Computer. Check that the ODD device is displayed in - Acer Aspire 5251 | Service Guide - Page 156
the desired player from the drop down menu. 5. Check that the Regional Code is correct for the selected media: IMPORTANT:Region can only be changed a limited 's user manual. Playback is Choppy If playback is choppy or jumps, perform the following actions one at a time to correct the problem. 1. - Acer Aspire 5251 | Service Guide - Page 157
other ATA Devices shown if applicable. Drive Not Detected If Windows cannot detect the drive, perform the following actions one at a time to correct the problem. 1. Restart the computer and press F2 to enter the BIOS Utility. 2. Check that the drive is detected in the ATAPI Model Name field on the - Acer Aspire 5251 | Service Guide - Page 158
Failure If the WLAN fails, perform the following actions one at a time to correct the problem. Do not replace a nondefective FRUs: Thermal Unit Failure If the Thermal Unit fails, perform the following actions one at a time to correct the problem. Do not replace a non-defective FRUs: 148 Chapter 4 - Acer Aspire 5251 | Service Guide - Page 159
problem. 1. Try an alternative mouse. 2. If the mouse uses a wireless connection, insert new batteries and confirm there is a good connection. See the mouse user manual 8. Restore system and file settings from a known good For more information see Windows Help and Support. 10. Roll back the mouse - Acer Aspire 5251 | Service Guide - Page 160
non-defective FRU). NOTE: Verify that all attached devices are supported by the computer. NOTE: Verify that the power supply being used check them for damage. If any problems are found, replace the FRU. 3. Remove or disconnect all of the following devices: • Non-Acer devices • Printer, mouse, and - Acer Aspire 5251 | Service Guide - Page 161
0xF9 - 0xFE 0xD8 - 0xE0 0xE5 - 0xE8 SEC Phase POST Code Table Functionality Name (Include\ PostCode.h) SEC_SYSTEM_POWER_ON Phase SEC SEC_BEFORE_MICROCODE_PATCH SEC_AFTER_MICROCODE_PATCH PEI PEI PEI PEI PEI PEI PEI PEI PEI PEI PEI PEI PEI PEI Post Code 70 71 72 73 74 75 76 77 78 79 7A 7E 7F 80 - Acer Aspire 5251 | Service Guide - Page 162
BDS_PCI_ENUMERATION_END BDS_CONNECT_CONSOLE_IN BDS_CONNECT_CONSOLE_OUT Phase BDS BDS BDS BDS BDS BDS BDS Post Code 10 11 13 14 15 16 17 Description Enter BDS entry Install Hotkey service PCI enumeration PCI resource assign complete PCI enumeration complete Keyboard Controller, Keyboard - Acer Aspire 5251 | Service Guide - Page 163
Table Functionality Name (Include\ PostCode.h) POST_BDS_NO_BOOT_DEVICE POST_BDS_START_IMAGE POST_BDS_ENTER_INT19 POST_BDS_JUMP_BOOT_SECTOR BDS BDS Phase POST_BD S POST_BD S POST_BD S POST_BD S Post Code 18 19 1A 1B 1C 1D 1E 1F 20 21 22 23 24 25 26 27 28 29 2A 2B 2C Description Error report device - Acer Aspire 5251 | Service Guide - Page 164
SMM_ACPI_DISABLE_START SMM_ACPI_DISABLE_END Phase SMM SMM SMM SMM SMM SMM SMM SMM SMM SMM Post Code 0xA0 0xA2 0xA6 0xA7 0xA1 0xA3 0xA4 0xA5 0xA8 0xA9 Description Identify Flash device in SMM SMM service initial OS call ACPI enable function ACPI enable function complete Enter S1 Enter S3 - Acer Aspire 5251 | Service Guide - Page 165
Jumper and Connector Locations Top View Chapter 5 Item JLVDS1 JSPK1 JSPK2 JKB1 JTP1 JUSB2 JCR1 Description Connect to LED / CCFL Panel Connect to Right Speaker Connect to Left Speaker Connect to Keyboard Connect to Touch pad (FFC) Connect to Power USB board (FFC) Connect to Card reader board (FFC - Acer Aspire 5251 | Service Guide - Page 166
Bottom View Item PJP2 PJP1 JDIMM1 / JDIMM2 JCRT1 JRJ45 JHDMI1 JMINI1 JUSB1 JMIC1 Description Connect to Battery DC-IN jack DDR3 Memory socket Connect to external CRT RJ45 LAN HDMI connector Connect to WLAN USB Connector Connect to external microphone Item JHDD1 JODD1 JFAN1 JCPU1 U3 U5 U20 JHP1 - Acer Aspire 5251 | Service Guide - Page 167
USB/B Board Item JUSB1/JUSB2 Power Board Description USB Connector ITEM LED1 LED2 LED3 LED4 LED5 LED6 LED7 DESCRIPTION For NEW75 ON/OFF LED For NEW85 ON/OFF LED For NEW95 ON/OFF LED For NEW75 MEDIA LED For NEW85 MEDIA LED For NEW95 MEDIA LED For NEW75 WWAN LED ITEM LED9 LED10 LED11 LED12 SW1 - Acer Aspire 5251 | Service Guide - Page 168
ITEM LED8 DESCRIPTION For NEW85 WLAN LED CR/B Board ITEM DESCRIPTION ITEM JREAD1 DESCRIPTION Card reader connector 158 Chapter 5 - Acer Aspire 5251 | Service Guide - Page 169
Clearing Password Check and BIOS Recovery This section provides you with the standard operating procedures of clearing password and BIOS recovery for the Aspire 5251/5551G/5551. The machine provides one Hardware Open Gap on main board for clearing password check, and one Hotkey for enabling BIOS - Acer Aspire 5251 | Service Guide - Page 170
. Follow the steps below: 1. Format the USB storage disk using the Fast Format option. 2. Save ROM file (file name: NEW75x64.fd) to BIOS.FD in the root directory. Make sure that there is no other BIOS file saved in the same directory. 3. Plug USB storage into USB port. 4. Press Fn + ESC button then - Acer Aspire 5251 | Service Guide - Page 171
FRU (Field Replaceable Unit) listing in global configurations of Aspire 5251/5551G/5551. Refer to this chapter whenever ordering Service Guide. For ACER AUTHORIZED SERVICE PROVIDERS, your Acer office may have a DIFFERENT part number code from those given in the FRU list of this printed Service Guide - Acer Aspire 5251 | Service Guide - Page 172
Aspire 5251/5551G/5551 Exploded Diagrams Main Assembly 1 2 3 6 4 5 7 No. Description 1 Keyboard 2 Upper Cover 3 Mainboard 4 USB Board 5 Card Reader Board 6 Thermal Module 7 Lower Cover Acer P/N 162 Chapter 6 - Acer Aspire 5251 | Service Guide - Page 173
Base Assembly 2 1 3 No. Description 1 Logic Lower Door 2 3G Door 3 Lower Cover Acer P/N Chapter 6 163 - Acer Aspire 5251 | Service Guide - Page 174
LED Assembly 5 1 6 7 2 3 8 4 No. Description 1 LCD Bracket (L) 2 LVDS Cable 3 ANTENNA WLAN- MAIN 4 Microphone Cable 5 LCD Bezel 6 LCD Bracket (R) 7 LCD Panel 8 ANTENNA WLAN- AUX 9 LCD Cover 9 Acer P/N 164 Chapter 6 - Acer Aspire 5251 | Service Guide - Page 175
Aspire 5251/5551G/5551 FRU List Chapter 6 165 - Acer Aspire 5251 | Service Guide - Page 176
Screw List 166 Chapter 6 - Acer Aspire 5251 | Service Guide - Page 177
Chapter 6 167 - Acer Aspire 5251 | Service Guide - Page 178
Acer Part No LX.PWJ02.005 AS5251- LX.PWJ02.004 1202G16Mn AS5251- LX.PWJ02.003 1203G16Mn AS5251- LX.PWJ02.002 1203G25Mn AS5251- LX.PWJ02.001 1202G25Mn AS5251- S2.PWJ02.001 1202G25Mn AS5251- LX.PUX02.001 1202G25Mn AS5251N122G32M n S2.PUX0C.001 RO PA PA PA PA PA WW PA WW Country - Acer Aspire 5251 | Service Guide - Page 179
AS52511202G25Mn AS52511202G16Mn AS52511203G16Mn AS52511203G25Mn AS52511202G25Mn AS52511202G25Mn AS52511202G25Mn AS5251N122G32Mn Acer Part No LX.PWJ02.005 LX.PWJ02.004 LX.PWJ02.003 LX.PWJ02.002 LX.PWJ02.001 S2.PWJ02.001 LX.PUX02.001 S2.PUX0C.001 ODD NSM8XS NSM8XS NSM8XS NSM8XS NSM8XS NSM8XS NSM8XS - Acer Aspire 5251 | Service Guide - Page 180
Aspire 5551G Model AS5551GN834G50Mn Acer Part No LX.PUU02.02 1 RO EMEA AS5551GN834G50Mn LX.PUU02.02 0 EMEA AS5551GN834G50Mn LX.PUU01.00 4 EMEA AS5551GN832G32Mn LX.PUU01.00 3 CHINA AS5551GN834G32Mi LX.PUU01.00 1 EMEA AS5551GN832G50Mn LX.PUU01.00 2 CHINA AS5551GN834G50Mn LX.PUU02. - Acer Aspire 5251 | Service Guide - Page 181
.00 3 EMEA AS5551GP323G25Mi LX.PUS01.00 2 EMEA AS5551GN834G50Mn LX.PUS02.01 4 EMEA AS5551GP524G50Mn LX.PUS02.01 3 EMEA AS5551GN834G32Mn LX.PUS02.01 2 EMEA AS5551GP524G50Mn LX.PUS02.01 1 EMEA AS5551GN833G25Mi LX.PUS01.00 1 EMEA Country Australia/ New Zealand Australia/ New Zealand - Acer Aspire 5251 | Service Guide - Page 182
AS5551GN834G50Mn AS5551GN834G50Mn AS5551GN832G32Mn AS5551GN834G32Mi AS5551GN832G50Mn AS5551GN834G50Mn AS5551GP524G64Mn AS5551GP324G32Mn Acer Part No LX.PUU02.021 LX.PUU02.020 LX.PUU01.004 LX.PUU01.003 LX.PUU01.001 LX.PUU01.002 LX.PUU02.019 LX.PUU02.018 LX.PUU02.017 CPU APN830 APN830 APN830 APN830 - Acer Aspire 5251 | Service Guide - Page 183
AS5551GN833G32Mn AS5551GP524G32Mi AS5551GP323G25Mi AS5551GN834G50Mn Acer Part No LX.PUU02.016 LX.PUU02.015 LX.PUU02.012 LX.PUU02.010 LX.PUU02.009 LX.PUU02.008 LX.PUU02.007 LX.PUU02.006 LX.PUU02.005 LX.PUU02.004 LX.PUU02.003 LX.PUU02.002 LX.PUU02.001 S2.PUU02.001 LX.PUS02.010 CPU AAP320 - Acer Aspire 5251 | Service Guide - Page 184
Acer Part No LX.PUS02.013 CPU ATP520 LCD NLED15.6 WXGAG VGA Chip PARK_XT AS5551GN834G32Mn LX.PUS02.012 APN830 NLED15.6 PARK_XT WXGAG AS5551GP524G50Mn LX.PUS02.011 ATP520 NLED15.6 PARK_XT WXGAG AS5551GN833G25Mi LX.PUS01.001 APN830 NLED15.6 PARK_XT WXGAG AS5551GP324G50Mn LX - Acer Aspire 5251 | Service Guide - Page 185
Acer Part No LX.PUU01.003 Memory 2 N Memory 3 Memory 4 N N LX.PUU01.001 SO2GBIII10 N N LX.PUU01.002 N N N LX.PUU02.019 SO2GBIII10 N N LX.PUU02.018 SO2GBIII10 N N LX.PUU02.017 SO2GBIII10 N N LX.PUU02.016 SO2GBIII10 N N LX.PUU02.015 SO2GBIII10 N N LX.PUU02.012 SO2GBIII10 N N LX - Acer Aspire 5251 | Service Guide - Page 186
AS5551GN334G32Mn AS5551GN332G32Mn Acer Part No LX.PUS01.003 Memory 2 SO2GBIII10 Memory 3 N Memory 4 N LX.PUS01.002 SO1GBIII10 N N LX.PUS02.014 SO2GBIII10 N N LX.PUS02.013 SO2GBIII10 N N LX.PUS02.012 SO2GBIII10 N N LX.PUS02.011 SO2GBIII10 N N LX.PUS01.001 SO1GBIII10 N N LX.PUS02.009 - Acer Aspire 5251 | Service Guide - Page 187
Acer Part No LX.PUU01.002 LX.PUU02.019 LX.PUU02.018 LX.PUU02.017 LX.PUU02.016 LX.PUU02.015 LX.PUU02.012 LX.PUU02.010 LX.PUU02.009 LX.PUU02.008 LX.PUU02.007 LX.PUU02.006 LX.PUU02.005 LX.PUU02.004 LX.PUU02.003 LX.PUU02.002 LX.PUU02.001 S2.PUU02.001 LX.PUS02.010 LX.PUS02.016 LX.PUS01.004 LX - Acer Aspire 5251 | Service Guide - Page 188
AS5551GN534G32Mn AS5551GN532G32Mn AS5551GN334G32Mn AS5551GN332G32Mn Acer Part No LX.PUS02.014 LX.PUS02.013 LX.PUS02.012 LX.PUS02.011 LX.PUS01.001 LX.PUS02.009 LX.PUS02.008 S2.PUS0C.001 LX.PUS02.007 LX.PUS02.006 LX.PUS02.005 LX.PUS02.004 LX.PUS02.003 LX.PUS02.002 LX.PUS02.001 ODD NSM8XS NSM8XS - Acer Aspire 5251 | Service Guide - Page 189
LX.PWK02.001 P324G64Mn AS5551- LX.PWK02.002 P323G32Mn AS5551- S2.PWK02.001 P324G50Mn AS5551P52_BR3G2 5M_brn LX.PWP01.002 AS55511_BR3G25M _brn LX.PWP01.001 AS55511_BR2G25M _brn AS5551P522G25Mn S2.PWP02.001 LX.PTQ02.022 RO PA PA PA PA PA PA EME A PA PA EME A PA WW PA PA WW TWN Country - Acer Aspire 5251 | Service Guide - Page 190
AS5551N832G32Mn Acer Part No LX.PTQ02.021 AS5551P323G25Mi LX.PTQ01.001 AS5551- LX.PTQ0C.002 P321G16Mn AS5551- LX.PTQ0C.001 P321G16Mn AS5551- LX.PTQ02.020 N834G50Mn AS5551- LX.PTQ02.019 P323G32Mn AS5551- LX.PTQ02.018 P524G50Mn AS5551- LX.PTQ02.017 P323G32Mn AS5551- S2.PTQ0C.001 - Acer Aspire 5251 | Service Guide - Page 191
AS55511_BR3G25M_ brn AS55511_BR2G25M_ brn AS5551P522G25Mn Acer Part No LX.PWK02.011 LX.PWK02.010 LX.PWK02.009 LX.PWK02.008 LX.PWK02.007 LX.PWK02.006 LX.PWK02.005 LX.PWK02.004 LX.PWK02.003 LX.PWK02.001 LX.PWK02.002 S2.PWK02.001 LX.PWP01.002 LX.PWP01.001 S2.PWP02.001 LX.PTQ02.022 CPU AAP320 AAP320 - Acer Aspire 5251 | Service Guide - Page 192
CPU APN830 LX.PTQ01.001 AAP320 LX.PTQ0C.002 AAP320 LX.PTQ0C.001 AAP320 LX.PTQ02.020 APN830 LX.PTQ02.019 AAP320 LX.PTQ02.018 ATP520 LX.PTQ02.017 AAP320 S2.PTQ0C.001 AAN330 LX.PTQ02.016 APN830 LX.PTQ02.015 APN830 LX.PTQ02.014 APN830 LX.PTQ02.013 AAP320 LX.PTQ02.012 AAP320 LX.PTQ02.009 - Acer Aspire 5251 | Service Guide - Page 193
Acer Part No LX.PWK02.009 LX.PWK02.008 LX.PWK02.007 LX.PWK02.006 LX.PWK02.005 LX.PWK02.004 LX.PWK02.003 LX.PWK02.001 LX.PWK02.002 S2.PWK02.001 LX.PWP01.002 LX.PWP01.001 S2.PWP02.001 LX.PTQ02.022 LX.PTQ02.021 LX.PTQ01.001 LX.PTQ0C.002 LX.PTQ0C.001 LX.PTQ02.020 LX.PTQ02.019 LX.PTQ02.018 LX - Acer Aspire 5251 | Service Guide - Page 194
AS5551P324G32Mn AS5551N532G32Mn AS5551N534G32Mn AS5551N334G32Mn AS5551N332G32Mn Acer Part No LX.PTQ02.016 LX.PTQ02.015 LX.PTQ02.014 LX.PTQ02.013 LX.PTQ02.012 LX.PTQ02.009 LX.PTQ02.007 LX.PTQ02.006 LX.PTQ02.004 LX.PTQ02.003 LX.PTQ02.002 LX.PTQ02.001 Memory 2 SO1GBIII10 Memory 3 N SO2GBIII10 - Acer Aspire 5251 | Service Guide - Page 195
Acer Part No LX.PWK02.002 S2.PWK02.001 LX.PWP01.002 LX.PWP01.001 S2.PWP02.001 LX.PTQ02.022 LX.PTQ02.021 LX.PTQ01.001 LX.PTQ0C.002 LX.PTQ0C.001 LX.PTQ02.020 LX.PTQ02.019 LX.PTQ02.018 LX.PTQ02.017 S2.PTQ0C.001 LX.PTQ02.016 LX.PTQ02.015 LX.PTQ02.014 LX.PTQ02.013 LX.PTQ02.012 LX.PTQ02.009 LX - Acer Aspire 5251 | Service Guide - Page 196
Model AS5551N532G32Mn AS5551N534G32Mn AS5551N334G32Mn AS5551N332G32Mn Acer Part No LX.PTQ02.004 LX.PTQ02.003 LX.PTQ02.002 LX.PTQ02.001 ODD NSM8XS NSM8XS NSM8XS NSM8XS Media Processor N N N N Extra SW1 McAfee McAfee McAfee McAfee Card Reader 5 in 1-Build in 5 in 1-Build in 5 in 1-Build in 5 in - Acer Aspire 5251 | Service Guide - Page 197
to the following lists for components, adapter cards, and peripherals which have passed these tests. Regarding configuration, combination and test procedures, please refer to the Aspire 5251/5551G/5551 Compatibility Test Report released by the Acer Mobile System Testing Department. Appendix B 187 - Acer Aspire 5251 | Service Guide - Page 198
Microsoft® Windows® 7 Environment Test Vendor Adapter 10001081 DELTA Type 65W 10001023 LITE-ON 65W 60002015 HIPRO 65W 10001081 DELTA 65W_BR 10001023 LITE-ON 65W_BR 10001023 LITE-ON 65W_BR 10001081 DELTA 90W 10001023 LITE-ON 90W 60002015 HIPRO 90W Battery 60001921 SANYO 6CELL2.2 - Acer Aspire 5251 | Service Guide - Page 199
Vendor CPU 22554573 AMD 22554573 AMD 60002168 AMDISS 60002168 AMDISS 22554573 AMD Type AAN330 AAP320 AAP320_BR AMDV120 APN830 22554573 AMD 22554573 AMD 22554573 AMD 60002168 AMDISS HDD 60002036 SEAGATE 60002036 SEAGATE APN930 ATN530 ATP520 ATP520_BR N160GB5.4KS N160GB5.4KS 60001922 TOSHIBA DIGI - Acer Aspire 5251 | Service Guide - Page 200
Vendor 60002215 SAMSUNG 60002215 SAMSUNG 60002036 SEAGATE 60002036 SEAGATE 60001922 TOSHIBA DIGI 60002005 HGST SG 60001994 WD 60002005 HGST SG 60002215 SAMSUNG 60002036 SEAGATE 60002036 SEAGATE 60001922 TOSHIBA DIGI 60002005 HGST SG 60001994 WD 60001994 WD LCD 60003316 AUO 60002215 SAMSUNG 60003316 - Acer Aspire 5251 | Service Guide - Page 201
Vendor 10001038 CMO 10001022 INNOLUX 60003316 AUO 60002215 SAMSUNG MEM 16081942 MICRON 60004668 ELPIDA 60002215 SAMSUNG 60002045 HYNIX 60024207 KINGSTON 60004668 ELPIDA 60002215 SAMSUNG 60002045 HYNIX 60002215 SAMSUNG 60002045 HYNIX 16081942 MICRON 60004668 ELPIDA 60002215 SAMSUNG 60002045 HYNIX - Acer Aspire 5251 | Service Guide - Page 202
*4 VRAM SAMSUNG Graphic DDRIII 800 1Gb K4W1G1646E-HC12 LF VRAM HYNIX Graphic DDRIII 800 1Gb H5TQ1G63BFR-12C LF AMD RS880M w/ HDCP EEPROM AMD SB820M Keyboard ACER AC7T_A10B AC7T Internal 17 Standard Black NONE Y2010 - Acer Aspire 5251 | Service Guide - Page 203
Vendor WiFi Antenna 10000105 WNC Audio Codec 10004786 REALTEK A cover 10000981 MISC 10000981 MISC B cover 9999995 ONE TIME VENDER 9999995 ONE TIME VENDER Bluetooth 23707801 FOXCONN TW 23707801 FOXCONN TW 23707801 FOXCONN TW 10001018 HON HAI Type PIFA ALC272X Black IMR Silver IMR Mirror Mirror w/ - Acer Aspire 5251 | Service Guide - Page 204
Vendor 23707801 FOXCONN TW 23707801 FOXCONN TW Type 3rd WiFi BG 3rd WiFi BG Description Foxconn Wireless LAN Broadcom 4312H BG (HM) Foxconn Wirelss LAN Atheros HB95BG (HM) T77H121.10 194 Appendix B - Acer Aspire 5251 | Service Guide - Page 205
of Acer's Notebook, Desktop and Server models including: • Service guides for all models • User's manuals • Bios updates • Software utilities • Spare parts lists • TABs (Technical Announcement Bulletin) For these purposes, we have included an Acrobat File to facilitate the problem-free downloading - Acer Aspire 5251 | Service Guide - Page 206
196 Appendix C - Acer Aspire 5251 | Service Guide - Page 207
28 System Security 32 Board Layout Top View 155 brightness hotkeys 13 C Camera Module Removing 89 Replacing 101, 103, 104, 106 Common Problems 138 computer on indicator 9 CPU Removing 83 Replacing 109 D DIMM Modules Replacing 130 Display 5 Index display hotkeys 13 E EasyTouch Failure 148 External - Acer Aspire 5251 | Service Guide - Page 208
138 Model Definition 168 N No Display Issue 139 O ODD Failure 145 Online Support Information 195 Optical Disk Drive Replacing 132, 133 Optical Drive Module Removing 49 Bracket Removing 70 Replacing 119, 122 TouchPad Failure 142 Troubleshooting Built-in KB Failure 141 EasyTouch Buttons 148 HDTV Switch - Acer Aspire 5251 | Service Guide - Page 209
Removing 61 Replacing 124 utility BIOS 25-33 W Windows 2000 Environment Test 188 Wireless Function Failure 148 WLAN Module Removing 54 Replacing 129 199 - Acer Aspire 5251 | Service Guide - Page 210
200