Acer Aspire 7540 User Guide
Acer Aspire 7540 Manual
 |
View all Acer Aspire 7540 manuals
Add to My Manuals
Save this manual to your list of manuals |
Acer Aspire 7540 manual content summary:
- Acer Aspire 7540 | User Guide - Page 1
Aspire Series Generic User Guide - Acer Aspire 7540 | User Guide - Page 2
Rights Reserved. Aspire Series Generic User Guide Original Issue: 07/2009 Changes may be made periodically to the information in this publication without obligation to notify any person of such revisions or changes. Such changes will be incorporated in new editions of this manual or supplementary - Acer Aspire 7540 | User Guide - Page 3
the power supply unit before connecting the power cord to the AC power outlet. Unplug the power cord before removing the power supply these instructions. • Increase the volume gradually until you can hear clearly and comfortably. • Do not increase the volume level after your ears have adjusted. - Acer Aspire 7540 | User Guide - Page 4
will probably cause unexpected short current or damage rotor devices, HDD, Optical drive, and even exposure risk from lithium battery pack. • The bottom surface, areas around ventilation openings and AC adapter may get hot. To avoid injury, ensure they do not come in contact with your skin or body - Acer Aspire 7540 | User Guide - Page 5
using a wide range of voltages; 100 to 120 or 220 to 240 V AC. The power cord included with the system meets the requirements for use in the distinct change in performance, indicating a need for service • the product does not operate normally after following the operating instructions Note: Adjust - Acer Aspire 7540 | User Guide - Page 6
recycle when possible. Do not dispose as household waste. Wireless devices may be susceptible to interference from the battery, which could affect performance. Replacing the battery pack The notebook uses lithium batteries. Replace the battery with the same type as that which came bundled with - Acer Aspire 7540 | User Guide - Page 7
"CLASS 1 LASER PRODUCT." In case of any trouble with this device, please contact your nearest AUTHORIZED service station. To prevent direct exposure to the laser telephone lines from the equipment when not in use and/or before servicing. • To avoid the remote risk of electric shock from lightning, - Acer Aspire 7540 | User Guide - Page 8
laptop under the following conditions. These devices may include, but are not limited to: wireless lan (WLAN), Bluetooth and/or 3G. Remember to follow any special regulations in force in any area, and always switch above separation distance instructions are followed until wireless phones Wireless - Acer Aspire 7540 | User Guide - Page 9
should service the device, or install the device in a vehicle. Faulty installation or service may be wireless telephone network, and may be illegal. Potentially explosive environments Switch off your device when in any area with a potentially explosive atmosphere and obey all signs and instructions - Acer Aspire 7540 | User Guide - Page 10
Agency. Acer is committed to offer products and services worldwide that change. More information refers to http:// www.energystar.gov or http://www.energystar.gov/powermangement Acer after 10 and 30 minute of inactivity respectively. • Wake the computer from sleep mode by pushing keyboard or moving - Acer Aspire 7540 | User Guide - Page 11
users may complain of eyestrain and headaches after prolonged use. Users Find your comfort zone by adjusting the viewing angle of the your shoulders • install the external display, keyboard and mouse properly and within comfortable reach room lighting, poorly focused screens, very small typefaces and - Acer Aspire 7540 | User Guide - Page 12
by using drapes, shades or blinds • using a task light • changing the display's viewing angle • using a glare-reduction filter • using a display visor, such as a piece of cardboard extended from the display's top front edge • Avoid adjusting your display to an awkward viewing angle. • Avoid looking - Acer Aspire 7540 | User Guide - Page 13
get started with setting up your computer. The printed Aspire Series Generic User Guide contains useful information applying to all models in the Aspire product series. It covers basic topics such as Acer eRecovery Management, using the keyboard, Audio, etc. Please understand that due to its nature - Acer Aspire 7540 | User Guide - Page 14
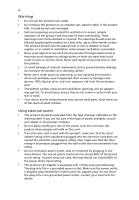
not slam the computer display when you close it. • Never place the computer on uneven surfaces. Taking care of your AC adapter Here are some ways to take care of your AC adapter: • Do not connect the adapter to any other device. • Do not step on the power cord or place heavy - Acer Aspire 7540 | User Guide - Page 15
of the same kind as replacements. Turn the power off before removing or replacing batteries. • Do not tamper with batteries. Keep them away from children. • Dispose of used batteries according to local regulations. Recycle if possible. Cleaning and servicing When cleaning the computer, follow - Acer Aspire 7540 | User Guide - Page 16
xvi - Acer Aspire 7540 | User Guide - Page 17
your AC adapter xiv Taking care of your battery pack xv Cleaning and servicing xv Touchpad 1 Touchpad basics (with fingerprint reader) 1 Touchpad basics (with two-click buttons) 2 Using the keyboard 3 Lock keys and embedded numeric keypad* 3 Windows keys 4 Audio 5 Acer PureZone - Acer Aspire 7540 | User Guide - Page 18
HomeMedia 19 Advanced 19 Live Update: 19 Albums 21 Editing Battery pack 23 Battery pack characteristics 23 Maximizing the battery's life 23 Installing and removing the battery pack 24 Charging the battery 25 Checking the battery level 25 Optimising battery life 25 Battery - Acer Aspire 7540 | User Guide - Page 19
socket 40 BIOS utility 41 Boot sequence 41 Enable disk-to-disk recovery 41 Password 41 Using software 42 Playing DVD movies 42 Frequently asked questions 43 Requesting service 46 International Travelers Warranty (ITW) 46 Before you call 46 Troubleshooting 47 Troubleshooting - Acer Aspire 7540 | User Guide - Page 20
- Acer Aspire 7540 | User Guide - Page 21
the same as clicking the left button. • Use Acer Bio-Protection fingerprint reader (3) supporting Acer FingerNav 4-way control function (only for certain models) Tap twice (at the same speed as double-clicking a mouse button). Tap once. Tap twice (at the same speed as double-clicking a mouse button - Acer Aspire 7540 | User Guide - Page 22
and hold, then use finger on the touchpad to drag the cursor. Click once. Tap twice (at the same speed as double-clicking a mouse button). Tap once. Tap twice (at the same speed as double-clicking a mouse button); rest your finger on the touchpad on the second tap and drag the cursor - Acer Aspire 7540 | User Guide - Page 23
, function and special keys. Lock keys and embedded numeric keypad* The keyboard has three lock keys which you can toggle on and off. Lock external keypad. Scroll Lock + When Scroll Lock is on, the screen moves one line up or down when you press the up or down arrow keys respectively - Acer Aspire 7540 | User Guide - Page 24
English 4 Windows keys The keyboard has two keys that perform Windows-specific Cycle through Sidebar gadgets < > + : Lock your computer (if you are connected to a network domain), or switch users (if you're not connected to a network domain) < > + : Minimizes all windows < > + : Open - Acer Aspire 7540 | User Guide - Page 25
models) The system provides you whole new enthusiastic audio experience including Acer PureZone with built-in stereo microphones featuring beam forming and echo cancellation technologies. Acer PureZone technology supports Acoustic Echo Cancellation, Beam Forming and Noise Suppression for pure sound - Acer Aspire 7540 | User Guide - Page 26
in real time from PCs or game consoles into Dolby Digital for easy connection to home theater systems through a single digital cable. Users can enjoy PC or game audio entertainment with exciting realism through home theater receivers or other devices equipped with Dolby Digital decoding technology - Acer Aspire 7540 | User Guide - Page 27
-purpose fingerprint software package integrated with the Microsoft Windows operating system. Utilizing the uniqueness of one's fingerprint, Acer Bio-Protection Fingerprint Solution incorporates protection against unauthorized access to your computer with centralized password management via Password - Acer Aspire 7540 | User Guide - Page 28
handy utility that offers four pre-defined display settings so you can view multiple windows on the same screen. To access this function, please go to Start, All Programs and click on Acer GridVista. You may choose any one of the four display settings indicated below: 12 2 13 1 3 2 13 24 Double - Acer Aspire 7540 | User Guide - Page 29
schedule or as you need to. To start Acer Backup Manager, press the Acer Backup Manager key above the keyboard. Alternatively, you can go to Start > All Programs > Acer Backup Manager > Acer Backup Manager. This will open the Welcome screen; from this screen you will be taken through the three steps - Acer Aspire 7540 | User Guide - Page 30
's graphics sub-system to reduce overall power consumption. When you press the Acer PowerSmart key, the screen brightness is reduced and the graphics chip switched to a lower speed; PCI and WLAN switch to power-saving modes. Press the Acer PowerSmart key again to return to your previous settings. - Acer Aspire 7540 | User Guide - Page 31
• Restore Operating System and Retain User Data • Reinstall Drivers or Applications This chapter will guide you through each process. Note: disc burner before entering Acer eRecovery Management for optical disc-related tasks. To use the password protection feature of Acer eRecovery Management, you - Acer Aspire 7540 | User Guide - Page 32
Click on Start > All Programs > Acer > Acer eRecovery Management. 2 Acer eRecovery Management opens to the Backup page. 3 Select the type of backup (factory default or drivers and applications) you would like to burn to disc. 4 Follow the instructions on screen to complete the process. Note: Create - Acer Aspire 7540 | User Guide - Page 33
and drivers for your Acer system. 1 Click on Start, All Programs, Acer, Acer eRecovery Management. 2 Switch to the Restore page by clicking Restore. 3 You can choose to restore the system from a factory default image or reinstall applications and drivers. 4 Follow the instructions on screen to - Acer Aspire 7540 | User Guide - Page 34
first backup disc and enable the F12 Boot Menu via the BIOS Setup Utility. 1 Turn on your computer and insert the first system recovery disc into the optical disc drive. Restart your computer. 2 During startup when the Acer logo shows, press the F2 key to enter BIOS Setup, where you can set system - Acer Aspire 7540 | User Guide - Page 35
for long-term use, you should select the Boot submenu. 1 Turn on your computer and insert the first system recovery disc into the optical disc drive. Restart your computer. 2 During startup when the Acer logo shows, press the F2 key to enter BIOS Setup, where you can set system parameters. 3 Use - Acer Aspire 7540 | User Guide - Page 36
and video clips • Homemedia - connect to other devices wirelessly to share media content • Advanced - change settings, update your Arcade software, view the help file and About . Note: For more detailed information on the features of Acer Arcade, please refer to the Arcade Help menu. This can be - Acer Aspire 7540 | User Guide - Page 37
Controls panel appears at the bottom of the screen. Navigation controls To return to the Arcade home in more detail in the Cinema of this guide. Cinema Play Movie: Click Play Movie to Ray discs, standard DVDs and video CDs (VCDs) with the Cinema function of Acer Arcade Deluxe. This player has the - Acer Aspire 7540 | User Guide - Page 38
appear at the bottom of the screen. This contains buttons to control the movie playback, select subtitles, adjust volume, select soundtrack language and played supports. Clicking the stop button will stop the movie playback, and return you to the Cinema main screen. At the bottom of the screen are - Acer Aspire 7540 | User Guide - Page 39
your wireless adaptor active before you can use HomeMedia. Advanced This section contains the settings in Acer Arcade Update: Click Live Update to connect to the Internet to check for, and download, available updates to the software. Settings: Click Settings to make various adjustments to your Acer - Acer Aspire 7540 | User Guide - Page 40
is recommended that you do not select Virtual Surround Sound, in order to avoid damaging your speakers. Audio Channel Expander should be used your slideshow when viewing photos. DVD: Acer Arcade Deluxe has several features and technologies to extend battery life while watching DVD movies. On this - Acer Aspire 7540 | User Guide - Page 41
Acer Arcade Deluxe. About: Click About to view the copyright and vendor information for Acer Arcade Deluxe. Albums Acer of your images. Slideshow settings To change slideshow settings refer to the Arcade to open the Music homepage. Select the folder, CD or category that contains the music you want to - Acer Aspire 7540 | User Guide - Page 42
English 22 Shuffle, Repeat All, Visualize, Volume and Menu. Visualize allows you to watch computer-generated visuals while you listen to music. Online Media (only for certain models) Online Media gives you easy access to photos and videos uploaded to the popular Flickr and YouTube websites. Note: - Acer Aspire 7540 | User Guide - Page 43
use between charges. Battery pack characteristics The battery pack has the following characteristics: • Employs current battery technology standards. • Delivers a battery-low warning. The battery is recharged whenever you connect the computer to the AC adapter. Your computer supports charge-in-use - Acer Aspire 7540 | User Guide - Page 44
faster it will reach the end of its effective life. A standard computer battery has a life span of about 300 charges. Installing and removing the battery pack Important! Before removing the battery from the unit, connect the AC adapter if you want to continue using your computer. Otherwise, turn off - Acer Aspire 7540 | User Guide - Page 45
English 25 To remove a battery pack: 1 Slide the battery release latch to release the battery. 2 Pull the battery from the battery bay. Charging the battery To charge the battery, first make sure that it is correctly installed in the battery bay. Plug the AC adapter into the computer, and connect - Acer Aspire 7540 | User Guide - Page 46
to recharge the battery rapidly. An extra fully charged battery pack is available. 1. Save all necessary files. 2. Close all applications. 3. Shut down the operating system to turn off the computer. 4. Replace the battery pack. 5. Turn on the computer and resume work. The AC adapter or a power - Acer Aspire 7540 | User Guide - Page 47
disks or compact disks from the drive(s). 3 Shut down the computer. 4 Close the display cover. 5 Disconnect the cord from the AC adapter. 6 Disconnect the keyboard, pointing device, printer, external monitor and other external devices. 7 Disconnect the Kensington lock if you are using one to secure - Acer Aspire 7540 | User Guide - Page 48
computer. If your meeting will be longer, or if your battery is not fully charged, you may want to bring the AC adapter with you to plug in your computer in the meeting Pressure against the top cover can damage the screen. What to take with you Unless you have some items at home, take the following - Acer Aspire 7540 | User Guide - Page 49
in the computer is charged. Airport security may require you to turn on your computer when carrying it into the gate area. What to take with you Take the following items with you: • AC adapter • Spare, fully-charged battery pack(s) • Additional printer driver files if you plan to use another printer - Acer Aspire 7540 | User Guide - Page 50
for traveling. What to bring with you Bring the following items with you: • AC adapter • Power cords that are appropriate for the country to which you are traveling • Spare, fully-charged battery packs • Additional printer driver files if you plan to use another printer • Proof of purchase, in case - Acer Aspire 7540 | User Guide - Page 51
set, you must enter this password to gain access to the BIOS utility. See "BIOS utility" on page 41. • User Password secures your computer against unauthorized use. Combine the use of this password with password checkpoints on boot-up and resume from Hibernation for maximum security. • Password on - Acer Aspire 7540 | User Guide - Page 52
password prompt appears in the center of the display screen. • When the Supervisor Password is set, a prompt appears when you press to enter the BIOS utility at boot-up. • Type the Supervisor Password and press to access the BIOS utility. If you enter the password incorrectly, a warning - Acer Aspire 7540 | User Guide - Page 53
mobile computing experience. Connectivity options Ports allow you to connect peripheral devices to your computer as you would with a desktop PC. For instructions on how to connect different external devices to the computer, read the following section. Fax/data modem (only for certain models) Your - Acer Aspire 7540 | User Guide - Page 54
English 34 Built-in network feature The built-in network feature allows you to connect your computer to an Ethernet-based network. To use the network feature, connect an Ethernet cable from the Ethernet (RJ-45) port on the chassis of the computer to a network jack or hub on your network. Consumer - Acer Aspire 7540 | User Guide - Page 55
English 35 Universal Serial Bus (USB) The USB 2.0 port is a high-speed serial bus which allows you to connect USB peripherals without taking up precious system resources. IEEE 1394 port (only for certain models) The computer's IEEE - Acer Aspire 7540 | User Guide - Page 56
support a vast number of expansion options, including flash memory card adapters, TV-tuners, Bluetooth connectivity and IEEE 1394B adapters. ExpressCards support functions. Not all ExpressCard slots will support both types. Please refer to your card's manual for details on how to install and - Acer Aspire 7540 | User Guide - Page 57
Then pull the card free from the slot. Installing memory Follow these steps to install memory: 1 Turn off the computer, unplug the AC adapter (if connected) and remove the battery pack. Then turn the computer over to access its base. 2 Remove the screws from the memory cover; then lift up and remove - Acer Aspire 7540 | User Guide - Page 58
diagonally into the slot, then (b) gently press it down until it clicks into place. 4 Replace the memory cover and secure it with the screw. 5 Reinstall the battery pack, and reconnect the AC adapter. 6 Turn on the computer. The computer automatically detects and reconfigures the total memory size - Acer Aspire 7540 | User Guide - Page 59
TV) antenna (for selected models) DVB-T digital TV is an international standard that is used to transmit terrestrial television services in digital format. It is gradually replacing analog broadcasts in many countries. The DVB-T digital antenna can be used with Windows Media Center to watch local - Acer Aspire 7540 | User Guide - Page 60
antenna cable up to 20 cm to improve signal quality. Watching TV with an external antenna or cable socket You may use conventional TV cables (connected to an external antenna or cable socket) to watch TV on your computer. Connecting antenna cables To connect your cables: 1 Plug the antenna connector - Acer Aspire 7540 | User Guide - Page 61
is being displayed. Boot sequence To set the boot sequence in the BIOS utility, activate the BIOS utility, then select Boot from the categories listed at the top of the screen. Enable disk-to-disk recovery To enable disk-to-disk recovery (hard disk recovery), activate the BIOS utility, then select - Acer Aspire 7540 | User Guide - Page 62
last region code set will remain permanent. Recovering your hard disk does not reset the number of times the region code has been set. Refer to the table Former USSR, parts of Africa, India People's Republic of China Note: To change the region code, insert a DVD movie of a different region into the - Acer Aspire 7540 | User Guide - Page 63
. Connect the AC adapter to recharge the battery pack. • Make sure that the AC adapter is properly plugged into the computer and to the power outlet. • If it is lit, check the following: • Is a non-bootable (non-system) disk in the external USB floppy drive? Remove or replace it with a system - Acer Aspire 7540 | User Guide - Page 64
or paperclip into the hole and push to eject the tray. The keyboard does not respond. Try attaching an external keyboard to a USB port on the computer. If it works, contact your dealer or an authorized service center as the internal keyboard cable may be loose. The printer does not work. Check the - Acer Aspire 7540 | User Guide - Page 65
and save changes. The system will reboot. Note: To activate the BIOS utility, press during POST. To start the recovery process: 1 Restart the system. 2 While the Acer logo is showing, press + at the same time to enter the recovery process. 3 Refer to the onscreen instructions to - Acer Aspire 7540 | User Guide - Page 66
you call Please have the following information available when you call Acer for online service, and please be at your computer when you call. With your support, we can reduce the amount of time a call takes and help solve your problems efficiently. If there are error messages or beeps reported by - Acer Aspire 7540 | User Guide - Page 67
dealer or an authorized service center. Keyboard interface error Contact your dealer or an authorized service center. Memory size mismatch Press (during POST) to enter the BIOS utility, then press Exit in the BIOS utility to reboot. If you still encounter problems after going through the - Acer Aspire 7540 | User Guide - Page 68
energy and, if not installed and used in accordance with the instructions, may cause harmful interference to radio communications. However, there is reception, which can be determined by turning the device off and on, the user is encouraged to try to correct the interference by one or more of the - Acer Aspire 7540 | User Guide - Page 69
the telephone company may discontinue your service temporarily. If possible, they will with the FCC. Your telephone company may make changes in its facilities, equipment, operations, or procedures to determine if it is causing the problem. If the problem is with the equipment, discontinue use and - Acer Aspire 7540 | User Guide - Page 70
482/EC - "TBR 21"] for single terminal connection to the Public Switched Telephone Network (PSTN). However, due to differences between the individual PSTNs provided operation on every PSTN termination point. In the event of problems, you should contact your equipment supplier in the first instance. - Acer Aspire 7540 | User Guide - Page 71
services. 2 This equipment is not capable, under all operating conditions, of correct operation at the higher speeds 10 call attempts to the same number within any 30 minute period for any single manual order to support pulse dialing problems occur, the user should NOT contact the telecom Fault Service - Acer Aspire 7540 | User Guide - Page 72
product may or may not contain wireless radio devices (such as wireless LAN and/or Bluetooth modules). Below information is for products with such devices. Declaration of Conformity for EU countries Hereby, Acer, declares that this notebook PC series is in compliance with the essential requirements - Acer Aspire 7540 | User Guide - Page 73
. Nevertheless, the notebook PC series shall be used in such a manner that the potential for human contact during normal operation is minimized as follows: 1 Users are requested to follow the RF safety instructions on wireless option devices that are included in the user's manual of each RF option - Acer Aspire 7540 | User Guide - Page 74
210) English Exposure of humans to RF fields (RSS-102) The notebook PC series employs low gain integral antennas that do not emit RF field in excess of angle Design azimuth angle Viewing direction range class Screen tilt angle Design screen illuminance Reflection class of LCD panel (positive
-
 1
1 -
 2
2 -
 3
3 -
 4
4 -
 5
5 -
 6
6 -
 7
7 -
8
-
9
-
10
-
11
-
12
-
13
-
14
-
15
-
16
-
17
-
18
-
19
-
20
-
21
-
22
-
23
-
24
-
25
-
26
-
27
-
28
-
29
-
30
-
31
-
32
-
33
-
34
-
35
-
36
-
37
-
38
-
39
-
40
-
41
-
42
-
43
-
44
-
45
-
46
-
47
-
48
-
49
-
50
-
51
-
52
-
53
-
54
-
55
-
56
-
57
-
58
-
59
-
60
-
61
-
62
-
63
-
64
-
65
-
66
-
67
-
68
-
69
-
70
-
71
-
72
-
73
-
74
 |
 |

Aspire Series
Generic User Guide