Acer Aspire R7-571 User Manual
Acer Aspire R7-571 Manual
 |
View all Acer Aspire R7-571 manuals
Add to My Manuals
Save this manual to your list of manuals |
Acer Aspire R7-571 manual content summary:
- Acer Aspire R7-571 | User Manual - Page 1
Aspire R7-571 / R7-572 User's Manual - Acer Aspire R7-571 | User Manual - Page 2
Aspire R7-571 / R7-572 User's Manual This revision: 03/2013 AcerCloud frees you to enjoy your digital life anytime, anywhere! This computer comes with AcerCloud pre-installed. AcerCloud is a personal cloud service : www.acer.com/acercloud Model number: Serial number: Date of purchase: Place of - Acer Aspire R7-571 | User Manual - Page 3
47 16 Recovering from Windows 48 Your guides 16 Recovering from a recovery backup ........ servicing 18 Battery pack 59 Battery pack characteristics 59 Charging the battery 59 Your Acer notebook the computer ..... 67 Creating a drivers and applications backup ..... 39 Preparing - Acer Aspire R7-571 | User Manual - Page 4
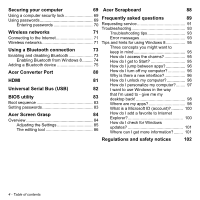
Securing your computer 69 Acer Scrapboard 88 Using a computer security lock 69 Using passwords 69 Frequently asked questions 89 Entering passwords 70 Requesting service 91 Troubleshooting 93 Wireless networks 71 Troubleshooting tips 93 Connecting to the Internet 71 Error messages - Acer Aspire R7-571 | User Manual - Page 5
carefully. Keep this document for future reference. Follow all warnings and instructions marked on the product. Turning the product off before cleaning Unplug this product from the wall outlet before cleaning. Do not use liquid cleaners or - Acer Aspire R7-571 | User Manual - Page 6
on power cord requirements, contact an authorized reseller or service provider. Protecting your hearing - Warning! Permanent hearing volume for prolonged periods of time. To protect your hearing, follow these instructions. - Increase the volume gradually until you can hear clearly and comfortably. - Acer Aspire R7-571 | User Manual - Page 7
- Do not increase the volume to block out noisy surroundings. - Decrease the volume if you can't hear people speaking near you. Bundled dummy cards - Note: Information in this section may not apply to your computer. Your computer shipped with plastic dummies installed in the card slots. Dummies - Acer Aspire R7-571 | User Manual - Page 8
The product has been dropped or the case has been damaged. - The product exhibits a distinct change in performance, indicating a need for service. - The product does not operate normally after following the operating instructions. - Note: Adjust only those controls that are covered by the operating - Acer Aspire R7-571 | User Manual - Page 9
normal, refer to qualified service personnel. Use only the or winter. Always try to keep the battery between 15°C and 25°C (59°F and 77°F). A device - Note: Please refer to www.acer.com for battery shipping documents. - transmitting devices when using your laptop under the following conditions. These - Acer Aspire R7-571 | User Manual - Page 10
care facilities when any regulations posted in these areas instruct you to do so. Hospitals or health care the following: - Always keep the device more than 15.3 centimeters (6 inches) from the pacemaker - Not . If interference occurs, consult your service provider. VEHICLES RF signals may affect - Acer Aspire R7-571 | User Manual - Page 11
with a potentially explosive atmosphere and obey all signs and instructions. Potentially explosive atmospheres include areas where you would normally off the device at refueling points such as near gas pumps at service stations. Observe restrictions on the use of radio equipment in fuel depots - Acer Aspire R7-571 | User Manual - Page 12
and prevent greenhouse gas emissions by meeting strict energy efficiency guidelines set by the U.S. Environmental Protection Agency. Acer is committed to offering products and services worldwide that help customers save money, conserve energy and improve the quality of our environment. The more - Acer Aspire R7-571 | User Manual - Page 13
may complain of eyestrain and headaches after prolonged use. Users are also at risk of physical injury after long hours of working in front of a computer. Long work periods, bad posture, poor work habits, stress, - Acer Aspire R7-571 | User Manual - Page 14
- If you view your monitor more than your documents, place the display at the center of your desk to minimize neck strain. Taking care of your vision Long viewing hours, wearing incorrect glasses or contact lenses, glare, excessive room lighting, poorly focused screens, very small typefaces and low- - Acer Aspire R7-571 | User Manual - Page 15
, take breaks regularly, and do some stretching exercises. - Note: For more information, please refer to "Regulations and safety notices" on page 102. Safety and comfort - 15 - Acer Aspire R7-571 | User Manual - Page 16
your computer can help you to be more productive, please refer to the User's Manual. This guide contains detailed information on such subjects as system utilities, data recovery, expansion options and troubleshooting. In addition it contains general regulations and safety notices for your notebook - Acer Aspire R7-571 | User Manual - Page 17
If you need to power down the computer for a short while, but don't want to completely shut it down, you can put it into Hibernate by pressing the power button. You can also put the computer in sleep mode by pressing the sleep hotkey + . Note: If you cannot power off the computer normally, - Acer Aspire R7-571 | User Manual - Page 18
extension cord. Also, the total current rating of all equipment plugged into a single wall outlet should not exceed the fuse rating. Cleaning and servicing When cleaning the computer, follow these steps: 1. Turn off the computer. 2. Disconnect the AC adapter. 3. Use a soft, moist cloth. Do not use - Acer Aspire R7-571 | User Manual - Page 19
YOUR ACER NOTEBOOK TOUR After setting up your computer as illustrated in the Setup Guide, let us show you around your new Acer computer. Aspire R7-571 / R7-572 Your Acer notebook tour - 19 - Acer Aspire R7-571 | User Manual - Page 20
view 1 2 3 # Icon 1 Item Webcam 2 Touchscreen 3 Windows key 20 - Your Acer notebook tour 4 5 Description Web camera for video communication. A light next to the webcam indicates that the webcam is active. Displays computer output, supports multi-touch input. Tap to return to the Start - Acer Aspire R7-571 | User Manual - Page 21
. Indicates the computer's power status. Indicates battery status. Charging: The light is amber when the battery is charging. Fully charged: The light is blue. Your Acer notebook tour - 21 - Acer Aspire R7-571 | User Manual - Page 22
Keyboard view 1 2 # Icon Item 1 Touchpad 22 - Your Acer notebook tour Description Touch-sensitive pointing device. The touchpad and selection buttons form a single surface. Press down firmly on the touchpad surface to perform a left - Acer Aspire R7-571 | User Manual - Page 23
Description Connects to the Acer Converter cable, allowing for easy connection to a LAN, an external display or an additional USB device. Note: There are different cables available. Please check with your retailer to see which are compatible with your computer. Supports high-definition digital video - Acer Aspire R7-571 | User Manual - Page 24
. Information on USB 3.0 • USB 3.0 compatible ports are blue. • Compatible with USB 3.0 and earlier devices. • For optimal performance, use USB 3.0-certified devices. • Defined by the USB 3.0 specification (SuperSpeed USB). 24 - Your Acer notebook tour - Acer Aspire R7-571 | User Manual - Page 25
devices. Volume control key Adjusts the system volume. Power button Turns the computer on and off. DC-in jack Connects to an AC adapter. Your Acer notebook tour - 25 - Acer Aspire R7-571 | User Manual - Page 26
handle of a locked drawer. Insert the lock into the notch and turn the key to secure the lock. Keyless models are also available. 26 - Your Acer notebook tour - Acer Aspire R7-571 | User Manual - Page 27
Base view 1 3 2 # Icon 1 2 Item Ventilation and cooling fan Speakers Description Allows the computer to stay cool. Do not cover or obstruct the openings. Deliver stereo audio output. Your Acer notebook tour - 27 - Acer Aspire R7-571 | User Manual - Page 28
# Icon 3 Item Battery reset pinhole Description Insert a paperclip into the hole and press for four seconds to reset the computer (simulates removing and reinstalling the battery). 28 - Your Acer notebook tour - Acer Aspire R7-571 | User Manual - Page 29
USING THE KEYBOARD The keyboard has full-sized keys and an embedded numeric keypad, separate cursor, lock, Windows, function and special keys. Lock keys and embedded numeric keypad The keyboard has three lock keys which you can toggle on and off. Lock key Caps Lock Num Lock + Scroll - Acer Aspire R7-571 | User Manual - Page 30
keycaps. To simplify the keyboard legend, cursor-control key symbols are not printed on the keys. Desired access Num Lock on Num Lock off Number keys on Type numbers in a normal embedded keypad manner. Cursor-control keys on embedded keypad Hold while using cursor-control keys. Hold < - Acer Aspire R7-571 | User Manual - Page 31
Hotkey + + + + + Icon Function Description Display toggle Switches display output between the display screen, external monitor (if connected) and both. Turns the display screen Display off backlight off to save power. Press any key to - Acer Aspire R7-571 | User Manual - Page 32
selected media file. Return to the previous media file. Jump to the next media file. Windows keys The keyboard has two keys that perform Windows-specific functions. Key Description Pressed alone it returns to the Start screen or to Windows key return to the last open app. It can also be - Acer Aspire R7-571 | User Manual - Page 33
TOUCHPAD Touchpad basics The touchpad controls the arrow (or 'cursor') on the screen. As you slide your finger across the touchpad, the cursor will follow this movement. Note: The touchpad is sensitive to finger movement; the lighter the touch, the better the response. Please keep the touchpad and - Acer Aspire R7-571 | User Manual - Page 34
touchpad to select all items in an area. Touchpad gestures Windows 8 and many applications support touchpad gestures that use one or more fingers. Note: Support for touchpad gestures depends on the active application. This allows you to control applications with a few simple gestures, such as: • - Acer Aspire R7-571 | User Manual - Page 35
return it to an earlier state. This section describes the recovery tools available on your computer. Acer provides Acer Recovery Management, which allows you to create a recovery backup, a drivers and applications backup, and to start recovery options, either using Windows tools, or the recovery - Acer Aspire R7-571 | User Manual - Page 36
16 GB of storage, it is recommended to use a USB drive with a capacity of 32 GB or larger. 1. From Start, type 'Recovery' and then click Acer Recovery Management in the list of apps. 2. Click Create Factory Default Backup. The Recovery Drive window 36 - Recovery - Acer Aspire R7-571 | User Manual - Page 37
opens. Make sure Copy contents from the recovery partition to the recovery drive is selected. This provides the most complete and safest recovery backup. 3. Plug in the USB drive then click Next. Recovery - 37 - Acer Aspire R7-571 | User Manual - Page 38
• Make sure your USB drive has enough capacity before continuing. The recovery backup requires at least 16 GB of storage 4. You will be shown the backup progress on the screen. 5. Follow the process until it completes. 6. After creating the recovery backup, you can choose to delete the recovery - Acer Aspire R7-571 | User Manual - Page 39
as 'Windows Recovery Backup'. Make sure you keep the backup in a safe place that you will remember. Creating a drivers and applications backup To create a Drivers and Applications Backup, that contains the factoryloaded software and drivers needed by your computer, you may use either Recovery - 39 - Acer Aspire R7-571 | User Manual - Page 40
your computer features a DVD recorder, one or more blank recordable DVDs. 1. From Start, type 'Recovery' and then click Acer Recovery Management in the list of apps. 2. Click Create Drivers and Applications Backup. Plug in the USB drive or insert a blank DVD into the optical drive, then click Next - Acer Aspire R7-571 | User Manual - Page 41
• If you are using a USB drive, make sure your USB drive has enough capacity before continuing. • If using DVDs, it will also show the number of blank, recordable discs you will need to complete the recovery discs. Make sure that you have the required number of identical, blank discs. Recovery - 41 - Acer Aspire R7-571 | User Manual - Page 42
and applications" on page 43. For instructions on reinstalling software and drivers that were not preinstalled, see that product's documentation or support Web site. 2. Revert to a previous system condition. If reinstalling software or drivers does not help, then the problem may be 42 - Recovery - Acer Aspire R7-571 | User Manual - Page 43
to its factory condition. If nothing else has solved the problem and you want to reset your system to factory condition, see "Returning your system to its factory condition" on page 47. Reinstalling drivers and applications As a troubleshooting step, you may need to reinstall the applications and - Acer Aspire R7-571 | User Manual - Page 44
If you are reinstalling using Windows and the recovery information stored on your computer: • From Start, type 'Recovery' and then click Acer Recovery Management in the list of apps. • Click Reinstall Drivers or Applications. 44 - Recovery - Acer Aspire R7-571 | User Manual - Page 45
see the Contents section of the Acer Resource Center. • Click the install icon for the item you want to install, then follow the onscreen instructions to complete the installation. Repeat this step for each item you want to reinstall. If you are reinstalling from a Drivers and Applications Backup on - Acer Aspire R7-571 | User Manual - Page 46
the Contents section of the Acer Resource Center. 3. Click as restore points. In most cases of hard-toresolve software problems, you can return to one of these restore points to also each time you install software or device drivers. Note: For more information about using Microsoft System Restore, from - Acer Aspire R7-571 | User Manual - Page 47
. This process may take several minutes, and may restart your computer. Returning your system to its factory condition If your computer experiences problems that are not recoverable by other methods, you may need to reinstall everything to return your system to its factory condition. You can - Acer Aspire R7-571 | User Manual - Page 48
on your hard drive, back them up now. See "Restore Factory Settings with Acer Recovery Management" on page 49. Customized Restore will attempt to retain your files (user data) but will reinstall all software and drivers. Software installed since you purchased your PC will be removed (except software - Acer Aspire R7-571 | User Manual - Page 49
Restore Factory Settings with Acer Recovery Management 1. Click Restore Factory Settings. Caution: 'Restore Factory Settings' will erase all files on your hard drive. 2. The Reset your PC window opens. Images for reference only. 3. Click Next, then choose how to erase your files: Recovery - 49 - Acer Aspire R7-571 | User Manual - Page 50
computer and press + during startup. A screen appears asking you to choose the keyboard layout. 2. Several options are now presented. Click Troubleshoot. 3. Click either Refresh your PC or Reset your PC. Note: "Refresh your PC" enables you to restore your computer to the default factory - Acer Aspire R7-571 | User Manual - Page 51
Customized Restore with Acer Recovery Management 1. Click Customized Restore (Retain User Data). 2. The Refresh your PC window opens. 3. Click Next, then Refresh. 4. The recovery process begins by restarting your computer, then continues by copying files to - Acer Aspire R7-571 | User Manual - Page 52
Recovering from a recovery backup To recover from a recovery backup on a USB drive: 1. Find your recovery backup. 2. If your computer does not have a built-in keyboard, make sure a keyboard is attached to your computer. 3. Plug in the USB drive and turn on your computer. 4. If it is not already - Acer Aspire R7-571 | User Manual - Page 53
54. c. Click Refresh your PC to start the refresh process: Refresh your PC will attempt to retain your files (user data) but will reinstall all software and drivers. Software installed since you purchased your PC will be removed (except software installed from the Windows Store). See "Refresh your - Acer Aspire R7-571 | User Manual - Page 54
Reset your PC from the recovery backup Caution: Reset your PC will erase all files on your hard drive. 1. The Reset your PC window opens. Images for reference only. 2. Click Next. 3. Select the operating system to recover (normally only one option is available). 4. Choose to keep any changes to the - Acer Aspire R7-571 | User Manual - Page 55
drive takes much longer, up to 5 hours, but is much more secure as old files are completely removed. 6. Click Reset. 7. After the recovery has finished, you can start using your computer by repeating the first-start process. Refresh your PC from the recovery backup 1. The Refresh your PC window - Acer Aspire R7-571 | User Manual - Page 56
: Note: If Fast startup is off, your computer will take longer to start from Sleep. Your computer will also not start if it receives an instruction to 56 - Power management - Acer Aspire R7-571 | User Manual - Page 57
start over a network (Wake on LAN). 1. Open the Desktop. 2. Click Power Options in the Notification area. 3. Select More Power Options. 4. Select Choose what the power buttons do. 5. To access Shutdown Settings, select Change settings that are currently unavailable. Power management - 57 - Acer Aspire R7-571 | User Manual - Page 58
6. Scroll down and disable Turn on fast startup. 7. Select Save changes. 58 - Power management - Acer Aspire R7-571 | User Manual - Page 59
you long use between charges. Battery pack characteristics The battery is recharged whenever you connect the computer to the AC adapter. Your computer supports charge-in-use, enabling you to recharge the battery while you continue to operate the computer. However, recharging with the computer turned - Acer Aspire R7-571 | User Manual - Page 60
1. Connect the AC adapter and fully charge the battery. 2. Disconnect the AC adapter. 3. Turn on the computer and operate using battery power. 4. Fully deplete the battery until the battery-low warning appears. 5. Reconnect the AC adapter and fully charge the battery again. Follow these steps again - Acer Aspire R7-571 | User Manual - Page 61
• Frequent use; the more you use the battery, the faster it will reach the end of its effective life. A standard computer battery has a life span of about 300 charges. Optimizing battery life Optimizing battery life helps you get the most out of battery operation, prolonging the charge/recharge - Acer Aspire R7-571 | User Manual - Page 62
Warning! Connect the AC adapter as soon as possible after the battery-low warning appears. Data may be lost if the battery is allowed to become fully depleted and the computer shuts down. When the battery-low warning appears, the recommended course of action depends on your situation: Situation - Acer Aspire R7-571 | User Manual - Page 63
TRAVELING WITH YOUR COMPUTER This section gives you tips and hints to consider when moving around or traveling with your computer. Disconnecting from the desktop Follow these steps to disconnect your computer from external accessories: 1. Save any open files. 2. Remove discs from optical drive(s). - Acer Aspire R7-571 | User Manual - Page 64
Preparing the computer Before moving the computer, close and latch the display cover to place it in Sleep mode. You can now safely take the computer anywhere you go within the building. To bring the computer out of Sleep mode, open the display; then press and release the power button. If you are - Acer Aspire R7-571 | User Manual - Page 65
to take with you Unless you have some items at home, take the following items with you: • AC adapter and power cord. • The printed Setup Guide. Traveling with your computer - 65 - Acer Aspire R7-571 | User Manual - Page 66
Special considerations Follow these guidelines to protect your computer while traveling to and from work: • Minimize the effects of temperature changes by keeping the computer with you. • If you need to stop for an extended period of time and cannot carry the computer with you, leave the computer in - Acer Aspire R7-571 | User Manual - Page 67
computer when carrying it into the gate area. What to take with you Take the following items with you: • AC adapter • Additional printer driver files if you plan to use another printer Special considerations In addition to the guidelines for taking the computer home, follow these guidelines to - Acer Aspire R7-571 | User Manual - Page 68
that are appropriate for the country to which you are traveling. • Additional printer driver files if you plan to use another printer. • Proof of purchase, in check that the local AC voltage and the AC adapter power cord specifications are compatible. If not, purchase a power cord that is compatible - Acer Aspire R7-571 | User Manual - Page 69
the BIOS utility. Once set, you must enter this password to gain access to the BIOS utility. See "BIOS utility" on page 83. • User Password secures your computer against unauthorized use. Combine the use of this password with password checkpoints on bootup and resume from Hibernation (if available - Acer Aspire R7-571 | User Manual - Page 70
forget your password, please get in touch with your dealer or an authorized service center. Entering passwords When a password is set, a password prompt appears in appears. Try again and press . • When the User Password is set and the password on boot parameter is enabled, a prompt appears at boot - Acer Aspire R7-571 | User Manual - Page 71
password if required. Otherwise, open Internet Explorer and follow the instructions. Please refer to your ISP or router documentation. Wireless networks of a wireless network? Mobility Wireless LAN systems allow you and other users of your home network to share access to files and devices connected - Acer Aspire R7-571 | User Manual - Page 72
to a high speed DSL internet connection. The ISP (Internet Service Provider) you have chosen normally supplies a modem/router with the subscription to their services. Read carefully the documentation supplied with your Access point/router for detailed setup instructions. 72 - Wireless networks - Acer Aspire R7-571 | User Manual - Page 73
, a software setting, or a separate Bluetooth dongle plugged into the computer's USB port (if no internal Bluetooth adapter is available). Note: Please check your devices owner's manual to determine how to turn on its Bluetooth adapter. Using a Bluetooth connection - 73 - Acer Aspire R7-571 | User Manual - Page 74
Enabling Bluetooth from Windows 8 Bluetooth on your computer is disabled by default. To enable your computer's Bluetooth adapter, do the following: 1. Open the Charms and select Settings > Change PC Settings > Wireless, or press the Windows key + and then type 'Wireless'; in the results, click - Acer Aspire R7-571 | User Manual - Page 75
4. Select the Allow Bluetooth devices to find this computer check box, click Apply, and then click OK. Adding a Bluetooth device Every new device must first be "paired" with your computer's Bluetooth adapter. This means it must first be authenticated for security purposes. You only need to pair once - Acer Aspire R7-571 | User Manual - Page 76
From the notification area, click the Bluetooth icon, and select Add a Bluetooth Device. Click on the device you want to add. 76 - Using a Bluetooth connection - Acer Aspire R7-571 | User Manual - Page 77
one of the devices not having any inputs (as in a headset), the passcode is hardcoded into the device (usually "0000" or "1234"). Consult your device's user manual for more information. Your device will show up in the list of devices if it was successfully paired. Open the Control Panel and under - Acer Aspire R7-571 | User Manual - Page 78
devices and printers. Right click on your device and select Advanced Operations > Connect to operation window. 78 - Using a Bluetooth connection - Acer Aspire R7-571 | User Manual - Page 79
The operation window enables you to play music and audio from your device through your computer, send files to your device and change Bluetooth settings. Using a Bluetooth connection - 79 - Acer Aspire R7-571 | User Manual - Page 80
Converter Port is a proprietary port that allows you to extend the connectivity options of your computer using a single cable. The Acer Converter Port supports one or more of the following through a dedicated cable: A LAN connection, an external display (VGA) port and an additional USB port. You - Acer Aspire R7-571 | User Manual - Page 81
HDMI HDMI (High-Definition Multimedia Interface) is an industry-supported, uncompressed, all-digital audio/video interface. HDMI provides an interface between any compatible digital audio/video source, such as a set-top box, DVD player, and A/V - Acer Aspire R7-571 | User Manual - Page 82
UNIVERSAL SERIAL BUS (USB) The USB port is a high-speed serial bus which allows you to connect USB peripherals without taking up system resources. 82 - Universal Serial Bus (USB) - Acer Aspire R7-571 | User Manual - Page 83
computer's BIOS. Your computer is already properly configured and optimized, and you do not need to run this utility. However, if you encounter configuration problems, you may need to run it. To activate the BIOS utility, press during the POST while the computer logo is being displayed. Boot - Acer Aspire R7-571 | User Manual - Page 84
capture all or part of anything that's displayed on your computer's screen. It works for both Desktop and Windows 8 UI applications. To launch Acer Screen Grasp, press + + . Once you have opened the application you can activate the launch gesture: Tapping the screen with three - Acer Aspire R7-571 | User Manual - Page 85
Full screen capture: Capture the full screen. 6 Settings: Change the defaults. Adjusting the Settings Tap the Settings icon to adjust the defaults for Acer Screen Grasp. You can enable or disable the launch gesture (tap the screen with three fingers), set the app to launch the editing tool after - Acer Aspire R7-571 | User Manual - Page 86
The editing tool After you've captured the screen, you can edit the image. 1 23 45 6 7 89 No. Description 1 Create another screen capture. 2 Undo. 3 Redo. 4 Pencil tool. 5 Marker tool. 6 Text tool. 7 Eraser. 86 - Acer Screen Grasp 1011 12 - Acer Aspire R7-571 | User Manual - Page 87
No. Description 8 Mosaic effect. 9 Tool settings. Share capture to... • Windows clipboard • Facebook 10 • Acer Scrapboard • Word • PowerPoint • Excel 11 Save. 12 Pin/unpin the toolbars. Acer Screen Grasp - 87 - Acer Aspire R7-571 | User Manual - Page 88
ACER SCRAPBOARD Acer Scrapboard is a useful tool to manage your screen captures. Screen captures are automatically sorted by date. Tap the Explorer. icon on the screen capture to open the website in Internet 88 - Acer Scrapboard - Acer Aspire R7-571 | User Manual - Page 89
FREQUENTLY ASKED QUESTIONS The following is a list of possible situations that may arise during the use of your computer. Easy solutions are provided for each one. I turned on the power, but the computer does not start or boot up Look at the power indicator: • If it is not lit, no power is being - Acer Aspire R7-571 | User Manual - Page 90
. The keyboard does not respond Try attaching an external keyboard to a USB port on the computer. If it works, contact your dealer or an authorized service center as the internal keyboard cable may be loose. 90 - Frequently asked questions - Acer Aspire R7-571 | User Manual - Page 91
on hand, especially when you travel, to receive the benefits from our support centers. Place your proof-ofpurchase in the flap located inside the front have an Acer-authorized ITW service site, you can still get in contact with our offices worldwide. Please visit www.acer.com. Frequently asked questions - Acer Aspire R7-571 | User Manual - Page 92
you call Please have the following information available when you call Acer for online service, and please be at your computer when you call. With your support, we can reduce the amount of time a call takes and help solve your problems efficiently. If there are error messages or beeps reported by - Acer Aspire R7-571 | User Manual - Page 93
to open the computer yourself; contact your dealer or authorized service center for assistance. Troubleshooting tips This computer incorporates an advanced design that delivers onscreen error message reports to help you solve problems. If the system reports an error message or an error symptom - Acer Aspire R7-571 | User Manual - Page 94
. Keyboard interface Contact your dealer or an authorized service error center. Memory size mismatch Press (during POST) to enter the BIOS utility, then press Exit in the BIOS utility to reboot. If you still encounter problems after going through the corrective measures, please contact - Acer Aspire R7-571 | User Manual - Page 95
Tips and hints for using Windows 8 We know this is a new operating system that will take some getting used to, so we've created a few pointers to help you get started. Three concepts you might want to keep in mind 1. Start The Start button is no longer available; you can launch apps from the Start - Acer Aspire R7-571 | User Manual - Page 96
and select the action you'd like to take. Alternatively, from Desktop, tap Acer Power Button and select the action you'd like to take. Why is there How do I unlock my computer? Swipe the lock screen upwards and tap a user account icon to unlock the computer. If your account has a password set, you - Acer Aspire R7-571 | User Manual - Page 97
Tap and hold the preview icon to see the characters you've entered to ensure the password is correct. How do I personalize my computer? You can personalize Start with a different background image or by arranging the tiles to suit your personal needs. To change the background, swipe the right-hand - Acer Aspire R7-571 | User Manual - Page 98
So, how do I close an app? Swipe the window downwards from the top to the bottom of the screen. Can I change the screen resolution? Swipe the right-hand edge of the screen inwards and tap Search, tap the text box to open the onscreen keyboard and start typing 'Control Panel' to display the results; - Acer Aspire R7-571 | User Manual - Page 99
How do I make an app appear on Start? If you're in All apps and you want to make an app appear on Start, tap and drag the app downwards and release it. Tap Pin to Start from the menu that appears at the bottom of the screen. How do I remove a tile from Start? Tap and drag the app downwards and - Acer Aspire R7-571 | User Manual - Page 100
to get one, swipe the right-hand edge of the screen inwards and tap Settings > Change PC settings > Users > Switch to a Microsoft account, and follow the onscreen instructions. How do I add a favorite to Internet Explorer? Internet Explorer 10 doesn't have traditional favorites, instead you can pin - Acer Aspire R7-571 | User Manual - Page 101
PC settings > Windows Updates. Tap Check for updates now. Where can I get more information? For more information please visit the following pages: • Windows 8 tutorials: www.acer.com/windows8-tutorial • Support FAQs: www.acer.com/support Frequently asked questions - 101 - Acer Aspire R7-571 | User Manual - Page 102
This device has been tested and found to comply with the limits for a Class B digital device pursuant to Part 15 of the FCC rules. television reception, which can be determined by turning the device off and on, the user is encouraged to try to correct the interference by one or more of the following - Acer Aspire R7-571 | User Manual - Page 103
modifications not expressly approved by the manufacturer could void the user's authority, which is granted by the Federal Communications and / or Bluetooth only. To prevent radio interference to the licensed service, this device is intended to be operated indoors. This product complies with - Acer Aspire R7-571 | User Manual - Page 104
Declaration of Conformity for EU countries Hereby, Acer, declares that this computer is in compliance with the essential requirements and other relevant provisions of Directive 1999/5/EC. Wireless operation channels for different domains N. - Acer Aspire R7-571 | User Manual - Page 105
Departments in which the use of the 2400 - 2483.5 MHz band is permitted with an EIRP of less than 100 mW indoors and less than 10 mW outdoors: 01 Ain Orientales 02 Aisne 03 Allier 05 Hautes Alpes 08 Ardennes 09 Ariege 11 Aude 12 Aveyron 16 Charente 24 Dordogne 25 Doubs 26 Drome 32 Gers 36 Indre 37 - Acer Aspire R7-571 | User Manual - Page 106
List of national codes This equipment may be operated in the following countries: Country ISO 3166 Country 2 letter code Austria AT Malta Belgium BE Netherlands Cyprus CY Poland Czech Republic CZ Portugal Denmark DK Slovakia Estonia EE Slovenia Finland FI Spain France FR - Acer Aspire R7-571 | User Manual - Page 107
to licensing." « Pour empêcher que cet appareil cause du brouillage au service faisant l'objet d'une licence, il doit être utilisé a l'inté 15 GHz to 5.25 GHz to reduce the potential for harmful interference to co-channel mobile satellite systems. High power radar is allocated as the primary user - Acer Aspire R7-571 | User Manual - Page 108
as follows: 1. Users are requested to follow the RF safety instructions on wireless option devices that are included in the user's manual of each RF may cause undesired operation of the device. This device complies with Part 15 of the FCC Rules. Operation is subject to the following two conditions:
-
 1
1 -
 2
2 -
 3
3 -
 4
4 -
 5
5 -
 6
6 -
 7
7 -
8
-
9
-
10
-
11
-
12
-
13
-
14
-
15
-
16
-
17
-
18
-
19
-
20
-
21
-
22
-
23
-
24
-
25
-
26
-
27
-
28
-
29
-
30
-
31
-
32
-
33
-
34
-
35
-
36
-
37
-
38
-
39
-
40
-
41
-
42
-
43
-
44
-
45
-
46
-
47
-
48
-
49
-
50
-
51
-
52
-
53
-
54
-
55
-
56
-
57
-
58
-
59
-
60
-
61
-
62
-
63
-
64
-
65
-
66
-
67
-
68
-
69
-
70
-
71
-
72
-
73
-
74
-
75
-
76
-
77
-
78
-
79
-
80
-
81
-
82
-
83
-
84
-
85
-
86
-
87
-
88
-
89
-
90
-
91
-
92
-
93
-
94
-
95
-
96
-
97
-
98
-
99
-
100
-
101
-
102
-
103
-
104
-
105
-
106
-
107
-
108
 |
 |

Aspire R7-571 / R7-572
User’s Manual