Acer B273HL User Manual
Acer B273HL Manual
 |
View all Acer B273HL manuals
Add to My Manuals
Save this manual to your list of manuals |
Acer B273HL manual content summary:
- Acer B273HL | User Manual - Page 1
and comfort 2 Unpacking 5 Attaching/Removing the base 6 Screen position adjustment 7 Connecting the power cord 9 Safety precaution 9 Cleaning your monitor 9 Power saving 1 0 DDC 1 0 Connector Pin Assignment 1 1 Standard Timing Table 13 Installation 14 User controls 15 How to adjust - Acer B273HL | User Manual - Page 2
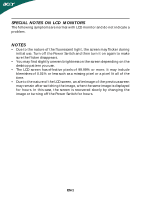
The following symptoms are normal with LCD monitor and do not indicate a problem. NOTES • Due to the nature of the fluorescent light, the screen may flicker during initial use. Turn off the Power Switch and then turn it - Acer B273HL | User Manual - Page 3
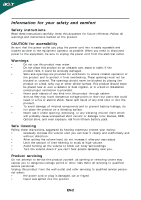
exposure risk from lithium battery pack. Safe listening Follow these instructions, suggested by hearing experts,to protect your earing. • if you can't hear people speaking near you. Product servicing Do not attempt to service this product yourself, as opening or removing covers may expose - Acer B273HL | User Manual - Page 4
performance, indicating a need for service • the product does not operate normally after following the operating instructions Note: Adjust only those controls more comfortable computer use. Finding your comfort zone Find your comfort zone by adjusting the viewing angle of the monitor, using a - Acer B273HL | User Manual - Page 5
Give your eyes regular breaks by looking away from the monitor and focusing on a distant point. • Blink frequently to Develop the following work habits to make your computer use more relaxing and productive: • Take short .acer-group.com/public/Sustainability/sustainability01.htm http://www.acer - Acer B273HL | User Manual - Page 6
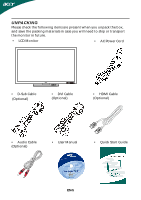
the following items are present when you unpack the box, and save the packing materials in case you will need to ship or transport the monitor in future. • LCD Monitor • AC Power Cord • D-Sub Cable (Optional) • DVI Cable (Optional) • HDMI Cable (Optional) • Audio Cable (Optional) • User - Acer B273HL | User Manual - Page 7
ATTACHING/REMOVING THE BASE Install: Align the base with the stand and push the base towards the top of the monitor, and then rotate the base clockwise until it stops. Tighten the screw clockwise. Remove: Reverse the steps to remove the base. EN-6 - Acer B273HL | User Manual - Page 8
the best viewing position, you can adjust the height/tilt/ swivel of the monitor. • Height Adjustment After pressing the top of the monitor, push the lock button towards right, then you can adjust the height of the monitor. 110mm • Tilt Please see the illustration below for an example of the - Acer B273HL | User Manual - Page 9
• Swivel With the built-in pedestal, you can swivel the monitor for the most comfortable viewing angle. EN-8 - Acer B273HL | User Manual - Page 10
CONNECTING THE POWER CORD • Check first to make sure that the power cord you use is the correct type required for your area. • This monitor has a universal power supply that allows operation in either 100/120V AC or 220/240 V AC voltage area. No user-adjustment is required. • Plug one - Acer B273HL | User Manual - Page 11
. The recovery time from Active OFF state back to ON state is around 3 seconds. DDC To make your installation easier, the monitor is able to Plug and Play with your system if your system also supports DDC protocol. The DDC (Display Data Channel) is a communication protocol through which the - Acer B273HL | User Manual - Page 12
PIN ASSIGNMENT 15-Pin Color Display Signal Cable PIN NO. 1. 2. 3. 4. 5. 6. 7. 8. DESCRIPTION Red Green Blue Monitor Ground DDC-return R-Ground G-Ground B-Ground PIN NO. 9. 10. 11. 12. 13. 14. 15. DESCRIPTION +5V Logic Ground Monitor Ground DDC-Serial Data H-Sync V-Sync DDC-Serial Clock EN-11 - Acer B273HL | User Manual - Page 13
- 15. 7. TMDS Data0+ 16. 8. TMDS Data0 Shield 17. 9. TMDS Data0- 18. 19. * only for certain models EN-12 Signal TMDS Date 3+ +5V Power Self Test Hot Plug Detect TMDS Data 0TMDS Data 0+ TMDS Data GND TMDS Date 5TMDS Date 5+ TMDS Clock GND TMDS Clock+ TMDS Clock- Meaning TMDS Clock+ TMDS - Acer B273HL | User Manual - Page 14
Standard Timing Table Mode Resolution 1 VGA 640x480 60 Hz 2 MAC 640x480 60.66 Hz 3 VESA 720x400 70 Hz 4 SVGA 800x600 56 Hz 5 SVGA 800x600 60 Hz 6 XGA 1024x768 60 Hz 7 XGA 1024x768 70 Hz 8 VESA 1152x864 75 Hz 9 SXGA 1280x1024 60 Hz 10 WXGA 1280x800 60 Hz 11 WXGA+ - Acer B273HL | User Manual - Page 15
. 4. Power-ON Main power switch 5. Power-ON Monitor and Computer Power-ON the monitor first, then power-ON the computer. This sequence is very important. 6. If the monitor still does not function properly, please refer to the troubleshooting section to diagnose the problem. Main power switch EN-14 - Acer B273HL | User Manual - Page 16
USER CONTROLS 3 4 6 5 5 1 2 Front Panel Controls 1.Power Switch: To turn ON or OFF the power. 2.Power LED: Lights up to indicate the power is turned ON. 3.Empowering / Exit: 1) When OSD menu is in active status, this button will act as EXIT-KEY(EXIT OSD menu). 2) When OSD menu is in off - Acer B273HL | User Manual - Page 17
When user press "MENU" button on front bezel A B A. Acer eColor Management If selected to "Acer eColor Management " item, will appear the Acer eColor" OSD • Operation instructions Acer eColor Management Step 1: Press " Key " to open the Acer eColor Management OSD and access the scenario modes - Acer B273HL | User Manual - Page 18
• ADJUSTING THE PICTURE The descriptions for function control LEDS A. Acer eColor Management Main Menu icon Sub Menu ic o n Sub Menu item D e s cr ip tio n N/A User mode User defined. Settings can be fine-tuned to suit - Acer B273HL | User Manual - Page 19
M a in Menu Ic o n Sub Menu Icon N /A N /A Sub Menu Ite m H . Position V . Position W a rm Cool D escription A djust the horizontal position. (available in A nalog mode only) A djust the vertical position. (available in A nalog m ode only) Set the color temperature to warm wh ite . Set the color - Acer B273HL | User Manual - Page 20
Sub or DVI-D or HDMI N/A Wide Mode Select Wide mode setting for Full screen, Aspect ratio N/A DDC/CI Turn ON/OFF DDC/CI support N/A Information Show the resolution, H/V frequency andinput port of current input timing. N/A Reset Clear each old status of Autoconfigurationand set the color - Acer B273HL | User Manual - Page 21
LCD monitor for servicing, please check the troubleshooting list below to see if you can self-diagnose the problem. (VGA Mode) Problems Current back of monitor. · Check if the power of computer system is ON. Unstable Picture · Check if the specification of graphics adapter and monitor is in - Acer B273HL | User Manual - Page 22
Problems Current Status Remedy LED ON · Using OSD, adjust brightness and contrast to maximum or reset to their default settings. LED OFF · Check the power switch. No Picture · Check if AC power cord is properly connected to the monitor back of monitor. · Check if the power of computer system - Acer B273HL | User Manual - Page 23
(MI) Italy Tel: +39-02-939-921 ,Fax: +39-02 9399-2913 www.acer.i t Hereby declare that: P roduct : T rade Name: M odel Number: SKU Nu mb er: LCD Monitor Acer B273HL B273HL xxxxxx; ("x" = 0~9, a ~ z, A ~ Z , or blank) Is compliant with the essential requirements and other relevant provisions - Acer B273HL | User Manual - Page 24
/Importer is responsible for this declaration: P roduct: Trade N ame: Model Number: SKU Number: LCD Monitor Acer B273HL B273HL xxxxxx; ("x" = 0~9, a ~ z, A ~ Z, or blank) Na me of Responsible Party: Acer America Corporation Address of Responsible Party: 333 West San Carlos St. San Jose, CA 95110
-
 1
1 -
 2
2 -
 3
3 -
 4
4 -
 5
5 -
 6
6 -
 7
7 -
8
-
9
-
10
-
11
-
12
-
13
-
14
-
15
-
16
-
17
-
18
-
19
-
20
-
21
-
22
-
23
-
24
 |
 |

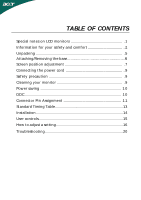
TABLE OF CONTENTS
Special notes on LCD monitors
................................................. .
1
Information for your safety and
comfort
................................. .
2
Unpacking
.................................................................................. .
5
Attaching/Removing the base.
...................................................
6
Screen position adjustment
....................................................... .
7
Connecting the power cord
...................................................... .
9
Safety precaution
...................................................................... .
9
Cleaning your monitor
.............................................................. .
9
Power saving
.............................................................................
10
DDC
............................................................................................
10
Connector Pin Assignment
.......................................................
11
Standard Timing Table
..................................................................
13
Installation
.....................................................................................
14
User controls
..................................................................................
15
How to adjust a setting
................................................................
16
Troubleshooting
............................................................................
20