Acer ET.B16RP.F02 User Guide
Acer ET.B16RP.F02 - AL1716Fb - 17" LCD Monitor Manual
 |
UPC - 099802831844
View all Acer ET.B16RP.F02 manuals
Add to My Manuals
Save this manual to your list of manuals |
Acer ET.B16RP.F02 manual content summary:
- Acer ET.B16RP.F02 | User Guide - Page 1
Installation instructions 3 Assembling the Monitor...3 Detaching the Monitor ...4 Adjusting the Viewing Angle...4 Connecting the Devices...5 Switching the Power ...5 Adjusting display settings 6 External Controls ...6 OSD options ...7 OSD Menu ...7 Troubleshooting ...9 General specifications 10 - Acer ET.B16RP.F02 | User Guide - Page 2
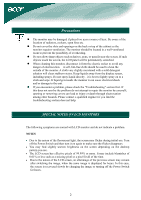
If such objects touch the screen, the LCD panel will be permanently scratched. When cleaning this monitor, disconnect it from the electric socket to troubleshooting section does not help. SPECIAL NOTES ON LCD MONITORS The following symptoms are normal with LCD monitor and do not indicate a problem - Acer ET.B16RP.F02 | User Guide - Page 3
LCD Monitor Package contents Power Cord VGA Cable User Manual (CD) Quick Start Guide Installation instructions Assembling the Monitor 1. Position the monitor on top of the stand. 2. Connect the stand into the neck of the monitor along the track. 3 - Acer ET.B16RP.F02 | User Guide - Page 4
and base and put them into carton. Important First, find a clean, flat surface to place the monitor after removing it from the stand. Place a clean dry cloth under the monitor to protect it further. Pull the monitor slightly up and away from the stand. Adjusting the Viewing Angle The viewing angle - Acer ET.B16RP.F02 | User Guide - Page 5
electric socket. Connect the signal cable to the VGA input socket of the monitor , and connect the signal cable to the VGA output socket of the or otherwise damaged. Switching the Power First, switch the power on to the monitor, then switch the power on to the computer. When you see the LED - Acer ET.B16RP.F02 | User Guide - Page 6
1 AUTO 2 < MINUS If OSD is active, press to exit a selection in OSD. If OSD is inactive, press and the monitor will automatically optimize the position, focus and clock of your display. If OSD is active, press to select or adjust OSD options. 3 > PLUS If OSD is active, press to select or - Acer ET.B16RP.F02 | User Guide - Page 7
OSD options Please refer to "External Controls" on Page 6. To adjust the OSD settings: 1. Press the MENU button to open the OSD menu. Press again to enter a selection of 10 functions on OSD. 2. Use the buttons marked < or >, to highlight a control, then adjust the control to the desired level. 3. - Acer ET.B16RP.F02 | User Guide - Page 8
LANGUAGE: Select the OSD menu language from English, German, Spanish, Russian, Traditional Chinese, French, Italian, and Japanese. OSD SETTING: This changes the position of the OSD window on the screen and staying time. Auto Config: System runs auto-configuration. INFORMATION: This shows brief - Acer ET.B16RP.F02 | User Guide - Page 9
optimize the or centered properly position of your display. • See "Position adjustment". Caution: Do not attempt to service the monitor yourself or open the computer yourself. Please refer all servicing to qualified service personnel if the problems cannot be solved in "Troubleshooting" section. 9 - Acer ET.B16RP.F02 | User Guide - Page 10
General specifications Item LCD Panel Display Max resolution Pixel Pitch Color Brightness Contrast Color Language OSD setting Auto config Information Reset Exit Video Interface Video Sync Specification 17-inch Flat panel active-matrix TFT LCD SXGA 1280×1024 pixels 0.264 mm 16.2M 300 cd/m² (Typical)
-
 1
1 -
 2
2 -
 3
3 -
 4
4 -
 5
5 -
 6
6 -
 7
7 -
8
-
9
-
10
 |
 |

1
Table of Contents
Precautions
.....................................................................................................................
2
SPECIAL NOTES ON LCD MONITORS
..................................................................
2
Package contents
............................................................................................................
3
Installation instructions
.................................................................................................
3
Assembling the Monitor
.....................................................................................................................
3
Detaching the Monitor
.......................................................................................................................
4
Adjusting the Viewing Angle
.............................................................................................................
4
Connecting the Devices
......................................................................................................................
5
Switching the Power
..........................................................................................................................
5
Adjusting display settings
..............................................................................................
6
External Controls
...............................................................................................................................
6
OSD options
....................................................................................................................
7
OSD Menu
.........................................................................................................................................
7
Troubleshooting
.............................................................................................................
9
General specifications
.......................................................................................
10