Acer EZ1601-01 Service Guide
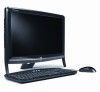
Acer EZ1601-01 - eMachines All-in-One Desktop Manual
 |
UPC - 884483747368
View all Acer EZ1601-01 manuals
Add to My Manuals
Save this manual to your list of manuals |
Acer EZ1601-01 manual content summary:
- Acer EZ1601-01 | Service Guide - Page 1
eMachines EZ1600/EZ1601 Service Guide Service guide files and updates are available on the ACER/CSD web; for more information, please refer to http://csd.acer.com.tw PRINTED IN TAIWAN - Acer EZ1601-01 | Service Guide - Page 2
Revision History Please refer to the table below for the updates made on this service guide. Date Chapter Updates II - Acer EZ1601-01 | Service Guide - Page 3
by any means, electronic, mechanical, magnetic, optical, chemical, manual or otherwise, without the prior written permission of Acer Incorporated. Disclaimer The information in this guide is subject to change without notice. Acer Incorporated makes no representations or warranties, either expressed - Acer EZ1601-01 | Service Guide - Page 4
additional information related to the current topic. Alerts you to any damage that might result from doing or not doing specific actions. Gives precautionary measures to avoid possible hardware or software problems. Reminds you to do specific actions relevant to the accomplishment of procedures. IV - Acer EZ1601-01 | Service Guide - Page 5
Service Guide. For ACER-AUTHORIZED SERVICE PROVIDERS, your Acer office may have a DIFFERENT part number code to those given in the FRU list of this printed Service Guide. You MUST use the list provided by your regional Acer office to order FRU parts for repair and service of customer machines - Acer EZ1601-01 | Service Guide - Page 6
VI - Acer EZ1601-01 | Service Guide - Page 7
18 Main 19 Advanced 20 Security 21 Power 24 PC Health 25 Boot 26 Exit 27 BIOS Flash Utilities 28 DOS Flash Utility 29 WinPhlash Utility 30 Using DMI Tools 31 Machine Disassembly and Replacement 34 Disassembly Requirements 34 General Information 34 Pre-disassembly Instructions - Acer EZ1601-01 | Service Guide - Page 8
108 Undetermined Problems 108 Jumper and Connector Locations 109 Top View 109 Bottom View 110 Clearing Password Check and BIOS Recovery 111 Clearing Password Check 111 BIOS Recovery by Crisis Disk 112 FRU (Field Replaceable Unit) List 115 eMachines EZ1600/EZ1601 Exploded Diagrams - Acer EZ1601-01 | Service Guide - Page 9
Edition • Linux® X Windows Processor • Intel® Atom™ N270 processor Chipset • Intel® 945GSE Express Chipset Memory • • Up to 2 GB of DDR2 533 MHz SDRAM (single-channel support on one DIMM) Display 18.5" widescreen with 16:9 aspect ratio 1366 x 768 native resolution 5 ms response time 250 - Acer EZ1601-01 | Service Guide - Page 10
45) port • Audio jack Software • eMachines Recovery Management • Microsoft® Office Home and Student 2007 (Trial) • Microsoft® Works • Norton Internet Security™ 2009 (60-day trial)4 • Adobe® Reader® • Adobe® Flash® Player • CyberLink® Power2Go™ • Google Toolbar™ and Desktop Search™ Dimensions • 484 - Acer EZ1601-01 | Service Guide - Page 11
Adapter • 65 W Optional accessories • eMachines PS/2 keyboard and mouse NOTE: Items marked with * denote only selected models. NOTE: The specifications listed above are for reference only. The exact configuration of your PC depends on the model purchased. Chapter 1 3 - Acer EZ1601-01 | Service Guide - Page 12
System Block Diagram 4 Chapter 1 - Acer EZ1601-01 | Service Guide - Page 13
Your eMachines Computer tour This section describes port locations, indicators, and controls for the computer. IMPORTANT:Your computer's hardware options, port locations, and indicators may vary from this illustration. Front View Power button Component Power button Description Press this button - Acer EZ1601-01 | Service Guide - Page 14
indicators may vary from this illustration. Optical disc drive Component Optical disc drive Icon Description Use this drive to listen to audio CDs, install games and programs, watch DVDs, and store large files onto recordable discs (depending on drive type). This drive may be a CD, recordable CD - Acer EZ1601-01 | Service Guide - Page 15
, MP3 player, PDA, cellular telephone, or other device into the memory card reader. Plug USB (Universal Serial Bus) devices (such as a USB external drive, printer, scanner, camera, keyboard, or mouse) into this port. Plug powered, analog front speakers, an external amplifier, or headphones into this - Acer EZ1601-01 | Service Guide - Page 16
PS/2 keyboard port PS/2 mouse port Icon Description Secure your computer to an object by connecting a Kensington cable lock to this slot. Plug the power cord into this connector. Plug an Ethernet network cable or a device (such as a DSL or cable modem for a broadband Internet connection) into this - Acer EZ1601-01 | Service Guide - Page 17
. Press these keys to play your audio files and to adjust the volume. Press this key to open the Windows Start menu. This key can also be used in combination with other keys to open utilities. See "Windows Keys" on page 10. Press this key in combination with keys that have alternate - Acer EZ1601-01 | Service Guide - Page 18
Start menu. It can also be used with other keys to provide a variety of functions: < >: Open or close the Start menu < > + : Display the desktop < > + : Open Windows Explore < > + : Search for a file or folder < > + : Cycle through Sidebar gadgets < > + : Lock your computer (if - Acer EZ1601-01 | Service Guide - Page 19
945GSE) • South Bridge (ICH7-M) RTL8111DL 10/100/1000M Onboard HDA Codec ALC269 Acer P/N North Bridge Chipset Item Chipset Features Specification ATI RS690MC • AGTL+ interface (Front-side bus) • Support Intel Atom Processor • 533MHz transfer rate processor bus speed • Integrated DRAM controller - Acer EZ1601-01 | Service Guide - Page 20
Bus Rev.2.0 compliant. • AC-Link for Audio and Telephony CODECs • Power management • ACPI Specification 3.0 compliant power management scheme. • PCI CLOCKRUN# and PME# support • ACPI-defined power states(C1, S1, S3, S4, S5 for Desktop) • ACPI-defined power states(C1~C4, S1, S3~S5 for Mobile) • ACPI - Acer EZ1601-01 | Service Guide - Page 21
memory can replace the external EEPROM • Serial EEPROM • Transmit/Receive on-chip buffer support • Supports power down/link down power saving • Built-in Switching regulator • Supports PCI MSI (Message Signaled Interrupt) and MSI-X • Supports quad core Receive-Side Scaling (RSS) • Embeds an adaptive - Acer EZ1601-01 | Service Guide - Page 22
Buffer size Interface Internal transfer rate (Mbits/sec, max) I/O data transfer rate (Mbytes/sec max) DC Power Requirements Voltage Specifications SATA 3GB/s maximum 875 Mbits/s maximum +5.0V ± 5%. Specifications Seagate ST9250315AS 250 512 2 1 5400 8 MB SATA 1175 875 Mbits/s maximum +5.0V - Acer EZ1601-01 | Service Guide - Page 23
layer), 6X DVD-RW, 6X DVD+RW, 5X DVD-RAM • 3.95GB (Ver. 1.0: read only) • Write Part 3": read & write) Drawer (Solenoid Open) Tact SW (Open) Emergency Release (draw open hole) Power Requirement Input Voltage DC 5 V +/- 5% Audio Interface Item Specification Audio Controller Alc269 supporting - Acer EZ1601-01 | Service Guide - Page 24
LCD 18.5" Item Vendor/model name Screen Diagonal (mm) Active Area (mm) Display resolution (pixels) Pixel Pitch Display Mode Typical White Luminance (cd/m2) also called Brightness Supported Colors Contrast Ratio Response Time (Optical Rise Time/Fall Time) msec Nominal Input Voltage VDD Interface - Acer EZ1601-01 | Service Guide - Page 25
configuration problems, you may need to run Setup. Please also refer to Chapter 4 Troubleshooting when problem arises Main, Advanced, Security, Boot, and Exit. Follow these instructions: • To choose a menu, use the left and parameters are found in the Item Specific Help part of the screen. Read this - Acer EZ1601-01 | Service Guide - Page 26
Specific Help System Memory: System Manufacturer: Product Name: System Serial Number: System BIOS Version: BIOS Release Date: 2048 MB eMachines models. Parameter Processor Type Processor Speed System Memory System Manufacturer Product Name System Serial Number field reports the memory size of the - Acer EZ1601-01 | Service Guide - Page 27
r B o o t Exit System Date: System Time: SATA PORT 1 SATA PORT 2 [05/27/2009] [17:21:24] [Hitachi HTS54501] [HL-DT-ST DVDRAM ] Item Specific Help , , or selects field. Quick Boot: Quiet Boot: Bootup Num-lock: Boot Sector Virus Protection: Halt On: [Enabled] [Enabled] [On - Acer EZ1601-01 | Service Guide - Page 28
o o t Exit XAdvanced Chipset Features XIntegrated Peripherals Item Specific Help F1 Help Esc Exit Select Item -/+ Change Values Memory Size • Frame Buffer Size • Graphics Memory • Onboard IDE Controller • Onboard SATA Controller • Onboard SATA Mode • Onboard USB Controller • Legacy USB Support - Acer EZ1601-01 | Service Guide - Page 29
Info M a i n Advanced Security P C H e a l t h P o w e r B o o t Exit Supervisor Password: User Password: Not Installed Not Installed Change Supervisor Password: [Press Enter] Change User Password [Press Enter] Item Specific Help Supervisor Password controls access to the setup utility. F1 - Acer EZ1601-01 | Service Guide - Page 30
can opt to enable the Password on boot parameter. 5. When you are done, press F10 to save the changes and exit the BIOS Setup Utility. Removing a Password Follow these steps: 1. Use the ↑ and ↓ keys to highlight the Set Supervisor Password parameter and press the Enter key. The Set Password box - Acer EZ1601-01 | Service Guide - Page 31
Changing a Password 1. Use the ↑ and ↓ keys to highlight the Set Supervisor Password parameter and press the Enter key. The Set Password box appears. Set Supervisor Password Enter Current Password [ ] Enter New Password [ ] Confirm New Password [ ] 2. Type the current password in the Enter - Acer EZ1601-01 | Service Guide - Page 32
o w e r B o o t Exit [S3(STR)] Item Specific Help Power On by RTC Alarm: [Disabled] Power On by Onboard LAN Wake Up by PS/2 KB/Mouse Wake Up by Mouse Restore On AC Power Loss Description Choose between STR (Suspend to Ram) and POS (Power on Standby). POS uses more power during suspend. Disable - Acer EZ1601-01 | Service Guide - Page 33
PC Memory +1.80V = Chipset +1.50V = Shutdown Temperature: 0.89V 10.6V 3.31V 5.05V 1.80V 1.47V [Disabled] Item Specific power supply voltage for the nominal 3.3V bus. This field is read only. Displays the power supply voltage for the nominal 5V bus. This field is read only. Displays the memory - Acer EZ1601-01 | Service Guide - Page 34
5 6: 7: 8: Excluded from boot order: 1: USB FDC: 1: USB CDROM: Item Specific Help Keys used to view or configure devices: Up and Down arrows select a device. the device up or down. and specifies the device fixed or removable. exclude or include the device to boot. enables - Acer EZ1601-01 | Service Guide - Page 35
Utility Info M a i n Advanced Security P C H e a l t h P o w e r B o o t Exit Exit Saving Changes Exit Discarding Changes Load Setup Defaults Discard Changes Save Changes Item Specific Help Exit System Setup and save your changes to CMOS. F1 Help Esc Exit Select Item -/+ Change Values F9 Setup - Acer EZ1601-01 | Service Guide - Page 36
BIOS Flash Utilities The BIOS flash memory update is required for the following conditions: • New versions of system programs • New features or options • Restore a BIOS when it becomes corrupted. This section contains instructions for the following BIOS utilities: • DOS flashit utility • WinPhlash - Acer EZ1601-01 | Service Guide - Page 37
can be booted in DOS mode (FAT 16 or FAT 32 partitions only) Information Main PhoenixBIOS Setup Utility Security Boot Exit Boot priority 4: USB HDD: 5: USB FDD: 6: USB KEY: 7: USB CD/DVD: 8: Item Specific Help Keys used to view or configure devices: Up and Down arrows select a device. - Acer EZ1601-01 | Service Guide - Page 38
for it to function properly. 2. In the Specify New BIOS file field, enter the BIOS ROM file name and path. IMPORTANT:Be sure the AC power is plugged in. If not, the following error message displays: 3. Click OK to begin the update. A progress screen displays. 4. When the process is complete the - Acer EZ1601-01 | Service Guide - Page 39
change the asset tag, product name, or serial number of the machine. 1. Copy the file qdmi30a.exe to USB flash disk with Boot into DOS. 5. Key in "qdmi30a" then click "Enter". The following screen appears. Select one of the functions to modify. To modify the asset tag, key in "1" and then key in a - Acer EZ1601-01 | Service Guide - Page 40
To modify the serial number, key in "3" then key in a new string for the serial number as shown below. To modify the 1394 GUID number, key in "4" then key in a new string for the 1394 GUID number as shown below 32 Chapter 2 - Acer EZ1601-01 | Service Guide - Page 41
Chapter 2 33 - Acer EZ1601-01 | Service Guide - Page 42
putting back the components. General Information Pre-disassembly Instructions Before proceeding with the disassembly procedure, make sure that you do the following: 1. Turn off the power to the system and all peripherals. 2. Unplug the AC adapter and all power and signal cables from the system - Acer EZ1601-01 | Service Guide - Page 43
Process Disassembly Flowchart Turn off power and disconnect all cables before proceeding Remove LCD Bezel Remove Support Legs Remove Inverter Board Remove LCD Brackets and Cable Remove Stand Assembly Remove Switch Board Remove LCD Module Remove ODD Module Remove ODD Board and Cable Remove - Acer EZ1601-01 | Service Guide - Page 44
WLAN Antennas Power Board Cable HDD Module WLAN Board Mainboard Thermal Module Screw M2*3 (Plated) M3.0*8.0 Self-tapping M2.0*4.0 Self-Tapping M2.0*4.0 (plated) M2.0*6.0 M3.0*8.0-Self-Tapping M3*3 M2.5*4 M3.0*5 M3.0*12.0-Self-Tapping M2.5*4 Quantity 2 2 4 2 1 1 4 1 6 2 4 Part No. Chapter - Acer EZ1601-01 | Service Guide - Page 45
Removing the Stand Assembly 1. See "Pre-disassembly Instructions" on page 34. 2. Lift the stand assembly up as shown below. 3. Pry up the edges of the hinge cover using a plastic tool as shown below. 4. - Acer EZ1601-01 | Service Guide - Page 46
hinge cover as shown until the securing tabs clear the slots. 6. Grasp the hinge cover with both hands to pull the top edge out and remove from the assembly. 7. Remove the three screws securing the hinge to the back cover. Step Switch Boards Size M4*8 Quantity 3 Screw Type Chapter 3 38 - Acer EZ1601-01 | Service Guide - Page 47
8. Remove the hinge from the back cover; pull down so the metal tabs on the hinge clear the slots in the back cover. 39 Chapter 3 - Acer EZ1601-01 | Service Guide - Page 48
Removing the LCD Bezel 1. See "Pre-disassembly Instructions" on page 34. 2. Using your fingers, pry the bezel away from the LCD screen starting from the top center. 3. Work your way from the center of the bezel to the right and left sides. 4. Pry the bezel apart from one of the top corners, working - Acer EZ1601-01 | Service Guide - Page 49
5. Lift the bezel away from the assembly as shown. IMPORTANT:The bezel is still attached to the assembly by a cable. Do not lift the bezel away completely 6. Unplug the switch board cable from the switch board. 41 Chapter 3 - Acer EZ1601-01 | Service Guide - Page 50
Removing the Switch Board 1. See "Removing the LCD Bezel" on page 40. 2. Remove the two screws securing the Switch Board to the LCD Bezel. Step Size Switch Boards M2*6 (plated) 2 3. Lift the Switch Board away from the LCD Bezel. Quantity Screw Type Chapter 3 42 - Acer EZ1601-01 | Service Guide - Page 51
Removing the Support Legs 1. See "Removing the LCD Bezel" on page 40 2. Remove the eight securing screws from the front of the computer as shown. Step Support legs Size M3.0*8 self-tapping Quantity 8 3. Remove the left leg from the assembly Screw Type 43 Chapter 3 - Acer EZ1601-01 | Service Guide - Page 52
4. Remove the right leg from the assembly. Chapter 3 44 - Acer EZ1601-01 | Service Guide - Page 53
the LCD Module 1. See "Removing the Support Legs" on page 43 2. Remove the two securing screws from the LCD Module. Step LCD Module Size M3.0*8 self-tapping Quantity 2 Screw Type 3. Lift the module up high enough so - Acer EZ1601-01 | Service Guide - Page 54
4. Unplug the inverter cable. 5. Unplug the LVDS cable. 6. Lift the LCD module away from the assembly and carefully place face-down on a clean lint-free cloth. Chapter 3 46 - Acer EZ1601-01 | Service Guide - Page 55
Removing the Inverter Board 1. See "Removing the LCD Module" on page 45. 2. Unplug the Mainboard connector cable from the Inverter Board. 3. Unplug the lower connector to the LCD Panel. 4. Unplug the upper connector to the LCD Panel. 47 Chapter 3 - Acer EZ1601-01 | Service Guide - Page 56
5. Unscrew the two securing screws holding the Inverter Board to the LCD Bracket. Step Inverter Board Size M3.0*5 Quantity 2 6. Lift the Inverter Board clear of the LCD assembly. Screw Type Chapter 3 48 - Acer EZ1601-01 | Service Guide - Page 57
LVDS cable and LCD Brackets 1. See "Removing the Inverter Board" on page 47. 2. Peel the LVDS cable away from the LCD module, taking care to grasp from the cloth adhesive strip 3. Peel - Acer EZ1601-01 | Service Guide - Page 58
4. Un-screw the two screws securing the left LCD bracket to the LCD module and lift the bracket away from the module. Step LCD Bracket Size M3*5 Quantity 2 Screw Type 5. Un-screw the two screws securing the right LCD bracket to the LCD module and lift the bracket away from the module. Step LCD - Acer EZ1601-01 | Service Guide - Page 59
Removing the ODD Module 1. See "Removing the LCD Module" on page 45. 2. Remove the ESD spacer from the top of the drive. 3. Remove the single screw securing the ODD to the Back Cover. Step ODD Module Size M3.0*8.0 Self-Tapping Quantity 1 Screw Type 51 Chapter 3 - Acer EZ1601-01 | Service Guide - Page 60
4. Disconnect the ODD from the mainboard by pushing the ODD out of the lower cover. Remove the ODD from the lower cover 5. Insert an appropriate tool into the hole in the ODD bezel to eject the ODD tray 6. Remove the ODD bezel by turning the bezel downward and pulling the bezel out. Chapter 3 52 - Acer EZ1601-01 | Service Guide - Page 61
7. Remove the two screws from the ODD bracket and pull the bracket away from the ODD module. Step ODD Bracket Size M2*3 (Plated) Quantity 2 Screw Type 53 Chapter 3 - Acer EZ1601-01 | Service Guide - Page 62
51 2. Disconnect the ODD cable from the ODD Board. IMPORTANT:Do not remove the cable completely; the grounding cable is still attached to one of the screws. 3. Remove the two securing screws from the ODD Board and remove the board and cable from the assembly. Step ODD Board Size M3.0*8.0 Self - Acer EZ1601-01 | Service Guide - Page 63
LCD Module" on page 45 2. Remove the four screws securing the speakers to the back cover. Step Speakers Size M2.0*4.0 Self-Tapping Quantity 4 3. Pull the speakers off the posts in the back panel. Screw Type 4. Unplug the speaker cable from the mainboard. 5. Remove the speaker cable from all - Acer EZ1601-01 | Service Guide - Page 64
from the WLAN Board as shown. NOTE: Take note of the correct cable positioning: Grey to the Main connector and Black to the Aux connector. 3. Remove the two screws securing the WLAN Antennas to the Back Cover. Step WLAN Antennas Size M2.0*4.0 (plated) Quantity 2 Screw Type Chapter 3 56 - Acer EZ1601-01 | Service Guide - Page 65
4. Remove the adhesive tape securing the cables to the back cover. 5. Lift the antennas off of the mounting pins. 6. Remove the cables from the cable channels. 57 Chapter 3 - Acer EZ1601-01 | Service Guide - Page 66
Removing the RTC Battery 1. See "Removing the LCD Module" on page 45. 2. Locate the RTC Battery. 3. Push the RTC battery in the direction indicated. The spring underneath will cause the RTC battery to pop up. 4. Lift the RTC Battery out of the Mainboard Chapter 3 58 - Acer EZ1601-01 | Service Guide - Page 67
Removing the Power Board Cable 1. See "Removing the LCD Module" on page 45. 2. Disconnect the Power Board Cable from the Mainboard 3. Remove the single screw securing the grounding cable to the Back Cover Step Power Board Cable Size M2.0*6.0 Quantity 1 Screw Type 59 Chapter 3 - Acer EZ1601-01 | Service Guide - Page 68
the HDD Module 1. See "Removing the LCD Module" on page 45 2. Remove the single screw securing the HDD assembly to the Back Cover. Step HDD Module Size M3.0*8.0-Self-Tapping Quantity 1 Screw Type 3. Slide the HDD assembly - Acer EZ1601-01 | Service Guide - Page 69
4. Lift the HDD assembly out of the Back Cover. 5. Remove the four screws securing the HDD to the HDD Carriage. Step HDD Module Size M3*3 Quantity 4 6. Lift the HDD Carriage clear of the HDD Module. Screw Type 61 Chapter 3 - Acer EZ1601-01 | Service Guide - Page 70
from the WLAN Board as shown. NOTE: Take note of the correct cable positioning: Grey to the Main connector and Black to the Aux connector. 3. Remove the single screw securing the WLAN Board to the Mainboard. Step WLAN Board Size M2.5*4 Quantity 1 Screw Type Chapter 3 62 - Acer EZ1601-01 | Service Guide - Page 71
4. Remove the WLAN Board from the Mainboard 63 Chapter 3 - Acer EZ1601-01 | Service Guide - Page 72
Removing the Mainboard 1. See "Removing the RTC Battery" on page 58. 2. See "Removing the WLAN Board" on page 62. 3. Disconnect the Speaker Cable from the Mainboard. 4. Disconnect the Power Board cable from the Mainboard. 5. Disconnect the ODD Cable from the Mainboard. Chapter 3 64 - Acer EZ1601-01 | Service Guide - Page 73
6. Remove the two screws securing the thermal module to the back cover. Step Mainboard Size M3.0*12-Self Tapping 2 Quantity Screw Type 7. Remove the screw securing the ODD grounding cable to the mainboard and back cover Step Mainboard Size M3.0*5 Quantity 1 Screw Type 65 Chapter 3 - Acer EZ1601-01 | Service Guide - Page 74
8. Remove the remaining five screws securing the mainboard to the back cover. Step Mainboard Size M3.0*5 Quantity 5 Screw Type 9. Using both hands, Tilt the Mainboard up and pull clear of the Back Cover as shown. Chapter 3 66 - Acer EZ1601-01 | Service Guide - Page 75
the Mainboard" on page 64 2. Place the Mainboard on a clean surface. 3. Remove the four screws securing the Thermal Module to the Mainboard. Step Thermal Module Size M2.5*4 Quantity 4 Screw Type 4. Using both hands, gently twist the Thermal - Acer EZ1601-01 | Service Guide - Page 76
Removing the Memory Module 1. See "Removing the ODD Module" on page 51 2. Push out the release latches on both sides of the DIMM socket to release the DIMM Module. 3. Remove the DIMM Module from the Mainboard. Chapter 3 68 - Acer EZ1601-01 | Service Guide - Page 77
Reassembly Procedure Replacing the Memory Modules 1. Remove the DIMM Module from the Mainboard. 2. Push down the Thermal Module. The following thermal pads are approved for use: • Eapus XR-PE 1. Remove all traces of thermal grease or pad adhesive from the CPU and thermal module using a lint-free - Acer EZ1601-01 | Service Guide - Page 78
2. Place the Thermal Module onto the Mainboard, taking care to align the screw holes before allowing the thermal pad to contact the CPU. 3. Replace the four securing screws. Step Thermal Module Size M2.5*4 Quantity 4 Screw Type Chapter 3 70 - Acer EZ1601-01 | Service Guide - Page 79
Replacing the Mainboard 1. Using both hands, insert the left edge of the mainboard into the Back Cover and lower into place, aligning the mainboard with the screw holes. 2. Replace the five screws in the positions indicated below to secure the mainboard to the back cover. Step Mainboard Size M3 - Acer EZ1601-01 | Service Guide - Page 80
3. Replace the screw to secure the ODD grounding cable to the mainboard and back cover. Step Mainboard Size M3.0*5 Quantity 1 Screw Type 4. Replace the two screws to secure the thermal module to the back cover. Step Mainboard Size M3.0*12-Self Tapping 2 Quantity Screw Type Chapter 3 72 - Acer EZ1601-01 | Service Guide - Page 81
5. Connect the ODD Cable to the Mainboard. 6. Connect the Power Board cable to the Mainboard. 7. Connect the Speaker Cable to the Mainboard. 73 Chapter 3 - Acer EZ1601-01 | Service Guide - Page 82
Replacing the WLAN Board 1. Insert the WLAN Board in to the Mainboard connector in the direction of the arrow. 2. Replace the single securing screw. Step WLAN Board Size M2.5*4 Quantity 1 Screw Type Chapter 3 74 - Acer EZ1601-01 | Service Guide - Page 83
3. Connect the antenna cables to the WLAN Board terminals as shown. NOTE: Take note of the correct cable positioning: Black to the red callout and gray to the blue callout. Replacing the HDD Modules 1. Place HDD Carriage onto the HDD Module, taking care to align the screw holes. 75 Chapter 3 - Acer EZ1601-01 | Service Guide - Page 84
2. Replace the four securing screws. Step HDD Module Size M3*3 Quantity 4 Screw Type 3. Place the HDD assembly into the Back Cover between the HDD guides. 4. Slide the HDD assembly in the direction indicated to connect the HDD to the SATA interface. Chapter 3 76 - Acer EZ1601-01 | Service Guide - Page 85
to secure the HDD assembly to the Back Cover. Step HDD Module Size M3.0*8.0-Self-Tapping Quantity 1 Screw Type Replacing the Power Board Cable 1. Insert the single screw securing the grounding cable to the Back Cover. Step Power Board Cable Size M2.0*6.0 Quantity 1 Screw Type 77 Chapter 3 - Acer EZ1601-01 | Service Guide - Page 86
2. Connect the Power Board Cable to the Mainboard. Replacing the RTC Battery 1. Push the RTC battery in the direction indicated until the battery clicks into place. Replacing the WLAN Antennas 1. Insert the cables into the cable channels. Chapter 3 78 - Acer EZ1601-01 | Service Guide - Page 87
2. Place the antennas onto the mounting pins. 3. Replace the adhesive tape securing the cables to the back cover. 4. Insert the two screws securing the WLAN Antennas to the Back Cover. Step WLAN Antennas Size M2.0*4.0 (plated) Quantity 2 Screw Type 79 Chapter 3 - Acer EZ1601-01 | Service Guide - Page 88
5. Connect the antenna cables to the WLAN Board as shown. NOTE: Take note of the correct cable positioning: Grey to the Main connector and Black to the Aux connector. Replacing the Speakers 1. Plug the speaker cable into the mainboard. 2. Insert the speakers onto the mounting posts in the back panel - Acer EZ1601-01 | Service Guide - Page 89
3. Insert the speaker cable into the cable clips. 4. Insert the four screws to secure the speakers to the back cover. Step Speakers Size M2.0*4.0 Self-Tapping Quantity 4 Screw Type 81 Chapter 3 - Acer EZ1601-01 | Service Guide - Page 90
onto the mounting pins on the back cover and insert the two securing screws as shown. IMPORTANT:Be sure the grounding cable is attached to one of the screws as indicated. Step ODD Board Size M3.0*8.0 Self-tapping 2 Quantity 2. Connect the ODD cable to the ODD Board. Screw Type Chapter 3 82 - Acer EZ1601-01 | Service Guide - Page 91
Replacing the ODD 1. Insert the two screws to secure the ODD bracket to the ODD module. Step ODD Bracket Size M2*3 (Plated) Quantity 2 2. Insert the ODD bezel into the front of the ODD module. Screw Type 83 Chapter 3 - Acer EZ1601-01 | Service Guide - Page 92
3. Insert the ODD into the lower cover and connect the ODD to the mainboard by pushing the ODD into the SATA interface on the ODD board. 4. Replace the single screw to secure the ODD to the Back Cover. Step ODD Module Size M3.0*8.0 Self-Tapping Quantity 1 5. Adhere the ESD spacer to the top of - Acer EZ1601-01 | Service Guide - Page 93
Replacing the LCD Brackets and Cable 1. Place the right bracket onto the LCD module and insert the two screws to secure it in place. Step LCD Bracket Size M3*5 Quantity 2 Screw Type 2. Place the left bracket onto the LCD module and insert the two screws to secure it in place. IMPORTANT:be sure - Acer EZ1601-01 | Service Guide - Page 94
3. Insert the LVDS cable connector into the LCD module and apply the clear protective tape to secure the connector in place. 4. Adhere the LVDS Cable to the back of the LCD panel. Replacing the Inverter Board 1. Place the Inverter Board onto the LCD assembly, taking care to mount it to the pins on - Acer EZ1601-01 | Service Guide - Page 95
2. Insert the two screws to secure the Inverter Board to the LCD Bracket. Step LCD Bezel Size M3.0*5 Quantity 2 3. Plug the upper connector into the LCD Panel. Screw Type 4. Plug the lower connector into the LCD Panel. 87 Chapter 3 - Acer EZ1601-01 | Service Guide - Page 96
5. Plug the Mainboard connector cable into the Inverter Board. Replacing the LCD Module 1. Hold the LCD module above the main assembly as shown. 2. Plug in the LVDS cable. Chapter 3 88 - Acer EZ1601-01 | Service Guide - Page 97
3. Plug in the inverter cable. 4. Place the module down onto the assembly, taking care to align the brackets with the screw holes in the back cover 5. Insert the two securing screws into the LCD Module. Step LCD Module Size M3.0*8 self-tapping Quantity 2 89 Screw Type Chapter 3 - Acer EZ1601-01 | Service Guide - Page 98
the bottom tabs should be covered by the LCD bracket tabs. 2. Insert the eight securing screws on the front of the computer as shown. Step Support legs Size M3.0*8 self-tapping Quantity 8 Screw Type Chapter 3 90 - Acer EZ1601-01 | Service Guide - Page 99
Replacing the Switch Board 3. Place the Switch Board onto the LCD Bezel. 4. Insert the two screws to secure the Switch Board to the LCD Bezel. Step Switch Boards Size M2*6 (plated) Quantity 2 Screw Type 91 Chapter 3 - Acer EZ1601-01 | Service Guide - Page 100
Replacing the LCD Bezel 1. Plug the switch board cable into the switch board. 2. Place the bezel onto assembly as shown. 3. Starting at the bottom edge, press the bezel into the back cover so that the securing tabs along the outside edges snap into place. Chapter 3 92 - Acer EZ1601-01 | Service Guide - Page 101
Replacing the Stand Assembly 1. Attach the hinge to the back cover; pull down so the metal tabs on the hinge clear the slots in the back cover. 2. Replace the three screws securing the hinge to the back cover. Step Switch Boards Size M4*8 Quantity 3 3. Slide the hinge cover over the hinge as - Acer EZ1601-01 | Service Guide - Page 102
indicated with your fingers, and down on the top of the hinge cover with your thumbs. 6. To verify that the hinge cover is fully inserted, open the stand. The hinge cover should not contact the stand when fully opened if it is properly installed. Chapter 3 94 - Acer EZ1601-01 | Service Guide - Page 103
95 Chapter 3 - Acer EZ1601-01 | Service Guide - Page 104
Troubleshooting Chapter 4 Common Problems Use the following procedure as a guide for computer problems. NOTE: The diagnostic tests are intended to test only Acer products. Non-Acer products, prototype If the Issue is still not resolved, see "Online Support Information" on page 142. Chapter 4 96 - Acer EZ1601-01 | Service Guide - Page 105
to isolate the problem Component Failure Memory Module Failure Wireless LAN Failure Speaker Failure Power Board Failure ODD screen displays • The ODD is noisy Perform the following general solutions one at a time to correct the problem. 1. Reboot the computer and retry the operation. 2. Try an - Acer EZ1601-01 | Service Guide - Page 106
from the item in the lists, try removing any recently installed software and retrying the operation. Discs Do Not Play If discs do not play when inserted in the drive, perform the following actions one at a time to correct the problem. 1. Check that the disc is correctly seated in the drive - Acer EZ1601-01 | Service Guide - Page 107
is identical to one of the ODDs specified in "Hardware Specifications and Configurations" on page 11. 3. Turn off the power and remove the cover to inspect the connections to the ODD. See "Disassembly Process" on page 42. a. Check for broken connectors on the drive, motherboard, and cables. b. Check - Acer EZ1601-01 | Service Guide - Page 108
Devices. 3. Roll back the audio driver to the previous version, if updated recently. 4. Remove and reinstall the audio driver. 5. Ensure that all volume Follow the onscreen prompts to configure the speakers. 8. Remove and recently installed hardware or software. 9. Restore system and file settings - Acer EZ1601-01 | Service Guide - Page 109
The device is properly installed. • There are no red Xs or yellow exclamation marks. • There are no device conflicts. • No hardware is listed under Other Devices. 3. Roll back the audio driver to the previous version, if updated recently. 4. Remove and reinstall the audio driver. 5. Ensure that all - Acer EZ1601-01 | Service Guide - Page 110
the preceding steps and select an earlier time and date. 10. Reinstall the Operating System. 11. If the Issue is still not resolved, see "Online Support Information" on page 142. Chapter 4 102 - Acer EZ1601-01 | Service Guide - Page 111
doesn't display, perform the following actions one at a time to correct the problem. 1. Make sure the computer has power by checking at least one of the following occurs: • Fans start up • Status LEDs light up 2. Drain any stored power by removing the power cable and battery and holding down the - Acer EZ1601-01 | Service Guide - Page 112
the memory modules. 5. Remove the drives (see "Disassembly Process" on page 35). 6. If the Issue is still not resolved, see "Online Support Information" on page 142. Abnormal Video Display If video displays abnormally, perform the following actions one at a time to correct the problem. 1. Reboot - Acer EZ1601-01 | Service Guide - Page 113
General Troubleshooting Issues Computer Shutsdown Intermittently If the system powers off at intervals, perform the following actions one at a time to correct the problem. 1. Check the power cable is properly connected to the computer and the electrical outlet. 2. Remove any extension cables between - Acer EZ1601-01 | Service Guide - Page 114
system DVD. c. The Install Windows screen displays. Click Next. d. Select Repair your computer. e. The System Recovery Options screen displays. Click information to resolve the problem. 4. Run the Windows Memory Diagnostic Tool. For more information see Windows Help and Support. 5. Restart the - Acer EZ1601-01 | Service Guide - Page 115
the mouse driver. 12. Check the Device Manager to determine that: • The device is properly installed. There are no red Xs or yellow exclamation marks. • There are no device conflicts. • No hardware is listed under Other Devices. 13. If the Issue is still not resolved, see "Online Support Information - Acer EZ1601-01 | Service Guide - Page 116
are supported by the computer. NOTE: Verify that the power supply being used at the time of the failure is operating correctly. 1. Power-off the computer. 2. Visually check for damage. If any problems are found, replace the FRU. 3. Remove or disconnect all of the following devices: • Non-Acer - Acer EZ1601-01 | Service Guide - Page 117
Jumper and Connector Locations Top View Chapter 5 DDR҈ SODIMM HDD connector 2 USB connector Media Card Reader connector USB connector USB connector MIC RJ45 USB connector Head Phone connector PS2 mouse connector PS2 keyboard connector Line in Jack Item HDD DDR2 Media Card USB PS2 Mouse - Acer EZ1601-01 | Service Guide - Page 118
Internal speaker connector Connector for inverter RTC Battery RTC Battery connector Item WLAN LCD Switch Cable Description Wireless LAN card slot Connector for LVDS cable Power Board cable connector 110 Chapter 5 - Acer EZ1601-01 | Service Guide - Page 119
operating procedures of clearing password and BIOS recovery for eMachines EZ1600/EZ1601 Series. The eMachines EZ1600/EZ1601 Series provides one Hardware Open Gap on the main board for clearing password check. Clearing Password Check Hardware Open Gap Description Item Description JP1 (RTC (RST - Acer EZ1601-01 | Service Guide - Page 120
to a successful one once the previous BIOS flashing process failed. BIOS Recovery Hotkey: The system provides a function hotkey: Fn+Esc, for enable BIOS Recovery process when system is powered on during BIOS POST. To use this function, it is strongly recommended to have the AC adapter and Battery - Acer EZ1601-01 | Service Guide - Page 121
A confirmation screen displays. 6. Click the OK button on the left to continue. 7. Click the (N) button when prompted to complete the process. 8. Insert the Crisis Disk in to the USB floppy drive attached to the BIOS flash failed system. Chapter 5 113 - Acer EZ1601-01 | Service Guide - Page 122
hold Fn+Esc then plug the AC power in. 10. Press the Power button. The system powers on and the Crisis BIOS Recovery process begins. BIOS Boot Block begins restoring the BIOS code from the Crisis floppy disk to BIOS ROM on the failed systems. When the Crisis - Acer EZ1601-01 | Service Guide - Page 123
16 17 18 No. Description 1 WLAN Card 2 Right LCD Bracket 3 soDIMM Memory 4 Heat Sink 5 Hard Disk Drive 6 Hard Disk Drive Bracket 7 ODD Bezel 8 Front Bezel Assembly 9 LCD Panel 10 Left LCD Bracket 11 Power Switch Board 12 Mainboard 13 Inverter Board 14 Left Support Leg 15 - Acer EZ1601-01 | Service Guide - Page 124
No. Description 16 Right Support Leg 17 Rear Cover Sub Assembly 18 Optical Disk Drive Acer P/N 116 Chapter 6 - Acer EZ1601-01 | Service Guide - Page 125
eMachines EZ1600/1601 FRU List Category Adapter Antenna Part No. AP.06501.030 N/A Description ADP 19V 3.42A(ADP-65JH DBK 100-240V) ANTENNA C680-520185-A WLAN Board N/A INV(SMD)(17~22V,VO=1700V) TWS- - Acer EZ1601-01 | Service Guide - Page 126
Category Part No. N/A Description CABLE ASSY EL7 SW(215MM,10P,30V,1A) Case/Cover/Bracket Assembly HS.NAS00.001 HS.NAS00.002 PWR CORD (FBEL7003,REV3A) N/A BRACKET LCD R EL7(FBEL7004,REV3A) N/A EL7 SUPPORT LEG L SUB ASSY N/A EL7 SUPPORT LEG R SUB ASSY N/A EL7 ODD BEZEL SUB ASSY N/A EL7 - Acer EZ1601-01 | Service Guide - Page 127
Category Part No. Description HEAT SINK ASV EL7(FBEL7001,REV3A) Hard Drive Keyboard LCD Memory Modem Chapter 6 KF.16G0B.002 KH.16007.024 1800D.003 LK.18006.002 LK.18006.003 CCFL LCD AUO 18.5"W WXGA None Glare M185XW01 V2 0B LF 250nit 5ms 1000:1 250nits HF CCFL LCD AUO 18.5"W WXGA None Glare - Acer EZ1601-01 | Service Guide - Page 128
Category Mouse ODD Part No. FX.10100.023 MS.11200.036 MS.11200.025 MS.11200.032 KU.0080D.040 N/A Description Pro-Nets VD56UL External USB Without any brand logo Rev 1.0 eMachines 3C2X PS2 910-000611 eMachines eCooper Mouse 20-14229G102 PS/2 3C2X Logitech SBF96 PS2 SBF96 for PB ODD HLDS Super-Multi - Acer EZ1601-01 | Service Guide - Page 129
Chapter 6 121 - Acer EZ1601-01 | Service Guide - Page 130
.NAT05.020 PW.NAT05.019 PW.NAT05.018 PW.NAT05.002 PW.NAT05.017 PW.NAT05.016 PW.NAT05.006 PW.NAT0C.004 PW.NAT05.005 PW.NAT0C.003 Model Name EZ1600 EZ1600 EZ1600 EZ1600 EZ1600 EZ1600 EZ1600 EZ1600 EZ1600 EZ1600 EZ1600 EZ1600 EZ1600 EZ1600 EZ1600 EZ1600 EZ1600 EZ1600 EZ1600 EZ1600 EZ1600 EZ1600 EZ1601 - Acer EZ1601-01 | Service Guide - Page 131
PW.NAT05.012 PW.NAT05.014 PW.NAT05.015 S1.NAT05.002 S1.NAT05.001 S1.VA606.001 S1.VA706.001 Acer Part no PW.NAS05.015 PW.NAS05.014 PW.NAS05.013 PW.NAS05.012 PW.NAS05.011 PW.NAS05.010 PW.NAS0C.004 PW.NAS05.009 PW.NAS05.008 PW.NAS05.007 PW.NAS05.006 PW.NAS05.005 Model Name EZ1601 EZ1601 EZ1601 EZ1601 - Acer EZ1601-01 | Service Guide - Page 132
Acer Part no PW.NAS0C.002 PW.NAS0C.003 PW.NAS05.002 PW.NAS0C.001 PW.NAS05.004 PW.NAS05.001 PW.NAS05.003 S1.NAS05.003 S1.NAS05.002 S1.NAS05.001 PW.NAT05.025 PW.NAT05.024 PW.NAT05.023 PW.NAT05.022 PW.NAT05.021 PW.NAT05.020 PW.NAT05.019 PW.NAT05.018 PW.NAT05.002 PW.NAT05.017 PW.NAT05.016 PW.NAT05.006 - Acer EZ1601-01 | Service Guide - Page 133
Acer Part no PW.NAT05.003 PW.NAT0C.005 PW.NAT0C.006 PW.NAT0C.001 PW.NAT05.010 PW.NAT05.009 PW.NAT05.001 PW.NAT05.007 PW.NAT05.008 PW.NAT05.013 PW.NAT05.011 PW.NAT05.012 PW.NAT05.014 PW.NAT05.015 S1.NAT05.002 S1.NAT05.001 S1.VA606.001 S1.VA706.001 Description EZ1601 EMEA002 XPHR17e/ATMN270B/SO1GBII6 - Acer EZ1601-01 | Service Guide - Page 134
PW.NAT05.003 PW.NAT0C.005 PW.NAT0C.006 PW.NAT0C.001 PW.NAT05.010 PW.NAT05.009 PW.NAT05.001 PW.NAT05.007 PW.NAT05.008 PW.NAT05.013 PW.NAT05.011 PW.NAT05.012 PW.NAT05.014 PW.NAT05.015 S1.NAT05.002 S1.NAT05.001 S1.VA606.001 S1.VA706.001 Acer Part no PW.NAS05.015 PW.NAS05.014 Chassis eClapton AIO 18 - Acer EZ1601-01 | Service Guide - Page 135
Acer Part no PW.NAS05.013 PW.NAS05.012 PW.NAS05.011 PW.NAS05.010 PW.NAS0C.004 PW.NAS05.009 PW.NAS05.008 PW.NAS05.007 PW.NAS05.006 PW.NAS05.005 PW.NAS0C.002 PW.NAS0C.003 PW.NAS05.002 PW.NAS0C.001 PW.NAS05.004 PW.NAS05.001 PW.NAS05.003 S1.NAS05.003 S1.NAS05.002 S1.NAS05.001 PW.NAT05.025 PW.NAT05.024 - Acer EZ1601-01 | Service Guide - Page 136
Acer Part no PW.NAT0C.006 PW.NAT0C.001 PW.NAT05.010 PW.NAT05.009 PW.NAT05.001 PW.NAT05.007 PW.NAT05.008 PW.NAT05.013 PW.NAT05.011 PW.NAT05.012 PW.NAT05.014 PW.NAT05.015 S1.NAT05.002 S1.NAT05.001 S1.VA606.001 S1.VA706.001 Memory E02 LinuxXWTH E02 XPHR17e LinuxXWFIe 01 XPHSGE02 XPHTWE2 Softload EN/FR - Acer EZ1601-01 | Service Guide - Page 137
Acer Part no PW.NAS05.003 S1.NAS05.003 S1.NAS05.002 S1.NAS05.001 PW.NAT05.025 PW.NAT05.024 PW.NAT05.023 PW.NAT05.022 PW.NAT05.021 PW.NAT05. 1e03 XPHR23e LinuxXWME 2e01 XPHR17e LinuxXWTH E02 LinuxXWTH E02 LinuxXWFIe 01 XPHVNE03 XPHTHE02 XPHTWE2 XPHJPE1 XPHAUE1 XPHAINE03 XPHMYE05 XPHAPHIE 03 EN/ - Acer EZ1601-01 | Service Guide - Page 138
Acer Part no PW.NAT05.014 PW.NAT05.015 S1.NAT05.002 S1.NAT05.001 S1.VA606.001 S1.VA706.001 Keyboard PS2/eCooper PS2/eCooper PS2/eCooper2 PS2/eCooper2 PS2/0810 PS2/0810 Mouse PS2Opt/PB PS2Opt/PB - Acer EZ1601-01 | Service Guide - Page 139
131 Appendix A - Acer EZ1601-01 | Service Guide - Page 140
Refer to the following lists for components, adapter cards, and peripherals which have passed these tests. Regarding configuration, combination and test procedures, please refer to the Aspire one series Compatibility Test Report released by the Acer Mobile System Testing Department. Appendix B 132 - Acer EZ1601-01 | Service Guide - Page 141
18.5 AIO eClapton EZ1601 eClapton AIO black bezel 18.5 AIO eClapton VZ280 vClapton AIO black bezel AIO 4-in-1 CR eClapton AIO 4-in-1 CR eClapton AIO eClapton AIO 18.5 Black eClapton AIO 18.5 White vClapton AIO 18.5 Black eMachines 18.5 AIO eClapton EZ1600 eClapton AIO Black chassis eMachines 18 - Acer EZ1601-01 | Service Guide - Page 142
BRAND Keyboard CHICONY CHICONY Type PS2/eCooper PS2/eCooper2 CHICONY CHICONY CHICONY CHICONY CHICONY CHICONY CHICONY CHICONY CHICONY PS2/eCooper PS2/eCooper2 PS2/eCooper PS2/eCooper2 PS2/eCooper PS2/eCooper2 PS2/eCooper PS2/eCooper2 PS2/eCooper CHICONY PS2/eCooper2 CHICONY CHICONY CHICONY PS2 - Acer EZ1601-01 | Service Guide - Page 143
BRAND CHICONY CHICONY Type PS2/eCooper2 PS2/eCooper CHICONY PS2/eCooper2 CHICONY CHICONY CHICONY CHICONY CHICONY CHICONY CHICONY CHICONY CHICONY CHICONY CHICONY CHICONY CHICONY CHICONY CHICONY CHICONY CHICONY CHICONY CHICONY CHICONY CHICONY PS2/eCooper PS2/eCooper2 PS2/eCooper PS2/eCooper2 PS2/ - Acer EZ1601-01 | Service Guide - Page 144
BRAND CHICONY CHICONY CHICONY CHICONY CHICONY CHICONY CHICONY CHICONY CHICONY CHICONY Type PS2/eCooper2 PS2/eCooper PS2/eCooper2 PS2/eCooper PS2/eCooper2 PS2/eCooper PS2/eCooper2 PS2/eCooper PS2/eCooper PS2/eCooper2 CHICONY CHICONY CHICONY CHICONY CHICONY CHICONY CHICONY CHICONY CHICONY CHICONY - Acer EZ1601-01 | Service Guide - Page 145
BRAND PRIMAX PRIMAX PRIMAX PRIMAX PRIMAX PRIMAX PRIMAX PRIMAX Type PS2/eCooper PS2/eCooper2 PS2/eCooper PS2/eCooper2 PS2/eCooper PS2/eCooper2 PS2/eCooper PS2/eCooper2 PRIMAX PRIMAX PRIMAX PRIMAX PS2/eCooper PS2/eCooper2 PS2/eCooper PS2/eCooper2 PRIMAX PRIMAX PRIMAX PS2/eCooper PS2/eCooper PS2/ - Acer EZ1601-01 | Service Guide - Page 146
BRAND PRIMAX PRIMAX PRIMAX PRIMAX PRIMAX PRIMAX PRIMAX PRIMAX PRIMAX PRIMAX PRIMAX PRIMAX PRIMAX PRIMAX PRIMAX PRIMAX PRIMAX PRIMAX PRIMAX PRIMAX PRIMAX PRIMAX PRIMAX PRIMAX PRIMAX Type PS2/eCooper2 PS2/eCooper PS2/eCooper2 PS2/eCooper PS2/eCooper2 PS2/eCooper PS2/eCooper2 PS2/eCooper PS2/eCooper2 - Acer EZ1601-01 | Service Guide - Page 147
Black Brazilian Portuguese Keyboard PRIMAX KB-0511 PS/2 Standard 107KS Black Brazilian Portuguese white bottom cover CCFL LCD AUO 18.5"W WXGA None Glare M185XW01 V2 0B LF 250nit 5ms 1000:1 250nits HF CCFL LCD AUO 18.5"W WXGA None Glare M185XW01 V2 0C LF 250nit 5ms 1000:1 250nits HF CCFL LCD CMO - Acer EZ1601-01 | Service Guide - Page 148
NANYA SAMSUNG SAMSUNG Modem Pro-Nets Mouse eMachines Logitech Logitech ODD HLDS Type eClapton Q945GSE_1394(N)_Lo go(N) Description MB Kit Q945GSE Intel 945GSE ICH7M RTL8111DL AIO 18.5 no W/O 1394 LF SO1GBII6 SO1GBII6 SO2GBII6 SO1GBII6 SO2GBII6 Memory MICRON SO-DIMM DDRII 667 1GB MT8HTF12864HDY - Acer EZ1601-01 | Service Guide - Page 149
141 Appendix B - Acer EZ1601-01 | Service Guide - Page 150
Acer's Notebook, Desktop and Server models including: • Service guides for all models • User's manuals • Training materials • Bios updates • Software utilities • Spare parts lists • TABs (Technical Announcement Bulletin) For these purposes, we have included an Acrobat File to facilitate the problem - Acer EZ1601-01 | Service Guide - Page 151
Exit 27 Information 18 Main 19 Navigating 17 PC Health 25 Power 24 Save and Exit 27 Security 21 System Security 27 Board Layout Bottom View 110 Top View 109 D Disassembly General Information 34 Disassembly Requirements 34 F FRU (Field Replaceable Unit) List 115 H HDD Module Removing 60 Replacing 75 - Acer EZ1601-01 | Service Guide - Page 152
BIOS 17-27, ??-28 W Windows 2000 Environment Test 132 WLAN Board Removing 62 Replacing 74 144 - Acer EZ1601-01 | Service Guide - Page 153
145 - Acer EZ1601-01 | Service Guide - Page 154
146