Acer FL8620 User Manual
Acer FL8620 Manual
 |
View all Acer FL8620 manuals
Add to My Manuals
Save this manual to your list of manuals |
Acer FL8620 manual content summary:
- Acer FL8620 | User Manual - Page 1
/FL950/ PF-L950UT/LP-620/DL710/ AWU1907/FL8620/LUP1000UT/FL1000/PFL1000UT/LP-630/DL720/ AWU1906/FL8630/LUP1200UT/FL1200/PFL1200UT/LP-640/DL730/ AWU1905 Series User's Guide Copyright © 2020. Acer Incorporated. All Rights Reserved. Acer Projector User's Guide Original Issue: 2/2020 - Acer FL8620 | User Manual - Page 2
without obligation to notify any person of such revisions or changes. Such changes will be incorporated in new editions of this manual or supplementary documents and publications. This company makes no representations or warranties, either expressed or implied, with respect to the contents - Acer FL8620 | User Manual - Page 3
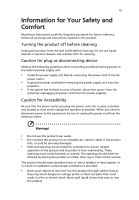
carefully. Keep this document for future reference. Follow all warnings and instructions marked on the product. Turning the product off before cleaning Unplug this product from the wall outlet before cleaning. Do not use liquid cleaners or - Acer FL8620 | User Manual - Page 4
power cord set, make sure that the new power cord is equivalent to the original supplied power cord. Please contact your local dealer or Acer service center for details. - Acer FL8620 | User Manual - Page 5
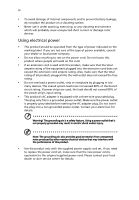
• the product has been dropped or the case has been damaged • the product exhibits a distinct change in performance, indicating a need for service • the product does not operate normally after following the operating instructions Note: Adjust only those controls that are covered by the operating - Acer FL8620 | User Manual - Page 6
vi looking at the lens. • Keep any items (magnifying glass etc.) out of the light path of the projector. The light path being projected from the lens is extensive, therefore any kind of abnormal objects that can redirect light coming out of the lens, can cause an unpredictable outcome such as a - Acer FL8620 | User Manual - Page 7
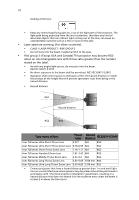
vii • In non-cinema, environments where unrestrained behaviour is reasonably foreseeable, the minimum separation height should be greater than or equal to 3.0 m to prevent potential exposure, for example by an individual sitting on another individual's shoulders, within the hazard distance. For - Acer FL8620 | User Manual - Page 8
Do not increase the volume to block out noisy surroundings. • Decrease the volume if you can't hear people speaking near you. Disposal instructions Do not throw this electronic device into the trash when discarding. To minimize pollution and ensure utmost protection of the global environment, please - Acer FL8620 | User Manual - Page 9
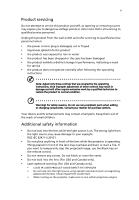
any appliance that generates a strong magnetic field. • Place in direct sunlight. Precautions Follow all warnings, precautions and maintenance as recommended in this user's guide to maximize the life of your unit. Warning: • Do not look into the projector's lens when the projector is on. The bright - Acer FL8620 | User Manual - Page 10
Contents Information for Your Safety and Comfort iii First Thing First ix Usage Notes ix Precautions ix Introduction 1 Product Features 1 Package Overview 2 Projector Overview 3 Projector Outlook 3 Control Panel 5 Remote Control Layout 6 MHL Feature Introduction 8 Getting - Acer FL8620 | User Manual - Page 11
Troubleshooting 35 LED & Alarm Definition Listing 39 Specifications 41 Compatibility Modes 44 Regulations and Safety Notices 49 - Acer FL8620 | User Manual - Page 12
, including the following outstanding features: • DLP® technology • Enables projecting 3D content via DLP Link Technology: Blu-Ray 3D supported • Acer ColorBoost technology delivers vivid, life-like images • High brightness and contrast ratio • Versatile display modes enable optimum performance - Acer FL8620 | User Manual - Page 13
your dealer immediately if any thing is missing. English Projector Power cord VGA cable Security card (optional) Remote control Quick start guide AAA Battery x 2 3G-SDI module (optional) HDBaseT module (optional) Note: Do not install 2 HDBaseT modules or 2 3G-SDI modules simultaneously - Acer FL8620 | User Manual - Page 14
English 3 Projector Overview Projector Outlook Front/upper side 1 3 2 3 # Description 1 Security bar 2 Projection lens (optional) 3 Remote control receiver Side 1 2 34 5 6 4 5 6 # Description 4 Indicator LED 5 Power key 6 Control panel 7 8 9 10 11 1213 14 1516 18 19 20 17 - Acer FL8620 | User Manual - Page 15
English 4 Bottom side 495 mm 1 450 mm 1 2 2 2 2 1 1 # Description 1 Tilt adjusting wheel Dimensions # Description 2 Ceiling mount holes (screw type: M6) [A] mm 552.5 mm 179.5 189.5 mm mm 548 mm Note: [A] differs when different lens is installed. Lens installed Acer FL8 series - Acer FL8620 | User Manual - Page 16
English 5 Control Panel 1 9 2 3 10 4 5 5 5 5 6 11 7 8 12 # Function 1 Power key 2 PATTERN 3 MENU 4 ENTER 5 Four directional selection keys 6 BACK 7 FOCUS Description Refer to the "Turning the Projector On/Off" section. Displays the test pattern. Launches the Onscreen - Acer FL8620 | User Manual - Page 17
English 6 Remote Control Layout 1 2 3 4 5 6 8 7 9 10 11 12 13 14 15 16 137 18 19 20 22 21 23 25 24 26 27 29 28 30 32 33 31 # Function Description 1 ON Refer to the "Turning the Projector On/Off" section. 2 OFF 3 Video To change source to composite video. 4 - Acer FL8620 | User Manual - Page 18
7 English # Function 15 Zoom 16 Focus 17 Picture 18 Pattern 19 Blank 20 Freeze 21 Aspect 22 ECO 23 Set 24 INFO 25 Lens Lock 26 Lens 27 Network 28 HSG 29 Language 30 Security 31 3D 32 Source 33 Keypad 0~9 Description Press "Zoom" and the indicator below lights up. Use to adjust the zoom - Acer FL8620 | User Manual - Page 19
8 English MHL Feature Introduction Press "SOURCE" for one second to enter or leave the MHL control mode. After entering the MHL control mode, press "RESYNC" to switch between the navigation mode (default) and numeric mode. Function SOURCE RESYNC Four directional select keys Keypad 0~9 MENU ENTER - Acer FL8620 | User Manual - Page 20
English 9 Getting Started Installing the Projection Lens 1 Remove the dust cap and upper lens cover. 2 Align the slot on the projection lens with the one on the projector to insert the projection lens. (Illustration #1) 3 Turn the lever counterclockwise until you feel it click into place to lock - Acer FL8620 | User Manual - Page 21
English 10 Connecting the Projector RS232 VGA/DVI/HDMI Wired remote control 3 2 Video/ S-Video Output DVD player, Set-top box, HDTV receiver BNC RCA 9 10 5 4 6 78 or or HDTV adapter 11 12 3D glasses 13 15 14 8 10 Display Smart device 1 # Description 1 Power cord 2 Wired - Acer FL8620 | User Manual - Page 22
English 11 Note: To ensure the projector works well with your computer, please make sure the timing of the display mode is compatible with the projector. Note: Some smart devices require a converter (supplied by the smart device maker) to enable the MHL function. Connecting Multiple Sources through - Acer FL8620 | User Manual - Page 23
English 12 Note: Avoid using the LAN cable when it is coiled or bundled. Note: Inserting or removing the LAN cable during projection may cause noise. Note: Connectivity with all HDBaseT transmitters on the market is not guaranteed. Note: Some HDBaseT transmitters may not enable correct projection - Acer FL8620 | User Manual - Page 24
English 13 Turning the Projector On/Off Turning On the Projector 1 Ensure that the power cord and signal cable are securely connected. The Power LED will light red. 2 Turn on the projector by pressing (POWER) on the control panel or on the remote control, and the Power indicator LED will turn blue. - Acer FL8620 | User Manual - Page 25
English 14 Turning Off the Projector 1 To turn the projector off, press the power button. This message appears: "Please press power button again to complete the shutdown process" Press the power button again. 2 The LED Power indicator will turn solid red to indicate standby mode. 3 It is now safe - Acer FL8620 | User Manual - Page 26
English 15 Adjusting the Projected Image Adjusting the Height of the Projected Image The projector is equipped with two elevator feet for adjusting the image height. To raise the image: 1 Use the front Tilt adjusting wheels to raise the image to the desired height and angle. 2 Use the rear Tilt - Acer FL8620 | User Manual - Page 27
English Optimizing Image Size and Distance Top view Projection distance (D) Screen Screen (W) Side view Projection distance (D) Screen Screen (H) Offset (Hd) Height 16 Width Diagonal 0.1W W [A] 0.1W [A] 0.1W W [A] 0.1W [A] H H Only with the following lenses: Acer FL8 series - Acer FL8620 | User Manual - Page 28
17 English • With Acer FL8 series Standard Zoom Lens Diagonal length (inch) size of 16:10 Screen Screen Size W x H (m) (inch) Width Height Width Height Projection Distance (D) (m) (feet) Wide Tele Wide Tele Offset (Hd) (m) (feet) Min. Max Min. Max 60 1.29 0.81 50.88 31.8 2.08 3.12 6. - Acer FL8620 | User Manual - Page 29
18 English • With Acer FL8 series Short Throw Zoom Lens Diagonal length (inch) size of 16:10 Screen Screen Size W x H (m) (inch) Width Height Width Height Projection Distance (D) (m) (feet) Wide Tele Wide Tele 60 1.29 0.81 50.88 31.8 1.47 2.2 4.82 7.23 70 1.51 0.94 59.36 37.1 1.71 2.57 - Acer FL8620 | User Manual - Page 30
19 English • With Acer FL8 series Ultra Long Throw Zoom Lens Diagonal length (inch) size of 16:10 Screen Screen Size W x H (m) (inch) Width Height Width Height Projection Distance (D) (m) (feet) Wide Tele Wide Tele Offset (Hd) (m) (feet) Min. Max Min. Max 60 1.29 0.81 50.88 31.8 7.13 - Acer FL8620 | User Manual - Page 31
English 20 How to Get a Preferred Image Position by Adjusting Lens Shift The projector is equipped with lens shift for adjusting the position of projected image without requiring you to physically move the projector. To shift the lens, use the control panel or remote control, or select "Display - Acer FL8620 | User Manual - Page 32
English 21 The vertical position [B] 1 image height Note: [B] differs when different lens is installed. Lens installed Acer FL8 series Standard Zoom Lens Acer FL8 series Ultra Short Throw Zoom Acer FL8 series Short Throw Zoom Lens Acer FL8 series Middle Throw Zoom Lens Acer FL8 series Long Throw - Acer FL8620 | User Manual - Page 33
English 22 User Controls Onscreen Display (OSD) Menus The projector has multilingual Onscreen Display (OSD) menus that allow you to make image adjustments and change a variety of settings. Using the OSD menus • To open the OSD menu, press "MENU" on the control panel or remote control. • When the - Acer FL8620 | User Manual - Page 34
23 Image Adjustment English Display Mode Brightness Contrast Saturation Tint Sharpness Gamma There are many factory presets optimized for various types of images. • Bright: For brightness optimization. • Standard: For common environment. • Video: For playing video in a bright environment. • sRGB - Acer FL8620 | User Manual - Page 35
. It will compensate for the color deviation due to the wall color to show the correct image tone. Note: "Saturation" and "Tint" functions are not supported under computer mode. - Acer FL8620 | User Manual - Page 36
the image right. • Press to move the image down. • Press to move the image up. V. Keystone Manually adjusts image distortion caused by tilting projection. Keystone H. Keystone Manually adjusts image distortion caused by tilting projection. Four Corners Use key to select which corner to adjust - Acer FL8620 | User Manual - Page 37
Lens Advanced 26 Lens Settings • Lens Lock: Selecting Yes will lock all the functions provide in this menu and the Lens Centering menu. You will not be able to change lens related settings. • Lens Shift: Press to select Normal Speed or Fine Tune to determine how fast you want the lens to move. - Acer FL8620 | User Manual - Page 38
capture the image that you want to use as the startup screen, follow the instructions below. Before proceeding with the following steps, make sure that the "Keystone" Position", "V. Position", and "Frequency" functions are not supported under video mode. Note: "RGB Input Range" is only available when the - Acer FL8620 | User Manual - Page 39
28 Default Adjustment English Language Menu Display Time Menu Position Projector Installation Auto Source Input Source Power Settings Sets a language for the OSD menus. Use to select your preferred language. Sets the length of time the On Screen Display will remain active after your last key - Acer FL8620 | User Manual - Page 40
Displays the network connection status. DHCP Select On to allow the projector to obtain an IP address automatically from your network. Select "Off" to manually assign IP, Subnet Mask and Gateway configuration. IP Address Set an IP address or display IP address provided from DHCP server when DHCP is - Acer FL8620 | User Manual - Page 41
English 30 Security Settings Reset Password Protection Select "On" to use the security verification when the turning on the projector. Select "Off" to be able to switch on the projector without a password verification. Change Password Sets the password. Lock to User Startup Screen Use this - Acer FL8620 | User Manual - Page 42
31 Note 3: The Info page shows the projector information and status. English - Acer FL8620 | User Manual - Page 43
English Options Laser Mode User High Altitude Mode Status Display 32 Sets the brightness mode. • Normal: Increases the brightness. • Eco.: Dims the projector light source which will lower power consumption and extend the light source life. • User: Memorize user's settings. Use to adjust the - Acer FL8620 | User Manual - Page 44
. • Inlet Temp: Display the temperature of the intake vent. • FW Version: Display the firmware version. Note: Supported 3D signal timings: Signal source type Video/S-Video/Component video VGA/HDMI (PC mode) Supported timing HQFS 3D (480i@60Hz), 576i@50Hz 640 x 480@50/60/100/120Hz 800 x 600@50/60 - Acer FL8620 | User Manual - Page 45
on graphics card 3D application program for correct 3D display. The SW players, such as Stereoscopic Player and DDD TriDef Media Player can support 3D format files. You can download these players on the web page below. - Stereoscopic Player (Trial): http://www.3dtv.at/Downloads/Index_en.aspx - Acer FL8620 | User Manual - Page 46
with your Acer projector, refer to the following troubleshooting guide. If the problem persists, please contact your local reseller or service center. Image Problems and Solutions # Problem Solution 1 No image appears • Make sure all the cables are correctly connected as onscreen described - Acer FL8620 | User Manual - Page 47
PCs may deactivate their own screens when a second display device is in use. Each has a different way to be reactivated. Refer to your computer's manual for detailed information. • If you are using an Apple® Mac® OS based notebook: In System Preferences, open Display and select Video Mirroring "On - Acer FL8620 | User Manual - Page 48
make adjustments. 11 Image is reversed • Select "Default Adjustment" > "Projector Installation" on the OSD and adjust the projection direction. Problems with the Projector # Condition Solution 1 The projector stops responding If possible, turn off the projector, then to all controls unplug - Acer FL8620 | User Manual - Page 49
clogged with dust, please clean it. Laser will automatically turn off soon. Replace the liquid cooler The water from liquid cooler is insufficient. Contact the service center for replacement. - Acer FL8620 | User Manual - Page 50
39 English LED & Alarm Definition Listing LED Messages Message Standby Power up processing Start to move C0 position C0 position ready Power On (Normal) Shutdown processing (Cooling) Firmware Download mode Timer Backup Error(Standby) Laser (1 Bank fail) Laser (2 Banks fail) Laser (3 Banks fail) - Acer FL8620 | User Manual - Page 51
40 English Message Fan 13 Error Fan 14 Error Fan Errors (more than 2 fans) Color Wheel Phosphor Wheel 1 Phosphor Wheel 2 Liquid Pump 1 Liquid Pump 2 Liquid Pump 1&2 Power LED Blue Red -- -- -- -- -- -- -- -- -- -- -- -- V -- V -- V -- Temp LED Red Quick Flashing Quick - Acer FL8620 | User Manual - Page 52
Projection screen size (diagonal) with clear focus Throw ratio Horizontal scan rate DLP™ Native: WUXGA (1920 x 1200) Maximum: WUXGA (1920 x 1200) (supports reduce blanking only) Refer to the "Compatibility Modes" section for more information. NTSC (3.58/4.43), PAL (M/N), PAL 60, SECAM, HDTV (720p - Acer FL8620 | User Manual - Page 53
Vertical/Horizontal), Manual • Ultra short throw zoom lens: +/-25 Degrees (Vertical/Horizontal), Manual Digital zoom N/A 1 • Remote control x 1 • AAA Battery x 2 (for the remote control) • Quick start guide x 1 Accessory (optional) • Security card x 1 • HDBaseT module x 1 • 3G-SDI module - Acer FL8620 | User Manual - Page 54
43 English Spare parts • Acer HDBaseT module for FL8 series (MC.JNM11.005) • Acer 3G-SDI module for FL8 series * Design and specifications are subject to change without notice. - Acer FL8620 | User Manual - Page 55
Compatibility Modes 1 VGA Analog - PC Signal Mode Resolution VGA 640 x 480 SVGA 800 x 600 XGA 1024 x 768 SXGA 1152 x 864 1280 x 1024 QuadVGA SXGA+ UXGA PowerBook G4 1280 x 960 1280 x 960 1400 x 1050 1600 x 1200 640 x 480 640 x 480 800 x 600 1024 x 768 1024 x 768 1152 x 870 V.Frequency [ - Acer FL8620 | User Manual - Page 56
45 English WXGA 1280 x 768 1280 x 768 HD 720 1280 x 768 1280 x 720 WXGA 1280 x 800 1280 x 800 - RB WSXGA+ acer_16:9 1440 x 900 1680 x 1050 1366 x 768 HD 1080 WSVGA WUXGA 1920 x 1080-RB 1920 x 1080-EIA 1024 x 600 1920 x 1200-RB 2 HDMI - PC Signal Mode Resolution VGA_60 VGA_72 VGA_75 - Acer FL8620 | User Manual - Page 57
46 English UXGA_60 1600 x 1200 Mac G4 640 x 480@60Hz MAC13 640 x 480@67Hz Mac G4 800 x 600@60Hz Mac G4 1024 x 768@60Hz MAC19 1024 x 768@75Hz MAC21 1152 x 870@75Hz WXGA_60 WXGA_75 1280 x 768 WXGA_85 WXGA_60 1280 x 720 WXGA_60 1280 x 800 WXGA_120-RB 1280 x 800 WXGA+_60 1440 - Acer FL8620 | User Manual - Page 58
47 English 4 MHL - Video Signal Mode 480i 480p 576i 576p 720p 720p 1080i 1080i 1080p 1080p 1080p Resolution 720 x 480 (1440 x 480) 720 x 480 720 x 576 (1440 x 576) 720 x 576 1280 x 720 1280 x 720 1920 x 1080 1920 x 1080 1920 x 1080 1920 x 1080 1920 x 1080 V.Frequency [Hz] 60 60 50 50 60 50 60 - Acer FL8620 | User Manual - Page 59
48 English 7 3D Timing Input timing 1280 X 720P @ 50Hz Top - and - Bottom HDMI 3D Input (with 3D Info Frame information) 1280 X 720P @ 60Hz 1280 X 720P @ 50Hz 1280 X 720P @ 60Hz 1920 X 1080i @ 50 Hz 1920 X 1080i @ 60 Hz Top - and - Bottom Frame packing Frame packing Side- by-Side (Half) Side - Acer FL8620 | User Manual - Page 60
English 49 Regulations and Safety Notices Declaration of Conformity for EU countries Acer hereby, declares that this projector series is in compliance with the essential requirements and other relevant provisions of Directive 1999/5/EC. Compliant with Russian/Ukraine/Belarus regulatory - Acer FL8620 | User Manual - Page 61
50 English English Acer Incorporated 8F, 88, Sec. 1, Xintai 5th Rd., Xizhi New Taipei City 221, Taiwan EU Declaration of Conformity We, Acer Incorporated 8F, 88, Sec. 1, Xintai 5th Rd., Xizhi, New Taipei City 221, Taiwan And, Acer Italy s.r.l. Viale delle Industrie 1/A, 20020 Arese (MI), Italy
-
 1
1 -
 2
2 -
 3
3 -
 4
4 -
 5
5 -
 6
6 -
 7
7 -
8
-
9
-
10
-
11
-
12
-
13
-
14
-
15
-
16
-
17
-
18
-
19
-
20
-
21
-
22
-
23
-
24
-
25
-
26
-
27
-
28
-
29
-
30
-
31
-
32
-
33
-
34
-
35
-
36
-
37
-
38
-
39
-
40
-
41
-
42
-
43
-
44
-
45
-
46
-
47
-
48
-
49
-
50
-
51
-
52
-
53
-
54
-
55
-
56
-
57
-
58
-
59
-
60
-
61
 |
 |

Acer Projector
FL8610/LU-P950UT/FL950/
PF-L950UT/LP-620/DL710/
AWU1907/FL8620/LU-
P1000UT/FL1000/PF-
L1000UT/LP-630/DL720/
AWU1906/FL8630/LU-
P1200UT/FL1200/PF-
L1200UT/LP-640/DL730/
AWU1905
Series User's Guide
Copyright © 2020. Acer Incorporated.
All Rights Reserved.
Acer Projector User's Guide
Original Issue: 2/2020