Acer ICONIA User Guide
Acer ICONIA Manual
 |
View all Acer ICONIA manuals
Add to My Manuals
Save this manual to your list of manuals |
Acer ICONIA manual content summary:
- Acer ICONIA | User Guide - Page 1
User Guide 1 - Acer ICONIA | User Guide - Page 2
© 2011 All Rights Reserved Acer ICONIA TAB User Guide Model: A500 First issue: 03/2011 Acer ICONIA TAB Model number Serial number Date of purchase Place of purchase 2 - Acer ICONIA | User Guide - Page 3
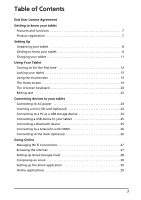
and functions 7 Product registration 7 Setting Up Unpacking your tablet 8 Getting to know your tablet 8 Charging your tablet 11 Using Your Tablet Turning on for the first time 12 Locking your tablet 13 Using the touchscreen 13 The Home screen 14 The onscreen keyboard 20 Editing text 22 - Acer ICONIA | User Guide - Page 4
to a PC 52 Synchronization 52 Setting the date and time 53 Setting alarms 53 Changing language and text options 53 Managing applications 53 Updating your tablet's operating system 54 Resetting your tablet 54 Appendix FAQ and troubleshooting 56 Other sources of help 57 Specifications 58 - Acer ICONIA | User Guide - Page 5
be used; 2. Make one copy of the Software solely for backup or archival purposes; 3. Make one hardcopy of any electronic documents regulations of the United States. SUPPORT SERVICES Acer is not obligated to provide technical or other support for the Software. ACER LIVE UPDATE Certain of the software - Acer ICONIA | User Guide - Page 6
TO USE THE SOFTWARE, THE PROVISION OF OR FAILURE TO PROVIDE SUPPORT SERVICES, OR OTHERWISE UNDER OR IN CONNECTION WITH ANY PROVISION OF THIS AGREEMENT must: 1. Cease all use of the Software; 2. Destroy or return to Acer the original and all copies of the Software; and 3. Delete the Software - Acer ICONIA | User Guide - Page 7
advantages await you! How to register To register your Acer product, please visit mobile.acer.com. Click Product Registration and follow the simple instructions. You can also register directly from your tablet by tapping the Acer Registration icon. After we receive your product registration, you - Acer ICONIA | User Guide - Page 8
damaged, contact your dealer immediately: • Acer ICONIA TAB • Quick Guide • USB cable • AC adapter • Warranty card Getting to know your tablet Front view 2 1 3 No. Item 1 Touchscreen 2 Front-facing camera 3 Light sensor Description 10.1-inch, 1280 x 800 pixel capacitive touchscreen. A 2-megapixel - Acer ICONIA | User Guide - Page 9
HDMI (Type D) Connects to an HDMI cable with a Type D connector connector. 2 3.5 mm headphone jack Connect to stereo headphones. 3 Power button Long press to turn the tablet on, press briefly to turn the screen on/off or enter sleep mode; press and hold to turn the - Acer ICONIA | User Guide - Page 10
and right views 2 3 4 1 No. Item 1 Docking port 2 Volume control key 3 Screen rotation lock switch Description Connect your tablet to the dock accessory. Increase and decrease the tablet volume. Use this switch to lock the screen rotation or allow the screen to match the tablet's orientation. 10 - Acer ICONIA | User Guide - Page 11
Description Insert a micro SD card into the slot under this cover. See "Inserting a micro SD card (optional)" on page 24. Charging your tablet For first-time use, you need to charge your tablet for four hours. After that you can recharge the battery as needed. Connect the DC-in jack to your - Acer ICONIA | User Guide - Page 12
before you can use your tablet. To start, tap to select your language, then tap Start. Follow the rest of the instructions as they are displayed. take advantage of other Google services on your tablet. If you want to restore existing settings from another device with Android 2.0 (or later) installed - Acer ICONIA | User Guide - Page 13
. This saves power and ensures your tablet does not unintentionally use any services. Your tablet will lock automatically if it is not used after a while. To change the delay, tap Apps > Settings > Screen > Timeout. Waking your tablet If the screen is off and the tablet does not react to any taps on - Acer ICONIA | User Guide - Page 14
-installed on your tablet, while others may be downloaded from the Android Market. The Home screen already features some useful one of the suggestions, applications or files shown in the list. Note: In order to search or browse the Internet, you must be connected to a wireless network. See "Going - Acer ICONIA | User Guide - Page 15
Back Tap this icon to go to the previous page, or to go up one level in a menu. This icon may be replaced with the hide icon in certain cases (such as if the keyboard or list of recent applications is shown). Hide Home Tap this icon to go directly to the Home screen. Recent Tap this - Acer ICONIA | User Guide - Page 16
one of your Home screens. While a shortcut is selected, thumbnails of the Home screens are shown below the list of applications, simply drag the shortcut to a screen the bottom-right corner of the screen. This area contains a variety of icons to inform you of your tablet's status. The icons on the - Acer ICONIA | User Guide - Page 17
low Bluetooth is on Battery is partially drained Connected to a Bluetooth device Airplane mode (wireless connectivity disconnected) Battery is full Battery is charging The Home screen 17 - Acer ICONIA | User Guide - Page 18
System update available Virtual private network (VPN) status Description Speaker is silenced Tablet microphone is off GPS is on Receiving location data from GPS More status notifications Syncing data Sync is on Problem with sign-in or sync Uploading data Downloading data Download finished 18 - Acer ICONIA | User Guide - Page 19
it is selected. You may drag the item to any free area on the screen. To move the item to a different home screen, drag it to the side of the screen, the Home screen will switch to the screen in that direction. Release the item when it is positioned correctly. To remove an item from the - Acer ICONIA | User Guide - Page 20
tap and hold an icon until an image of the Home screens appears. Drag the icon to a Home screen to create a shortcut. The onscreen keyboard When you tap depending on the application and information that is required. Changing Android keyboard settings To use a different keyboard language or change - Acer ICONIA | User Guide - Page 21
key, and then Android keyboard settings. Tap Auto correction or Show correction suggestions and select one of the options. Changing the keyboard To use a different keyboard type, tap the Keyboard status icon; this will open a menu listing the text input methods available on your tablet. Tap your - Acer ICONIA | User Guide - Page 22
tablet. Tap the settings icon next to the XT9 Text Input entry. Function Description Languages and settings Set the languages that will be available. If you have selected more than one Note: Certain applications may not support text selection, or only support it in certain areas. Others - Acer ICONIA | User Guide - Page 23
The selected text is highlighted, with a tab at each end of the selection. 2. Drag either tab to expand or reduce the amount of selected text, or tap Select all. 3. To cut or copy the text, tap the Cut or Copy button. Editing text 23 - Acer ICONIA | User Guide - Page 24
removing it from the tablet. Take care when removing the card, the slot is spring-loaded. Connecting to a PC as a USB storage device Download and install the latest USB driver on your computer before connecting your tablet to the computer. Visit www.acer.com/worldwide/support/ download.htm for the - Acer ICONIA | User Guide - Page 25
such as a keyboard or USB storage device, through the Host USB port. Note: Some keys on keyboards are not supported. Accessing files on a USB storage device Note: Your tablet only supports USB storage devices that use the FAT or FAT32 file system. You can access media files (photos, music and video - Acer ICONIA | User Guide - Page 26
Note: Please check for updates to the tablet's software that may add support for additional Bluetooth devices. Visit www.acer.com/support. Connecting to a television with HDMI Connect a micro HDMI (Type D) cable to your tablet then plug the other end of the HDMI cable into a TV or monitor with an - Acer ICONIA | User Guide - Page 27
in the bottom-right corner of the screen. If Wi-Fi is not on, tap Turn on Wi-Fi, and wait for your tablet to detect nearby networks. Tap the of the page. Enter the address using the keyboard and tap Enter or the Go arrow. To view your browsing history, bookmarks or frequently visited sites, open the - Acer ICONIA | User Guide - Page 28
open, press the small tab with a plus sign. Simply tap one of the tabs across the top of the screen to switch pages. New tab Pinch to zoom in Gmail account address and password when you first started your tablet, follow the on screen instructions. Note: You need to activate a Google account before - Acer ICONIA | User Guide - Page 29
and tap Manual setup to enter the parameters manually. Tap Next to finish the setup process. The combined inbox feature of your tablet allows • Acer Sync: Sync your data between your tablet, your computer and the Google servers. • SocialJogger: View updates to your social networks in one location. - Acer ICONIA | User Guide - Page 30
one location, allowing you to quickly follow what your friends are doing across several platforms. From the application menu, tap Acer screen or application menu to open the Android Market. Here you can obtain a variety of add-on programs and applications to enhance the functionality of your tablet. - Acer ICONIA | User Guide - Page 31
for a specific application. Once you have selected an application, tap the DOWNLOAD button to download and install the application. You will be told which services (contact information, wireless access, GPS, etc.) the application requires access in order to function correctly. If none of these - Acer ICONIA | User Guide - Page 32
personalizing your Home screen. See "Personalizing the Home screen" on page 19 the top-right corner of the screen. Alternatively, you can go to Settings from the application menu you can see a list of your contacts connected to Google Talk services. Tap on a contact to open a chat session. After you - Acer ICONIA | User Guide - Page 33
Acer content folders Your tablet includes content folders that allow you to easily organize and access your favorite applications. Choose one of the four categories on the Home screen or application menu: eReading, Games, Multimedia or Social. Tap the shortcut to open a screen of the screen may contain links - Acer ICONIA | User Guide - Page 34
sign in the top right corner and select one or more applications from the list. Tap OK to add shortcuts for the selected applications. You may view up to twenty shortcuts on a single screen. If you add more than twenty shortcuts, swipe the screen up to see additional shortcuts. Moving or removing - Acer ICONIA | User Guide - Page 35
files, the device may not be recognized for a few minutes. Tap clear.fi. Acer clear.fi will automatically detect devices that are connected to a wireless network and display them at the bottom of the screen, with your tablet as the default device on the leftmost corner. Tap any of the connected - Acer ICONIA | User Guide - Page 36
thumbnail, then tap and hold any of the connected device showing an arrow. Select Play or Save. To upload a photo to Facebook, or Flickr via Acer Photo Uploader, or to paired devices using Bluetooth, tap and hold a photo thumbnail, then tap Share. clear.fi videos Tap a folder under Collection to - Acer ICONIA | User Guide - Page 37
Note: The Acer clear.fi video player only plays MP4 files. Please check for updates to the tablet's software which may add support for other types of video. See "Updating your tablet's operating system" on page 54. To send video files, for example, to paired devices using Bluetooth or to YouTube, - Acer ICONIA | User Guide - Page 38
the formats supported by your tablet. See "Multimedia" on page 58. Media server Your tablet can act Share contents before you can start using the service. You may select to share Video, Photo shared. Dolby Mobile To access Dolby Mobile settings go to the application menu and tap Settings > Dolby - Acer ICONIA | User Guide - Page 39
internal memory or your Google account. Tap Contacts from the application menu to view your contacts. If you don't have any contacts stored on your tablet, you can sync with your Google account contacts, import contacts from a contact data file (vCard or csv) or add a new contact. . If you have - Acer ICONIA | User Guide - Page 40
an entry. Tap Add another field for more categories. To assign an image to your contact, tap the silhouette and select an images from your tablet's picture gallery (select Gallery if requested). You may also take and crop a new photo. Tap Done to finish and save the contact. Tip: Set each - Acer ICONIA | User Guide - Page 41
your contact list. Open the Internet browser on your computer and go to mail.google.com. Sign in to your account and click Contacts. Select the list; the next time your tablet synchronizes with your computer, these changes will also be made to your tablet's contact list. Warning: Backup your contacts - Acer ICONIA | User Guide - Page 42
all the steps in taking photos and videos with your tablet. Note: It is recommended that you insert a microSD see you while you can see them on the screen. Normally, the video chat software you are using using the front-facing camera. In the camera window, the controls on the right allow you to - Acer ICONIA | User Guide - Page 43
. Zoom in Crop and enlarge the center of the screen. When using zoom, the image on the screen does not represent the quality of the final image. video recorder). Switches to the camera. Internal memory Saves photos to the tablet's internal memory (this is the default). Memory card Saves photos to - Acer ICONIA | User Guide - Page 44
as needed. Note: When using zoom, the image on the screen does not represent the quality of the final image. 4. Tap you the options described above are set to your preferences. 2. Frame your subject and steady your tablet and zoom in or out as needed. 3. Press the camera button down fully to begin - Acer ICONIA | User Guide - Page 45
certain resolutions. Supported formats Type Gallery by tapping the thumbnail in the bottom-left corner of the screen. Alternatively, open the application menu and tap Gallery, then Camera. Select file directly using various services. Tap Menu and then Share. Note: Share options vary depending on - Acer ICONIA | User Guide - Page 46
purchase, store and read books on your tablet contents of your tablet are shown on the screen as a series screen up or down to display more titles. Note: Connect your tablet to a computer and add books to the lumibooks folder on your tablet As you add books to your tablet, you may find it difficult - Acer ICONIA | User Guide - Page 47
) system is used. LumiRead supports books protected with Adobe ID. In order to read certain books, you must activate your tablet with an Adobe ID. See "Your Adobe ID" on page 48. Opening a book All books stored on your tablet may be seen on the shelves on the main screen. If you have many - Acer ICONIA | User Guide - Page 48
Adobe DRM (Digital Rights Management). Before you can read them, you must enter an Adobe ID to activate your tablet. Only one activation is required, as it covers all purchases. If you already have an Adobe ID, you may use this to activate your tablet. To create an Adobe ID: 1. Open LumiRead. 48 - Acer ICONIA | User Guide - Page 49
ID. Make sure you remember your password. 6. Select Continue. Your Adobe ID is now registered. Entering your Adobe ID To register your tablet, follow these steps: 1. Open LumiRead. 2. Tap the Settings button 3. Select Device activation. 4. Enter the email address and password used to create your - Acer ICONIA | User Guide - Page 50
when pressing soft keys and on certain UI interactions. Screen You can adjust your tablet screen settings by tapping Apps > Settings > Screen. Item Brightness Animation Timeout Description Adjust screen brightness. Enable window animations. Set a delay before the screen will be turned off. 50 - Acer ICONIA | User Guide - Page 51
Sets up and manages Virtual Private Networks. Adjusting Bluetooth settings You can use Bluetooth to exchange information between your tablet and other mobile devices. Bluetooth connections For all Bluetooth settings, tap Apps > Settings > Wireless & networks > Bluetooth settings. Here you - Acer ICONIA | User Guide - Page 52
enter a PIN on both devices to establish the connection. Note: Only A2DP stereo headsets (without microphone) are supported. Please check for updates to the tablet's software which may add support for additional Bluetooth devices. Connecting to a PC If you wish to transfer information between your - Acer ICONIA | User Guide - Page 53
tablet, PC and corresponding Google services. You must install the Acer Sync program on your computer; download and install Acer Sync and Acer PIM for the PC from the mobile.acer Setting the date and time To set the date and time, tap Apps > Settings > Date & time application menu and going to Apps > - Acer ICONIA | User Guide - Page 54
the uninstall. Warning! You should only remove programs if you are familiar with the Android operating system. Updating your tablet's operating system Your tablet can download and install system updates, adding support for new devices or expanding software options. To check for updates, tap Apps - Acer ICONIA | User Guide - Page 55
Open Settings from the application menu, then tap Privacy > Factory data reset; click Reset tablet and then Erase everything to format your tablet. If your tablet still does not respond, refer to "FAQ and troubleshooting" on page 56. Resetting your tablet 55 - Acer ICONIA | User Guide - Page 56
troubleshooting This section lists frequently asked questions that may arise during the use of your tablet that is not supported. Refer to "Multimedia supported. Refer to "Multimedia" on page 58 for more information. How do I check the OS version of my device? Tap Apps > Settings > About tablet - Acer ICONIA | User Guide - Page 57
of use, such as watching a video or playing a game. All Acer tablets are factory tested before release. Other sources of help For information on: Up-to-date information regarding your tablet Service enquiries Refer to: www.acer.com mobile.acer.com www.acer.com/support Other sources of help 57 - Acer ICONIA | User Guide - Page 58
NVIDIA® Tegra™ 250 dual-core Cortex-A9, 1 GHz • Ultra-low power GeForce® GPU • System memory: • 1 GB of RAM • 16 or 32 GB of flash memory • Google Android™ operating system Display • 10.1" WXGA TFT-LCD capacitive multi-touch screen • 1280 x 800 resolution • 262K colors support Multimedia • Micro - Acer ICONIA | User Guide - Page 59
• 5-megapixel rear camera with flash (auto focus) Expansion • microSD memory card slot (up to 32 GB) Battery • Rechargeable high density Li-polymer batteries: 3260 mAh x 2 (24.1 Wh) Note: Length of battery operation will depend on power consumption which is based - Acer ICONIA | User Guide - Page 60
, this device requires a good quality connection to the network. In some cases, transmission of data files or messages may be delayed until such a connection is available. Ensure that the above separation distance instructions are followed until the transmission is completed. Parts of the device are - Acer ICONIA | User Guide - Page 61
your device in health care facilities when any regulations posted in these areas instruct you to do so. Hospitals or health care facilities may be using with some hearing aids. If interference occurs, consult your service provider. Vehicles RF signals may affect improperly installed or inadequately - Acer ICONIA | User Guide - Page 62
for models supporting phone function) call. Consult this guide or your service provider for more . • Is kept at least 30 centimetres (one foot) away from a mobile phone. • screen. • If you spill liquid on your device, switch it off immediately, unplug the AC adapter. Do not attempt to service - Acer ICONIA | User Guide - Page 63
case has been damaged • the product exhibits a distinct change in performance, indicating a need for service Note: Adjust only those controls that are covered by the operating instructions at low (below 0 °C/32 °F) or high (over 40 Acer approved batteries, and recharge your battery only with Acer - Acer ICONIA | User Guide - Page 64
dropping this device or battery. It can cause damage. • Contact your service provider or reseller to have them checked if this device or battery turn-byturn directions, if available. Also, using a mobile device or accessory may be prohibited or restricted in certain areas. Always obey the laws - Acer ICONIA | User Guide - Page 65
instructs you. • Get better performance by going windows, but some windows sun shielding films can block satellite signals. • Get better performance by moving away from radios, entertainment equipment, and other electronic devices. Keep away from children • Keep your device & its accessories screen - Acer ICONIA | User Guide - Page 66
government authorities. Protection of personal information Erase personal data before disposing of the product. To delete data, perform a master reset. Deleting date from the device memory does not ensure that it cannot be recovered. Disposal and recycling information Do not throw this electronic - Acer ICONIA | User Guide - Page 67
Equipment (WEEE) regulations, visit www.acer-group.com/ public/Sustainability/sustainability01.htm of your device packaging & product guide should be in accordance with national have a restricted frequency band. The worst case maximum authorized power indoors is: • 10 mW for the entire 2.4 GHz band ( - Acer ICONIA | User Guide - Page 68
GHz band: • Maximum authorized power indoors is 100 mW • Maximum authorized power outdoors is 10 mW Departments in which the use of the 2400 - 2483.5 MHz band is permitted Ariege 11 Aude 12 Aveyron 16 Charente 24 Dordogne 25 Doubs 26 Drome 32 Gers 36 Indre 37 Indre et Loire 41 Loir et Cher 45 Loret - Acer ICONIA | User Guide - Page 69
and, if not installed and used in accordance with the instructions, may cause harmful interference to radio communications. However, there off and on, the user is encouraged to try to correct the interference by one or more of the following measures: • Reorient or relocate the receiving antenna. - Acer ICONIA | User Guide - Page 70
du mêre type ou d' un type équivalent recommandé par le constructeur. Mettre au rebut les batteries usagées conformément aux instructions du fabricant. ADVARSEL! Eksplosjonsfare ved feilaktig skifte av batteri. Benytt samme batteritype eller en tilsvarende type anbefalt av apparatfabrikanten. Brukte - Acer ICONIA | User Guide - Page 71
contain no metal and that position the handset a minimum of 0 cm from the body. Use of other accessories may not ensure compliance with FCC RF exposure guidelines. If you do not use a body-worn accessory and are not holding the device at the ear, position the handset a minimum of 0 cm from your - Acer ICONIA | User Guide - Page 72
SAR limit is 2.0 W/ kg, averaged over 10 g of body tissue. It meets the requirements of other accessories may not ensure compliance with ICNIRP exposure guidelines. If you do not use a bodyworn accessory and are your device: open Settings > About tablet > Legal information > Certification Logo. - Acer ICONIA | User Guide - Page 73
Acer Incorporated Date: March 2, 2011 Declaration of Conformity We, Acer Incorporated, of 8F., No. 88, Sec. 1, Xintai 5th Rd., Xizhi Dist, New Taipei City, 22181, Taiwan Declare under sole responsibility that the product: Model: A500 Description: Tablet /A1:2007 Class B ; EN 55024:1998/A1:2001 10
-
 1
1 -
 2
2 -
 3
3 -
 4
4 -
 5
5 -
 6
6 -
 7
7 -
8
-
9
-
10
-
11
-
12
-
13
-
14
-
15
-
16
-
17
-
18
-
19
-
20
-
21
-
22
-
23
-
24
-
25
-
26
-
27
-
28
-
29
-
30
-
31
-
32
-
33
-
34
-
35
-
36
-
37
-
38
-
39
-
40
-
41
-
42
-
43
-
44
-
45
-
46
-
47
-
48
-
49
-
50
-
51
-
52
-
53
-
54
-
55
-
56
-
57
-
58
-
59
-
60
-
61
-
62
-
63
-
64
-
65
-
66
-
67
-
68
-
69
-
70
-
71
-
72
-
73
 |
 |

User Guide