Acer P205H Acer P205H LCD Monitor Users Guide
Acer P205H - Bmd Widescreen LCD Display Manual
 |
UPC - 884483536207
View all Acer P205H manuals
Add to My Manuals
Save this manual to your list of manuals |
Acer P205H manual content summary:
- Acer P205H | Acer P205H LCD Monitor Users Guide - Page 1
and comfort 2 Unpacking 5 Attaching/Removing the base 6 Screen position adjustment 6 Connecting the power cord 7 Safety precaution 7 Cleaning your monitor 7 Power saving 8 DDC 8 Connector Pin Assignment 9 Standard Timing Table 11 Installation 12 User controls 13 Troubleshooting 19 - Acer P205H | Acer P205H LCD Monitor Users Guide - Page 2
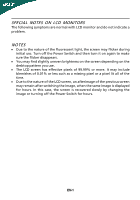
with LCD monitor and do not indicate a problem. NOTES · Due to the nature of the fluorescent light, the screen may flicker during initial use. Turn off the Power Switch and then turn it on again to make sure the flicker disappears. · You may find slightly uneven brightness on the screen depending - Acer P205H | Acer P205H LCD Monitor Users Guide - Page 3
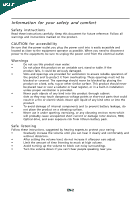
this product on an unstable cart, stand or table. If the product falls, touch dangerous voltage points or short-out parts that could result in a fire or adjust. • Limit the amount of time listening to music at high volume. • Avoid turning up the volume to block out noisy surroundings. • Turn - Acer P205H | Acer P205H LCD Monitor Users Guide - Page 4
distinct change in performance, indicating a need for service • the product does not operate normally after following the operating instructions Note: Adjust only those controls that are covered by the operating instructions, since improper adjustment of other controls may result in damage and - Acer P205H | Acer P205H LCD Monitor Users Guide - Page 5
reach • if you view your monitor more than your documents, place lighting, poorly focused screens, very small adjusting your display to an awkward viewing angle. • Avoid looking at bright light sources, such as open windows acer-group.com/public/Sustainability/sustainability01.htm http://www.acer - Acer P205H | Acer P205H LCD Monitor Users Guide - Page 6
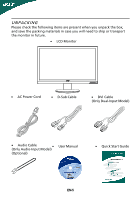
when you unpack the box, and save the packing materials in case you will need to ship or transport the monitor in future. · LCD Monitor · AC Power Cord · D-Sub Cable · DVI Cable (Only Dual-Input Model) · Audio Cable (Only Audio-Input Model) · (Optional) User Manual · Quick Start Guide EN-5 - Acer P205H | Acer P205H LCD Monitor Users Guide - Page 7
cloth to avoid scratching the screen. Install: Align the base with the stand and push the base towards the top of the monitor. Remove: Depress the release hooks as indicated first before removing the base and follow the arrow direction to remove it. SCREEN POSITION ADJUSTMENT In oder to optimize - Acer P205H | Acer P205H LCD Monitor Users Guide - Page 8
placing the monitor against a bright background or where sun- light or other light sources may reflect on the face of the monitor. Place the monitor just below eye level. · Handle with care when transporting the monitor. · Refrain from giving shock or scratch to the screen, as screen is fragile - Acer P205H | Acer P205H LCD Monitor Users Guide - Page 9
system if your system also supports DDC protocol. The DDC (Display Data Channel) is a communication protocol through which the monitor automatically informs the host system about its capabilities, for example, supported resolutions and corresponding timing. The monitor supports DDC2B standard. EN-8 - Acer P205H | Acer P205H LCD Monitor Users Guide - Page 10
CONNECTOR PIN ASSIGNMENT 15-Pin Color Display Signal Cable PIN NO. 1. 2. 3. 4. 5. 6. 7. 8. DESCRIPTION Red Green Blue Monitor Ground DDC-return R-Ground G-Ground B-Ground PIN NO. 9. 10. 11. 12. 13. 14. 15. DESCRIPTION +5V Logic Ground Monitor Ground DDC-Serial Data H-Sync V-Sync DDC-Serial - Acer P205H | Acer P205H LCD Monitor Users Guide - Page 11
Display Signal Cable* PIN Meaning PIN Meaning 1. TMDS Data2- 13. NC 2. TMDS Data2+ 14. +5V Power 3. TMDS Data 2/4 Shield 15. Logic Ground 4. NC 16. Hot Plug Detect 5. NC 17. TMDS Data0- 6. DDC Clock 18. TMDS Data0+ 7. DDC Data 19. TMDS Data 0/5 Shield 8. NC 20. NC - Acer P205H | Acer P205H LCD Monitor Users Guide - Page 12
Standard Timing Table Mode Resolution 1 VGA 640x480 60 Hz 2 VESA 640x480 72 Hz 3 VESA 640x480 75 Hz 4 MAC 640x480 66. 17 SXGA 1280x1024 60 Hz 18 SXGA 1280x1024 75 Hz 19 VESA 1280x720 60 Hz 20 WXGA 1280x800 60 Hz 21 WXGA 1360x768 60 Hz 22 WXGA+ 1600x900 60 Hz 23 WXGA+ 1600x900 75 - Acer P205H | Acer P205H LCD Monitor Users Guide - Page 13
to the monitor, then to a properly grounded AC outlet. 4. Power-ON Monitor and Computer Power-ON the monitor first, then power-ON the computer. This sequence is very important. 5. If the monitor still does not function properly, please refer to the troubleshooting section to diagnose the problem. EN - Acer P205H | Acer P205H LCD Monitor Users Guide - Page 14
activate the OSD menu. Volume Up / Down Press to adjust volume (Only Audio-Input Model)(Optional) INPUT Input Key Use Input key to select from different video sources that may be connected to your monitor. (a) VGA input (b) DVI input (c) HDMI input As you cycle through the sources you will see the - Acer P205H | Acer P205H LCD Monitor Users Guide - Page 15
eColor Management Operation instructions Step 1: Press " " Key to open the Acer eColor Management OSD and access the scenario modes Step 2: Press " " or " " to select the mode Step 3: Press " AUTO " Key to confirm the mode and run Auto Adjust. Features and Benefits Main Menu icon Sub Menu icon - Acer P205H | Acer P205H LCD Monitor Users Guide - Page 16
specifications may vary. The OSD can be used for adjusting the settings of your LCD Monitor. Press the MENU key to open the OSD. You can use the OSD to adjust wish to adjust. 3 Use the / keys to adjust the sliding scales. 4 The Picture menu can be used to adjust the current Brightness, Contrast, - Acer P205H | Acer P205H LCD Monitor Users Guide - Page 17
Adjusting the OSD position 1 Press the MENU key to bring up the OSD. 2 Using the directional keys, select OSD from the on screen display. Then navigate to the feature you wish to adjust. EN-16 - Acer P205H | Acer P205H LCD Monitor Users Guide - Page 18
Adjusting the setting 1 Press the MENU key to bring up the OSD. 2 Using the / keys, select Setting from the OSD. Then navigate to the feature you wish to adjust. 3 The Setting menu can be used to adjust the screen Menu Language and other important settings. EN-17 - Acer P205H | Acer P205H LCD Monitor Users Guide - Page 19
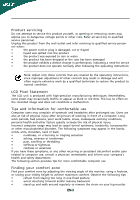
Product information 1 Press the MENU key to bring up the OSD. 2 Using the / keys, select Information from the OSD. Then the basic information of LCD monitor will show up for current input. EN-18 - Acer P205H | Acer P205H LCD Monitor Users Guide - Page 20
Before sending your LCD monitor for servicing, please check the troubleshooting list below to see if you can self-diagnose the problem. (VGA Mode) Problems Current Status Remedy LED ON · Using OSD, adjust brightness and contrast to maximum or reset to their default settings. LED OFF - Acer P205H | Acer P205H LCD Monitor Users Guide - Page 21
Mode) Problems Current Status Remedy LED ON · Using OSD, adjust brightness and contrast to maximum or reset to their default settings. LED OFF · Check the power switch. No Picture · Check if AC power cord is properly connected to the monitor. LED displays amber color · Check if video signal - Acer P205H | Acer P205H LCD Monitor Users Guide - Page 22
by the U.S. Environmental Protection Agency. Acer is committed to offer products and services worldwide that help customers save money, "computer sleep" mode after 15 and 30 minute of inactivity respectively. • Wake the monitor when it is in Active Off mode, move the mouse or press any keyboard key. - Acer P205H | Acer P205H LCD Monitor Users Guide - Page 23
Taiwan Contact Person: Mr. Easy Lai Tel: 886-2-8691-3089 Fax: 886-2-8691-3120 E-mail: [email protected] Hereby declare that: Product Name: 20"W LCD Monitor Brand Name: Acer Main Model Number: P205Hxxxx Series Model Number: P205Hxxxx Is compliant with the essential requirements and other - Acer P205H | Acer P205H LCD Monitor Users Guide - Page 24
www.acer.com Federal Communications Commission Declaration of Conformity This device complies with Part 15 of the FCC Rules. : Main Model Number: Series Model Number: 20"W LCD Monitor P205Hxxxx P205Hxxxx Name of Responsible Party: Acer America Corporation Address of Responsible Party: 333
-
 1
1 -
 2
2 -
 3
3 -
 4
4 -
 5
5 -
 6
6 -
 7
7 -
8
-
9
-
10
-
11
-
12
-
13
-
14
-
15
-
16
-
17
-
18
-
19
-
20
-
21
-
22
-
23
-
24
 |
 |

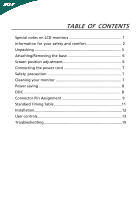
TABLE OF CONTENTS
Special notes on LCD monitors
..................................................
1
Information for your safety and
comfort
..................................
2
Unpacking
...................................................................................
5
Attaching/Removing the base
....................................................
6
Screen position adjustment
........................................................
6
Connecting the power cord
.......................................................
7
Safety precaution
.......................................................................
7
Cleaning your monitor
...............................................................
7
Power saving
...............................................................................
8
DDC
..............................................................................................
8
Connector Pin Assignment
.........................................................
9
Standard Timing Table
..................................................................
11
Installation
.....................................................................................
12
User controls
..................................................................................
13
Troubleshooting
............................................................................
19