Acer PD100 PD100 Quick Start Guide
Acer PD100 Manual
 |
View all Acer PD100 manuals
Add to My Manuals
Save this manual to your list of manuals |
Acer PD100 manual content summary:
- Acer PD100 | PD100 Quick Start Guide - Page 1
tighten the screws. 3. Connect one end of the power cord into the AC power socket on the projector; connect the other end to an electrical outlet. Powering On the Projector Powering On the Projector 1. Remove the lens cap. 2. Turn on the projector first and then the computer. 3. Adjust the position
-
 1
1
 |
 |
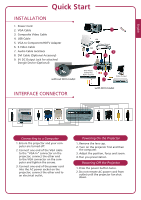
Quick Start
INSTALLATION
Connecting to a Computer
1. Ensure the projector and your com-
puter are turned off.
2. Connect one end of the VGA cable
to the “VGA In” connector on the
projector; connect the other end
to the VGA connector on the com-
puter and tighten the screws.
3. Connect one end of the power cord
into the AC power socket on the
projector; connect the other end to
an electrical outlet.
Powering On the Projector
INTERFACE CONNECTOR
Powering On the Projector
1. Remove the lens cap.
2. Turn on the projector first and then
the computer.
3. Adjust the position, focus and zoom.
4. Run you presentation.
Powering Off the Projector
1. Press the power button twice.
2. Do not remote AC power cord from
outlet until the projector fan shut
down.
English
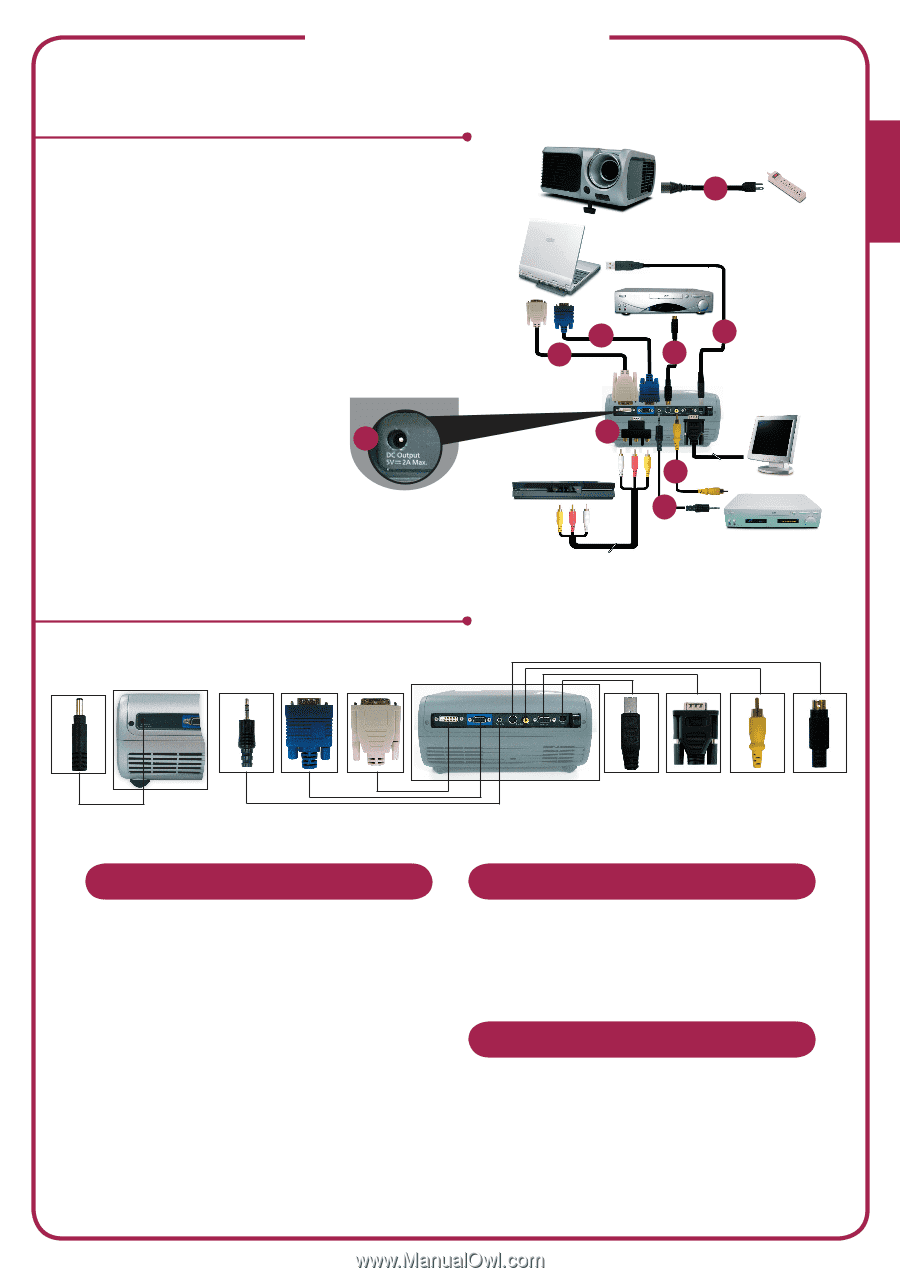
8
4
2
1
3
5
7
6
DVI
RGB
USB
DVD Player,
Settop Box,
HDTV receiver
1. Power Cord
2. VGA Cable
3. Composite Video Cable
4. USB Cable
5. VGA to Component/HDTV Adapter
6. S-Video Cable
7. Audio Cable Jack/Jack
8. DVI Cable (Optional Accessory)
9. 5V DC Output Jack for attached
Dongle Device (Optional)
Video Output
S-Video Output
with DVI model
without DVI model
9