Acer S230HL User Manual
Acer S230HL Manual
 |
View all Acer S230HL manuals
Add to My Manuals
Save this manual to your list of manuals |
Acer S230HL manual content summary:
- Acer S230HL | User Manual - Page 1
Acer LCD Monitor User Guide - Acer S230HL | User Manual - Page 2
. No part of this publication may be reproduced, stored in a retrieval system, or transmitted, in any form or by any means, electronically, mechanically, by photocopy, recording or otherwise, without the prior written permission of Acer Incorporated. Acer LCD Monitor User Guide Model number Serial - Acer S230HL | User Manual - Page 3
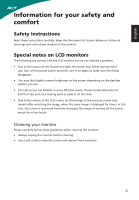
. Follow all warnings and instructions marked on the product. Special notes on LCD monitors The following are normal with the LCD monitor and do not indicate a problem. • Due to the nature of the fluorescent light, the screen may flicker during initial use. Turn off the power switch and then turn it - Acer S230HL | User Manual - Page 4
damage internal devices. • The adapter is only used for this monitor, do not be used for other purposes. • Your device uses one of the following power supplies: Manufacture : Hipro Electronics Co.,Ltd. Model:HP-A0301R3 (S220HQL Model) Manufacture : Delta Electronics Inc., Model: ADP-30MH B (S220HQL - Acer S230HL | User Manual - Page 5
power supply cord set. If you need to replace the power cord set, make sure that the new power cord meets the following requirements: detachable type, UL listed/CSA certified, type SPT-2, rated 7 A 125 V minimum, VDE approved or its equivalent, 4.6 meters (15 feet) maximum length. Product servicing - Acer S230HL | User Manual - Page 6
those controls that are covered by the operating instructions, since improper adjustment of other controls may result in damage and small parts. Keep them out of the reach of small children. IT Equipment Recycling Information Acer is strongly committed to environmental protection and views recycling - Acer S230HL | User Manual - Page 7
for power management: • Activate display's Sleep mode within 15 minutes of user inactivity. • Activate computer's Sleep mode within 30 minutes of user Finding your comfort zone Find your comfort zone by adjusting the viewing angle of the monitor, using a footrest, or raising your sitting height - Acer S230HL | User Manual - Page 8
visor, such as a piece of cardboard extended from the display's top front edge • Avoid adjusting your display to an awkward viewing angle. • Avoid looking at bright light sources, such as open windows, for extended periods of time. Developing good work habits Develop the following work habits - Acer S230HL | User Manual - Page 9
02 9399-2913 www.acer.it Hereby declare that: Product: Trade Name: Model Number: SKU Number: LCD Monitor Acer S220HQL; S230HL S220HQL xxxxxx ; S230HL xxxxxx ("x" = /EC with regard to establishing a framework for the setting of ecodesign requirements for energy-related product. Year to - Acer S230HL | User Manual - Page 10
this declaration: Product: Model Number: SKU Number: Name of Responsible Party: Address of Responsible Party: Contact Person: Phone No.: Fax No.: LCD Monitor S220HQL ; S230HL S220HQL xxxxxx ; S230HL xxxxxx ("x" = 0~9, a ~ z, A ~ Z or Blank) Acer America Corporation 333 - Acer S230HL | User Manual - Page 11
ix Federal Communications Commission Declaration of Conformity x Unpacking 1 Attaching the base (for selected models) 2 Screen position adjustment 3 Connecting the adapter and AC Power cord 3 Power saving 3 Display Data Channel (DDC) 4 Connector pin assignment 4 15-pin color - Acer S230HL | User Manual - Page 12
Setting Menu 12 Information Menu 13 Troubleshooting 14 VGA Mode 14 English DVI/HDMI mode (Optional) 15 - Acer S230HL | User Manual - Page 13
that the following items are present when you unpack the box, and save the packing materials in case you need to ship or transport the monitor in the future. LCD monitor User guide Quick start guide D-sub cable HDMI cable (Optional) AC Power cord DVI cable (Optional) AC Adapter 1 - Acer S230HL | User Manual - Page 14
1 Attach the monitor stand arm to the base. 2 Ensure that the base is locked onto the monitor stand arm. • Secure the base to the monitor stand arm by turning the white screw using the integrated tab or a suitable coin. (for selected models) Note: Take care when performing the installation to avoid - Acer S230HL | User Manual - Page 15
power supply that allows operation in either 100/120 V AC or 220/240 V AC voltage area. No user-adjustment is required. • Plug one end of the AC power cord to the Adapter, and plug the other end into an AC outlet. • For units using 120 V AC: Use a UL-listed cord set, type SVT wire and plug rated - Acer S230HL | User Manual - Page 16
automatically informs the host system about its capabilities; for example, supported resolutions and corresponding timing. The monitor supports the DDC2B standard. Connector pin assignment 15-pin color display signal cable 1 5 6 10 11 15 PIN No. Description 1 Red 2 Green 3 Blue - Acer S230HL | User Manual - Page 17
NC PIN No. Description 13 NC 14 +5 V power 15 GND (return for +5 V hsync.vsync) 16 Hot-plug detection 17 TMDS data 018 TMDS data 0+ 19 TMDS data 0/5 shield 20 NC 21 NC 22 TMDS clock shield 23 TMDS clock+ 24 DDC TMDS clock- 19-pin color display signal cable 19 171513 11 9 7 5 3 1 18161412 - Acer S230HL | User Manual - Page 18
15 WXGA 16 17 WXGA+ 18 WSXGA+ 19 UXGA 20 VESA Resolution 640x480 640x480 640x480 720x400 800x600 800x600 800x600 1024x600 1024x768 1024x768 1152x864 1280x960 1280x1024 1280x720 1280x800 1360x768 1440x900 1680x1050 1600x1200 1920x1080 Refresh Rate 60 Hz 72 Hz 66.7 Hz 70 Hz 56 Hz - Acer S230HL | User Manual - Page 19
cable to the computer. (3) HDMI Cable (Optional, only HDMI-Input Model) a. Make sure both the monitor and computer are powered-OFF. b. Connect the HDMI cable to the computer. 2 Connect the adapter a Connect the AC cord to the adapter. b Connect one end of the adapter to the monitor and the other end - Acer S230HL | User Manual - Page 20
is inactive, press this button for two seconds to activate the Auto Adjustment function and the monitor will automatically optimize the display position, focus, and clock of your display. 5 Empowering Key Press this button to open the Acer eColor Management OSD and access the scenario modes. 8 - Acer S230HL | User Manual - Page 21
to your monitor. (Optional, only Dual-Input Model or HDMI-Input Model) Acer eColor Management Operation instructions 1 Press the Empowering Key to open the Acer eColor Management OSD menu and access the scenario modes. mpowering Technology User ECO Standard Graphics Movie Adjust/Exit 2 Press - Acer S230HL | User Manual - Page 22
Using the OSD Menus Note: The following content is for general reference only. Actual product specifications may vary. Your LCD monitor is equipped with an on-screen display (OSD) menu for making various adjustments and settings. Press the Menu button to open the OSD menu. You can use the OSD menu - Acer S230HL | User Manual - Page 23
menu: Acer ecolor Management, Brightness, Contrast, H. Position, V. Position, Focus, Clock, Colour Temp, and Auto Config. 3 Press the < / > button to scroll through the Picture options, and press the Menu button to enter its sub-menu. 4 Press the < / > button to adjust/select the setting and press - Acer S230HL | User Manual - Page 24
to bring up the OSD menu. 2 Press the < / > button to select OSD menu. OSD and press the Menu button to enter the 3 To adjust the OSD Timeout setting, press the Menu button to enter its sub-menu. 4 Press the < / > button to select the desired time interval and press the Auto button to - Acer S230HL | User Manual - Page 25
> button to select Setting and press the Menu button to enter the Setting menu. The following options are available in the Setting menu: Wide Mode, adjust/select the setting and press the Auto button to confirm. Information Menu The Information menu displays the basic information of the LCD monitor - Acer S230HL | User Manual - Page 26
with non-standard signals. Check the display setting on your system. In case of a missing image, please select another resolution or vertical refresh rate. Wait for a few seconds after adjusting the size of the image before changing or disconnecting the signal cable or switching off the monitor. 14 - Acer S230HL | User Manual - Page 27
English DVI/HDMI mode (Optional) Problem No picture visible LED status Blue Off Remedy Using the OSD menu, adjust brightness and contrast to maximum or reset to their default settings. Check the power switch. Check if the AC power cord is properly connected to the monitor. Blinking Blue Check
-
 1
1 -
 2
2 -
 3
3 -
 4
4 -
 5
5 -
 6
6 -
 7
7 -
8
-
9
-
10
-
11
-
12
-
13
-
14
-
15
-
16
-
17
-
18
-
19
-
20
-
21
-
22
-
23
-
24
-
25
-
26
-
27
 |
 |

Acer LCD Monitor
User Guide