Acer S232HL User Manual
Acer S232HL Manual
 |
View all Acer S232HL manuals
Add to My Manuals
Save this manual to your list of manuals |
Acer S232HL manual content summary:
- Acer S232HL | User Manual - Page 1
and comfort 2 Unpacking 5 Attaching/Removing the base 6 Screen position adjustment 6 Connecting the power cord 7 Safety precaution 7 Cleaning your monitor 7 Power saving 8 DDC 8 Connector Pin Assignment 9 Standard Timing Table 11 Installation 12 User controls 13 Troubleshooting 19 - Acer S232HL | User Manual - Page 2
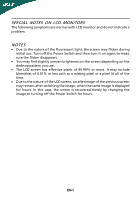
SPECIAL NOTES ON LCD MONITORS The following symptoms are normal with LCD monitor and do not indicate a problem. NOTES · Due to the nature of the fluorescent light, the screen may flicker during initial use. Turn off the Power Switch and then turn it on again to make sure the flicker disappears. · - Acer S232HL | User Manual - Page 3
supplies: Manufacturer: FSP Technology Inc.,Model: FSP040- RAB Manufacturer: Delta Electronics Inc., Model: ADP-40PH BB Manufacturer: Asian Power Devices Inc., Model: DA-40A19 Manufacturer: TpV Electronics ( Fujian)CO.,LTD, Model: ADPC1940, ADPC1940 - Safe listening Follow these instructions - Acer S232HL | User Manual - Page 4
yourself, as opening or removing covers may expose you to dangerous voltage points or other risks. Refer all servicing to qualified service personnel. Unplug this product from the wall outlet and refer servicing to qualified service person- nel when: • the power cord or plug is damaged, cut - Acer S232HL | User Manual - Page 5
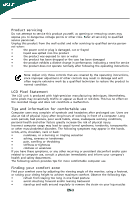
• changing the display's viewing angle • using a glare-reduction filter • using a display visor, such as a piece of cardboard extended from the display's top front edge • Avoid adjusting your display to an awkward viewing angle. • Avoid looking at bright light sources, such as open windows - Acer S232HL | User Manual - Page 6
you unpack the box, and save the packing materials in case you will need to ship or transport the monitor in future. · LCD Monitor · AC Adapter · AC Power Cord · D-Sub Cable (Optional) · DVI Cable (Optional) · User Manual · Quick Start Guide S232HL LCD monitor P/N:MU.LQY00.001 $'0 2010 EN-5 - Acer S232HL | User Manual - Page 7
Attaching the Base Note: Remove the monitor and monitor base from its packaging. Carefully place the monitor face-down on a stable surface -- use a cloth to avoid scratching the screen. 1 Attach the the monitor stand arm to the base. 2 Ensure that the base is locked onto the monitor stand arm. - Acer S232HL | User Manual - Page 8
· This monitor has a universal power supply that allows operation in either 100/120V AC or 220/240 V AC voltage area. No user-adjustment is required. · Plug one end of the power cord to the AC Inlet, plug another end to a proper AC outlet. · For unit using at 120 V AC: Use a UL Listed Cord Set, Type - Acer S232HL | User Manual - Page 9
saving The monitor will be driven into Power Saving" mode by the control signal from the display controller, as indicated by the amber-color power LED. State ON Power Saving Mode LED Light Blue Amber The power saving states will be kept until a control signal has been detected or the keyboard - Acer S232HL | User Manual - Page 10
Blue Monitor Ground DDC-return R-Ground G-Ground B-Ground PIN NO. 9. 10. 11. 12. 13. 14. 15. DESCRIPTION +5V Logic Ground Monitor Ground DDC-Serial Data H-Sync V-Sync DDC-Serial Clock 24-Pin Color 1/3 Shield 23. 12. NC 24. * only for certain models EN-9 Meaning NC +5V Power Logic Ground - Acer S232HL | User Manual - Page 11
19-pin Color Display Signal Cable* 1917151311 9 7 5 3 1 1816141210 8 6 4 2 PIN No. Description 1 TMDS Data2+ 3 TMDS Data2- 5 TMDS Data1 Shield 7 Data1- 8 TMDS Data0 Shield 10 TMDS Clock+ 12 TMDS Clock- 14 Reserved (N.C. on device) 16 SDA 18 +5V Power * only for certain models EN-10 - Acer S232HL | User Manual - Page 12
Standard Timing Table Mode Resolution 1 640x480 60 Hz 2 MAC 640x480 66.66 Hz 3 VESA 720x400 70 Hz 4 SVGA 800x600 56 Hz 5 SVGA 800x600 60 Hz 6 XGA 1024x768 60 Hz 7 XGA 1024x768 70 Hz 8 VESA 1152x864 75 Hz 9 SXGA 1280x1024 60 Hz 10 WXGA 1280x800 60 Hz 11 WXGA+ 1440x900 60 - Acer S232HL | User Manual - Page 13
computer's port. 1-3 HDMI Cable (Only HDMI-Input Model) a. Make sure both the monitor and computer are powered-OFF. b. Connect the HDMI cable to the computer. 2. Connect the adapter a Connect the AC cord to the adapter. b Connect one end of the adapter to the monitor and the other end to a properly - Acer S232HL | User Manual - Page 14
USER CONTROLS Power Switch / Power LED: To turn the monitor ON or OFF. Lights up to indicate the power is turned ON. Using the Shortcut Menu Press the function button to open the shortcut menu. The shortcut menu lets you quickly select the most commonly accessed settings. Empowering: Press the - Acer S232HL | User Manual - Page 15
instructions Step 1: Press " " Key to open the Acer User defined. Settings can be fine-tuned to suit any situation N/A ECO mode Adjusts the settings to reduce power consumption. N/A Standard D efau lt Settin g . R eflects n a tive d isp lay mode capability N/A Grahpic mode Enhances colors - Acer S232HL | User Manual - Page 16
reference only. Actual product specifications may vary. The OSD can be used for adjusting the settings of your LCD Monitor. Press the MENU key to open the OSD. You can use the OSD to adjust the picture quality, OSD position and general settings. For advanced settings, please refer to following - Acer S232HL | User Manual - Page 17
Adjusting the OSD position 1 Press the MENU key to bring up the OSD. 2 Using the directional keys, select OSD from the on screen display. Then navigate to the feature you wish to adjust. EN-16 - Acer S232HL | User Manual - Page 18
Adjusting the setting 1 Press the MENU key to bring up the OSD. 2 Using the / keys, select Setting from the OSD. Then navigate to the feature you wish to adjust. 3 The Setting menu can be used to adjust the screen Menu Language and other important settings. EN-17 - Acer S232HL | User Manual - Page 19
Product information 1 Press the MENU key to bring up the OSD. 2 Using the / keys, select Information from the OSD. Then the basic information of LCD monitor will show up for current input. EN-18 - Acer S232HL | User Manual - Page 20
your LCD monitor for servicing, please check the troubleshooting list below to see if you can self-diagnose the problem. (VGA Mode) Problems Current Status Remedy LED ON · Using OSD, adjust brightness and contrast to maximum or reset to their default settings. LED OFF · Check the power switch - Acer S232HL | User Manual - Page 21
(DVI/HDMI mode) Problems Current Status Remedy LED ON · Using OSD, adjust brightness and contrast to maximum or reset to their default settings. LED OFF · Check the power switch. No Picture · Check if AC power cord is properly connected to the monitor. LED displays amber color · Check if - Acer S232HL | User Manual - Page 22
6928 Manno Switzerland Hereby declare that: Product: Trade Name: Model Number: SKU Number: LCD Monitor Acer S232HL S232HL xxxxxx ("x" = 0~9, a ~ z, or A ~ 2009/125/EC with regard to establishing a framework for the setting of ecodesign requirements for energy-related product. Year to begin - Acer S232HL | User Manual - Page 23
The following local Manufacturer /Importer is responsible for this declaration: Product: LCD Monitor Model Number: S232HL SKU Number: S232HL xxxxxx ("x" = 0~9, a ~ z, A ~ Z or Blank) Name of Responsible Party: Acer America Corporation Address of Responsible Party: 333 West San Carlos St. San
-
 1
1 -
 2
2 -
 3
3 -
 4
4 -
 5
5 -
 6
6 -
 7
7 -
8
-
9
-
10
-
11
-
12
-
13
-
14
-
15
-
16
-
17
-
18
-
19
-
20
-
21
-
22
-
23
 |
 |

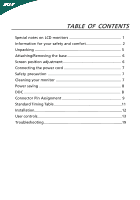
TABLE OF CONTENTS
Special notes on LCD monitors
..................................................
1
Information for your safety and
comfort
..................................
2
Unpacking
...................................................................................
5
Attaching/Removing the base
....................................................
6
Screen position adjustment
........................................................
6
Connecting the power cord
.......................................................
7
Safety precaution
.......................................................................
7
Cleaning your monitor
...............................................................
7
Power saving
...............................................................................
8
DDC
..............................................................................................
8
Connector Pin Assignment
.........................................................
9
Standard Timing Table
..................................................................
11
Installation
.....................................................................................
12
User controls
..................................................................................
13
Troubleshooting
............................................................................
19