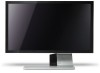
Acer S243HL User Manual
Acer S243HL - Bmii Widescreen Slim WLED Display Manual
 |
UPC - 884483872619
View all Acer S243HL manuals
Add to My Manuals
Save this manual to your list of manuals |
Acer S243HL manual content summary:
- Acer S243HL | User Manual - Page 1
Acer LCD Monitor User Guide - Acer S243HL | User Manual - Page 2
. Acer Incorporated. All Rights Reserved. Acer LCD Monitor User Guide Original Issue: 06/2009 Changes may be made periodically to the information in this publication without obligation to notify any person of such revisions or changes. Such changes will be incorporated in new editions of this manual - Acer S243HL | User Manual - Page 3
carefully. Keep this document for future reference. Follow all warnings and instructions marked on the product. Special notes on LCD monitors The following are normal with the LCD monitor and do not indicate a problem. • Due to the nature of the fluorescent light, the screen may flicker during - Acer S243HL | User Manual - Page 4
power from the equipment, be sure to unplug the power cord from the electrical outlet. Safe listening To protect your hearing, follow these instructions. • Gradually increase the volume until you can hear it clearly and comfortably and without distortion. • After setting the volume level, do not - Acer S243HL | User Manual - Page 5
or its equivalent, 4.6 meters (15 feet) maximum length. Product servicing Do not attempt to service this product yourself, as opening or removing covers may expose you to performance, indicating a need for service • the product does not operate normally after following the operating instructions - Acer S243HL | User Manual - Page 6
at service stations. Acer is strongly committed to environmental protection and views recycling, in the form of salvaging acer-group.com/public/Sustainability/sustainability01.htm Visit www.acer-group.com for further information on the features and benefits of our other products. Disposal instructions - Acer S243HL | User Manual - Page 7
vii LCD pixel statement The LCD unit is produced with high-precision manufacturing techniques. Nevertheless, some pixels may occasionally misfire or appear as black or red dots. This has no effect on the recorded image and does not constitute a malfunction. This product has been shipped enabled for - Acer S243HL | User Manual - Page 8
viii Taking care of your vision Long viewing hours, wearing incorrect glasses or contact lenses, glare, excessive room lighting, poorly focused screens, very small typefaces and low-contrast displays could stress your eyes. The following sections provide suggestions on how to reduce eyestrain. Eyes - Acer S243HL | User Manual - Page 9
SA Via Cantonale, Centro Galleria 2 6928 Manno Switzerland Hereby declare that: Product: LCD Monitor Trade Name: Acer Model Number: S243HL Series Model Type: SKU Number: S243HLxxxx ("x" = 0~9, a ~ z, or A ~ Z) Is compliant with the essential requirements and other relevant provisions - Acer S243HL | User Manual - Page 10
/Importer is responsible for this declaration: Product Name: Main Model Number: Series Model Number: 24"W LCD Monitor S243HLxxxx S243HLxxxx Name of Responsible Party: Acer America Corporation Address of Responsible Party: 333 West San Carlos St. San Jose, CA 95110 U. S. A. Contact Person - Acer S243HL | User Manual - Page 11
iv Product servicing v Additional safety information vi IT Equipment Recycling Information vi Disposal instructions vi LCD 8 Users controls 9 Front panel controls 9 Acer eColor Management 10 Operation instructions 10 Features and benefits 10 Adjusting the OSD settings - Acer S243HL | User Manual - Page 12
Troubleshooting 15 VGA mode 15 HDMI mode 16 - Acer S243HL | User Manual - Page 13
you unpack the box, and save the packing materials in case you need to ship or transport the monitor in the future. LCD monitor User guide Quick start guide D-sub cable HDMI cable (Optional) AC Power cord Audio Cable - Acer S243HL | User Manual - Page 14
English 2 Attaching the base (for selected models) Note: Remove the monitor and monitor base from its packaging. Carefully place the monitor face-down on a stable surface -- use a cloth to avoid scratching the screen. 1 Attach the the monitor stand arm to the base. 2 Ensure that the base is locked - Acer S243HL | User Manual - Page 15
adjusted to 15 degrees up or 5 degrees down. Connecting the adapter and AC Power code • Check first to make sure that the power cord you use is V AC: Use a cord set consisting of H05VV-F cord and plug rated 10 A/250 V. The cord set should have the appropriate safety approvals for the country in - Acer S243HL | User Manual - Page 16
a communication protocol through which the monitor automatically informs the host system about its capabilities; for example, supported resolutions and corresponding timing. The monitor supports the DDC2B standard. Connector pin assignment 15-pin color display signal cable 1 5 6 10 11 15 PIN - Acer S243HL | User Manual - Page 17
5 English 19-pin color display signal cable 1917151311 9 7 5 3 1 1816141210 8 6 4 2 PIN No. Description 1 TMDS Data2+ 3 TMDS Data2- 5 TMDS Data1 Shield 7 TMDS Data0+ 9 TMDS Data0- 11 TMDS Clock Shield 13 CEC 15 SCL 17 DDC/CEC Ground 19 Hot Plug Detect PIN No. Description 2 TMDS - Acer S243HL | User Manual - Page 18
6 Standard timing table English M ode R e so l u t i o n 1 640x480 60 Hz 2 VGA 640x480 72 Hz 3 640x480 75 Hz 4 MAC 640x480 66.7 Hz 5 VESA 720x400 70 Hz 6 800x600 56 Hz 7 800x600 SVGA 60 Hz 8 800x600 72 Hz 9 800x600 75 Hz 10 MAC 832x624 74.55 Hz 11 - Acer S243HL | User Manual - Page 19
the other and to a properloy grounded,AC outlet. 4 Turn on the monitor and computer Turn on the monitor first, then the computer. This sequence is very important. 5 If the monitor does not function properly, please refer to the troubleshooting section to diagnose the problem DC 22 1 Audio 22 - Acer S243HL | User Manual - Page 20
Auto and the monitor will automatically optimize the display position, focus, and clock of your display. Empowering Key Press the Empowering Key to open the Acer eColor Management OSD and access the scenario modes. Please refer to - Acer S243HL | User Manual - Page 21
eColor Management Operation instructions 1 Press the Empowering Key to open the Acer eColor Management OSD and access the scenario modes. 2 Press " " or " " to select the mode. 3 Press the Auto-adjust button to confirm the mode and exit Acer eColor Management. Features and benefits Main menu Sub - Acer S243HL | User Manual - Page 22
English 10 Adjusting the OSD settings Note: The following content is for general reference only. Actual product specifications may vary. The OSD can be used for adjusting the settings of your LCD Monitor. Press the Menu key to open the OSD. You can use the OSD to adjust the picture quality, OSD - Acer S243HL | User Manual - Page 23
11 Adjusting the OSD position English 1 Press the Menu key to bring up the OSD. 2 Using the directional keys, select OSD from the onscreen display. Then navigate to the feature you wish to adjust. - Acer S243HL | User Manual - Page 24
12 Adjusting the setting English 1 Press the Menu key to bring up the OSD. 2 Using the / keys, select feature you wish to adjust. Setting from the OSD. Then navigate to the 3 The Setting menu can be used to adjust the screen Menu Language and other important settings. - Acer S243HL | User Manual - Page 25
13 Product information English 1 Press the Menu key to bring up the OSD. 2 Using the / keys, select Information from the OSD. Then the basic information of LCD monitor will show up for current input. - Acer S243HL | User Manual - Page 26
Before sending your LCD monitor for servicing, please check the troubleshooting list below to see if you can self-diagnose the problem. VGA mode Problem No picture visible LED status Blue Off Remedy Using the OSD, adjust brightness and contrast to maximum or reset to their default - Acer S243HL | User Manual - Page 27
15 English HDMI mode Problem No picture visible LED status Blue Off Remedy Using the OSD, adjust brightness and contrast to maximum or reset to their default settings. Check the power switch. Amber Check if the AC power cord is properly connected to the monitor. Check if the video signal
-
 1
1 -
 2
2 -
 3
3 -
 4
4 -
 5
5 -
 6
6 -
 7
7 -
8
-
9
-
10
-
11
-
12
-
13
-
14
-
15
-
16
-
17
-
18
-
19
-
20
-
21
-
22
-
23
-
24
-
25
-
26
-
27
 |
 |

User Guide
Acer LCD Monitor