Acer TravelMate 7510 User Manual
Acer TravelMate 7510 Manual
 |
View all Acer TravelMate 7510 manuals
Add to My Manuals
Save this manual to your list of manuals |
Acer TravelMate 7510 manual content summary:
- Acer TravelMate 7510 | User Manual - Page 1
TravelMate 7510/7110 Series User's Guide - Acer TravelMate 7510 | User Manual - Page 2
TravelMate 7510/7110 Series User's Guide Original Issue: 06/2007 Changes may be made periodically to the information in this publication without obligation to notify any person of such revisions or changes. Such changes will be incorporated in new editions of this manual to your computer. All - Acer TravelMate 7510 | User Manual - Page 3
instructions Read these instructions carefully. Keep this document for future reference. Follow all warnings and instructions power to the power supplies: Install the power supply before connecting the power cord to the power supply. Unplug the power cord before removing the power supply or covered. - Acer TravelMate 7510 | User Manual - Page 4
the product. • To avoid damage of internal components and to prevent battery leakage, do not place the product on a vibrating surface. • Never product only with the supplied power supply cord set. If you need to replace the power cord set, make sure that the new power cord meets the following - Acer TravelMate 7510 | User Manual - Page 5
service • the product does not operate normally after following the operating instructions Note: Adjust only those controls that are covered by the operating instructions battery may present a risk of fire or explosion. Warning! Batteries may explode if not handled properly. Do not disassemble or - Acer TravelMate 7510 | User Manual - Page 6
when using your laptop under the following conditions. These devices may include, but are not limited to: wireless lan (WLAN), Bluetooth and/or in health care facilities when any regulations posted in these areas instruct you to do so. Hospitals or health care facilities may be your service provider. - Acer TravelMate 7510 | User Manual - Page 7
with a potentially explosive atmosphere and obey all signs and instructions. Potentially explosive atmospheres include areas where you would normally off the device at refueling points such as near gas pumps at service stations. Observe restrictions on the use of radio equipment in fuel depots - Acer TravelMate 7510 | User Manual - Page 8
on the Waste from Electrical and Electronics Equipment (WEEE) regulations, visit http://global.acer.com/about/sustainability.htm Mercury advisory For projectors or electronic products containing an LCD/CRT monitor or display: Lamp(s) inside this product contain mercury and must be recycled - Acer TravelMate 7510 | User Manual - Page 9
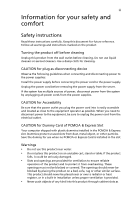
mode within 30 minutes of user inactivity. • Wake the computer from Sleep mode by pushing power button. • More power management settings can be done through Acer ePower Management. Tips and information for comfortable use Computer users may complain of eyestrain and headaches after prolonged use - Acer TravelMate 7510 | User Manual - Page 10
shrugging your shoulders • install the external display, keyboard and mouse properly and within comfortable reach • excessive room lighting, poorly focused screens, very small typefaces and low- display in such a way that the side faces the window or any light source • minimizing room light by using - Acer TravelMate 7510 | User Manual - Page 11
work habits Develop the following work habits to make your computer use more relaxing and productive: • Take short breaks regularly Exercise regularly and maintain a healthy body. Warning! We do not recommend using the computer on a couch or bed. If this is unavoidable, work for only short periods, - Acer TravelMate 7510 | User Manual - Page 12
on the screen to complete the installation. For instructions on how to use Adobe Reader, access the Help and Support menu. Basic care and tips for using your computer Turning your computer on and off To turn on the computer, simply press and release the power button below the LCD screen beside the - Acer TravelMate 7510 | User Manual - Page 13
xiii To turn the power off, do any of the following: • Use the Windows shutdown command Click on Start, Turn Off Computer, then click on Turn Off. • Use the power button You can also shut down the computer by closing the display cover, or by pressing the sleep hotkey + . Note: If you cannot - Acer TravelMate 7510 | User Manual - Page 14
as replacements. Turn the power off before removing or replacing batteries. • Do not tamper with batteries. Keep them away from children. • Dispose of used batteries according to local regulations. Recycle if possible. Cleaning and servicing When cleaning the computer, follow these steps: 1 Turn - Acer TravelMate 7510 | User Manual - Page 15
xii Your guides xii Basic care and tips for using your computer xii Turning your computer on and off xii Taking care of your computer xiii Taking care of your AC adapter xiii Taking care of your battery pack xiv Cleaning and servicing xiv Acer Empowering Technology 1 Empowering - Acer TravelMate 7510 | User Manual - Page 16
service 42 International Travelers Warranty (ITW) 42 Before you call 42 Taking your notebook PC with you 43 Disconnecting from the desktop 43 Moving around 43 Preparing the computer Card slot 51 Installing memory 52 BIOS utility 52 Boot sequence 52 Enable disk-to-disk recovery 53 - Acer TravelMate 7510 | User Manual - Page 17
53 Playing DVD movies 53 Power management 54 Acer eRecovery Management 54 Create backup 55 Restore from backup 55 Create factory default image CD 56 Re-install bundled software without CD 56 Change password 57 Troubleshooting 58 Troubleshooting tips 58 Error messages 58 - Acer TravelMate 7510 | User Manual - Page 18
- Acer TravelMate 7510 | User Manual - Page 19
by optimizing disk space, memory and registry settings. • Acer eRecovery Management backs up and recovers data flexibly, reliably and completely. • Acer eSettings Management accesses system information and adjusts settings easily. • Acer ePower Management extends battery power via versatile - Acer TravelMate 7510 | User Manual - Page 20
by unauthorized persons. It is conveniently integrated with Windows Explorer as a shell extension for quick and easy data encryption/decryption and also supports on-the-fly file encryption for MSN Messenger and Microsoft Outlook. The Acer eDataSecurity Management setup wizard will prompt you for - Acer TravelMate 7510 | User Manual - Page 21
Acer eLock Management is a security utility that allows you to lock your removable data, optical and floppy drives to ensure that data can't be stolen while your notebook is unattended. • Removable data devices - includes USB disk drives, USB pen drives, USB flash drives, USB MP3 drives, USB memory - Acer TravelMate 7510 | User Manual - Page 22
Empowering Technology 4 To activate Acer eLock Management, a password must be set first. Once set, you can apply locks to any of is no method to reset it except by reformatting your notebook or taking your notebook to an Acer Customer Service Center. Be sure to remember or write down your password. - Acer TravelMate 7510 | User Manual - Page 23
. The user can also enable advanced options for full control over the following options: • Memory optimization - releases unused memory and check usage. • Disk optimization - removes unneeded items and files. • Speed optimization - improves the usability and performance of your Windows XP system. - Acer TravelMate 7510 | User Manual - Page 24
Empowering Technology 6 Acer eRecovery Management Acer eRecovery Management is a powerful utility that does away with the need for recovery disks provided by the manufacturer. The Acer eRecovery Management utility occupies space in a hidden partition on your system's hard drive. By default, user- - Acer TravelMate 7510 | User Manual - Page 25
Technology 7 For more information, please refer to "Acer eRecovery Management" on page 54 in the AcerSystem User's Guide. Note: If your computer did not come with a Recovery CD or System CD, please use Acer eRecovery Management's "System backup to optical disk" feature to burn a backup image to CD - Acer TravelMate 7510 | User Manual - Page 26
hardware specifications, change BIOS passwords or other Windows settings, and to monitor the system health status. Acer eSettings Management also: • Provides a simple graphical user interface for navigation. • Displays general system status and advanced monitoring for power users on Acer computer. - Acer TravelMate 7510 | User Manual - Page 27
is "Maximum Performance." You can adjust CPU speed, LCD brightness and other settings, or click on buttons to turn the following functions on/off: Wireless LAN, Bluetooth, CardBus, FireWire(1394), Wired LAN and Optical Device if supported. DC mode (Battery mode) There are four pre-defined profiles - Acer TravelMate 7510 | User Manual - Page 28
10 Battery status For real-time battery life estimates based on current usage, refer to the panel in the upper half of the window. For additional options, click "Settings" to: • Set alarms. • Re-load factory defaults. • Select what actions to be taken when the cover is closed or the power button - Acer TravelMate 7510 | User Manual - Page 29
Empowering Technology 11 - Acer TravelMate 7510 | User Manual - Page 30
Empowering Technology 12 Acer ePresentation Management Acer ePresentation Management lets you project your computer's display to an external device or projector using the hot key: Fn + F5. If auto-detection hardware is implemented in the system and the external display supports it, your system - Acer TravelMate 7510 | User Manual - Page 31
in the Just for Starters... poster, let us show you around your new Acer notebook. Front view # Icon Item 1 Built-in camera 2 Display screen Description 310,000 pixel web camera for video communication. (for selected models) Also called Liquid-Crystal Display (LCD), displays computer output. - Acer TravelMate 7510 | User Manual - Page 32
mouse buttons; the center button serves as a 4-way scroll button. Palmrest Comfortable support area for your hands when you use the computer. Keyboard For entering data into your computer. Power button Turns the computer on and off. Easy-launch buttons Buttons for launching frequently used - Acer TravelMate 7510 | User Manual - Page 33
-out jack with speakers, headphones). S/PDIF support 5 Power indicator Indicates the computer's power status. 6 Battery indicator Indicates the computer's batttery status. 7 Bluetooth Indicates the status of Bluetooth communication communication. indicator 8 Wireless Indicates the - Acer TravelMate 7510 | User Manual - Page 34
from the slot. button 2 PC Card slot Accepts one Type II PC Card. 3 5-in-1 card reader Accepts Secure Digital (SD), MultiMediaCard (MMC), Memory Stick (MS), Memory Stick PRO (MS PRO), xD-Picture Card (xD). 4 Three USB 2.0 Connect to USB 2.0 devices (e.g., USB mouse, ports USB camera - Acer TravelMate 7510 | User Manual - Page 35
/PAL) port with S-video input. 3 External display Connects to a display device (e.g., external (VGA) port monitor, LCD projector). 4 Modem (RJ-11) port Connects to a phone line. 5 Ethernet (RJ-45) Connects to an Ethernet 10/100/1000-based port network. 6 Battery Powers the computer. - Acer TravelMate 7510 | User Manual - Page 36
Memory compartment Houses the computer's main memory. 6 PCI Express Mini Card bay Houses the computer's PCI Express Mini Card. 7 Hard disk bay Houses the computer's hard disk (secured with screws). 8 Battery lock Locks the battery in position. 9 Battery bay Houses the computer's battery pack - Acer TravelMate 7510 | User Manual - Page 37
19 Specifications English Operating system Platform System memory • Genuine Windows® XP Home Edition (Service Pack 2) • Genuine Windows® XP Professional (Service Pack 2) • Genuine Windows® XP Media Center Edition 2005 TravelMate 7510 Series AMD Turion™ 64 X2 Mobile Technology TL-52/TL-56/TL-60 - Acer TravelMate 7510 | User Manual - Page 38
graphics with 128 MB of shared system memory • Dual independent displays supported • 16.7 million colors • MPEG-2/DVD hardware-assisted capability • Acer Arcade™ featuring Acer CinemaVision™ and Acer ClearVision™ technologies • 80/120/160 GB hard disk drive • Optical drive options: • DVD-Super Multi - Acer TravelMate 7510 | User Manual - Page 39
power management standard: supports Standby and Hibernation power-saving modes 71 W 4800 mAh (8-cell) or 44 W 4000 mAh (6-cell) Liion battery pack Acer QuicCharge™ technology: • 80% charge in 1 hour • 2-hour rapid charge system-off • 2.5-hour charge-in-use 3-pin 90 W AC adapter 105-/106-key keyboard - Acer TravelMate 7510 | User Manual - Page 40
support • Microphone-in jack • Line-in jack • Ethernet (RJ-45) port • Modem (RJ-11) port • DC-in jack for AC adapter • Acer Bluetooth® VoIP phone • 512 MB/1GB DDR2 533/667 MHz soDIMM module • 8-cell Li-ion battery pack • 6-cell Li-ion battery pack • 3-pin 90 W AC adapter • External USB floppy disk - Acer TravelMate 7510 | User Manual - Page 41
Humidity (non-condensing): • Operating: 20% to 80% • Non-operating: 20% to 80% • ACPI • DMI 2.0 • Mobile PC 2002 • Wi-Fi® One-year International Travelers Warranty (ITW) Note: The specifications listed above are for reference only. The exact configuration of your PC depends on the model purchased. - Acer TravelMate 7510 | User Manual - Page 42
the hard disk drive is active. Caps Lock Num Lock Lights up when Caps Lock is activated. Lights up when Num Lock is activated. Power Indicates the computer's power status. Battery Indicates the computer's batttery status. Bluetooth Indicates the status of Bluetooth communication. Wireless - Acer TravelMate 7510 | User Manual - Page 43
25 1. Charging: The light shows amber when the battery is charging. 2. Fully charged: The light shows green Key < > and one user-programmable button. Press < > to run the Acer Empowering Technology. Please see "Acer Empowering Technology" on page 1. The mail and Web browser buttons are pre-set to - Acer TravelMate 7510 | User Manual - Page 44
your finger across the surface of the touchpad. The central location on the palmrest provides optimum comfort and support. Touchpad basics The following items show you how to use the touchpad: • Move your finger across mimics your cursor pressing on the right scroll bar of Windows applications. - Acer TravelMate 7510 | User Manual - Page 45
not increase the touchpad's responsiveness. Note: By default, vertical and horizontal scrolling is enabled on your touchpad. It can be disabled under Mouse settings in Windows Control Panel. - Acer TravelMate 7510 | User Manual - Page 46
numeric keypad, separate cursor, lock, Windows, function and special keys. Lock keys and embedded numeric keypad The keyboard has three lock keys which you can assume cursor and other shortcut functions. When Scroll Lock is on, the screen moves one line up or down when you press the up or down - Acer TravelMate 7510 | User Manual - Page 47
all windows action. Application This key has the same effect as clicking the right mouse key button; it opens the application's context menu. Hotkeys The computer employs hotkeys or key combinations to access most of the computer's controls like screen brightness, volume output and the BIOS - Acer TravelMate 7510 | User Manual - Page 48
Display toggle Screen blank Touchpad toggle Speaker toggle Volume up Launches Acer eSettings in Acer Empowering Technology. See "Acer Empowering Technology" on page 1. Launches Acer ePower Management in Acer Empowering Technology. See "Acer Empowering Technology" on page 1. Puts the computer in - Acer TravelMate 7510 | User Manual - Page 49
Open a text editor or word processor. 2 Either press < > at the bottom-right of the keyboard, or hold and then press the key at the upper-center of the keyboard. Note: Some fonts and software do not support the Euro symbol. Please refer to www.microsoft.com/typography/faq/faq12.htm for - Acer TravelMate 7510 | User Manual - Page 50
clip to the emergency eject hole to eject the optical drive tray when the computer is off. Using a computer security lock The notebook comes with a Kensington-compatible security slot for a security lock. Wrap the computer security lock cable around an immovable object such as a table or handle of - Acer TravelMate 7510 | User Manual - Page 51
English 33 Audio The computer comes with 32-bit High-Definition audio, and built-in stereo speakers. Adjusting the volume Use hotkeys to easily adjust the volume on your computer. See "Hotkeys" on page 29 for more information on adjusting the speaker volume. - Acer TravelMate 7510 | User Manual - Page 52
or at the back of the LCD panel. The Acer OrbiCam fully supports the Acer Video Conference technology so you transmit the best video conference quality over an Instant Messenger service. Getting to know your Acer OrbiCam 1 23 # Item 1 Lens 2 Power indicator 3 Rubber grip (selected models - Acer TravelMate 7510 | User Manual - Page 53
Start > All Programs > Acer > Acer OrbiCam. The Acer OrbiCam capture window appears. Using the Acer OrbiCam as webcam The Acer OrbiCam is automatically selected as the capture device of any Instant Messenger (IM) application. To use the Acer OrbiCam as a webcam, open the IM service, then select the - Acer TravelMate 7510 | User Manual - Page 54
utilities Note: The system utilities work under Microsoft Windows XP only. Acer GridVista (dual-display compatible) Note: This settings so you can view multiple windows on the same screen. To access this function, please go to Start, All Programs and click on Acer GridVista. You may choose any one - Acer TravelMate 7510 | User Manual - Page 55
up: 1 Run Acer GridVista and select your preferred screen configuration for each display from the taskbar. 2 Drag and drop each window into the appropriate Manager allows you to set the four easy-launch buttons located above the keyboard. "Easy-launch buttons" on page 25 for the location of the - Acer TravelMate 7510 | User Manual - Page 56
main window, click Scans. 3 In the Scans panel, click Run Full System Scan. 4 When the scan is complete, a scan summary appears. Click Finished. You can schedule customized virus scans that run unattended on specific dates and times or at periodic intervals. If you are using the computer when - Acer TravelMate 7510 | User Manual - Page 57
each one. I turned on the power, but the computer does not start or boot up. Look at the power indicator: • If it is not lit, no power is being supplied to the computer. Check the following: • If you are using on the battery, it may be low and unable to power the computer. Connect the AC adapter to - Acer TravelMate 7510 | User Manual - Page 58
keyboard to a USB port on the computer. If it works, contact your dealer or an authorized service center as the internal keyboard cable may be loose. The printer does not work. Check the following: • Make sure that the printer is connected to a power up your location. Refer to the Windows manual. - Acer TravelMate 7510 | User Manual - Page 59
start the recovery process: 1 Restart the system. 2 While the Acer logo is showing, press + at the same time to enter the recovery process. 3 Refer to the onscreen instructions to perform system recovery. Important! This feature occupies 4 to 5 GB in a hidden partition on your hard disk. - Acer TravelMate 7510 | User Manual - Page 60
you call Acer for online service, and please be at your computer when you call. With your support, we can reduce the amount of time a call takes and help solve your problems efficiently. If there are error messages or beeps reported by your computer, write them down as they appear on the screen (or - Acer TravelMate 7510 | User Manual - Page 61
display; then press and release the power button. If you are taking the computer to a client's office or a different building, you may choose to shut down the computer: Click on Start, Turn Off Computer, then click on Turn Off (Windows XP). Or: You can put the computer in Sleep mode by pressing - Acer TravelMate 7510 | User Manual - Page 62
than your computer. If your meeting will be longer, or if your battery is cover of the computer. Pressure against the top cover can damage the screen. What to take with you Unless you have some items at home, take the following items with you: • AC adapter and power cord • The printed User's Guide - Acer TravelMate 7510 | User Manual - Page 63
keyboard, monitor or mouse. Traveling with the computer When you are moving within a larger distance, for instance, from your office building to a client's office building or traveling locally. Preparing the computer Prepare the computer as if you were taking it home. Make sure that the battery - Acer TravelMate 7510 | User Manual - Page 64
Prepare the computer as you would normally prepare it for traveling. What to bring with you Bring the following items with you: • AC adapter • Power cords that are appropriate for the country to which you are traveling • Spare, fully-charged battery packs • Additional printer driver files if - Acer TravelMate 7510 | User Manual - Page 65
set, you must enter this password to gain access to the BIOS utility. See "BIOS utility" on page 52. • User Password secures your computer against unauthorized use. Combine the use of this password with password checkpoints on boot-up and resume from Hibernation for maximum security. • Password on - Acer TravelMate 7510 | User Manual - Page 66
screen. • When the Supervisor Password is set, a prompt appears when you press to enter the BIOS utility at boot-up. • Type the Supervisor Password and press to access the BIOS and hold the power button for four seconds to shut down the computer. Then turn on the computer again, and try - Acer TravelMate 7510 | User Manual - Page 67
options Ports allow you to connect peripheral devices to your computer as you would with a desktop PC. For instructions on how to connect different external devices to the computer, read the following section. Fax/data modem Your computer has a built-in V.92 56 Kbps fax/data modem. Warning - Acer TravelMate 7510 | User Manual - Page 68
an Ethernet-based network. To use the network feature, connect an Ethernet cable from the Ethernet (RJ-45) port on the chassis of the computer to a network jack or hub on your network. Universal Serial Bus (USB) The USB 2.0 port is a high-speed serial bus which allows you to connect - Acer TravelMate 7510 | User Manual - Page 69
them. PC Cards (formerly PCMCIA) are add-on cards for portable computers, giving you expansion possibilities long afforded by desktop PCs. Popular PC technology by expanding the bandwidth to 32 bits. Note: Refer to your card's manual for details on how to install and use the card, and its functions. - Acer TravelMate 7510 | User Manual - Page 70
the memory cover and secure it with the screw. 5 Reinstall the battery pack, and reconnect the AC adapter. 6 Turn on the computer. The computer automatically detects and reconfigures the total memory size. Please consult a qualified technician or contact your local Acer dealer. BIOS utility The BIOS - Acer TravelMate 7510 | User Manual - Page 71
enable disk-to-disk recovery (hard disk recovery), activate the BIOS utility, then select Main from the categories listed at the top of the screen. Find D2D Recovery at the bottom of the screen and use the and keys to set this value to Enabled. Password To set a password on boot, activate - Acer TravelMate 7510 | User Manual - Page 72
energy. This computer employs a power management scheme that supports the advanced configuration and power interface (ACPI), which allows for maximum power conservation and maximum performance at the same time. Windows handles all power-saving chores for your computer. Acer eRecovery Management - Acer TravelMate 7510 | User Manual - Page 73
click Next. Follow the instructions on screen to complete the process. Restore from backup You can restore backups previously created (as stated in the Create backup section) from hard disk, CD or DVD. 1 Boot to Windows XP. 2 Press + to open the Acer eRecovery Management utility. 3 Enter - Acer TravelMate 7510 | User Manual - Page 74
internally for easy driver and application re-installation. 1 Boot to Windows XP. 2 Press + to open the Acer eRecovery Management utility. 3 Enter the password to proceed. The default password is six zeros. 4 In the Acer eRecovery Management window, select Recovery actions and click - Acer TravelMate 7510 | User Manual - Page 75
Next. 5 In the Recovery settings window, select Password: Change Acer eRecovery Management password and click Next. 6 Follow the instructions on screen to complete the process. Note: If the system crashes, and will not boot to Windows, you can run Acer disk-to-disk recovery to restore the factory - Acer TravelMate 7510 | User Manual - Page 76
Read it before calling a technician if a problem occurs. Solutions to more serious problems require opening up the computer. Do not attempt to open the computer yourself; contact your dealer or authorized service center for assistance. Troubleshooting tips This notebook PC incorporates an advanced - Acer TravelMate 7510 | User Manual - Page 77
59 If you still encounter problems after going through the corrective measures, please contact your dealer or an authorized service center for assistance. Some problems may be solved using the BIOS utility. English English - Acer TravelMate 7510 | User Manual - Page 78
energy and, if not installed and used in accordance with the instructions, may cause harmful interference to radio communications. However, there is which is granted by the Federal Communications Commission, to operate this computer. Operation conditions This device complies with Part 15 of the FCC - Acer TravelMate 7510 | User Manual - Page 79
NMB-003 du Canada. Declaration of Conformity for EU countries Hereby, Acer, declares that this notebook PC series is in compliance with the essential harm to the telephone network, the telephone company may discontinue your service temporarily. If possible, they will notify you in advance. But, - Acer TravelMate 7510 | User Manual - Page 80
advance to give you an opportunity to maintain uninterrupted telephone service. If this equipment should fail to operate properly, disconnect the equipment from the phone line to determine if it is causing the problem. If the problem is with the equipment, discontinue use and contact your dealer or - Acer TravelMate 7510 | User Manual - Page 81
Telecom's Specifications: a There shall be no more than 10 call attempts to the same number within any 30 minute period for any single manual call cause a false answer condition. Should such problems occur, the user should NOT contact the telecom Fault Service. 8 This equipment may not provide for - Acer TravelMate 7510 | User Manual - Page 82
statement The CD or DVD drive used with this computer is a laser product. The CD or DVD drive STRÅLEN LCD pixel statement The LCD unit is produced with high-precision manufacturing techniques. Nevertheless, some pixels may occasionally misfire or appear as black or red or disassembly is prohibited. - Acer TravelMate 7510 | User Manual - Page 83
contain wireless radio devices (such as wireless LAN and/or Bluetooth modules). Below information is for products with such devices. European V1.2.1:2002 • EN301 489-3 V1.4.1:2002 (Applied to models with 27MHz wireless mouse/keyboard) • EN301 489-7 V1.2.1:2002 (Applied to models with 3G function) • - Acer TravelMate 7510 | User Manual - Page 84
English 66 wireless mouse/keyboard) • EN301 511 V9.0.2:2003 (Applied to models with 3G function) • EN301 908-1 V2.2.1:2003 (Applied to models with 3G function). • EN301 908-2 V2.2.1:2003 (Applied to models with 3G function). - Acer TravelMate 7510 | User Manual - Page 85
Card built in to the screen section and all persons. Note: The Acer wireless Mini PCI adapter implements a transmission diversity function. The function does not emit radio frequencies simultaneously from both antennas. One of the antennas is selected automatically or manually (by users) to ensure - Acer TravelMate 7510 | User Manual - Page 86
reduce the potential for harmful interference to co-channel Mobile Satellite systems. 3 High power radar are allocated as primary users of the 5.25 to 5.35 GHz and in 2.4 GHz band To prevent radio interference to the licensed service, this device is intended to be operated indoors and installation - Acer TravelMate 7510 | User Manual - Page 87
for this declaration: Product name: Notebook PC Model number: MS2195 Machine type: TravelMate 7510/7110 SKU number: TravelMate 751xxx /711xxx ("x" = 0 - 9, a - z, or A - Z) Name of responsible party: Acer America Corporation Address of responsible party: 333 West San Carlos St. San Jose - Acer TravelMate 7510 | User Manual - Page 88
: 886-2-8691-3089 Fax: 886-2-8691-3000 E-mail: [email protected] Hereby declare that: Product: Personal Computer Trade Name: Acer Model Number: MS2195 Machine Type: TravelMate 7510/7110 SKU Number: TravelMate 751xxx /711xxx("x" = 0~9, a ~ z, or A ~ Z) Is compliant with the essential requirements - Acer TravelMate 7510 | User Manual - Page 89
LCD panel ergonomic specifications English English Design viewing distance Design inclination angle Design azimuth angle Viewing direction range class Screen tilt angle Design screen illuminance Reflection class of LCD Ordinary LCD: Class I • Protective or Acer CrystalBrite™ LCD: Class III Both • - Acer TravelMate 7510 | User Manual - Page 90
for xiv BIOS utility 52 brightness hotkeys 30 C caps lock 28 on indicator 24 care AC adapter xiii battery pack xiv computer xiii CD-ROM ejecting manually 40 troubleshooting 40 cleaning computer xiv computer caring for xiii cleaning xiv disconnecting 43 features 13, 36 indicators 24 keyboards 28 - Acer TravelMate 7510 | User Manual - Page 91
40 problems 39 CD-ROM 40 display 39 keyboard 40 printer 40 startup 39 troubleshooting 58 Q questions setting location for modem use 40 S safety CD or DVD 64 modem notices 61 scroll lock 28 security keylock 32, 47 passwords 47 speakers hotkey 30 troubleshooting 40 support information 42
-
 1
1 -
 2
2 -
 3
3 -
 4
4 -
 5
5 -
 6
6 -
 7
7 -
8
-
9
-
10
-
11
-
12
-
13
-
14
-
15
-
16
-
17
-
18
-
19
-
20
-
21
-
22
-
23
-
24
-
25
-
26
-
27
-
28
-
29
-
30
-
31
-
32
-
33
-
34
-
35
-
36
-
37
-
38
-
39
-
40
-
41
-
42
-
43
-
44
-
45
-
46
-
47
-
48
-
49
-
50
-
51
-
52
-
53
-
54
-
55
-
56
-
57
-
58
-
59
-
60
-
61
-
62
-
63
-
64
-
65
-
66
-
67
-
68
-
69
-
70
-
71
-
72
-
73
-
74
-
75
-
76
-
77
-
78
-
79
-
80
-
81
-
82
-
83
-
84
-
85
-
86
-
87
-
88
-
89
-
90
-
91
 |
 |

TravelMate 7510/7110 Series
User's Guide