Acer U5320W User Manual
Acer U5320W Manual
 |
View all Acer U5320W manuals
Add to My Manuals
Save this manual to your list of manuals |
Acer U5320W manual content summary:
- Acer U5320W | User Manual - Page 1
Acer Projector U5220/R215/PU-X15/U5320W/R225/ PU-W15/U5520B/R245E/PU-815K/ U5520i/R245R/PU-815F Series User's Guide - Acer U5320W | User Manual - Page 2
Rights Reserved. Acer Projector User's Guide Issue date: 01/2015 Changes may be made periodically to the information in this publication without obligation to notify any person of such revisions or changes. Such changes will be incorporated in new editions of this manual or supplementary documents - Acer U5320W | User Manual - Page 3
document for future reference. Follow all warnings and instructions marked on the product. Turning the product off power outlet. • Unplug the power cord before removing the power supply unit from the projector. • If the system has multiple sources of power, disconnect power from the system by - Acer U5320W | User Manual - Page 4
iv • To avoid damage of internal components and to prevent battery leakage, do not place the product on a vibrating surface. • Never use it under sporting, exercising, or any vibrating environment which will probably cause unexpected short current or damage rotor devices or lamp. Using electrical - Acer U5320W | User Manual - Page 5
, indicating a need for service • the product does not operate normally after following the operating instructions Note: Adjust only those least 50cm clearance from walls and free flow of air around the projector are necessary. • Locations where temperatures may become excessively high, such - Acer U5320W | User Manual - Page 6
and follow all changing instructions. • Reset the "Lamp Hour Reset" function from the Onscreen Display "Management" menu after replacing the lamp module. • Do not attempt to disassemble this projector. There are dangerous high voltages inside which may hurt you. The only user serviceable part is the - Acer U5320W | User Manual - Page 7
the volume if you can't hear people speaking near you. Disposal instructions Do not throw this electronic device into the trash when discarding. To ) regulations, visit http://www.acer-group.com/public/ Sustainability/index.htm Mercury advisory For projectors or electronic products containing an - Acer U5320W | User Manual - Page 8
as recommended in this user's guide to maximize the life of your unit. Warning: • Do not look into the projector's lens when the lamp is on shock. • When changing the lamp, please allow the projector to cool down, and follow all changing instructions. • This product will detect the life of the - Acer U5320W | User Manual - Page 9
7 Getting Started 8 Connecting the Projector 8 Turning the Projector On/Off 12 Turning On the Projector 12 Turning Off the Projector 13 Adjusting the Projected Image 14 How 22 Image 24 Setting 27 Management 34 Audio 34 3D 35 Language 36 Appendices 37 Troubleshooting 37 - Acer U5320W | User Manual - Page 10
LED & Alarm Definition Listing 41 Using the Inner Connector(s) 41 Replacing the Lamp 42 Wall Mount Installation 44 Specifications 45 Compatibility Modes 48 Regulations and safety notices 52 - Acer U5320W | User Manual - Page 11
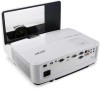
Product Features This product is a single-chip DLP® projector, including the following outstanding features: THIS PROJECTOR CAN ONLY BE WALL MOUNTED. • DLP® technology U5220/R215/PU-X15: Native 1024 x 768 XGA resolution, Auto/4:3/16:9 aspect ratio supported U5320W/R225/PU-W15: Native 1280 x 800 WXGA - Acer U5320W | User Manual - Page 12
(CD-ROM) Remote control Quick start guide Battery x 2 Dust filter (Optional) SmartPen & PB dongle (Optional) USB WiFi adapter (Optional) Acer Projector Multi-media (CD-ROM) (Optional) Acer Projector Multi-media quick start guide (Optional) WirelessHD dongle kit (Optional) Wall mount kit - Acer U5320W | User Manual - Page 13
English Projector Overview Projector Outlook Front/upper side 2 3 4 5 1 6 3 7 8 9 10 # Description # 8 9 10 11 1 3 4 5 6 7 8 9 10 11 12 14 15 (U5220/R215/PU-X15/U5320W/R225/PU- W15) U552102B/R24153E/PU-815K/U5520i/R2144515R/ PU-815F # Description # Description 1 LAN (RJ45 port - Acer U5320W | User Manual - Page 14
LED 3 Keystone 4 Power key 5 MENU 6 BACK Stop 7 TEMP 8 SOURCE 9 Four directional selection keys 10 PLAY/Pause Description Lamp Indicator LED. Refer to the "Turning the Projector On/Off" section. Adjusts image distortion caused by tilting projection (±15 degrees). Refer to the "Turning the - Acer U5320W | User Manual - Page 15
YCbCr (480i/576i). To change source to Component video. This connector supports YPbPr/YCbCr. To change source to S-Video. To change source to HDMI™ (or DVI). (for the model with HDMI™ or DVI connector) Sends signals to the projector. To pause the screen image. Chooses RGB, component video, S-Video - Acer U5320W | User Manual - Page 16
MENU 16 PgUp/PgDn 17 VIDEO 18 RATIO 19 WIRELESS; LAN/WiFi 20 Rewind Play/Pause Stop Fast-forward 21 SD/USB A 22 USB B 23 3D Description Launches the Onscreen Display (OSD) menu, returns to the previous step for the OSD menu operation or exits the OSD menu. For computer mode - Acer U5320W | User Manual - Page 17
7 English MHL Feature Introduction When your smartphone is connected to the projector, you can use some buttons on the remote control to control your smartphone. Press "MODE" for one second to enter or leave the MHL control - Acer U5320W | User Manual - Page 18
English 8 Getting Started Connecting the Projector • For models without multi-media function VGA Display 11 Smartphone RS232 /tablet Video/S-Video DVD player, Output Set-top box, HDTV receiver LR RB G 9 11 - Acer U5320W | User Manual - Page 19
works well with your computer, please make sure the timing of the display mode is compatible with the projector. Note: Some smart devices require a converter (supplied by the smart device maker) to enable the MHL function. Note: Compatible HDMI/MHL dongles: WirelessHD, MWA3, Android, - Acer U5320W | User Manual - Page 20
English 10 • For models with multi-media function VGA Display 11 Smartphone RS232 /tablet Video/S-Video DVD player, Output Set-top box, HDTV receiver LR RB G 9 11 RB G 3 13 D-Sub HDTV adapter LR Microphone Speakers 13 14 12 # Description # Description 1 Power cord 9 3 RCA - Acer U5320W | User Manual - Page 21
works well with your computer, please make sure the timing of the display mode is compatible with the projector. Note: Some smart devices require a converter (supplied by the smart device maker) to enable the MHL function. Note: Compatible HDMI/MHL dongles: WirelessHD, MWA3, Android, - Acer U5320W | User Manual - Page 22
panel or remote control, and the Power indicator LED will turn blue. 3 Turn on your source (computer, notebook, video player, etc.). The projector will detect your source automatically (when the Source Lock function is disabled). • If the screen displays "No Signal", please make sure the signal - Acer U5320W | User Manual - Page 23
that the fan has failed. The lamp will automatically turn off, the projector will automatically shut down, and the LED Temp indicator will blink. Contact your local dealer or service center. Note: Whenever the projector automatically shuts down and the LED Temp indicator turns solid red, contact - Acer U5320W | User Manual - Page 24
image quality is possible for image sizes around 78.2". Note: Remind as below figure, the space of 151 cm height is required when the projector is located at 70 cm distance. A 70 cm Desired distance 78.2" B Height: C 151 cm From base to bottom of image Desired Distance (cm) < A > Screen - Acer U5320W | User Manual - Page 25
image quality is possible for image sizes around 92.2". Note: Remind as below figure, the space of 153 cm height is required when the projector is located at 70 cm distance. 70 cm Desired distance A 92.2" B Height: 153 cm C From base to bottom of image Desired Distance (cm) < A > Screen - Acer U5320W | User Manual - Page 26
image quality is possible for image sizes around 94.2". Note: Remind as below figure, the space of 150 cm height is required when the projector is located at 70 cm distance. 70 cm Desired distance A 94.2" B Height: C 150 cm From base to bottom of image Desired Distance (cm) < A > Screen - Acer U5320W | User Manual - Page 27
a desired image size by adjusting either the position or the zoom ring. • SVGA/XGA To obtain an image size of 90", set the projector at a distance 0.9 m from the screen. 0.9 m Desired distance B&C 90" Desired image size A Height: D 174 cm From base to bottom of image Desired Image Size - Acer U5320W | User Manual - Page 28
English 18 • WXGA To obtain an image size of 90", set the projector at a distance 0.7 m from the screen. 0.7 m B&C Desired distance A 90" Desired image size Height: D 150 cm From base to bottom of image Desired Image Size Distance (m) Diagonal ( - Acer U5320W | User Manual - Page 29
English 19 • 1080P To obtain an image size of 90", set the projector at a distance 0.7 m from the screen. 0.7 m B&C Desired distance 90" Desired image size A D Height: 143 cm From base to bottom of image Desired Image Size Diagonal (inch) < A > W ( - Acer U5320W | User Manual - Page 30
" on the control panel or remote control to launch the OSD for projector installation and maintenance. 3 The background pattern acts as a guide to adjusting the calibration and alignment settings, such as screen size and Press "MENU" anytime to exit the menu and return to the Acer welcome screen. - Acer U5320W | User Manual - Page 31
return to the main menu. • To exit the OSD menu, press "MENU" on the control panel or remote control again. It will close and the projector will automatically save the new settings. Main menu Submenu Setting Note: Some of the following OSD settings may not be available. Please refer to the - Acer U5320W | User Manual - Page 32
English 22 Color Display Mode Wall Color Brightness Contrast Saturation Tint Color Temperature There are many factory presets optimized for various types of images. • Bright: For brightness optimization. • Presentation: For meeting presentation with higher brightness. • Standard: For common - Acer U5320W | User Manual - Page 33
English 23 Dynamic Black Gamma If turned on, the projector dynamically adjusts the power consumption of the lamp according to the brightness of the greater gamma value, dark scenery will look brighter. Note: "Saturation" and "Tint" functions are not supported under computer , or HDMI (PC) mode. - Acer U5320W | User Manual - Page 34
select this function, the projector inverts the image for wall-mounted projection. • : When you select this function, the projector reverses and inverts the in by 1.333 times. • V. Keystone: Manually adjusts image distortion caused by tilting projection (±15 degrees). H/V Keystone • H. Keystone - Acer U5320W | User Manual - Page 35
English 4 Corner Correction 25 Manually adjusts the shape and size of an image that is Press • Press to move the image down. to move the image up. Frequency Tracking Changes the projector's refresh rate to match the frequency of your computer's graphics card. If you experience a vertical - Acer U5320W | User Manual - Page 36
English 26 Note: "H. Position", "V. Position", "Frequency" and "Tracking" functions are not supported under video mode. Note: "HDMI Color Range" and "HDMI Scan Info" are only available when the input signal is HDMI. - Acer U5320W | User Manual - Page 37
to differentiate between projectors and communicate with the Acer SmartPen. Double Click Speed • Adjust the double click speed of your pen to make it response faster or slower to meet your needs. Pairing • To pair a pen, select "Pairing" and follow the on-screen instructions. To release a pen - Acer U5320W | User Manual - Page 38
use as the startup screen, follow the instructions below. Notice Before proceeding with the following • Change the "Startup Screen" from the default setting "Acer" to "User". • Select "Screen Capture" to customize Selecting "On" enables the function. The projector can output a VGA signal when it is - Acer U5320W | User Manual - Page 39
to "On", you can set timeout function. • Press to select timeout duration. • The range is from 10 to 990 minutes. • When time is up, the projector will request you to enter the password again. • The factory default setting of "Timeout (Min.)" is "Off". • Once the security function is enabled, the - Acer U5320W | User Manual - Page 40
" which is printed on the Security Card that came with your projector. This unique password will be accepted by the projector no matter what the administrator password is. • If the Security Card is lost, please contact your local Acer service center. Lock User Startup Screen This function is set to - Acer U5320W | User Manual - Page 41
. See Note 2 and Note 3. These buttons function the same as those on the OSD menus, projector control panel, or remote control. Note 2 : An overview of the Tools page You can enter the projector information. You can adjust the LAN control settings. You can set the user password/ administrator - Acer U5320W | User Manual - Page 42
English 32 Note 3: The Info page shows the projector information and status. About Acer SmartPen Setting Note 1: Preparations 1. Connect the projector and your computer with a USB cable and VGA cable. 2. Turn on your projector and make sure it is displaying the computer's image. 3. Plug the PB - Acer U5320W | User Manual - Page 43
English Note 2: Overview of the Acer SmartPen Link light 33 Nib Left mouse button Right mouse button will allow 30 hours non-stop use. The battery is only rechargeable, and is not user serviceable or user replaceable. 4. Avoid shadows! The pen cannot work if its tip is in a shadow or it is pointing - Acer U5320W | User Manual - Page 44
down while there is (Minutes) no signal input detected after the time you set. AC Power On Selecting "On" enables the function. The projector will automatically turn on when power is supplied via the power cord. Lamp Hour Elapse Displays the lamp's elapsed operating time (in hours). Choose - Acer U5320W | User Manual - Page 45
to execute "Invert" to get best match of left/right image sequence to get the correct image (for DLP 3D). Choose "On" to display the 3D warning message. 3D Warning Message Note: Supported 3D signal timings: Signal source type Video/S-Video/Component video VGA/HDMI (PC mode) HDMI (Video mode) MHL - Acer U5320W | User Manual - Page 46
English 36 The SW players, such as Stereoscopic Player and DDD TriDef Media Player can support 3D format files. You can download these players on the web page below. - Stereoscopic Player (Trial): http://www.3dtv.at/Downloads/Index_en.aspx - DDD TriDef Media - Acer U5320W | User Manual - Page 47
37 Appendices English Troubleshooting If you experience a problem with your Acer projector, refer to the following troubleshooting guide. If the problem persists, please contact your local reseller or service center. Image Problems and Solutions # Problem Solution 1 No image appears • Make - Acer U5320W | User Manual - Page 48
Each has a different way to be reactivated. Refer to your computer's manual for detailed information. • If you are using an Apple® Mac® on the projector lens. • Make sure the projection screen is within the required distance: U5220/R215/PU-X15: 1.9 to 3.7 feet (0.6 to 1.1 meters) U5320W/R225/PU- - Acer U5320W | User Manual - Page 49
11 Image is reversed • Select "Image" > "Projection" on the OSD and adjust the projection direction. Problems with the Projector # Condition Solution 1 The projector stops responding If possible, turn off the projector, then to all controls unplug the power cord and wait at least 30 seconds - Acer U5320W | User Manual - Page 50
before it is used. Please also check the dust filters if they are installed. If the dust filter is clogged with dust, please clean it. Projector Overheated. Lamp will automatically turn off soon. Replace the lamp - the lamp is about to reach its maximum lifetime. Prepare to replace it soon. Lamp - Acer U5320W | User Manual - Page 51
(Color wheel -- failure) V V V Quick flashing TEMP LED Red -- --- -- -- V Quick flashing --- Using the Inner Connector(s) Turn the projector off by pressing (POWER). Allow the projector at least 45 minutes to cool down. Disconnect the power cord. 1 Use a screwdriver to remove the screw - Acer U5320W | User Manual - Page 52
of its useful life in full power operation. Replacement Suggested!" When you see this message, change the lamp as soon as possible. Make sure the projector has been cooled down for at least 45 minutes before changing the lamp. Warning: Lamp compartment is hot! Allow it to cool down before changing - Acer U5320W | User Manual - Page 53
3 Remove the lamp protection film (Illustration #2). 4 Remove the screw that secures the lamp module (Illustration #3). 5 Disconnect the lamp connector from the projector. Lift the handle so that it stands up. Pull out the lamp module by force (Illustration #4). To replace the lamp module, use a new - Acer U5320W | User Manual - Page 54
English 44 Wall Mount Installation For details, refer to the user manual enclosed with the wall mount kit (SWM04). Warning: Ensure that only qualified service personnel install the projector. 125.96 338.99 238.12 188.32 65.5 287.3 M4x8 149.5 58.5 288 242.04 M4x8 322.81 - Acer U5320W | User Manual - Page 55
specs, please refer to Acer DLP™ • U5220/R215/PU-X15: Native: XGA (1024 x 768) Maximum: UXGA (1600 x 1200), 1080p (1920 x 1080), WUXGA (1920 x 1200) (supports reduce blanking only) • U5320W 38 mm, 1:1.0 Manual Zoom and Manual Focus • U5220/R215/PU-X15: 60" (153 cm) - 120" (305 cm) • U5320W/R225/PU-W15 - Acer U5320W | User Manual - Page 56
- 99 KHz 23 - 120 Hz +/-15 Degrees (Horizontal & Vertical), Manual 2 X 10W x 2 Approximate 5.5kg (12.13 lbs.) 339 x • U5520B/R245E/PU-815K/U5520i/R245R/PU-815F: 400 W 0ºC to 40ºC / 32ºF to 104ºF U5220/R215/PU-X15/U5320W/R225/PU-W15: • Power socket x 1 • Mini USB x 1 • DC 5V OUT x 1 • VGA input x 2 - Acer U5320W | User Manual - Page 57
kit x 1 • Composite video cable x 1 • Dust filter x 1 • SmartPen x 1 • PB dongle x 1 • WirelessHD dongle kit x 1 • USB WiFi adapter x 1 • Acer Projector Multi-media (CD-ROM) x 1 • Acer Projector Multi-media quick start guide x 1 * Design and specifications are subject to change without notice. - Acer U5320W | User Manual - Page 58
English 48 Compatibility Modes 1 VGA Analog - PC Signal Mode Resolution VGA 640 x 480 SVGA 800 x 600 XGA 1024 x 768 SXGA 1152 x 864 1280 x 1024 QuadVGA SXGA+ UXGA PowerBook G4 1280 x 960 1280 x 960 1400 x 1050 1600 x 1200 640 x 480 640 x 480 800 x 600 1024 x 768 1024 x 768 1152 x 870 - Acer U5320W | User Manual - Page 59
49 English 1280 x 768 1280 x 768 1280 x 768 1280 x 720 1280 x 800 WXGA 1280 x 800 - RB 1440 x 900 1680 x 1050 1366 x 768 1920 x 1080-RB 1920 x 1080-EIA 1024 x 600 1920 x 1200-RB 2 HDMI - PC Signal Mode Resolution VGA_60 VGA_72 VGA_75 VGA_85 VGA_120 SVGA_56 SVGA_60 SVGA_72 SVGA_75 - Acer U5320W | User Manual - Page 60
50 English SXGA+_60 1400 x 1050 UXGA_60 1600 x 1200 Mac G4 640 x 480@60Hz MAC13 640 x 480@67Hz Mac G4 800 x 600@60Hz Mac G4 1024 x 768@60Hz MAC19 1024 x 768@75Hz MAC21 1152 x 870@75Hz WXGA_60 WXGA_75 1280 x 768 WXGA_85 WXGA_60 1280 x 720 WXGA_60 1280 x 800 WXGA_120-RB 1280 - Acer U5320W | User Manual - Page 61
51 English 4 MHL - Video Signal Mode 480i 480p 576i 576p 720p 720p 1080i 1080i 1080p 1080p 1080p Resolution 720 x 480 (1440 x 480) 720 x 480 720 x 576 (1440 x 576) 720 x 576 1280 x 720 1280 x 720 1920 x 1080 1920 x 1080 1920 x 1080 1920 x 1080 1920 x 1080 V.Frequency [Hz] 60 60 50 50 60 50 60 - Acer U5320W | User Manual - Page 62
52 Regulations and safety notices FCC notice This device has been tested and found to comply with the limits for a Class radio frequency energy and, if not installed and used in accordance with the instructions, may cause harmful interference to radio communications. However, there is no guarantee - Acer U5320W | User Manual - Page 63
003 du Canada. Declaration of Conformity for EU countries Acer hereby, declares that this projector series is in compliance with the essential requirements and other GHz band To prevent radio interference to the licensed service, this device is intended to be operated indoors and installation outdoors is - Acer U5320W | User Manual - Page 64
English 54 List of applicable countries This device must be used in strict accordance with the regulations and constraints in the country of use. For further information, please contact a local office in the country of use. Please see http://ec.europa.eu/enterprise/rtte/implem.htm for the latest - Acer U5320W | User Manual - Page 65
(MI) Italy Tel: +39-02-939-921, Fax: +39-02 9399-2913 www.acer.it Declare under our own responsibility that the product: Product: DLP Projector Trade Name: Acer Model Number: U5220/R215/PU-X15/QNX1421/U5320W/R225/PU-W15/QWX1422/ U5520B/R245E/PU-815K/U5520i/R245R/PU-815F/Q1P1423 series To - Acer U5320W | User Manual - Page 66
95110 U. S. A. Tel: 254-298-4000 Fax: 254-298-4147 www.acer.com Federal Communications Commission Declaration of Conformity This device complies with Part 15 of : Contact Person: Phone No.: Fax No.: DLP Projector QNX1421/QWX1422/Q1P1423 series Acer America Corporation 333 West San Carlos St. Suite
-
 1
1 -
 2
2 -
 3
3 -
 4
4 -
 5
5 -
 6
6 -
 7
7 -
8
-
9
-
10
-
11
-
12
-
13
-
14
-
15
-
16
-
17
-
18
-
19
-
20
-
21
-
22
-
23
-
24
-
25
-
26
-
27
-
28
-
29
-
30
-
31
-
32
-
33
-
34
-
35
-
36
-
37
-
38
-
39
-
40
-
41
-
42
-
43
-
44
-
45
-
46
-
47
-
48
-
49
-
50
-
51
-
52
-
53
-
54
-
55
-
56
-
57
-
58
-
59
-
60
-
61
-
62
-
63
-
64
-
65
-
66
 |
 |

Acer Projector
U5220/R215/PU-X15/U5320W/R225/
PU-W15/U5520B/R245E/PU-815K/
U5520i/R245R/PU-815F
Series User's Guide