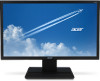
Acer V246HYLC User Manual
Acer V246HYLC Manual
 |
View all Acer V246HYLC manuals
Add to My Manuals
Save this manual to your list of manuals |
Acer V246HYLC manual content summary:
- Acer V246HYLC | User Manual - Page 1
Acer LCD Monitor User's Guide - Acer V246HYLC | User Manual - Page 2
Guide Original Issue: 01/2013 Changes may be made periodically to the information in this publication without obligation to notify any person of such revisions or changes. Such changes will be incorporated in new editions of this manual Acer LCD Monitor User's Guide Model number Serial number Date - Acer V246HYLC | User Manual - Page 3
following are normal with the LCD monitor and do not indicate a problem. • Due to the nature of the fluorescent light, the screen may safety and comfort Safety instructions Read these instructions carefully. Keep this document for future reference. Follow all warnings and instructions marked on the - Acer V246HYLC | User Manual - Page 4
power from the equipment, be sure to unplug the power cord from the electrical outlet. Safe listening To protect your hearing, follow these instructions. • Gradually increase the volume until you can hear it clearly and comfortably and without distortion. • After setting the volume level, do not - Acer V246HYLC | User Manual - Page 5
or its equivalent, 4.5 meters (15 feet) maximum length. Product servicing Do not attempt to service this product yourself, as opening or removing covers may expose you to performance, indicating a need for service • the product does not operate normally after following the operating instructions - Acer V246HYLC | User Manual - Page 6
a potentially explosive atmosphere and obey all signs and instructions. Potentially explosive atmospheres include areas where you would normally bodily injury or even death. Switch off the device near gas pumps at service stations. Observe restrictions on the use of radio equipment in fuel depots, - Acer V246HYLC | User Manual - Page 7
vii Disposal instructions Do not throw this electronic device into the trash when discarding. To minimize pollution and ensure utmost protection of the global environment, please recycle. For - Acer V246HYLC | User Manual - Page 8
viii This product has been shipped enabled for power management: • Activate display's Sleep mode within 15 minutes of user inactivity. • Activate computer's Sleep mode within 30 minutes of user inactivity. • Wake the computer from Sleep mode by pushing the power button. Tips and information for - Acer V246HYLC | User Manual - Page 9
ix Taking care of your vision Long viewing hours, wearing incorrect glasses or contact lenses, glare, excessive room lighting, poorly focused screens, very small typefaces and low-contrast displays could stress your eyes. The following sections provide suggestions on how to reduce eyestrain. Eyes • - Acer V246HYLC | User Manual - Page 10
English Acer Incorporated 8F, 88, Sec. 1, Xintai 5th Rd., Xizhi New Taipei City 221, Taiwan Declaration of Conformity We, Acer Incorporated 8F, 88, Sec. 1, Xintai 5th Rd., Xizhi, New Taipei City 221, Taiwan And, Acer Italy s.r.l. Viale delle Industrie 1/A, 20020 Arese (MI), Italy Tel: +39-02-939- - Acer V246HYLC | User Manual - Page 11
Federal Communications Commission Supplier's Declaration of Conformity V246HYL V246HYL - Acer V246HYLC | User Manual - Page 12
gas emissions by meeting strict energy efficiency guidelines set by the U.S. Environmental Protection Agency. Acer is committed to offer products and services worldwide that help customers save money, conserve energy and improve the quality of our environment. The more energy we can save through - Acer V246HYLC | User Manual - Page 13
servicing Additional safety information IT equipment recycling information Disposal instructions ) Connector pin assignment Standard timing table Installation User controls How to adjust a setting Acer eColor Management Troubleshooting VGA mode DVI mode DP mode 1 iii iii iii iii iii iv iv iv iv v vi - Acer V246HYLC | User Manual - Page 14
the box, and save the packing materials in case you need to ship or transport the monitor in the future. LCD monitor Quick start guide *DP cable (Option) *D-sub cable (Option) *DVI cable (Option) *AC power cord *Audio Cable (Option) *Also the Replaceable parts required by the TCO Certified - Acer V246HYLC | User Manual - Page 15
2 Attaching the Base Note: Remove the monitor and monitor base from its packaging. Carefully place the monitor face-down on a stable surface -- use a cloth to avoid scratching the screen. ① ④② ③ Remove: Reverse the steps to remove the base. Screen position adjustment To optimize the viewing - Acer V246HYLC | User Manual - Page 16
from "power saving" mode back to "on" is around 3 seconds. Display Data Channel (DDC) To make installation easier, so long as your system supports the DDC protocol, the monitor is able to plug-and-play. The DDC is a communication protocol through which the monitor automatically informs the host - Acer V246HYLC | User Manual - Page 17
4 Connector pin assignment 1 5 6 10 11 15 15-pin color display signal cable PIN No. Description 1 Red 2 Green 3 Blue 4 Monitor ground 5 DDC-return 6 R-ground 7 G-ground 8 B-ground PIN No. Description 9 +5 V 10 Logic ground 11 Monitor ground 12 DDC-serial data 13 H-sync 14 V-sync 15 DDC- - Acer V246HYLC | User Manual - Page 18
5 24-pin color display signal cable* PIN No. Description 1 TMDS data 2- 2 TMDS data 2+ 3 TMDS data 2/4 shield 4 NC 5 NC 6 DDC clock 7 DDC data 8 NC 9 TMDS data 1- 10 TMDS data 1+ 11 TMDS data 1/3 shield 12 NC PIN No. Description 13 NC 14 +5 V power 15 GND (return for +5 V hsync. - Acer V246HYLC | User Manual - Page 19
6 Standard timing table 1 VGA 640×480 60 Hz 2 MAC 640×480 66.66 Hz 3 VESA 720×400 70 Hz 4 SVGA 800×600 56 Hz 5 SVGA 800×600 60 Hz 6 XGA 1024×768 60 Hz 7 XGA 1024×768 70 Hz 8 VESA 1152×864 75 Hz 9 SXGA 1280×1024 60 Hz 10 VESA 1280×720 60 Hz 11 WXGA - Acer V246HYLC | User Manual - Page 20
properly, please refer to the troubleshooting section to diagnose the problem. *POWER CORD specifications refer to page15 *For the installation of replaceable parts, please refer to the above installation instructions. *Users may go to the local service network to replace /purchase the qualified - Acer V246HYLC | User Manual - Page 21
8 USER CONTROLS Power Switch / Power LED: To turn the monitor ON or OFF. Lights up to indicate the power is turned ON. Using the Shortcut Menu Press the function button to open the shortcut menu. The shortcut menu lets you quickly select the most commonly accessed settings. Empowering: Press the - Acer V246HYLC | User Manual - Page 22
9 Acer eColor Management Operation instructions Step 1: Press " " Key to open the Acer eColor Management OSD and access the scenario modes Step 2: Press " " or " " to select the mode Step 3: Press " AUTO " - Acer V246HYLC | User Manual - Page 23
10 Adjusting the OSD settings Note: The following content is for general reference only. Actual product specifications may vary. The OSD can be used for adjusting the settings of your LCD Monitor. Press the MENU key to open the OSD. You can use the OSD to adjust the picture quality, OSD position - Acer V246HYLC | User Manual - Page 24
11 Adjusting the OSD position 1 Press the MENU key to bring up the OSD. 2 Using the directional keys, select OSD from the on screen display. Then navigate to the feature you wish to adjust. - Acer V246HYLC | User Manual - Page 25
12 Adjusting the setting 1 Press the MENU key to bring up the OSD. 2 Using the / keys, select Setting from the OSD. Then navigate to the feature you wish to adjust. 3 The Setting menu can be used to adjust the screen Menu Language and other important settings. - Acer V246HYLC | User Manual - Page 26
13 Product information Information 1920 x 1080 H:65KHz V:60Hz VGA Input S/N:ETL5309 1326350380B3742 1 Press the MENU key to bring up the OSD. 2 Using the / keys, select Information from the OSD. Then the basic information of LCD monitor will show up for current input. - Acer V246HYLC | User Manual - Page 27
Before sending your LCD monitor for servicing, please check the troubleshooting list below to see if you can self-diagnose the problem. VGA mode Problem No picture visible LED status Blue Off Remedy Using the OSD, adjust brightness and contrast to maximum or reset to their default - Acer V246HYLC | User Manual - Page 28
is properly connected at the back of monitor. Check that the computer system is switched on and in power saving/ standby mode. DP mode Problem No picture visible LED status Blue Off Remedy Using the OSD, adjust brightness and contrast to maximum or reset to their default settings. Check the - Acer V246HYLC | User Manual - Page 29
you wish to adjust Brightness/Contrast of your monitor,please change OSD mode to Standard mode in the Picture menu. Then you can manually adjust Brightness/Contrast level. TCO certifies the Standard mode. 繁體中文 OSD ECO OSD TCO 简体中文 OSD 模式是 ECO OSD TCO OSD ECO OSD Standard - Acer V246HYLC | User Manual - Page 30
Anda ingin menyesuaikan Kecerahan/Kontras monitor, ubah mode OSD ke mode Standar di menu Gambar. Anda dapat menyesuaikan tingkat Kecerahan/Kontras secara manual. TCO menjamin mode Standar. Italiano La modalità OSD predefinita di questo monitor è la modalità ECO. Se si desidera regolare Luminosit - Acer V246HYLC | User Manual - Page 31
Dacă doriți să ajustați Luminozitatea/Contrastul monitorului dvs., vă rugăm să comutați modul OSD la modul Standard în meniul Imagine. Apoi, puteți ajusta manual nivelul de Luminozitate/Contrast. TCO certifică modul Standard. Pусский ECO Slovensky Režim ECO je v tomto monitore ako štandardn - Acer V246HYLC | User Manual - Page 32
Slovenščina Privzeti način zaslonskega vmesnika tega monitorja je način ECO. Če želite prilagoditi svetlost/kontrast monitorja,spremenite način zaslonskega vmesnika v standardni način v meniju »Picture« (Slika). Nato lahko ročno prilagodite raven svetlosti/kontrasta. Potrdilo za standardni način je
-
 1
1 -
 2
2 -
 3
3 -
 4
4 -
 5
5 -
 6
6 -
 7
7 -
8
-
9
-
10
-
11
-
12
-
13
-
14
-
15
-
16
-
17
-
18
-
19
-
20
-
21
-
22
-
23
-
24
-
25
-
26
-
27
-
28
-
29
-
30
-
31
-
32
 |
 |

Acer LCD Monitor
User's Guide