Acer VT5800-U-P8200 Veriton 5800/6800/7800 User"s Guide (EN)
Acer VT5800-U-P8200 Manual
 |
View all Acer VT5800-U-P8200 manuals
Add to My Manuals
Save this manual to your list of manuals |
Acer VT5800-U-P8200 manual content summary:
- Acer VT5800-U-P8200 | Veriton 5800/6800/7800 User"s Guide (EN) - Page 1
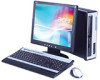
Veriton 5800/6800/7800 Series User's Guide - Acer VT5800-U-P8200 | Veriton 5800/6800/7800 User"s Guide (EN) - Page 2
All Rights Reserved. Veriton 5800/6800/7800 Series User's Guide Original Issue: March 2005 Changes may be made periodically to the information in this publication without obligation to notify any person of such revisions or changes. Such changes will be incorporated in new editions of this manual or - Acer VT5800-U-P8200 | Veriton 5800/6800/7800 User"s Guide (EN) - Page 3
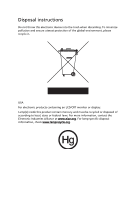
Disposal instructions Do not throw this electronic device into the trash when discarding. To minimize pollution and ensure utmost or federal laws. For more information, contact the Electronic Industries Alliance at www.eiae.org. For lamp-specific disposal information, check www.lamprecycle.org. - Acer VT5800-U-P8200 | Veriton 5800/6800/7800 User"s Guide (EN) - Page 4
- Acer VT5800-U-P8200 | Veriton 5800/6800/7800 User"s Guide (EN) - Page 5
Technology 3 Acer eDataSecurity Management 4 Acer eLock Management 5 Acer ePerformance Management 6 Acer eRecovery Management 7 Acer eSettings Management 8 Acer eAcoustics Management 9 2 First things first 11 Specifications 13 Package contents 15 Accessing the User's Guide 15 - Acer VT5800-U-P8200 | Veriton 5800/6800/7800 User"s Guide (EN) - Page 6
54 Mainboard layout 54 Upgrading your computer 56 Installing additional memory 56 To remove a DDR2 DIMM 56 To install a DDR2 DIMM 57 To reconfigure your computer 58 Replacing the Veriton 5800's hard disk 58 Installing an expansion card 59 Replacing the Veriton 6800/7800's hard - Acer VT5800-U-P8200 | Veriton 5800/6800/7800 User"s Guide (EN) - Page 7
How do I open and watch a DVD? 68 BIOS utility 69 Reinstalling programs 69 Using backup (Windows XP only) 70 How do I back up files from my hard drive? 21 80 Notice for Australia 80 Important safety instructions 80 Macrovision copyright protection notice 82 Lithium battery - Acer VT5800-U-P8200 | Veriton 5800/6800/7800 User"s Guide (EN) - Page 8
Appendix B: Taking care of your computer 87 Important tips 88 Cleaning and servicing 88 To clean your computer and keyboard 88 To clean your pointing device 89 To clean your monitor 89 When to contact a service technician 89 Asking for technical assistance 89 Index 91 - Acer VT5800-U-P8200 | Veriton 5800/6800/7800 User"s Guide (EN) - Page 9
1 Empowering Technology - Acer VT5800-U-P8200 | Veriton 5800/6800/7800 User"s Guide (EN) - Page 10
Acer's innovative Empowering Technology makes it easy for you to access frequently used functions and manage your new Acer desktop. - Acer VT5800-U-P8200 | Veriton 5800/6800/7800 User"s Guide (EN) - Page 11
six handy utilities: • Acer eDataSecurity Management protects data with passwords and advanced encryption algorithms. • Acer eLock Management limits access to external storage media. • Acer ePerformance Management improves system performance by optimizing disk space, memory and registry settings - Acer VT5800-U-P8200 | Veriton 5800/6800/7800 User"s Guide (EN) - Page 12
eDataSecurity Management Acer eDataSecurity Management is a handy file encryption utility that protects your files from being accessed by unauthorized persons. It is conveniently integrated with Windows Explorer as a shell extension for quick and easy data encryption/decryption and also supports on - Acer VT5800-U-P8200 | Veriton 5800/6800/7800 User"s Guide (EN) - Page 13
utility that allows you to lock up your removable data, optical and floppy drives to ensure that data can't be stolen while your computer is unattended. • Removable data devices - includes USB disk drives, USB pen drives, USB flash drives, USB MP3 drives, USB memory card password, Acer eLock - Acer VT5800-U-P8200 | Veriton 5800/6800/7800 User"s Guide (EN) - Page 14
Management is a system optimization tool that boosts the performance of your Acer computer. It provides you with the following options to enhance overall system performance: • Memory optimization - release unused memory and check usage • Disk optimization - remove unneeded items and files • Speed - Acer VT5800-U-P8200 | Veriton 5800/6800/7800 User"s Guide (EN) - Page 15
by the manufacturer. The Acer eRecovery Management utility occupies space in a hidden partition on your system's HDD. User-created backups are stored on D:\ drive. Acer eRecovery Management provides you with: • Password protection • Recovery of applications and drivers • Image/data backup • Back - Acer VT5800-U-P8200 | Veriton 5800/6800/7800 User"s Guide (EN) - Page 16
Management allows you to inspect hardware specifications and to monitor the system health status. Furthermore, Acer eSettings Management enables you to optimize your Windows operating system, so your computer runs faster, smoother and better. Acer eSettings Management also: • Provides a simple - Acer VT5800-U-P8200 | Veriton 5800/6800/7800 User"s Guide (EN) - Page 17
eAcoustics Management Acer eAcoustics Management is a utility that allows you to enjoy a quieter system, scaled to your individual performance needs. Acer eAcoustics Management reduces the sound created from your desktop by adjusting system fan speeds. Utilize different profiles, so you can find - Acer VT5800-U-P8200 | Veriton 5800/6800/7800 User"s Guide (EN) - Page 18
10 1 Empowering Technology - Acer VT5800-U-P8200 | Veriton 5800/6800/7800 User"s Guide (EN) - Page 19
2 First things first - Acer VT5800-U-P8200 | Veriton 5800/6800/7800 User"s Guide (EN) - Page 20
This chapter describes the system specifications and contents of your computer package. - Acer VT5800-U-P8200 | Veriton 5800/6800/7800 User"s Guide (EN) - Page 21
, two external) Veriton 7800: • Three external 5.25" drive bays • Six 3.5" drive bays (four internal, two external) Marvell® 88E8052 with gigabit Ethernet Optional PCI modem Two PS/2 ports 9-pin serial port 25-pin parallel port Eight USB 2.0 ports Ethernet (RJ-45) port VGA port Six audio jacks Two - Acer VT5800-U-P8200 | Veriton 5800/6800/7800 User"s Guide (EN) - Page 22
Veriton 7800 Series: 450 (H) x 187 (W) x 495 (D) mm Norton AntiVirus™ Acer Empowering Technology PC2001 SMBIOS (DMI) 2.3.1 PCI 2.3 WFM 2.0 ACPI 2.0 Microsoft® OnNow ENERGY STAR MacroVision 300 W FCC, CE, C-tick, BSMI, VCCI, CCC, cUL, UL, Nemko, GS (TUV), ENERGY STAR Note: The specifications listed - Acer VT5800-U-P8200 | Veriton 5800/6800/7800 User"s Guide (EN) - Page 23
User's Guide This User's Guide is also available on your computer as an Adobe Acrobat PDF file. To access the User's Guide (for Windows XP) 1 On the Windows XP taskbar, click on the start button then select Help and Support. 2 On the Help and Support Center home page, double-click the Veriton Series - Acer VT5800-U-P8200 | Veriton 5800/6800/7800 User"s Guide (EN) - Page 24
16 2 First things first - Acer VT5800-U-P8200 | Veriton 5800/6800/7800 User"s Guide (EN) - Page 25
3 System tour - Acer VT5800-U-P8200 | Veriton 5800/6800/7800 User"s Guide (EN) - Page 26
This chapter discusses the features and components of your computer. - Acer VT5800-U-P8200 | Veriton 5800/6800/7800 User"s Guide (EN) - Page 27
to 4 GB dual-channel memory • Power management function • CD-ROM, CD-RW, DVD-ROM, DVD/CD-RW combo, DVD-Dual or DVD-Super multi drive • High-capacity, Enhanced-IDE hard disk Multimedia • Intel® high-definition audio • Supporting up to 7.1 surround sound, audio CODEC support for 192 KHz quality - Acer VT5800-U-P8200 | Veriton 5800/6800/7800 User"s Guide (EN) - Page 28
20 Front panel Your computer's front panel consists of the following: Veriton 5800 3 System tour Veriton 6800 - Acer VT5800-U-P8200 | Veriton 5800/6800/7800 User"s Guide (EN) - Page 29
21 Veriton 7800 Icon Component 5.25" drive bay(s) 3.5" floppy drive Microphone-in jack (front) Speaker-out/line-out port USB ports Hardware reset button Indicators Power button Veriton 5800 1 2 3 4 5 6 7 8 Veriton 6800/7800 1 2 3 4 5 6 7 - Acer VT5800-U-P8200 | Veriton 5800/6800/7800 User"s Guide (EN) - Page 30
22 Rear panel Your computer's rear panel consists of the following: Veriton 5800 3 System tour Veriton 6800 - Acer VT5800-U-P8200 | Veriton 5800/6800/7800 User"s Guide (EN) - Page 31
23 Veriton 7800 Icon Component Power supply Power cord socket Voltage selector switch PS/2 mouse port PS/2 keyboard port Serial port Parallel/printer port CRT/LCD monitor port USB ports Network port Veriton 5800/6800/7800 1 2 3 4 5 6 7 8 9 10 - Acer VT5800-U-P8200 | Veriton 5800/6800/7800 User"s Guide (EN) - Page 32
jack Expansion slots Chassis lock pad Hardware reset button Veriton 5800/6800/7800 11 12 13 14 Audio jacks function table Color/Use Blue Green Pink Orange Black Gray Headphone Line-in Headphone 1.1 CH Line-in Line-out Mic-in 3.1 CH Line-in - Acer VT5800-U-P8200 | Veriton 5800/6800/7800 User"s Guide (EN) - Page 33
see "Connecting your mouse and keyboard" on page 37. No. Description 1 Sleep button 3 Multimedia keys 5 Scroll Lock key 7 Cursor keys 9 Windows logo key 11 Function keys No. Description 2 Internet/Email/Search keys 4 Volume control/mute keys 6 Num Lock key 8 Application key 10 - Acer VT5800-U-P8200 | Veriton 5800/6800/7800 User"s Guide (EN) - Page 34
browser. Email Launches your email application. Search Opens a search window. Multimedia keys Allow you to conveniently play, pause, stop, advance file. Press to start playing the audio track or video file. Press again to pause. Press to stop playing the audio track or video file. Press to - Acer VT5800-U-P8200 | Veriton 5800/6800/7800 User"s Guide (EN) - Page 35
27 Volume control/mute keys Icon Key Description Volume up Press to increase audio volume. Volume down Press to decrease audio volume. Mute Toggle sound on/off. Lock keys The keyboard has three lock keys which you can toggle on and off to switch between functions. Lock key Scroll Lock - Acer VT5800-U-P8200 | Veriton 5800/6800/7800 User"s Guide (EN) - Page 36
Windows keys The keyboard has two keys that perform Windows-specific functions. Key Description Windows key Pressed alone, this key has the same effect as clicking on the Windows button. < > + Opens the My Computer window. < > + Opens Help and Support. < > + Opens the Find: All - Acer VT5800-U-P8200 | Veriton 5800/6800/7800 User"s Guide (EN) - Page 37
29 Function keys The function keys, F1 - F12, let you perform specific functions, depending on the application that uses them. Palm rest The detachable palm rest provides you with a comfortable place to rest your hands while typing. - Acer VT5800-U-P8200 | Veriton 5800/6800/7800 User"s Guide (EN) - Page 38
with extra care. To insert a CD or DVD into your computer's CD or DVD drive: 1. Gently push the Eject button located on the front panel. Veriton 5800 Veriton 6800/7800 - Acer VT5800-U-P8200 | Veriton 5800/6800/7800 User"s Guide (EN) - Page 39
the label or title side of the disk is facing upward. When holding a disk, hold it by the edges to avoid leaving smudges or fingerprints. Veriton 5800 Veriton 6800/7800 3. Push the tray and it will close automatically. - Acer VT5800-U-P8200 | Veriton 5800/6800/7800 User"s Guide (EN) - Page 40
or electronics shop. Hard disk Your computer is pre-installed with a high-capacity Enhanced-IDE (E-IDE) hard disk. For instructions on how to upgrade or replace your hard disk, see: "Replacing the Veriton 5800's hard disk" on page 58. "Replacing the Veriton 6800/7800's hard disk" on page 60. - Acer VT5800-U-P8200 | Veriton 5800/6800/7800 User"s Guide (EN) - Page 41
4 Setting up your computer - Acer VT5800-U-P8200 | Veriton 5800/6800/7800 User"s Guide (EN) - Page 42
This chapter contains step-by-step instructions on how to set up your computer and connect additional peripherals. - Acer VT5800-U-P8200 | Veriton 5800/6800/7800 User"s Guide (EN) - Page 43
your system. Here are some points to consider: Adjusting your chair Having the right kind of chair does not necessarily mean you'll be properly supported. It is necessary to adjust your chair to fit your body. Proper body posture will make you more comfortable and productive. • Avoid tilting your - Acer VT5800-U-P8200 | Veriton 5800/6800/7800 User"s Guide (EN) - Page 44
36 4 Setting up your computer Take note of the following when selecting a location for your computer: • Do not put your computer near any equipment that might cause electromagnetic or radio frequency interference, such as radio transmitters, televisions, copy machines or heating and air- - Acer VT5800-U-P8200 | Veriton 5800/6800/7800 User"s Guide (EN) - Page 45
37 Connecting peripherals Setting up your computer is easy. For the most part, you only have four things to connect: the mouse, the keyboard, the monitor, and the power cable. Note: The peripherals shown in the connections below are for your reference only. Actual device models may vary in select - Acer VT5800-U-P8200 | Veriton 5800/6800/7800 User"s Guide (EN) - Page 46
the monitor port (blue port) located on the rear panel of your computer . Note: When a VGA card is added to the PCI Express slot, the monitor should be connected to the add-on card and the onboard VGA will be disabled. Note: Refer to the monitor manual for additional instructions and information. - Acer VT5800-U-P8200 | Veriton 5800/6800/7800 User"s Guide (EN) - Page 47
39 Connecting the power cable Caution: Before you proceed, check the voltage range in your area. Make sure that it matches your computer's voltage setting. If they don't match, change your computer's voltage setting according to your area's voltage range. Set the voltage selector switch to the - Acer VT5800-U-P8200 | Veriton 5800/6800/7800 User"s Guide (EN) - Page 48
), make sure that it is plugged in and turned on. Turning off your computer To turn off your computer, follow the steps below. For Windows XP: 1 On the Windows XP taskbar, click on the Start button, and click Turn Off Computer, then click Turn Off. 2 Turn off all peripherals connected to your - Acer VT5800-U-P8200 | Veriton 5800/6800/7800 User"s Guide (EN) - Page 49
41 Connecting options Connecting your printer Your computer supports parallel, serial and USB printers. To connect a parallel printer, plug the printer cable into the parallel port (burgundy port) located on the rear panel of - Acer VT5800-U-P8200 | Veriton 5800/6800/7800 User"s Guide (EN) - Page 50
line your computer. into their corresponding ports on the rear panel of Connecting to the network You can connect your computer to a Local Area Network (LAN) using a network cable. To do so, simply plug the network cable into the network port on the rear panel of your computer. Note: Consult your - Acer VT5800-U-P8200 | Veriton 5800/6800/7800 User"s Guide (EN) - Page 51
43 Connecting multimedia devices You can connect multimedia devices such as microphones, earphones or headphones, external speakers and audio line-in devices. These devices will let you take advantage of your computer's multimedia features. Note: The multimedia devices shown below are for reference - Acer VT5800-U-P8200 | Veriton 5800/6800/7800 User"s Guide (EN) - Page 52
. You can also adjust the volume by using the volume icon on the taskbar at the bottom of your screen. • External speakers: Connect to the audio-out/line-out jack jack) located on the rear panel of your computer. (lime-green - Acer VT5800-U-P8200 | Veriton 5800/6800/7800 User"s Guide (EN) - Page 53
line-in device: Connects to the audio-in/line-in jack jack) located on the rear panel of your with eight external USB ports: four on the front and four on the rear panel. These ports support USB 2.0 high-performance external devices such as webcams and digital still cameras. They also allow you - Acer VT5800-U-P8200 | Veriton 5800/6800/7800 User"s Guide (EN) - Page 54
46 4 Setting up your computer Note: The USB devices shown below are for reference only. Actual device models may vary by geographic region. Note: Some USB devices have a built-in USB port which permits you to connect more USB devices. - Acer VT5800-U-P8200 | Veriton 5800/6800/7800 User"s Guide (EN) - Page 55
5 Upgrading your computer - Acer VT5800-U-P8200 | Veriton 5800/6800/7800 User"s Guide (EN) - Page 56
This chapter contains instructions on how to upgrade your computer, and basic information about your system boards that you will find helpful when performing the upgrade process. - Acer VT5800-U-P8200 | Veriton 5800/6800/7800 User"s Guide (EN) - Page 57
and post-installation instructions. ESD precautions requiring ESD protection. Preinstallation instructions Always observe the following 2 Open your computer according to the instructions on page 49. 3 Follow the ESD See the following sections for specific instructions on the component you wish to - Acer VT5800-U-P8200 | Veriton 5800/6800/7800 User"s Guide (EN) - Page 58
50 5 Upgrading your computer Post-installation instructions Observe the following after installing a computer component: 1 See to it that the components are installed according to the step-by-step instructions in their respective sections. 2 Replace any expansion boards or peripherals that you - Acer VT5800-U-P8200 | Veriton 5800/6800/7800 User"s Guide (EN) - Page 59
51 Opening your Veriton 5800 Caution! Before you proceed, make sure that you have turned off your computer and all peripherals connected to it. Read the "Preinstallation instructions" on page 49. You need to open your computer before you can install additional components. See the following section - Acer VT5800-U-P8200 | Veriton 5800/6800/7800 User"s Guide (EN) - Page 60
52 5 Upgrading your computer Opening your Veriton 6800/7800 Caution! Before you proceed, make sure that you have turned off your computer and all peripherals connected to it. Read the "Preinstallation instructions" on page 49. You need to open your computer before you can install additional - Acer VT5800-U-P8200 | Veriton 5800/6800/7800 User"s Guide (EN) - Page 61
53 Veriton 7800 To replace the side panel 1 Align the side panel's hinges to the housing frame and then push it in to slide it back into place. 2 Secure the side panels with the two screws. - Acer VT5800-U-P8200 | Veriton 5800/6800/7800 User"s Guide (EN) - Page 62
54 System boards 5 Upgrading your computer Mainboard layout The mainboard becomes accessible once you open your computer. Refer to the section below for the corresponding mainboard layout of your Veriton 5800/ 6800/7800 series computer model. - Acer VT5800-U-P8200 | Veriton 5800/6800/7800 User"s Guide (EN) - Page 63
55 No. Component No. Component 1 4 memory slots 2 CPU fan connector 3 CPU socket 4 ATX 12V power connector 5 USB connectors 6 PCI Express X16 connector 7 2 PCI conventional bus connectors 8 CD audio connector 9 S/PDIF audio connector 10 External COM port connector 11 System fan connector - Acer VT5800-U-P8200 | Veriton 5800/6800/7800 User"s Guide (EN) - Page 64
, contact your dealer or a qualified service technician for assistance. Note: The mainboard model shown in the following figures may not be exactly the same as the one found in your computer. Installing additional memory The four 240-pin sockets on the mainboard support Double Data Rate 2 (DDR2 - Acer VT5800-U-P8200 | Veriton 5800/6800/7800 User"s Guide (EN) - Page 65
to release the DDR2 DIMM (a). Gently pull the DDR2 DIMM out of the socket (b). To install a DDR2 DIMM 1 Locate the DDR2 DIMM socket on the mainboard. 2 Align the DDR2 DIMM with the socket (a). Press the DDR2 DIMM into the socket until the clips lock onto the DDR2 DIMM (b). Note: The DDR2 - Acer VT5800-U-P8200 | Veriton 5800/6800/7800 User"s Guide (EN) - Page 66
58 5 Upgrading your computer To reconfigure your computer Your computer automatically detects the amount of memory installed. Run the BIOS utility to view the new value for total system memory and make a note of it. Replacing the Veriton 5800's hard disk Follow these steps to replace your - Acer VT5800-U-P8200 | Veriton 5800/6800/7800 User"s Guide (EN) - Page 67
PCI Express or PCI slot on the mainboard. 3 Remove the bracket lock that holds the bracket to the computer. Save the lock. 4 Pull out the bracket on the housing opposite the selected empty slot. 5 Remove the expansion card from its protective packaging. 6 Align the card in the empty bracket and then - Acer VT5800-U-P8200 | Veriton 5800/6800/7800 User"s Guide (EN) - Page 68
60 5 Upgrading your computer Replacing the Veriton 6800/7800's hard disk Follow these steps to replace your computer's hard disk: 1 Remove the disk cables are securely connected to their corresponding connectors on the mainboard. 4 Replace the side panel. See "To replace the side panel" on page 53. - Acer VT5800-U-P8200 | Veriton 5800/6800/7800 User"s Guide (EN) - Page 69
an empty PCI Express or PCI slot on the mainboard. 3 Remove the lock that holds the bracket to the computer. 4 Pull out the bracket on the housing opposite the selected empty slot. 5 Remove the expansion card from its protective packaging. 6 Align the card with the empty bracket and then insert it - Acer VT5800-U-P8200 | Veriton 5800/6800/7800 User"s Guide (EN) - Page 70
62 5 Upgrading your computer - Acer VT5800-U-P8200 | Veriton 5800/6800/7800 User"s Guide (EN) - Page 71
6 System utilities - Acer VT5800-U-P8200 | Veriton 5800/6800/7800 User"s Guide (EN) - Page 72
This chapter describes applications that are preinstalled on your computer. - Acer VT5800-U-P8200 | Veriton 5800/6800/7800 User"s Guide (EN) - Page 73
include any of the following: • Adobe Reader • Norton AntiVirus • NTI CD-Maker • PowerDVD • BIOS utility • Acer Empowering Technology If your computer is configured with Microsoft Windows XP, the following utilities can be used to monitor and maintain system health: • Backup • Disk Defragmenter All - Acer VT5800-U-P8200 | Veriton 5800/6800/7800 User"s Guide (EN) - Page 74
6 System utilities Norton AntiVirus window, click Scan for Viruses. 3 In the Scan for Viruses panel, click Scan My Computer. 4 Under Actions, click Scan. 5 When the scan is complete, a scan summary appears. Click Finished. You can schedule customized virus scans that run unattended on specific - Acer VT5800-U-P8200 | Veriton 5800/6800/7800 User"s Guide (EN) - Page 75
DVD Burner) The NTI CD&DVD-Maker is optical disk-recording software that allows you to create and copy audio, data and videos to recordable or rewritable optical disks. To copy an audio or data disk: 1 Click the Quick Burning icon on the desktop. 2 Insert the CD you would like to copy - Acer VT5800-U-P8200 | Veriton 5800/6800/7800 User"s Guide (EN) - Page 76
utilities PowerDVD (for models with DVD) PowerDVD is a high-quality, pure software DVD player that brings high-quality movies and karaoke to your multimedia PC. You can play back high-resolution DVD titles or MPEG-2 files with MPEG-2 video and Dolby Digital (AC-3) audio a viewer window and the - Acer VT5800-U-P8200 | Veriton 5800/6800/7800 User"s Guide (EN) - Page 77
need to run this utility. However, if you encounter configuration problems and get the "Run Setup" message, you will need to run this utility. Note: Before you run BIOS, make sure that you application that you want to reinstall. 4 Follow all onscreen instructions until you finish the installation. - Acer VT5800-U-P8200 | Veriton 5800/6800/7800 User"s Guide (EN) - Page 78
the Backup utility: 1 Click the Start button in the taskbar. 2 Highlight All Programs 3 Click Accessories 4 Select System Tools 5 Click Backup When Backup starts, follow the onscreen instructions to set up your backup profile and schedule. For more information about Backup, refer to Windows XP help - Acer VT5800-U-P8200 | Veriton 5800/6800/7800 User"s Guide (EN) - Page 79
71 Disk defragmenter (Windows XP only) The disk degfragmentation utility consolidates files and folders on your computer's hard disk. This allows your computer to access files and whether or not it needs to be defragmented. For more information about Disk Defragmenter, refer to Windows XP help. - Acer VT5800-U-P8200 | Veriton 5800/6800/7800 User"s Guide (EN) - Page 80
72 6 System utilities - Acer VT5800-U-P8200 | Veriton 5800/6800/7800 User"s Guide (EN) - Page 81
7 Frequently asked questions - Acer VT5800-U-P8200 | Veriton 5800/6800/7800 User"s Guide (EN) - Page 82
This chapter tells you what to do in case your computer is not working properly. However, if a more serious problem arises, contact your dealer or the technical support center (www.acersupport.com) for assistance. - Acer VT5800-U-P8200 | Veriton 5800/6800/7800 User"s Guide (EN) - Page 83
. Insert the startup disk you created during Windows setup into the floppy drive and press + + to restart your computer. This will automatically diagnose your system and make necessary fixes. However, if the diagnostic utility still reports a problem, then you may have to perform - Acer VT5800-U-P8200 | Veriton 5800/6800/7800 User"s Guide (EN) - Page 84
control/mute knob on your USB keyboard to toggle from mute to sound on. • If headphones, earphones or external speakers are connected to information on the good disk there may be a problem with the drive. Contact your dealer or technical support center for assistance. System cannot write data on the - Acer VT5800-U-P8200 | Veriton 5800/6800/7800 User"s Guide (EN) - Page 85
Appendix A: Notices - Acer VT5800-U-P8200 | Veriton 5800/6800/7800 User"s Guide (EN) - Page 86
ENERGY STAR guidelines compliance As an ENERGY STAR partner, Acer Inc. has determined that this product meets the ENERGY STAR frequency energy and, if not installed and used in accordance with the instructions, may cause harmful interference to radio communications. However, there is no guarantee - Acer VT5800-U-P8200 | Veriton 5800/6800/7800 User"s Guide (EN) - Page 87
. Declaration of Conformity for EU countries Acer hereby declares that this personal PC series network, the telephone company may discontinue your service temporarily. If possible, they will notify you an opportunity to maintain uninterrupted telephone service. If this equipment should fail to operate - Acer VT5800-U-P8200 | Veriton 5800/6800/7800 User"s Guide (EN) - Page 88
successful operation on every PSTN termination point. In the event of problems, you should contact your equipment supplier in the first instance. Notice Important safety instructions Read these instructions carefully. Save them for future reference. 1 Follow all warnings and instructions marked on - Acer VT5800-U-P8200 | Veriton 5800/6800/7800 User"s Guide (EN) - Page 89
servicing to qualified service personnel under the following conditions: a When the power cord or plug is damaged or frayed. b If liquid has been spilled onto the product. c If the product has been exposed to rain or water. d If the product does not operate normally when the operating instructions - Acer VT5800-U-P8200 | Veriton 5800/6800/7800 User"s Guide (EN) - Page 90
82 Appendix A: Notices Macrovision copyright protection notice This product incorporates copyright protection technology that is protected by U.S. patents and other intellectual property rights. Use of this copyright protection technology must be authorized by Macrovision, and is intended for home - Acer VT5800-U-P8200 | Veriton 5800/6800/7800 User"s Guide (EN) - Page 91
83 Laser compliance statement The CD or DVD drive used with this computer is a laser product. The CD or DVD drive's classification label content (shown below) is located on the drive. CLASS 1 LASER PRODUCT CAUTION: INVISIBLE LASER RADIATION WHEN OPEN. AVOID EXPOSURE TO BEAM. APPAREIL A LASER DE - Acer VT5800-U-P8200 | Veriton 5800/6800/7800 User"s Guide (EN) - Page 92
is responsible for this declaration: Product name: Model: Name of responsible party: Address of responsible party: Contact person: Tel: Fax: Personal computer Veriton 5800/6800/7800 Acer America Corporation 2641 Orchard Parkway San Jose, CA 95134 USA Mr. Young Kim 408-922-2909 408-922-2606 - Acer VT5800-U-P8200 | Veriton 5800/6800/7800 User"s Guide (EN) - Page 93
product: Model: Acer Inc. 8F, 88, Sec. 1, Hsin Tai Wu Rd. Hsichih, Taipei Hsien 221 Taiwan, ROC Personal computer Veriton 5800/6800/7800 Conforms to terminal connection to the Public Switched Telephone Network (PSTN). We, Acer Inc., hereby declare that the equipment bearing the trade name and - Acer VT5800-U-P8200 | Veriton 5800/6800/7800 User"s Guide (EN) - Page 94
86 Appendix A: Notices - Acer VT5800-U-P8200 | Veriton 5800/6800/7800 User"s Guide (EN) - Page 95
Appendix B: Taking care of your computer - Acer VT5800-U-P8200 | Veriton 5800/6800/7800 User"s Guide (EN) - Page 96
your computer Please read the important instructions listed in this section. Following these instructions will help you maximize the durability These adjustments could make viewing the screen more comfortable. Cleaning and servicing To clean your computer and keyboard 1 Turn off the computer and - Acer VT5800-U-P8200 | Veriton 5800/6800/7800 User"s Guide (EN) - Page 97
cleaning instructions, refer to the documentation that came with your monitor. When to contact a service troubleshooting tips discussed in the "Frequently asked questions" on page 75. • If your problem is not listed in the "Frequently asked questions" on page 75. • If you want to replace or upgrade - Acer VT5800-U-P8200 | Veriton 5800/6800/7800 User"s Guide (EN) - Page 98
90 Appendix B: Taking care of your computer - Acer VT5800-U-P8200 | Veriton 5800/6800/7800 User"s Guide (EN) - Page 99
91 Index A accessing the online User's Guide 15 applications 65 B BIOS utility 69 C computer cover remove 51 replace 51 computer maintenance 88 cleaning 88 servicing 88 connecting options multimedia devices 43 audio line-in device 45 earphones/headphones 44 external speakers 43 microphone 43 - Acer VT5800-U-P8200 | Veriton 5800/6800/7800 User"s Guide (EN) - Page 100
40 turning on computer 40 power button 40 Index U upgrade add memory 56 install DDR DIMM 57 reconfigure computer 58 computer 56 install an expansion card 59 installation precautions post-installation 50 open computer reinstall side panel 53 replace components memory 56 V Veriton mainboard layout 54
-
 1
1 -
 2
2 -
 3
3 -
 4
4 -
 5
5 -
 6
6 -
 7
7 -
8
-
9
-
10
-
11
-
12
-
13
-
14
-
15
-
16
-
17
-
18
-
19
-
20
-
21
-
22
-
23
-
24
-
25
-
26
-
27
-
28
-
29
-
30
-
31
-
32
-
33
-
34
-
35
-
36
-
37
-
38
-
39
-
40
-
41
-
42
-
43
-
44
-
45
-
46
-
47
-
48
-
49
-
50
-
51
-
52
-
53
-
54
-
55
-
56
-
57
-
58
-
59
-
60
-
61
-
62
-
63
-
64
-
65
-
66
-
67
-
68
-
69
-
70
-
71
-
72
-
73
-
74
-
75
-
76
-
77
-
78
-
79
-
80
-
81
-
82
-
83
-
84
-
85
-
86
-
87
-
88
-
89
-
90
-
91
-
92
-
93
-
94
-
95
-
96
-
97
-
98
-
99
-
100
 |
 |

Veriton 5800/6800/7800 Series
User's Guide