Acer Veriton 5700GX Acer Veriton 3900/5900/6900/7900 User's Guide EN
Acer Veriton 5700GX Manual
 |
View all Acer Veriton 5700GX manuals
Add to My Manuals
Save this manual to your list of manuals |
Acer Veriton 5700GX manual content summary:
- Acer Veriton 5700GX | Acer Veriton 3900/5900/6900/7900 User's Guide EN - Page 1
Veriton Series User's Guide - Acer Veriton 5700GX | Acer Veriton 3900/5900/6900/7900 User's Guide EN - Page 2
Acer Incorporated. All Rights Reserved. Veriton Series User's Guide Original Issue: 08 / 2006 Changes may be made periodically to the information in this publication without obligation to notify any person of such revisions or changes. Such changes will be incorporated in new editions of this manual - Acer Veriton 5700GX | Acer Veriton 3900/5900/6900/7900 User's Guide EN - Page 3
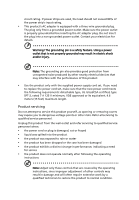
document for future reference. Follow all warnings and instructions marked on the product. Turning the product off before operation of the product and to protect it from overheating. These openings must not be blocked or covered. The openings should never be blocked by placing the product on a bed, - Acer Veriton 5700GX | Acer Veriton 3900/5900/6900/7900 User's Guide EN - Page 4
length. Product servicing Do not attempt to service this product yourself, as opening or removing covers case has been damaged • the product exhibits a distinct change in performance, indicating a need for service • the product does not operate normally after following the operating instructions - Acer Veriton 5700GX | Acer Veriton 3900/5900/6900/7900 User's Guide EN - Page 5
or before servicing. • To avoid the remote risk of electric shock from lightning, do not connect the telephone line to this equipment during lightning or thunderstorms. Disposal instructions Do Industries Alliance at www.eiae.org. For lamp-specific disposal information, check www.lamprecycle.org. - Acer Veriton 5700GX | Acer Veriton 3900/5900/6900/7900 User's Guide EN - Page 6
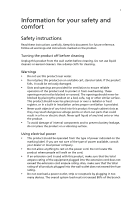
Tips and information for comfortable use Computer users may complain of eyestrain and headaches after prolonged use. Users are also at risk of physical injury after long hours of working in front of a computer. Long work periods, bad posture, poor work habits, stress, inadequate working conditions, - Acer Veriton 5700GX | Acer Veriton 3900/5900/6900/7900 User's Guide EN - Page 7
your display to an awkward viewing angle. • Avoid looking at bright light sources, such as open windows, for extended periods of time. Developing good work habits Develop the following work habits to make your refer to "Regulations and safety notices" on page 89 in the AcerSystem User's Guide. - Acer Veriton 5700GX | Acer Veriton 3900/5900/6900/7900 User's Guide EN - Page 8
- Acer Veriton 5700GX | Acer Veriton 3900/5900/6900/7900 User's Guide EN - Page 9
Management 6 Acer ePerformance Management 8 Acer eAcoustics Management 9 Using Acer eAcoustics Management 9 Acer eAcoustics Management Main Page 10 Acer eRecovery Management 11 1 First things first 13 Specifications 15 Package contents 17 Accessing the User's Guide 17 2 System - Acer Veriton 5700GX | Acer Veriton 3900/5900/6900/7900 User's Guide EN - Page 10
Optical drive 32 Taking care of your CDs and DVDs 35 Hard disk 35 3 Setting up your computer 37 instructions 53 Post-installation instructions 54 Opening your computer 3900Pro 55 To remove the computer cover 55 To replace the computer cover 56 Opening your Veriton 5900Pro 57 - Acer Veriton 5700GX | Acer Veriton 3900/5900/6900/7900 User's Guide EN - Page 11
5 System utilities 69 Adobe Reader 71 NTI CD&DVD-Maker (for models with CD or DVD Burner) 72 PowerDVD (for models with DVD) 74 How do I open and watch a DVD? 74 BIOS utility 75 Reinstalling programs 75 Recovering your system 76 Using backup (Windows XP only) 82 How do I back up - Acer Veriton 5700GX | Acer Veriton 3900/5900/6900/7900 User's Guide EN - Page 12
European Union (EU) 95 The FCC RF safety requirement 95 Canada - Low-power license-exempt radio communication devices (RSS-210) 96 Federal Communications Comission Declaration of Conformity 97 Declaration of Conformity for CE marking 98 Index 99 - Acer Veriton 5700GX | Acer Veriton 3900/5900/6900/7900 User's Guide EN - Page 13
Empowering Technology - Acer Veriton 5700GX | Acer Veriton 3900/5900/6900/7900 User's Guide EN - Page 14
Acer's innovative Empowering Technology makes it easy for you to access frequently used functions and manage your new Acer desktop. - Acer Veriton 5700GX | Acer Veriton 3900/5900/6900/7900 User's Guide EN - Page 15
Acer eAcoustics Management offers a useful tool to balance your computing power needs with your desired level of quietness. • Acer eRecovery Management backs up and recovers data flexibly, reliably and completely. • Acer Acer eLock Management and Acer running Acer eLock Management or Acer - Acer Veriton 5700GX | Acer Veriton 3900/5900/6900/7900 User's Guide EN - Page 16
eSettings Management allows you to inspect hardware specifications, change BIOS passwords or other Windows settings, and to monitor the system health status. Acer eSettings Management also: • Provides a simple graphical user interface for navigation. • Displays general system status and advanced - Acer Veriton 5700GX | Acer Veriton 3900/5900/6900/7900 User's Guide EN - Page 17
only. • Interfaces - includes serial port, parallel port, infrared (IR), and Bluetooth. To activate Acer eLock Management, a password must be set first. Once set, you can apply locks to any of or taking your computer to an Acer Customer Service Center. Be sure to remember or write down your password. - Acer Veriton 5700GX | Acer Veriton 3900/5900/6900/7900 User's Guide EN - Page 18
by unauthorized persons. It is conveniently integrated with Windows Explorer as a shell extension for quick and easy data encryption/decryption and also supports on-the-fly file encryption for MSN Messenger and Microsoft Outlook. The Acer eDataSecurity Management setup wizard will prompt you for - Acer Veriton 5700GX | Acer Veriton 3900/5900/6900/7900 User's Guide EN - Page 19
7 - Acer Veriton 5700GX | Acer Veriton 3900/5900/6900/7900 User's Guide EN - Page 20
Management is a system optimization tool that boosts the performance of your Acer computer. It provides an express optimization method to release unused memory and optimization - removes unneeded items and files. • Speed optimization - improves the usability and performance of your Windows XP system. - Acer Veriton 5700GX | Acer Veriton 3900/5900/6900/7900 User's Guide EN - Page 21
Acer eAcoustics Management To launch Acer eAcoustics Management: • Click on the Acer eAcoustics Management icon in the Empowering Technology toolbar shown on your desktop. • From the Start menu, go to (All) Programs > Acer Empowering Technology > Acer eAcoustics Management. This will open the Acer - Acer Veriton 5700GX | Acer Veriton 3900/5900/6900/7900 User's Guide EN - Page 22
Page Listed on the main page are two options for Acer eAcoustics Management, labeled as Quiet and Professional. Select the mode Web browsing, and instant messaging. This mode creates the lowest audio disturbance. Professional Mode Use this mode for processing-intensive tasks, when you require - Acer Veriton 5700GX | Acer Veriton 3900/5900/6900/7900 User's Guide EN - Page 23
backups are stored on the D:\ drive. Acer eRecovery Management provides you with: • Password protection. • Recovery of applications and drivers. • Image/data backup: • Back up to HDD (set recovery point). • Back up to CD/DVD. • Image/data recovery tools: • Recover from a hidden partition (factory - Acer Veriton 5700GX | Acer Veriton 3900/5900/6900/7900 User's Guide EN - Page 24
computer did not come with a Recovery CD or System CD, please use Acer eRecovery Management's "System backup to optical disk" feature to burn a backup image to CD or DVD. To ensure the best results when recovering your system using a CD or Acer eRecovery Management, detach all peripherals (except - Acer Veriton 5700GX | Acer Veriton 3900/5900/6900/7900 User's Guide EN - Page 25
1 First things first - Acer Veriton 5700GX | Acer Veriton 3900/5900/6900/7900 User's Guide EN - Page 26
This chapter describes the system specifications and contents of your computer package. - Acer Veriton 5700GX | Acer Veriton 3900/5900/6900/7900 User's Guide EN - Page 27
® Windows® XP Home Edition Intel® Celeron® with 533 MHz FSB Intel® Celeron® D with 533 MHz FSB Intel® Pentium® 4 with 533/800 MHz FSB Intel® Pentium® D with 800/1066 MHz FSB Intel® Q965 Express Dual channels supported on four DIMMs Supporting up to 4 GB of DDR2 533/667/800 RAM Veriton 3900Pro - Acer Veriton 5700GX | Acer Veriton 3900/5900/6900/7900 User's Guide EN - Page 28
Dynamic Video Memory Technology (DVMT) support Realtek ALC888 with embedded Intel® HDA CODEC PS/2 or USB multimedia keyboard Choice of Acer CRT or LCD monitors Lock pad and intrusion alert Veriton 3900Pro Series: 345 (H) x 101.3 (W) x 414.7 (D) mm Veriton 5900Pro Series: 370 (H) x 130.2 (W) x 435 - Acer Veriton 5700GX | Acer Veriton 3900/5900/6900/7900 User's Guide EN - Page 29
User's Guide This User's Guide is also available on your computer as an Adobe Acrobat PDF file. To access the User's Guide (for Windows XP) 1 On the Windows XP taskbar, click on the Start button then select Help and Support. 2 On the Help and Support Center home page, double-click the Veriton Series - Acer Veriton 5700GX | Acer Veriton 3900/5900/6900/7900 User's Guide EN - Page 30
18 1 First things first - Acer Veriton 5700GX | Acer Veriton 3900/5900/6900/7900 User's Guide EN - Page 31
2 System tour - Acer Veriton 5700GX | Acer Veriton 3900/5900/6900/7900 User's Guide EN - Page 32
This chapter discusses the features and components of your computer. - Acer Veriton 5700GX | Acer Veriton 3900/5900/6900/7900 User's Guide EN - Page 33
• One serial port (optional 2nd serial port connection) • One parallel port • One VGA port • Eight Universal Serial Bus (USB) 2.0 ports (four on the front; four on the rear panel) • High-speed V.92, 56K fax/modem (manufacturing option) • Gigabit Ethernet LAN support with remote wake-up function - Acer Veriton 5700GX | Acer Veriton 3900/5900/6900/7900 User's Guide EN - Page 34
22 Front panel Your computer's front panel consists of the following: Veriton 5900Pro 2 System tour Veriton 6900Pro - Acer Veriton 5700GX | Acer Veriton 3900/5900/6900/7900 User's Guide EN - Page 35
23 Veriton 3900Pro/Veriton 7900Pro Icon Component 5.25" drive bay(s) 3.5" floppy drive Microphone-in jack (front) Speaker-out/line-out port USB ports Hardware reset button Indicators Power button Veriton 3900Pro/ 5900Pro 1 2 3 4 5 6 7 8 Veriton 6900Pro/7900Pro 1 2 3 4 5 6 7 - Acer Veriton 5700GX | Acer Veriton 3900/5900/6900/7900 User's Guide EN - Page 36
24 Rear panel Your computer's rear panel consists of the following: Veriton 5900Pro 2 System tour Veriton 6900Pro - Acer Veriton 5700GX | Acer Veriton 3900/5900/6900/7900 User's Guide EN - Page 37
25 Veriton 3900Pro/Veriton 7900Pro Icon Component # Power supply 1 Power cord socket 2 Voltage selector switch 3 PS/2 mouse port 4 PS/2 keyboard port 5 Serial port 6 Parallel/printer port 7 CRT/LCD monitor port 8 USB ports 9 Network port 10 - Acer Veriton 5700GX | Acer Veriton 3900/5900/6900/7900 User's Guide EN - Page 38
jack 11 Expansion slots 12 Chassis lock pad 13 Hardware reset button 14* *. Only for Veriton 6900Pro / Veriton 7900Pro Audio jacks function table Color/Use Blue Green Pink Orange Black Gray Headphone Line-in Headphone 1.1 CH Line-in Line-out Mic-in 3.1 CH Line-in - Acer Veriton 5700GX | Acer Veriton 3900/5900/6900/7900 User's Guide EN - Page 39
see "Connecting your mouse and keyboard" on page 41. No. Description 1 Sleep button 3 Multimedia keys 5 e (Scroll Lock) key 7 Cursor keys 9 Windows logo key 11 Function keys No. Description 2 Internet/Email/Search keys 4 Volume control/mute keys 6 Num Lock key 8 Application key - Acer Veriton 5700GX | Acer Veriton 3900/5900/6900/7900 User's Guide EN - Page 40
current default browser. Email Launches your email application. Search Opens a search window. Multimedia keys Allow you to conveniently play, pause, file. Press to start playing the audio track or video file. Press again to pause. Press to stop playing the audio track or video file. Press to - Acer Veriton 5700GX | Acer Veriton 3900/5900/6900/7900 User's Guide EN - Page 41
Volume down Press to decrease audio volume. Mute Toggle sound on/off. Lock keys The keyboard has three lock keys which you can toggle on and off to switch between functions. Lock key Description e (Scroll Lock) When "e" is activated, press to run Acer Empowering Technology. When "Scroll Lock - Acer Veriton 5700GX | Acer Veriton 3900/5900/6900/7900 User's Guide EN - Page 42
off. Windows keys The keyboard has two keys that perform Windows-specific functions. Key Windows key Description Opens the My Computer window. < > + Opens Help and Support. < > + Opens the Find: All Files dialog box. < > + Opens the Run dialog box. < > + Minimizes all windows - Acer Veriton 5700GX | Acer Veriton 3900/5900/6900/7900 User's Guide EN - Page 43
Key Description Application This key has the same effect as clicking the right mouse button; it opens the application's context menu. key Function keys The function keys, F1 - F12, let you perform specific functions, depending on the application that uses them. Palm rest The detachable palm rest - Acer Veriton 5700GX | Acer Veriton 3900/5900/6900/7900 User's Guide EN - Page 44
, are also compact, lightweight and easy to carry around. However, they are more delicate than diskettes and must be handled with extra care. To insert a CD or DVD into your computer's CD or DVD drive: 1. Gently push the Eject button located on the front panel. Veriton 3900Pro Veriton 5900Pro - Acer Veriton 5700GX | Acer Veriton 3900/5900/6900/7900 User's Guide EN - Page 45
33 Veriton 6900Pro/7900Pro 2. When the disk tray slides open, place the CD or DVD gently on the tray. Make sure that the label or title side of the disk is facing upward. When holding a disk, hold it by the edges to avoid leaving smudges or fingerprints. Veriton 3900Pro - Acer Veriton 5700GX | Acer Veriton 3900/5900/6900/7900 User's Guide EN - Page 46
34 Veriton 5900Pro 2 System tour Veriton 6900Pro/7900Pro 3. Push the tray and it will close automatically. - Acer Veriton 5700GX | Acer Veriton 3900/5900/6900/7900 User's Guide EN - Page 47
with a high-capacity Enhanced-IDE (E-IDE) hard disk. For instructions on how to upgrade or replace your hard disk, see: "Replacing the Veriton 3900Pro's hard disk" on page 62. "Replacing the Veriton 5900Pro's hard disk" on page 65. "Replacing the Veriton 6900Pro/7900Pro's hard disk" on page 67. - Acer Veriton 5700GX | Acer Veriton 3900/5900/6900/7900 User's Guide EN - Page 48
36 2 System tour - Acer Veriton 5700GX | Acer Veriton 3900/5900/6900/7900 User's Guide EN - Page 49
3 Setting up your computer - Acer Veriton 5700GX | Acer Veriton 3900/5900/6900/7900 User's Guide EN - Page 50
This chapter contains step-by-step instructions on how to set up your computer and connect additional peripherals. - Acer Veriton 5700GX | Acer Veriton 3900/5900/6900/7900 User's Guide EN - Page 51
your system. Here are some points to consider: Adjusting your chair Having the right kind of chair does not necessarily mean you'll be properly supported. It is necessary to adjust your chair to fit your body. Proper body posture will make you more comfortable and productive. • Avoid tilting your - Acer Veriton 5700GX | Acer Veriton 3900/5900/6900/7900 User's Guide EN - Page 52
40 3 Setting up your computer Take note of the following when selecting a location for your computer: • Do not put your computer near any equipment that might cause electromagnetic or radio frequency interference, such as radio transmitters, televisions, copy machines or heating and air- - Acer Veriton 5700GX | Acer Veriton 3900/5900/6900/7900 User's Guide EN - Page 53
41 Connecting peripherals Setting up your computer is easy. For the most part, you only have four things to connect: the mouse, the keyboard, the monitor, and the power cable. Note: The peripherals shown in the connections below are for your reference only. Actual device models may vary in select - Acer Veriton 5700GX | Acer Veriton 3900/5900/6900/7900 User's Guide EN - Page 54
the monitor port (blue port) located on the rear panel of your computer . Note: When a VGA card is added to the PCI Express slot, the monitor should be connected to the add-on card and the onboard VGA will be disabled. Note: Refer to the monitor manual for additional instructions and information. - Acer Veriton 5700GX | Acer Veriton 3900/5900/6900/7900 User's Guide EN - Page 55
43 Connecting the power cable Caution: Before you proceed, check the voltage range in your area. Make sure that it matches your computer's voltage setting. If they don't match, change your computer's voltage setting according to your area's voltage range. Set the voltage selector switch to the - Acer Veriton 5700GX | Acer Veriton 3900/5900/6900/7900 User's Guide EN - Page 56
make sure that it is plugged in and turned on. Turning off your computer To turn off your computer, follow the steps below. For Windows XP: 1 On the Windows XP taskbar, click on the Start button, and click Turn Off Computer, then click Turn Off. 2 Turn off all peripherals connected to your computer - Acer Veriton 5700GX | Acer Veriton 3900/5900/6900/7900 User's Guide EN - Page 57
45 Connecting options Connecting your printer Your computer supports parallel, serial and USB printers. To connect a parallel printer, plug the printer cable into the parallel port (burgundy port) located on the rear panel of - Acer Veriton 5700GX | Acer Veriton 3900/5900/6900/7900 User's Guide EN - Page 58
line your computer. into their corresponding ports on the rear panel of Connecting to the network You can connect your computer to a Local Area Network (LAN) using a network cable. To do so, simply plug the network cable into the network port on the rear panel of your computer. Note: Consult your - Acer Veriton 5700GX | Acer Veriton 3900/5900/6900/7900 User's Guide EN - Page 59
47 Connecting multimedia devices You can connect multimedia devices such as microphones, earphones or headphones, external speakers and audio line-in devices. These devices will let you take advantage of your computer's multimedia features. Note: The multimedia devices shown below are for reference - Acer Veriton 5700GX | Acer Veriton 3900/5900/6900/7900 User's Guide EN - Page 60
. You can also adjust the volume by using the volume icon on the taskbar at the bottom of your screen. • External speakers: Connect to the audio-out/line-out jack jack) located on the rear panel of your computer. (lime-green - Acer Veriton 5700GX | Acer Veriton 3900/5900/6900/7900 User's Guide EN - Page 61
line-in device: Connects to the audio-in/line-in jack jack) located on the rear panel of your with eight external USB ports: four on the front and four on the rear panel. These ports support USB 2.0 high-performance external devices such as webcams and digital still cameras. They also allow you - Acer Veriton 5700GX | Acer Veriton 3900/5900/6900/7900 User's Guide EN - Page 62
50 3 Setting up your computer Note: The USB devices shown below are for reference only. Actual device models may vary by geographic region. Note: Some USB devices have a built-in USB port which permits you to connect more USB devices. - Acer Veriton 5700GX | Acer Veriton 3900/5900/6900/7900 User's Guide EN - Page 63
4 Upgrading your computer - Acer Veriton 5700GX | Acer Veriton 3900/5900/6900/7900 User's Guide EN - Page 64
This chapter contains instructions on how to upgrade your computer, and basic information about your system boards that you will find helpful when performing the upgrade process. - Acer Veriton 5700GX | Acer Veriton 3900/5900/6900/7900 User's Guide EN - Page 65
. 2 Open your computer according to the instructions on page 53. 3 Follow the ESD precautions described above before handling a computer component. 4 Remove any expansion boards or peripherals that block access to the DIMM sockets or component connectors. 5 See the following sections for specific - Acer Veriton 5700GX | Acer Veriton 3900/5900/6900/7900 User's Guide EN - Page 66
Observe the following after installing a computer component: 1 See to it that the components are installed according to the step-by-step instructions in their respective sections. 2 Replace any expansion boards or peripherals that you removed earlier. 3 Replace the side panels. 4 Connect the - Acer Veriton 5700GX | Acer Veriton 3900/5900/6900/7900 User's Guide EN - Page 67
off your computer and all peripherals connected to it. Read the "Preinstallation instructions" on page 53. You need to open your computer before you can install additional components. See the following section for instructions. To remove the computer cover 1 Turn off your computer and unplug all - Acer Veriton 5700GX | Acer Veriton 3900/5900/6900/7900 User's Guide EN - Page 68
56 4 Upgrading your computer To replace the computer cover 1 Align the cover's hinges to the housing frame; then gently push it in to slide it back into place. Secure the cover with thumbscrews. - Acer Veriton 5700GX | Acer Veriton 3900/5900/6900/7900 User's Guide EN - Page 69
57 Opening your Veriton 5900Pro Caution! Before you proceed, make sure that you have turned off your computer and all peripherals connected to it. Read the "Preinstallation instructions" on page 53. You need to open your computer before you can install additional components. See the following - Acer Veriton 5700GX | Acer Veriton 3900/5900/6900/7900 User's Guide EN - Page 70
58 4 Upgrading your computer Opening your Veriton 6900Pro/ 7900Pro Caution! Before you proceed, make sure that you have turned off your computer and all peripherals connected to it. Read the "Preinstallation instructions" on page 53. You need to open your computer before you can install - Acer Veriton 5700GX | Acer Veriton 3900/5900/6900/7900 User's Guide EN - Page 71
59 Veriton 7900Pro To replace the side panel 1 Align the side panel's hinges to the housing frame and then push it in to slide it back into place. 2 Secure the side panels with the two screws. - Acer Veriton 5700GX | Acer Veriton 3900/5900/6900/7900 User's Guide EN - Page 72
the memory, the hard disk, the CPU and the expansion cards. You need components, contact your dealer or a qualified service technician for assistance. Note: The mainboard model memory The four 240-pin sockets on the mainboard support Double Data Rate 2 (DDR2) Synchronous Dynamic Random Access - Acer Veriton 5700GX | Acer Veriton 3900/5900/6900/7900 User's Guide EN - Page 73
61 3 Press the holding clips on both sides of the DDR2 DIMM socket outward to release the DDR2 DIMM (a). Gently pull the DDR2 DIMM out of the socket (b). To install a DDR2 DIMM 1 Locate the DDR2 DIMM socket on the mainboard. 2 Align the DDR2 DIMM with the socket (a). Press the DDR2 DIMM into the - Acer Veriton 5700GX | Acer Veriton 3900/5900/6900/7900 User's Guide EN - Page 74
. Run the BIOS utility to view the new value for total system memory and make a note of it. Replacing the Veriton 3900Pro's hard disk Follow these steps to replace your computer's hard disk: 1 Remove the computer cover (see page 55). 2 Detach all cables connected to the CD - Acer Veriton 5700GX | Acer Veriton 3900/5900/6900/7900 User's Guide EN - Page 75
63 3 Lift the drive frame to a 90-degree angle; then pull out, and remove the drive frame. - Acer Veriton 5700GX | Acer Veriton 3900/5900/6900/7900 User's Guide EN - Page 76
you removed earlier and connect the power and hard disk cables to the new hard disk. 7 Reinstall the drive frame into the housing. 8 Reattach the CD or DVD drive and the floppy drive cables. Note: Make sure that the other ends of the disk drive cables are securely connected to their - Acer Veriton 5700GX | Acer Veriton 3900/5900/6900/7900 User's Guide EN - Page 77
. 8 Replace the computer cover (see page 55). When you turn on the computer, BIOS (Basic Input/Output System) automatically detects and assigns resources to the newly-installed devices. Replacing the Veriton 5900Pro's hard disk Follow these steps to replace your computer's hard disk: 1 Remove the - Acer Veriton 5700GX | Acer Veriton 3900/5900/6900/7900 User's Guide EN - Page 78
properly seated. 7 Secure the card to your computer with the bracket lock you removed earlier. 8 Replace the computer cover. When you turn on the computer, BIOS automatically detects and assigns resources to the newly installed devices. - Acer Veriton 5700GX | Acer Veriton 3900/5900/6900/7900 User's Guide EN - Page 79
67 Replacing the Veriton 6900Pro/7900Pro's hard disk Follow these steps to replace your computer's hard disk: 1 Remove the side panel. 2 Detach the power and hard disk cables from - Acer Veriton 5700GX | Acer Veriton 3900/5900/6900/7900 User's Guide EN - Page 80
the bracket lock you removed earlier. 8 Replace the side panel. See "To replace the side panel" on page 59. When you turn on the computer, BIOS automatically detects and assigns resources to the newly installed devices. - Acer Veriton 5700GX | Acer Veriton 3900/5900/6900/7900 User's Guide EN - Page 81
5 System utilities - Acer Veriton 5700GX | Acer Veriton 3900/5900/6900/7900 User's Guide EN - Page 82
This chapter describes applications that are preinstalled on your computer. - Acer Veriton 5700GX | Acer Veriton 3900/5900/6900/7900 User's Guide EN - Page 83
Reader • NTI CD-Maker • PowerDVD • BIOS utility • Acer Empowering Technology If your computer is configured with Microsoft Windows XP, the following is running, select Open from the File menu. 3 Select the file you wish to view in the Open file browser and click the Open button. For more - Acer Veriton 5700GX | Acer Veriton 3900/5900/6900/7900 User's Guide EN - Page 84
is optical disk-recording software that allows you to create and copy audio, data and videos to recordable or rewritable optical disks. To copy an audio or data disk: 1 Click the Quick Burning icon on the desktop. 2 Insert the CD you would like to copy into the source drive and a blank disk - Acer Veriton 5700GX | Acer Veriton 3900/5900/6900/7900 User's Guide EN - Page 85
73 4 Click the Start button to begin copying. For more information about NTI CD&DVD-Maker and its other features, refer to the NTl CD&DVD-Maker Help menu. - Acer Veriton 5700GX | Acer Veriton 3900/5900/6900/7900 User's Guide EN - Page 86
MPEG-2 files with MPEG-2 video and Dolby Digital (AC-3) audio. PowerDVD provides a complete set of commands for navigation and Desktop Portal Page. How do I open and watch a DVD? In most cases, when you insert a DVD into your computer's optical drive, PowerDVD will automatically open a viewer window - Acer Veriton 5700GX | Acer Veriton 3900/5900/6900/7900 User's Guide EN - Page 87
problems and get the "Run Setup" message, you will need to run this utility. Note: Before you run BIOS, make sure that you have saved all open Insert the System CD into the CD or DVD drive. 3 Select the application that you want to reinstall. 4 Follow all onscreen instructions until you finish - Acer Veriton 5700GX | Acer Veriton 3900/5900/6900/7900 User's Guide EN - Page 88
default settings or last system backup. Your Veriton series computer includes an OBR(One Button Recovery) button, a feature that makes restoring your combine key during BIOS to enter hidden partition. This utility has same password protection with Acer eRecovery. Follow all onscreen instructions. - Acer Veriton 5700GX | Acer Veriton 3900/5900/6900/7900 User's Guide EN - Page 89
77 You can also follow the steps below: 1 Locate the OBR button. 2 Press the button. You can change the password in Acer eRecovery. - Acer Veriton 5700GX | Acer Veriton 3900/5900/6900/7900 User's Guide EN - Page 90
78 5 System utilities a If you have not yet backed-up your system. - Acer Veriton 5700GX | Acer Veriton 3900/5900/6900/7900 User's Guide EN - Page 91
79 b If you have previously backed-up your system. 3 Select "Recover to Default Settings" to restore your system to the default factory settings. Select "Recover data from last backup" to restore your system to the last system backup. - Acer Veriton 5700GX | Acer Veriton 3900/5900/6900/7900 User's Guide EN - Page 92
80 5 System utilities 4 If you chose the recovery option, you should see the following screen. Click OK to continue. 5 After 15 seconds the system will reboot and initiate the restore operation. - Acer Veriton 5700GX | Acer Veriton 3900/5900/6900/7900 User's Guide EN - Page 93
be required to go through the setup process again. Caution! Running the Recovery operation will erase all files previously saved in your computer so make sure to back up your important files before starting the recovery process. Note : This feature occupies 4GB in a hidden partition on your hard - Acer Veriton 5700GX | Acer Veriton 3900/5900/6900/7900 User's Guide EN - Page 94
82 5 System utilities Using backup (Windows XP only) The Backup utility creates copies of information on Accessories 4 Select System Tools 5 Click Backup When Backup starts, follow the onscreen instructions to set up your backup profile and schedule. For more information about Backup, refer to - Acer Veriton 5700GX | Acer Veriton 3900/5900/6900/7900 User's Guide EN - Page 95
83 Disk defragmenter (Windows XP only) The disk degfragmentation utility consolidates files and All Programs 3 Click Accessories 4 Select System Tools 5 Click Disk Defragmenter When Disk Defragmenter opens, select a drive/volume and click Analyze. The system will quickly examine the volume and - Acer Veriton 5700GX | Acer Veriton 3900/5900/6900/7900 User's Guide EN - Page 96
84 5 System utilities - Acer Veriton 5700GX | Acer Veriton 3900/5900/6900/7900 User's Guide EN - Page 97
6 Frequently asked questions - Acer Veriton 5700GX | Acer Veriton 3900/5900/6900/7900 User's Guide EN - Page 98
This chapter tells you what to do in case your computer is not working properly. However, if a more serious problem arises, contact your dealer or the technical support center (www.acersupport.com) for assistance. - Acer Veriton 5700GX | Acer Veriton 3900/5900/6900/7900 User's Guide EN - Page 99
startup disk you created during Windows setup into the floppy drive and problem, then you may have to perform the recovery process to restore your system to its original default factory settings. Note: For more information about recovering your system, see "Acer support center for assistance. - Acer Veriton 5700GX | Acer Veriton 3900/5900/6900/7900 User's Guide EN - Page 100
) disk. If your drive can not read the information on the good disk there may be a problem with the drive. Contact your dealer or technical support center for assistance. System cannot write data on the hard disk or CD-R/CD-RW. Check the following: • Make sure the diskette or hard disk is not write - Acer Veriton 5700GX | Acer Veriton 3900/5900/6900/7900 User's Guide EN - Page 101
Appendix A: Regulations and safety notices - Acer Veriton 5700GX | Acer Veriton 3900/5900/6900/7900 User's Guide EN - Page 102
notices ENERGY STAR guidelines compliance As an ENERGY STAR partner, Acer Inc. has determined that this product meets the ENERGY STAR frequency energy and, if not installed and used in accordance with the instructions, may cause harmful interference to radio communications. However, there is no - Acer Veriton 5700GX | Acer Veriton 3900/5900/6900/7900 User's Guide EN - Page 103
NMB-003 du Canada. Declaration of Conformity for EU countries Hereby, Acer, declares that this PC series is in compliance with the essential causes harm to the telephone network, the telephone company may discontinue your service temporarily. If possible, they will notify you in advance. But, - Acer Veriton 5700GX | Acer Veriton 3900/5900/6900/7900 User's Guide EN - Page 104
advance to give you an opportunity to maintain uninterrupted telephone service. If this equipment should fail to operate properly, disconnect the equipment from the phone line to determine if it is causing the problem. If the problem is with the equipment, discontinue use and contact your dealer or - Acer Veriton 5700GX | Acer Veriton 3900/5900/6900/7900 User's Guide EN - Page 105
Specifications: a There shall be no more than 10 call attempts to the same number within any 30 minute period for any single manual that Telecom lines will always continue to support pulse dialing. 7 Use of pulse Should such problems occur, the user should NOT contact the telecom Fault Service. 8 This - Acer Veriton 5700GX | Acer Veriton 3900/5900/6900/7900 User's Guide EN - Page 106
. The CD or DVD drive's classification label (shown below) is located on the drive. CLASS 1 LASER PRODUCT CAUTION: INVISIBLE LASER RADIATION WHEN OPEN. AVOID notice Note: Below regulatory information is for models with wireless LAN and/or Bluetooth only. General This product complies with the - Acer Veriton 5700GX | Acer Veriton 3900/5900/6900/7900 User's Guide EN - Page 107
use. For further information, please contact local office in the country of use. The FCC RF safety requirement The radiated output power of the wireless LAN Card is far below the FCC radio frequency exposure limits. Nevertheless, the PC series shall be used in such a manner that the potential for - Acer Veriton 5700GX | Acer Veriton 3900/5900/6900/7900 User's Guide EN - Page 108
, including interference that may cause undesired operation of the device. b Operation in 2.4 GHz band To prevent radio interference to the licensed service, this device is intended to be operated indoors and installation outdoors is subject to licensing. c Operation in 5 GHz band • The device - Acer Veriton 5700GX | Acer Veriton 3900/5900/6900/7900 User's Guide EN - Page 109
/importer is responsible for this declaration: Product name: Model: Name of responsible party: Address of responsible party: Contact person: Tel: Fax: Personal computer Veriton Series Acer America Corporation 2641 Orchard Parkway San Jose, CA 95134 USA Mr. Young Kim 408-922-2909 408-922-2606 - Acer Veriton 5700GX | Acer Veriton 3900/5900/6900/7900 User's Guide EN - Page 110
that product: Model: Acer Inc. 8F, 88, Sec. 1, Hsin Tai Wu Rd. Hsichih, Taipei Hsien 221 Taiwan Personal computer Veriton Series Conforms to the single terminal connection to the Public Switched Telephone Network (PSTN). We, Acer Inc., hereby declare that the equipment bearing the trade name and - Acer Veriton 5700GX | Acer Veriton 3900/5900/6900/7900 User's Guide EN - Page 111
online User's Guide 17 applications 71 B BIOS utility 75 C computer cover remove 57 replace 57 connecting options multimedia devices 47 audio line-in device 49 earphones/headphones 48 external speakers 47 microphone 47 network 45, 46 printer 45 serial mouse 46 USB devices 49 D disk drives CD-ROM/DVD - Acer Veriton 5700GX | Acer Veriton 3900/5900/6900/7900 User's Guide EN - Page 112
100 NTI CD-Maker 72 PowerDVD 74 reinstalling programs 75 T turning off computer 44 software computer 62 computer 60 install an expansion card 66 installation precautions post-installation 54 open computer 55 reinstall side panel 59 remove computer cover 55 replace top cover 56 replace components memory
-
 1
1 -
 2
2 -
 3
3 -
 4
4 -
 5
5 -
 6
6 -
 7
7 -
8
-
9
-
10
-
11
-
12
-
13
-
14
-
15
-
16
-
17
-
18
-
19
-
20
-
21
-
22
-
23
-
24
-
25
-
26
-
27
-
28
-
29
-
30
-
31
-
32
-
33
-
34
-
35
-
36
-
37
-
38
-
39
-
40
-
41
-
42
-
43
-
44
-
45
-
46
-
47
-
48
-
49
-
50
-
51
-
52
-
53
-
54
-
55
-
56
-
57
-
58
-
59
-
60
-
61
-
62
-
63
-
64
-
65
-
66
-
67
-
68
-
69
-
70
-
71
-
72
-
73
-
74
-
75
-
76
-
77
-
78
-
79
-
80
-
81
-
82
-
83
-
84
-
85
-
86
-
87
-
88
-
89
-
90
-
91
-
92
-
93
-
94
-
95
-
96
-
97
-
98
-
99
-
100
-
101
-
102
-
103
-
104
-
105
-
106
-
107
-
108
-
109
-
110
-
111
-
112
 |
 |

Veriton Series
User's Guide